
Loading ...
Loading ...
Loading ...
-11-
Protection Against Deep
Discharging
The lithium ion battery is protected
against deep discharging by the
“Electronic Cell Protection (ECP)”.
When the battery is empty, the tool is
switched off by means of a protective
circuit.
Temperature-dependent
Overload Protection
In normal conditions of use, the tool
cannot be overloaded. However, if the
power tool is overloaded or not kept
within the permitted battery
temperature range, the speed is
reduced or the power tool switches off.
If the tool speed is automatically
reduced in such situations, the tool will
run again at full speed once the
permitted battery temperature is
reached or the load is reduced. During
automatic shut-down, switch off the
power tool, allow the battery to cool
down, and then switch the power tool
back on (Fig. 1).
Brake
When the trigger is released it activates
the electrical brake to stop the blade
quickly. This feature is especially useful
when making repetitive cuts.
Blade Orbit Selector Lever
Maximum cutting efficiency can be
obtained by adjusting the blade orbit
selector lever to suit the material being
cut.
The following chart will help you
determine which setting to use for your
application. This chart is intended as a
guideline only, and test cuts in scrap
material should be performed first to
determine the best setting.
Setting 0
Hard materials such as
metals or thin sheet metals.
This setting can be used
with knife blades, grit edge
blades, rasp work. and
down cutting blades.
Setting 1
Soft materials where
cleaner cutting or delicate
scrolling work is performed.
Setting 2
Medium density materials
such as harder woods or
particle board.
Setting 3
Soft materials such as
wood, plastics, etc. and
when fast cutting is more
important than a clean cut.
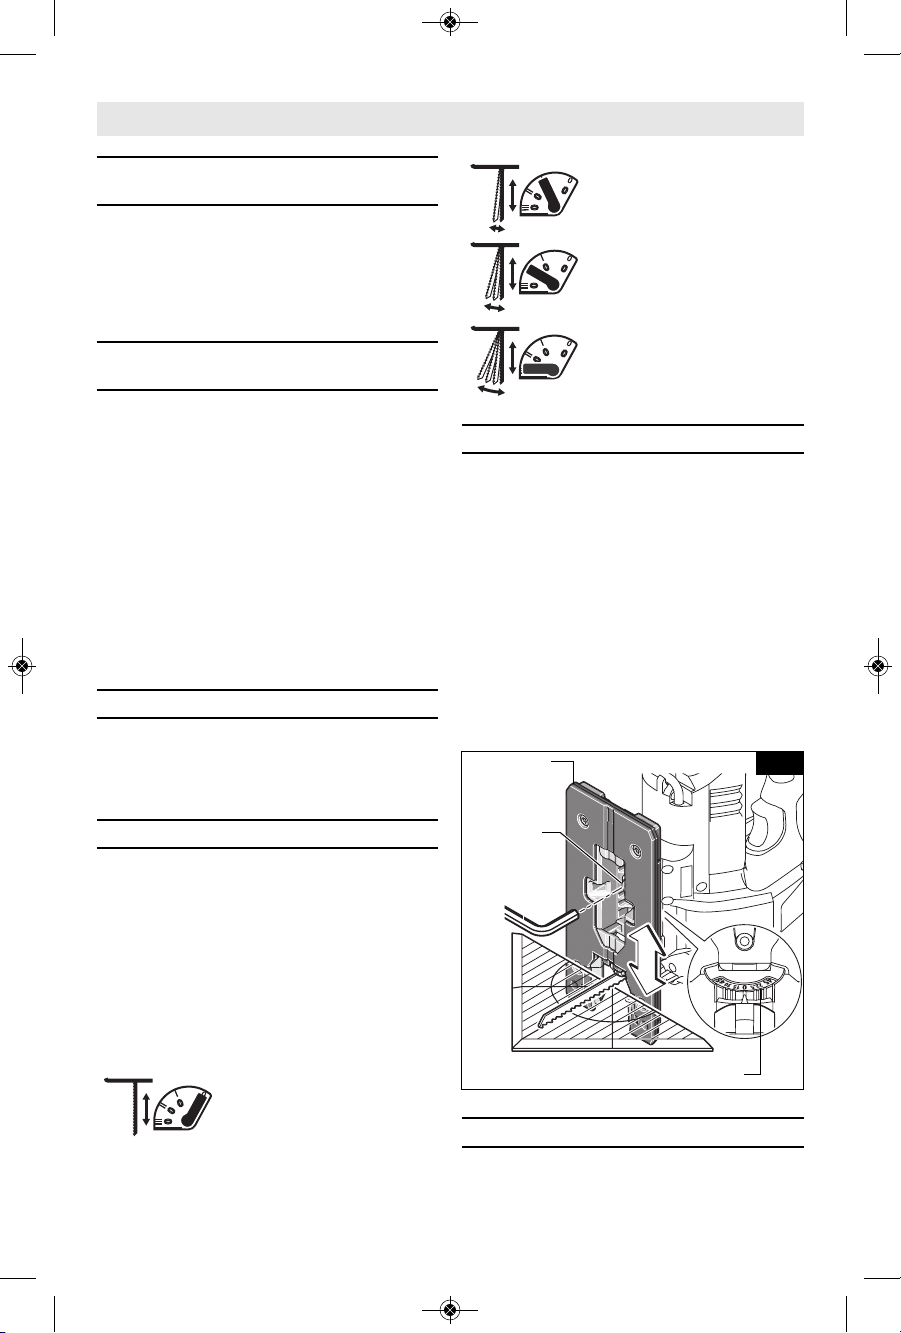
Footplate Angle Adjustment
The footplate may be tilted to allow
angle cuts up to 45° in either direction.
Note: before adjusting the footplate,
remove anti-splinter insert, if used.
To adjust footplate, loosen screw with
allen wrench provided, slide the
footplate slightly forward towards the
front of tool, then rotate to desired
angle. The detent slots will hold the
footplate firmly at 45°, and there are
additional position marks for 15° and
30° angles. Intermediate angles may be
set with a protractor. After positioning
the footplate securely tighten screw
(Fig. 6).
Flush Cutting
To allow the saw to make a
perpendicular cut close to a vertical
Operating Instructions
FOOTPLATE
SCREW
Fig. 6
BEVEL SCALE
FOOTPLATE
2610051978.qxp_JSH180 3/16/20 8:33 AM Page 11
Loading ...
Loading ...
Loading ...