
Loading ...
Loading ...
Loading ...
10
3. The battery will take approximately 1 hr 20 mins to charge.
The battery indicator LEDs will twinkle and illuminate one
by one during the charging process. Unplug the charger
immediately when the 3 LEDs are all illuminated.
mCAUTION! FIRE HAZARD. When disconnecting the
charger from the battery, be sure to unplug the charger from
the outlet rst, then disconnect the charger from the battery.
mWARNING! This charger does not automatically turn
o when the battery is fully charged. Please take care not
to leave the battery plugged into the charger. Switch o or
unplug the charger at the mains when charging is complete.
4. Timely recharging of the battery will help prolong the
battery's life. You must recharge the battery pack when
you notice a drop in the equipment's power.
IMPORTANT! Never allow the battery pack to become fully
discharged as this will cause irreversible damage to the battery.
Operation
This cordless chain saw sharpener is used to sharpen the
individual teeth on a saw chain blade. The unique adjustments
of the machine allow you to set the proper depth and angle
for accurately sharpening the teeth. By following a basic setup
procedure you can accurately use this chain saw sharpener.
Before sharpening the saw chain, gather the correct
specications for the saw chain you are going to sharpen on
this cordless chain saw sharpener. These specications can be
found on the box or package that the saw chain came in when
you rst purchased it.
mWARNING! There is a risk of serious personal injury for
the operators and the bystanders from improper sharpened
saw chain. Read and follow all manufacturer's instructions for
your saw chain.
mWARNING! All adjustments must be made prior to
inserting the battery.
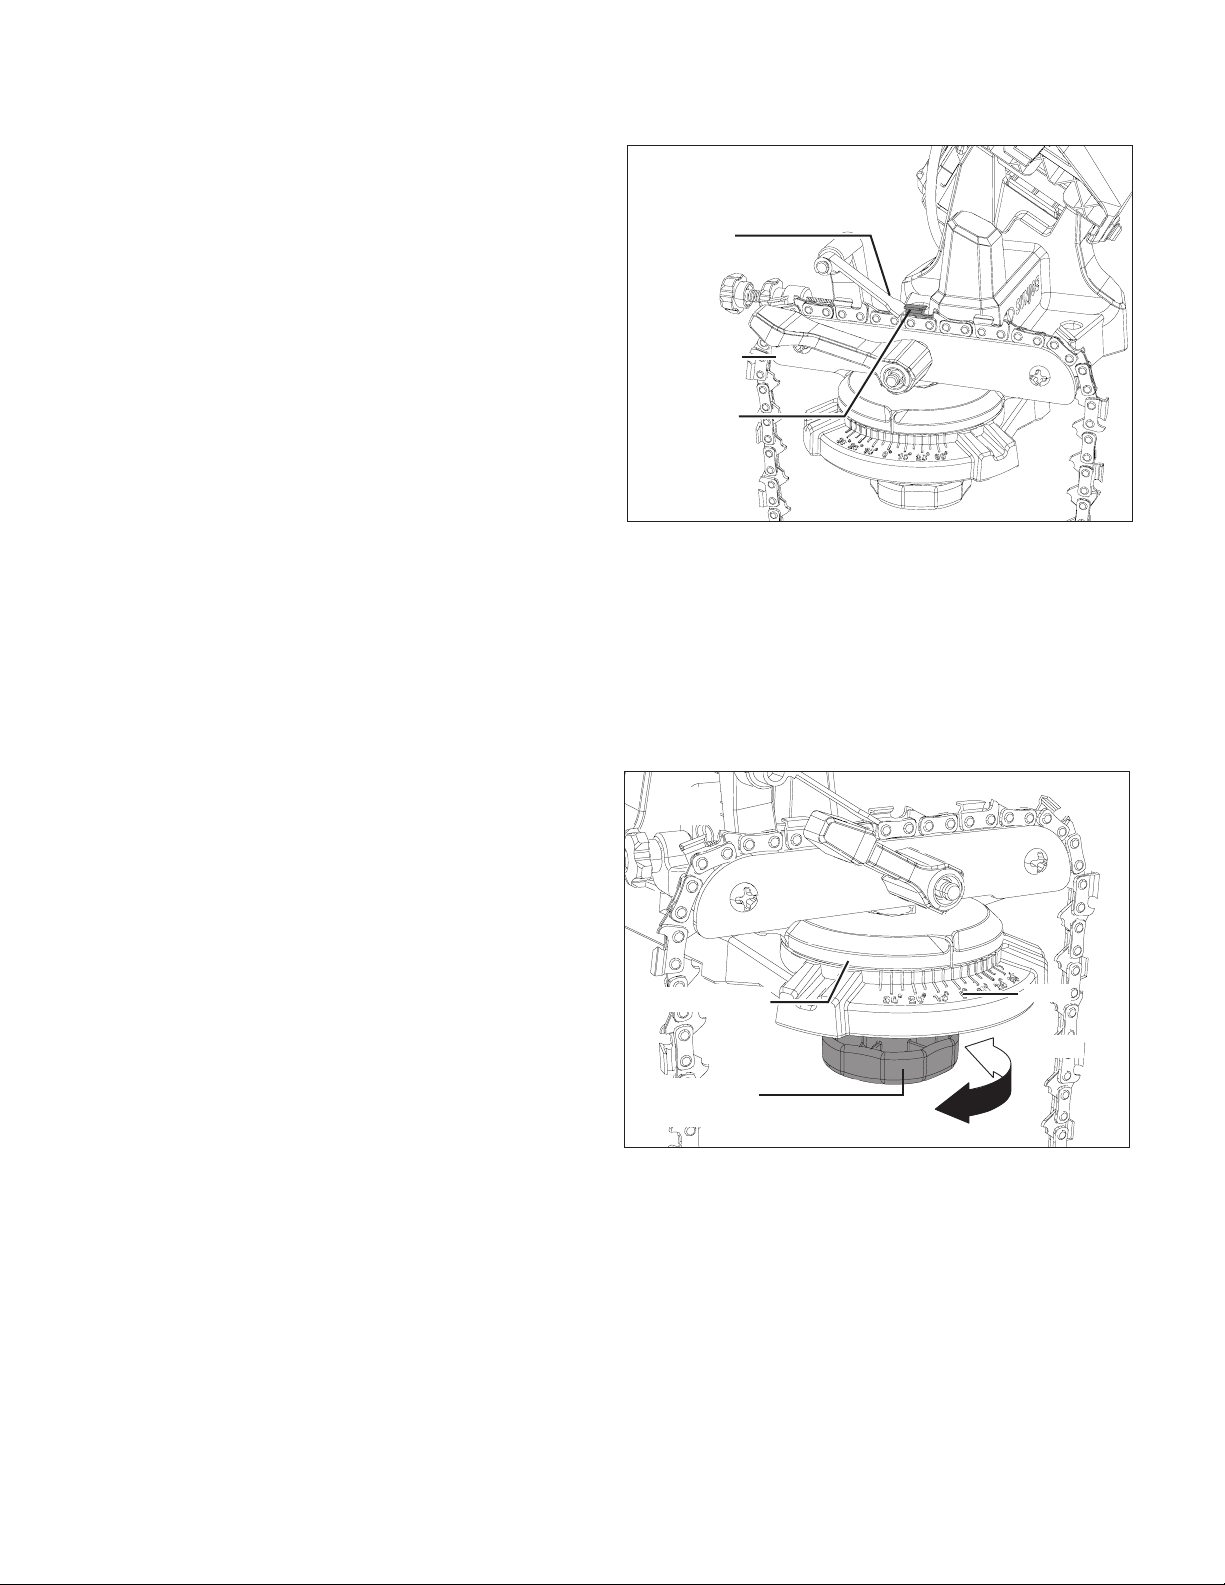
Position the Saw Chain
1. Clean the chain before sharpening it. Wash it with a non-
ammable solvent. Don't use gasoline to dry the chain.
2. Lift up the chain stop and position the chain in the chain
guide. Lower the chain stop so that it is positioned on the
tooth you want to start with. (Fig. 5).
NOTE: It's recommended to mark the rst chain tooth you
start with.
Set the Swivel Angle
Dierent chains have dierent swivel angles for sharpening.
The specic information should be obtained from the
manufacturer of the chain.
The adjusting knob of the swivel angle is on the bottom of
the machine and allows the grinding table to swivel generally
from -30 to 30 degrees. To adjust the swivel angle, follow the
instruction below.
1. Loosen the swivel angle adjusting knob for setting the
swivel angle (Fig. 6).
2. Set the desired grinding angle by rotating the grinding
table by hand. Use the scale below the grinding table to
get the desired angle (Fig. 6).
3. Tighten the swivel angle adjusting knob. Make sure the
grinding table is locked securely (Fig. 6).
Fig. 5
Chain stop
Chain guide
Chain
tooth to be
sharpened
Fig. 6
Swivel angle
adjusting knob
Tighten
Loosen
Grinding table
Scale
Loading ...
Loading ...
Loading ...