Loading ...
Loading ...
Loading ...
13
mWARNING! Before switching on the wet/dry vacuum,
make sure that it is not in contact with any foreign objects.
7. After vacuuming is nished, press the OFF ( O ) side of the
ON/OFF switch and remove the battery. Remove the paper
dust bag and pour out the debris inside.
Wet Vacuuming Mode
mWARNING! Do not use the cartridge lter or the paper
dust bag for wet vacuuming. Follow the instructions below to
assemble the foam lter for wet vacuuming.
1. Make sure the battery is removed from the compartment.
2. Unlock the powerhead by ipping up the latches on both
sides, and then lift up to remove (Fig. 5).
3. Turn the powerhead upside down. Install the foam lter
over the lter basket (Fig. 16)
4. Replace the powerhead. Lock the latches on both sides
securely (Fig. 8).
5. With the hose and the preferred nozzle connected, insert
the battery into the battery compartment, and press the
ON ( I ) side on the ON/OFF switch (Fig. 14).
6. After vacuuming is nished, press the OFF ( O ) side of the
ON/OFF switch and remove the battery. Clean the debris
and dust in the tank as described in Maintenance section.
Blowing Mode
The cordless wet/dry vacuum also has blower feature. Follow
the instructions below to use the blower feature.
mWARNING! Always wear safety goggles before using it
as a blower.
mWARNING! Keep children and bystanders away from
the working area.
mWARNING! Wear a dust mask if blowing creates dust
that might be inhaled.
1. Shut o the unit and remove the battery.
2. Disconnect the suction hose from air inlet by pressing the
release button on the connector, and pull the hose out
from the vacuum (Fig. 17).
3. Connect the suction hose to the air outlet on the back of
the powerhead by pressing it securely into the air outlet
(Fig. 18).
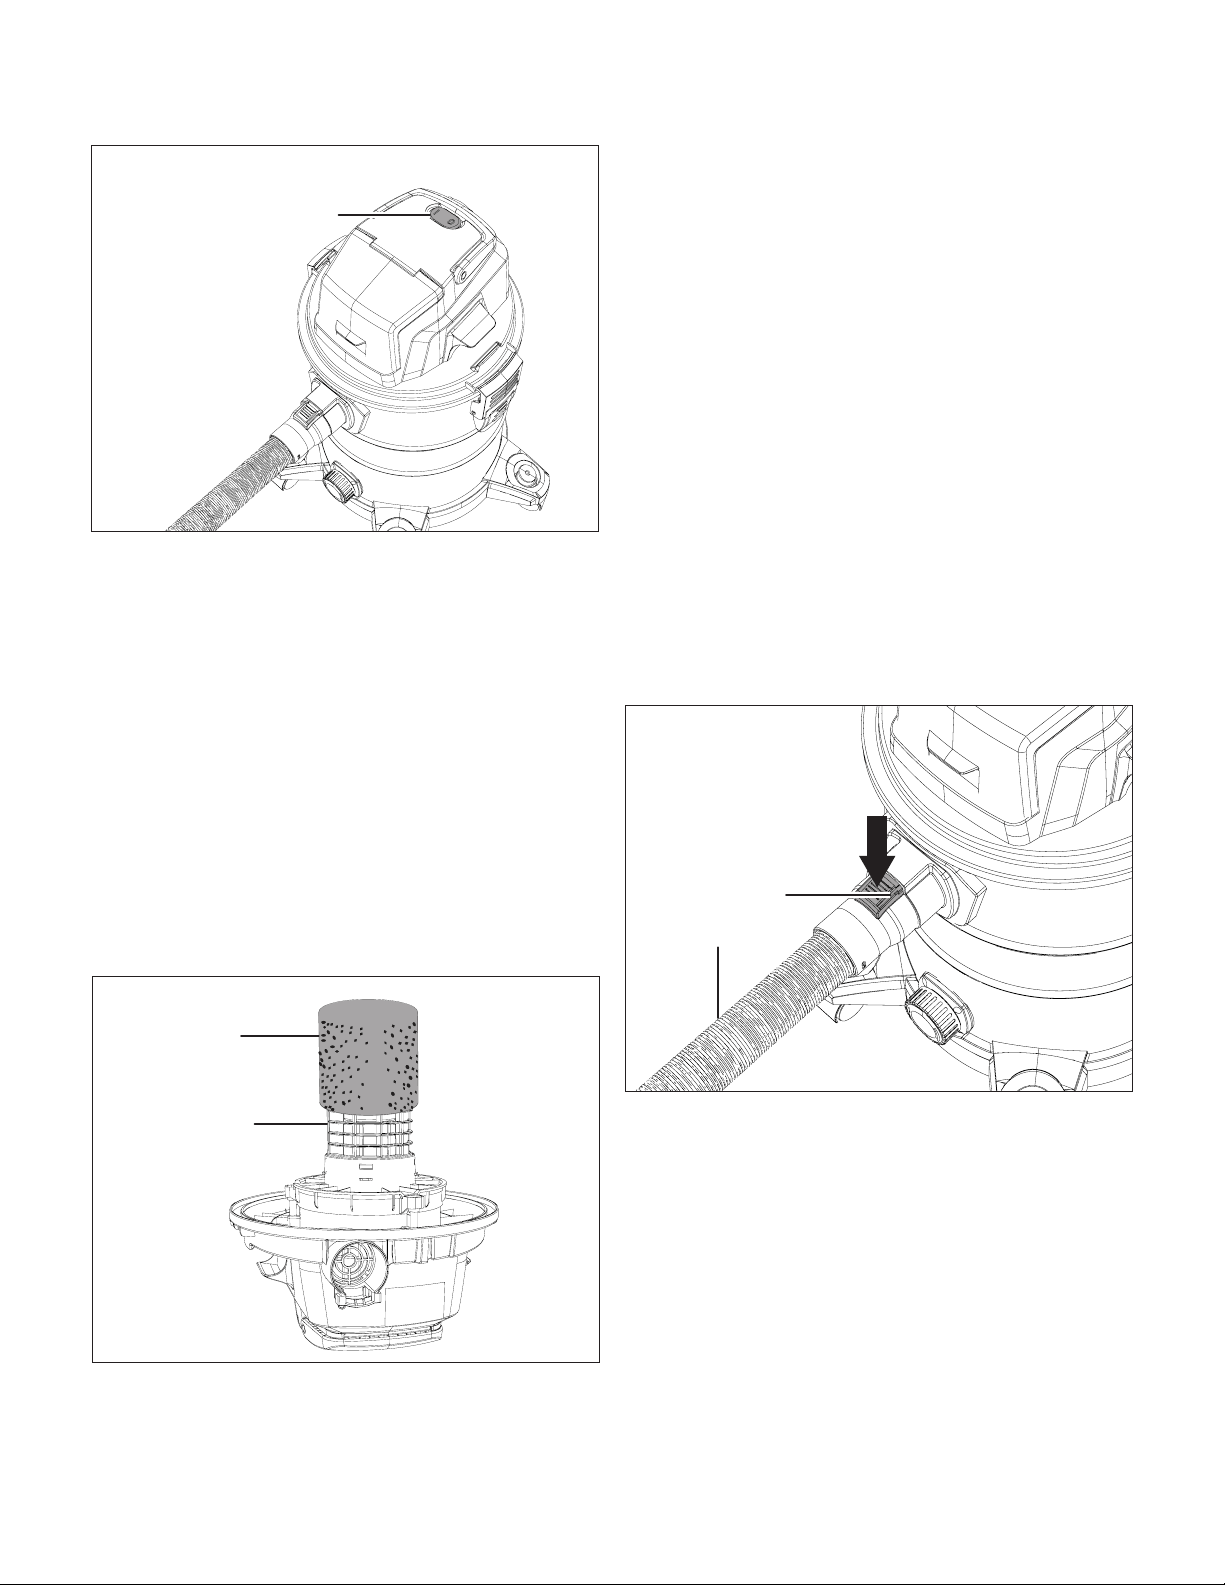
Fig. 15
ON/OFF switch
Fig. 16
Foam lter
Filter basket
Fig. 17
Release button
Suction hose
Loading ...
Loading ...
Loading ...