Loading ...
Loading ...
Loading ...
12
mWARNING! To avoid personal injury, wear ear
protectors when operating this unit. Wear a face mask or dust
mask in dusty locations.
Dry Vacuuming Mode
mWARNING! Make sure to assemble the cartridge
lter properly when using the equipment for dry vacuuming.
The use of incorrect lter will damage the unit and void the
warranty.
The cartridge lter should be pre-assembled on the lter cage.
If not, follow the instruction below to assemble the cartridge
lter.
1. Make sure the battery is removed from the compartment.
2. Unlock the powerhead by ipping up the latches on both
sides, and then lift up (Fig. 5).
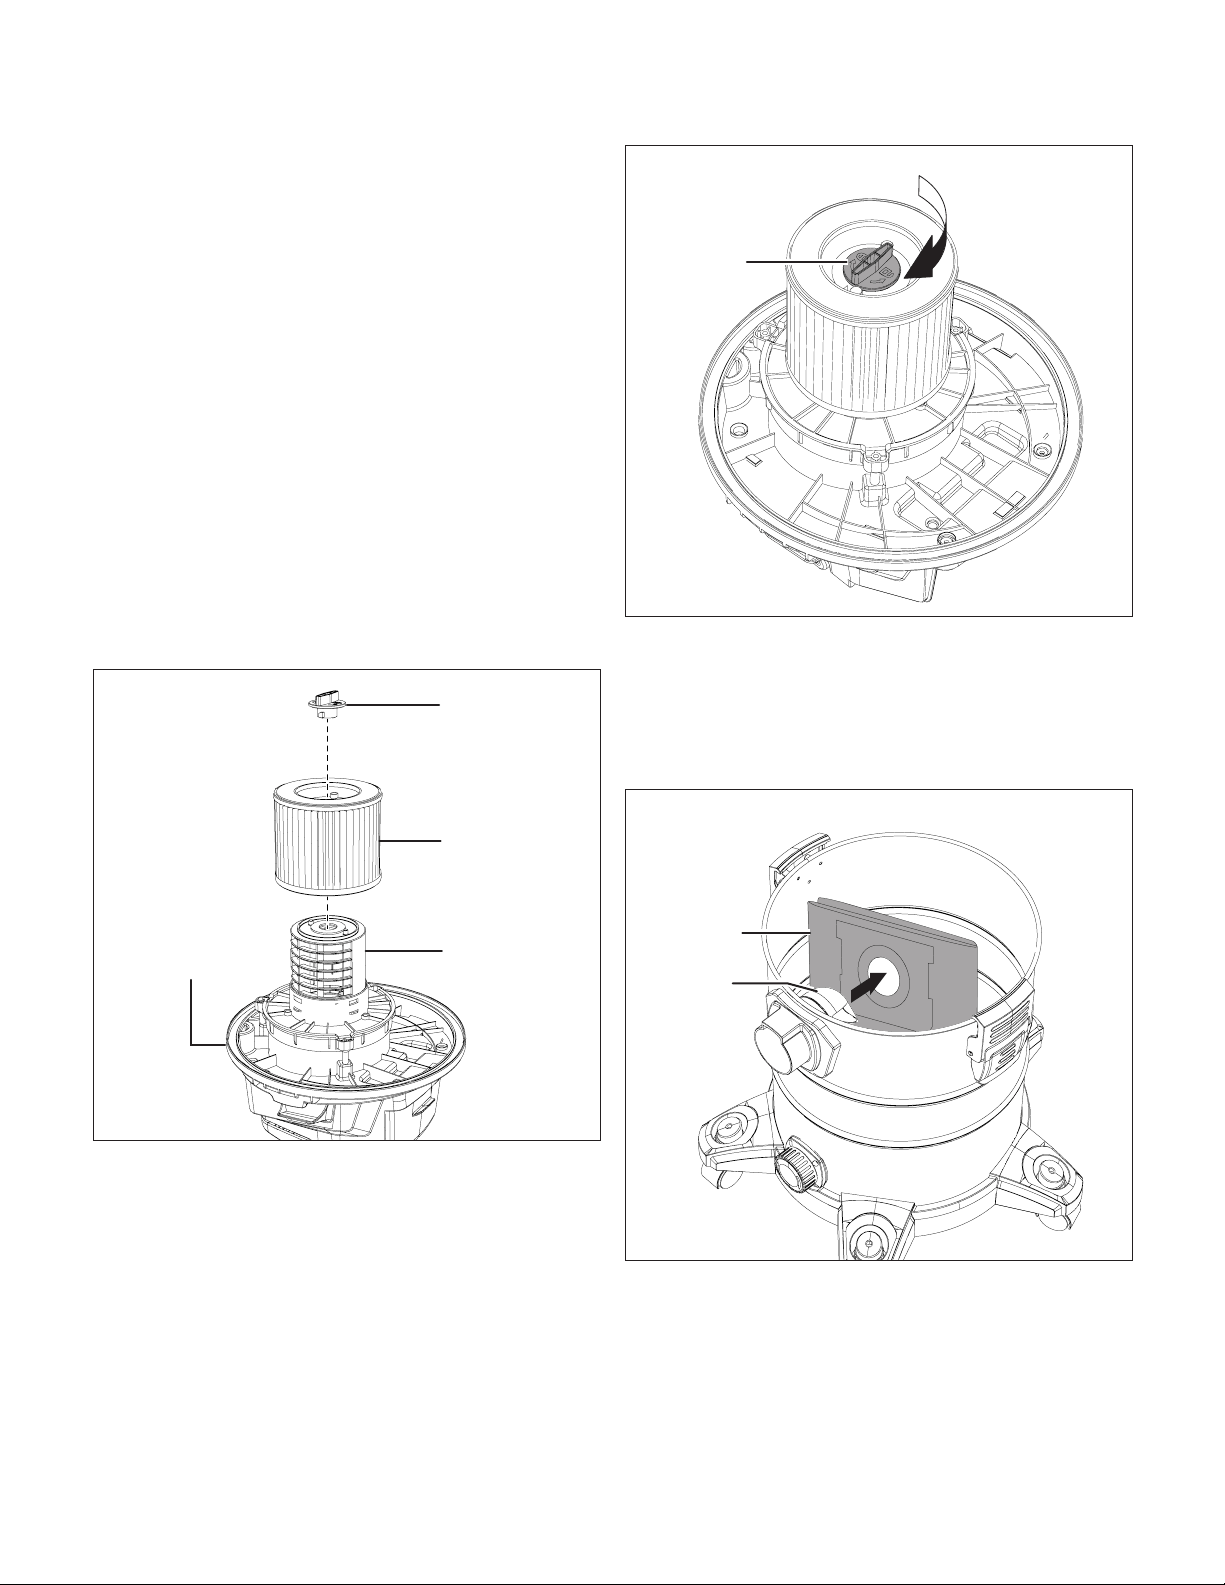
3. Turn the powerhead upside down. Put the lter basket
onto the cartridge lter. Push down until the lter sits
securely. Insert the cartridge lter lock. Turn clockwise to
secure (Figs. 12 - 13).
4. Before putting back the powerhead, assemble the dust
bag by inserting the air inlet tube into the hole on the dust
bag, as shown (Fig. 14).
NOTE: It's recommended to use the paper dust bag for
dry vacuuming. The paper dust bag will collect all debris
and make clean-up after vacuuming much easier.
5. Replace the powerhead. Lock the latches on both sides
securely (Figs. 8 – 9).
6. With the hose and the preferred nozzle connected, insert
the battery into the battery compartment, and press the
ON ( I ) side on the ON/OFF switch (Fig. 15).
Fig. 12
Powerhead
Filter basket
Cartridge lter
Cartridge
lter lock
Fig. 13
Cartridge
lter lock
Fig. 14
Paper
dust bag
Air inlet
tube
Loading ...
Loading ...
Loading ...