Loading ...
Loading ...
Loading ...
11
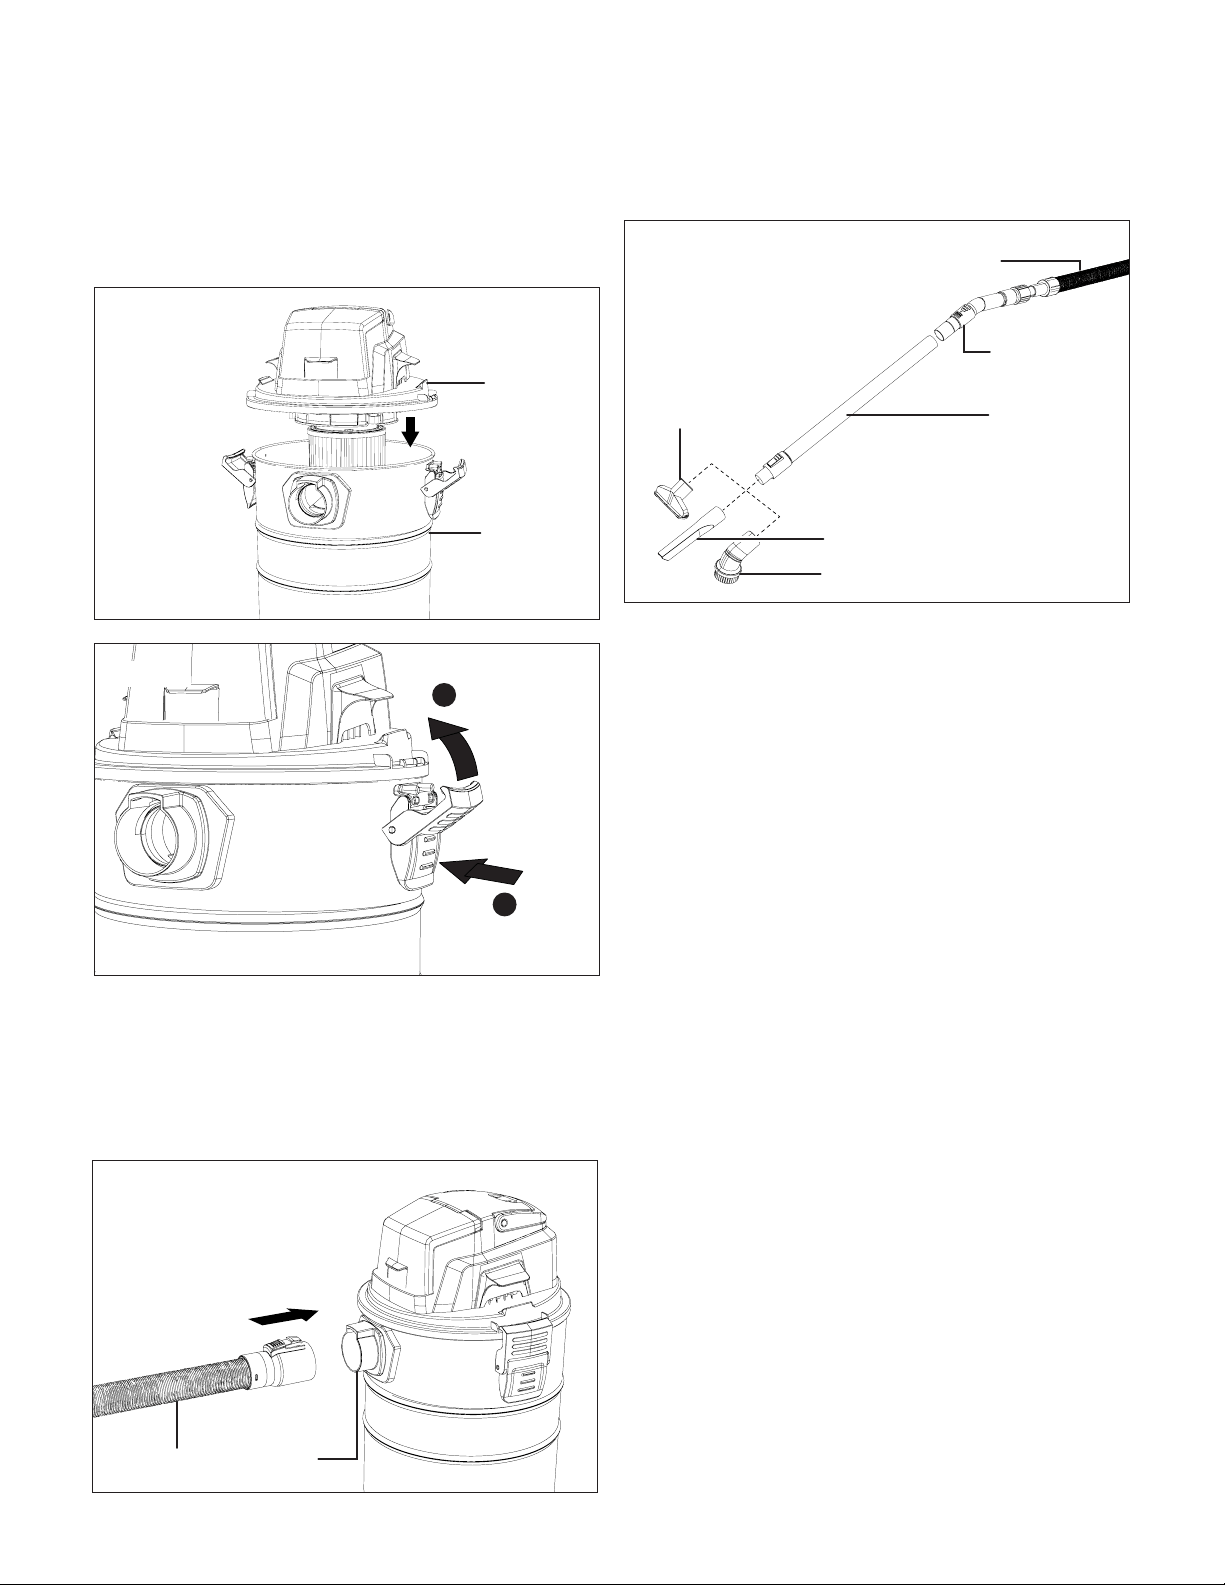
5. Turn the dust tank back over onto the casters. Cap it with
the powerhead with the desired lter attached. Flip up the
two latches located on either side of the dust tank. Press
in on the two latches located on either side of the dust
tank until they snap into place, securing the powerhead to
the tank (Figs. 8 – 9).
NOTE: For dry vacuum cleaning, install the supplied cartridge
lter and the dust bag. For wet vacuum cleaning, install the
supplied foam lter. See page 12 - 13 for instructions on how
to install the lters.
6. Insert the end of the suction hose with the releasing
button into the air inlet. Push in to lock it in place (Fig. 10).
7. Connect the preferred nozzle with the other end of the
suction hose. If needed, use the equipped telescopic tube
and the air regulation handle, as shown (Fig. 11).
NOTE: This unit is equipped with 3 nozzles. The utility nozzle
is for vacuuming solids and liquids over medium and larger
areas. The crevice nozzle is for vacuuming solids and liquids
in corners, edges and other areas that are dicult to access.
The dust brush is good for collecting light material while
vacuuming.
Operation
mWARNING! DO NOT vacuum hazardous substances.
This cordless wet/dry vacuum is designed to clean hard
surfaces. It is only suitable for vacuuming wet or dry light
materials. The vacuuming of heavy materials such as metal,
stones, branches, broken glass is expressly excluded.
Do not switch on the wet/dry vacuum until it has been
completely assembled. Before switching on the unit, always
check the lter is assembled securely.
mWARNING! Use the wet/dry vacuum only in daylight or
good articial light.
• Make sure the powerhead is properly installed and
secured when using. Make sure each latch is locked.
Failure to properly secure the locks could cause the
powerhead to release from the tank.
• Double check to make sure the lters are not broken or
torn. Do not use lters that are broken or torn. Handle the
lters carefully when removing and installing.
• To reduce the risk of hearing loss associated with sound
level(s), hearing protection is required.
• Be extremely careful when working on slopes and stairs.
• Always move forward by walking. Never run.
• Clean up after using the wet/dry vacuum. Dispose of
debris appropriately.
• Always use the carrying handle for transporting the
equipment.
Powerhead
Fig. 8
Dust tank
Fig. 9
Flip up
1
Press
2
Fig. 10
Suction hose
Air Inlet
Fig. 11
Suction hose
Air
regulation
handle
(optional)
Telescopic
tube (optional)
Utility nozzle
Dust brush
Crevice nozzle
Loading ...
Loading ...
Loading ...