Loading ...
Loading ...
Loading ...
1716
ASSEMBLY & ADJUSTMENTS
The chain saw is intended for wood: sawing of trees, tree trunks, branches, wooden beams,
planks, etc. Cuts can be sawed with or across the grain. This product is not suitable
for sawing mineral materials, plastics or non-wood building materials.
INTENDED USE
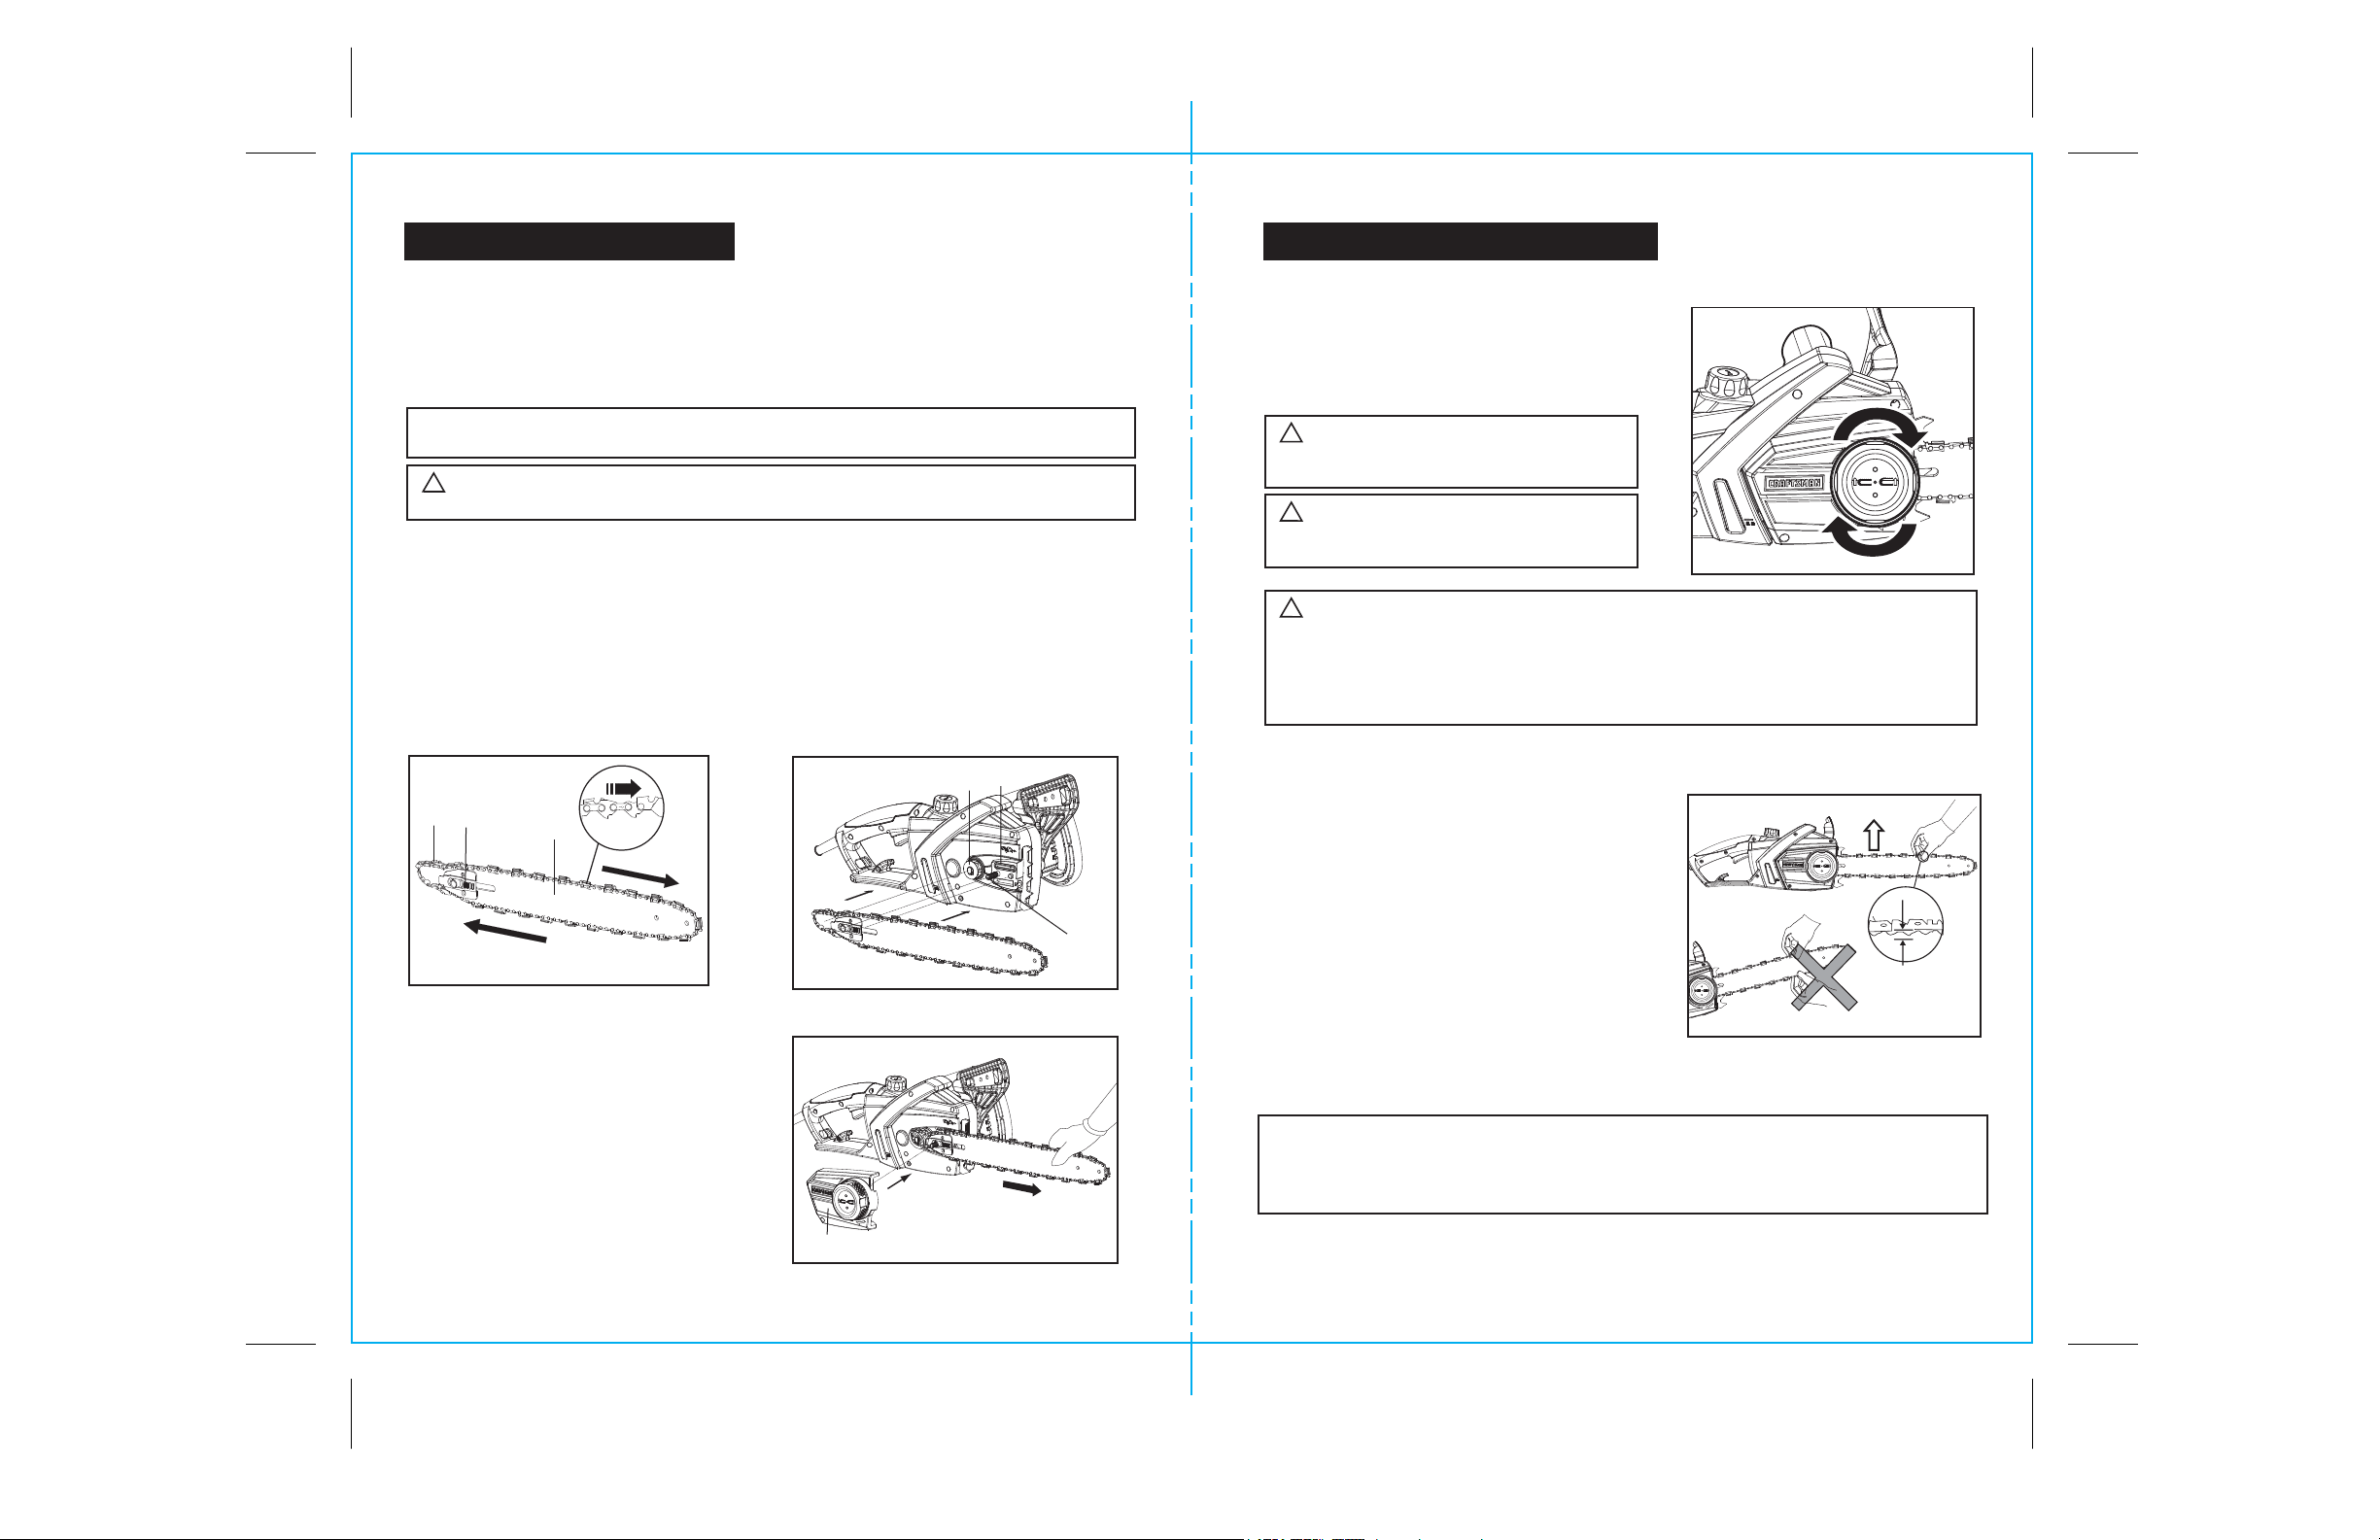
CHAIN AND CHAIN BAR ASSEMBLY/REPLACEMENT
(See Figs. 4a, 4b, 4c, 4d and Pgs 14-15 for part reference)
WARNING:
Do not connect the chain saw to extension cord and power source
before it is completely assembled. Always use gloves when handling the chain.
!
Fig. 4b
1. Place the chain saw on any suitable flat surface.
2. (See Fig. 4a) Slide the chain (8) in the slot around the guide bar (7). Ensure chain is in
correct running direction by comparing with chain symbol (14). Ensure the chain tensioning
catch (15) is facing outwards.
3. (See Fig. 4b) Fit the chain onto the drive sprocket (12) and guide the guide bar (7), so that
the fastening bolt (17) and the two guide fins (13) fit into the keyway of the guide bar (7).
4. Check to make sure all parts are seated
properly and hold chain and guide bar in
a level position. (See Fig. 4c)
5. Fit cover plate into place. Ensure that the
chain catcher (16) fits into the groove of the
cover plate (19).
6. Tighten the cover plate by turning the
Chain Tensioning Knob (11) clockwise until
it is tight. (See Figs. 4c and 4d)
7. Check the chain tension as described in
the Tensioning Chain section on the next
page of this manual.
ASSEMBLY
NOTE: This Chain Saw comes fully assembled, including the Chain /Chain Bar Assembly.
See below for Chain/Chain Bar Replacement.
NOTE: If chain tension does loosen in the course of chain saw use, retension the chain as
follows: Loosen the Chain Tension knob by turning it counterclockwise 3 full turns. Make sure
that the cover plate is securely tightened in place. Proceed to tension chain by performing
steps 1 - 3 listed above.
Fig. 4a
Fig. 4c
Cover Plate
19
12
13
18
7
8 15
17
ASSEMBLY & ADJUSTMENTS cont.
WARNING:
Unplug chain saw from
power source before adjusting saw chain
tension.
!
WARNING:
Cutting edges on chain
are sharp. Use protective gloves when
handling chain.
!
WARNING: ALWAYS Maintain proper chain tension. A loose chain will
increase the risk of kickback. A loose chain may jump out of guide bar groove.
This may injure operator and damage chain. A loose chain will cause chain, chain
bar, and sprocket to wear rapidly. The chain life of the saw chain mainly depends
upon sufficient lubrication and correct tensioning. Avoid tensioning the chain if it
is hot, as this will cause the chain to become over tensioned when it cools down.
!
TENSIONING CHAIN
Always check the chain tension before use,
after the first cuts and regularly during use.
Upon initial operation, new chains can lengthen
considerably.
1. Place the chain saw on any suitable flat surface.
2. Turn the Chain Tensioning Knob (11) by hand
clockwise until it is fully tight. The tension is
automatically set while the Chain Tensioning
Knob is being tightened. The ratchet mechanism
prevents the chain tension from loosening.
The mechanism also automatically maintains
proper chain tension even when the chain
stretches during use.
3. Double check the tension set by the
automatic Chain Tensioning Knob.
The correct chain tension is reached when the
chain can be raised approximately 1/8 to 1/4 in.
(3-6 mm) from the Guide Bar in the center.
This should be done by using one hand to raise
the chain against the weight of the machine.
If the gap exceeds 1/4 inch, turn the chain tensioning knob further clockwise.
Fig. 4d
Fig. 5
NOTE: Use one hand
to raise chain.
approx.
1/8 to 1/4-in.
(3-6 mm)
Loading ...
Loading ...
Loading ...