Loading ...
Loading ...
Loading ...
20
20
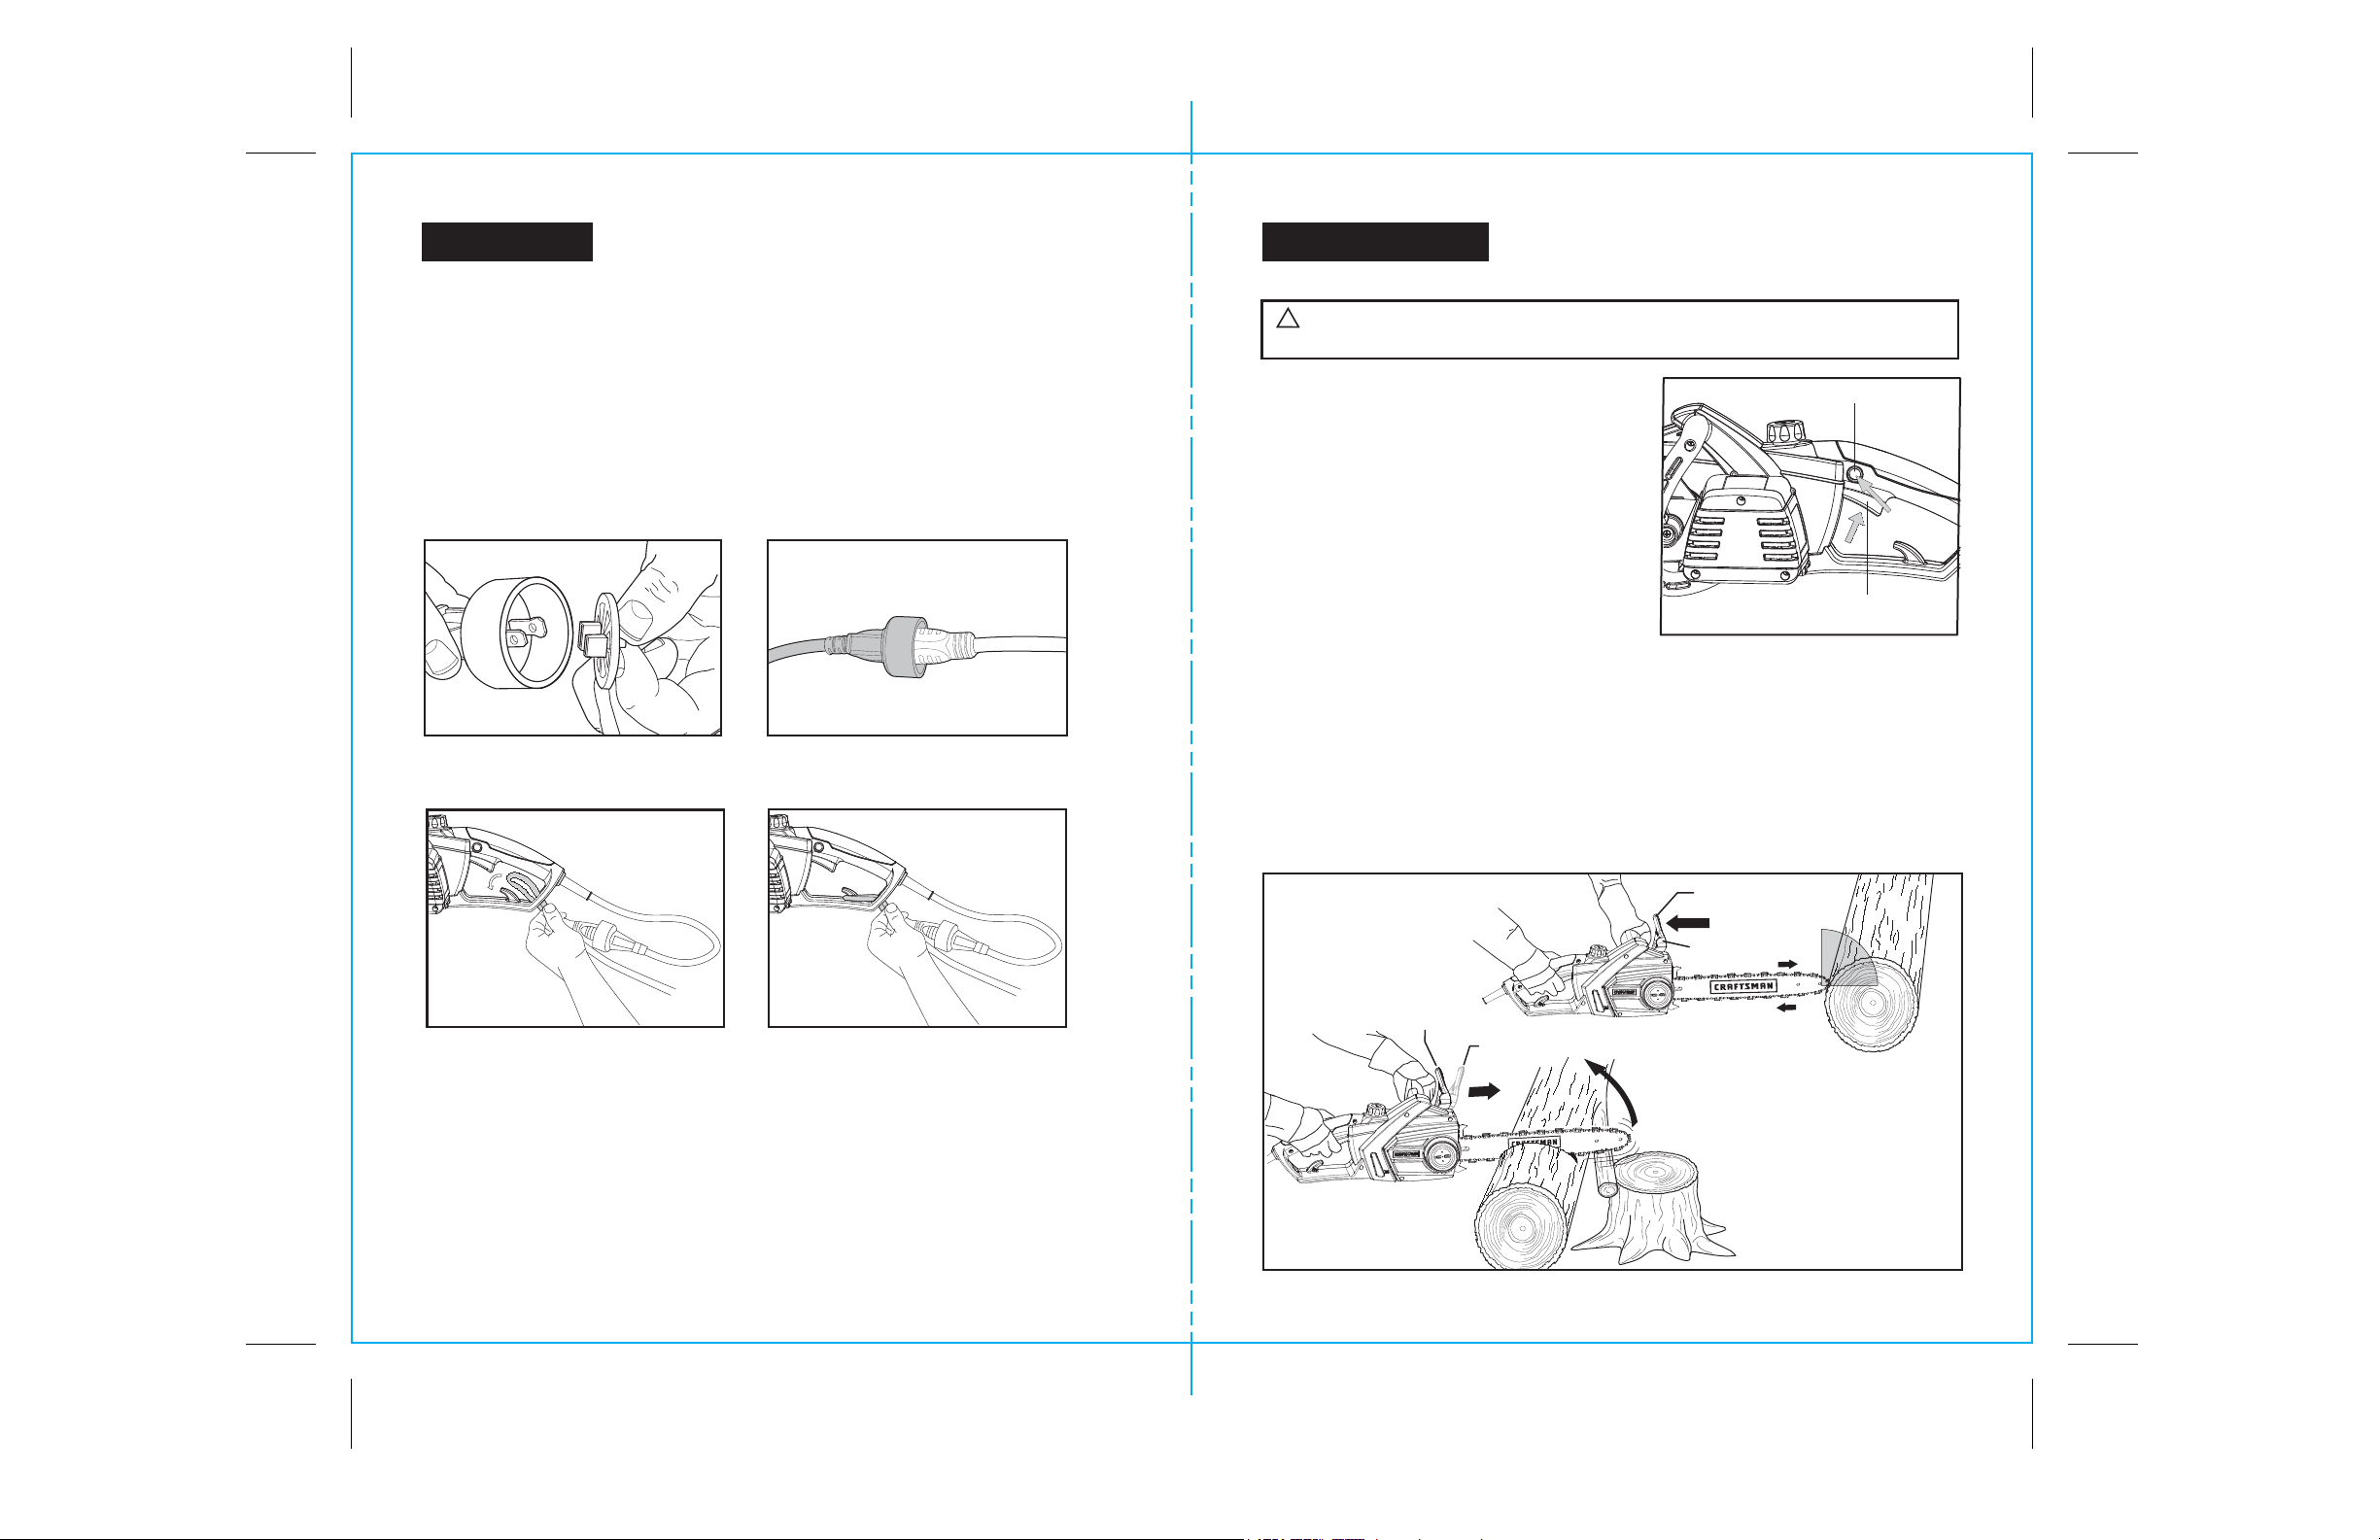
OPERATION
1. Remove Plug safety cap as shown (Fig. 7a). Insert extension cord socket into
Chain Saw’s Plug (Fig. 7b).
2. An Extension Cord Retainer is attached to the Handle to reduce strain on the cord.
To use this feature, simply double the extension cord as shown, about a foot from
the end, and insert it into the end of the Retainer. Place the loop formed by
doubling the cord over the Hook (Fig. 7c). Gently tug on the cord to ensure that it
is firmly situated in the Retainer (Fig. 7d).
3. Keep extension cord clear of operator, unit and any obstacles at all times.
Do not expose the cord to heat, oil, water, or sharp edges.
ATTACHING EXTENSION CORD
Fig. 7a Fig. 7b
Cord locked in Extension Cord Retainer
Completed
Fig. 7dFig. 7c
21
WARNING:
Check the voltage and electric current supply: The voltage
and current supply must comply with the ratings on the data plate.
!
SWITCHING ON AND OFF (Fig. 8)
OPERATION cont.
1. To switch the Chain Saw ON, press the
lock-off button, then fully press the on/off
switch (2) and hold in this position.
The lock-off button (3) can now be released.
2. To switch the Chain Saw OFF, release the on/off
switch (2). Do not stop chain saw after sawing
by activating the front hand guard
(manual chain brake).
Fig. 9
THE CHAIN BREAK
(
Built-In, Manual and Automatic and Systems)
(Figs. 8 and 9)
The MANUAL chain brake is a safety mechanism activated through the front
hand guard (6) when kickback occurs. Chain stops immediately.
The following function check should be carried out at regular intervals.
1. MANUAL CHAIN BRAKE (See Fig. 9): PUSH front hand guard (6) forward (position 2 )
and try starting the chain saw. The chain must not start. To deactivate the chain brake,
pull hand guard (6) backwards (position 1), and release On/Off (trigger) switch (2).
(See Fig. 8 for On/Off switch location)
2.
When saw is running, RELEASE the On/Off (trigger) switch to activate chain brake
AUTOMATICALLY. (See Fig. 8 for On/Off switch location)
Lock-off (3)
Fig. 8
On/Off switch (2)
(trigger)
Pos. 1
Pos. 1
6 Hand Guard
Pos. 2
Loading ...
Loading ...
Loading ...