Loading ...
Loading ...
Loading ...
11
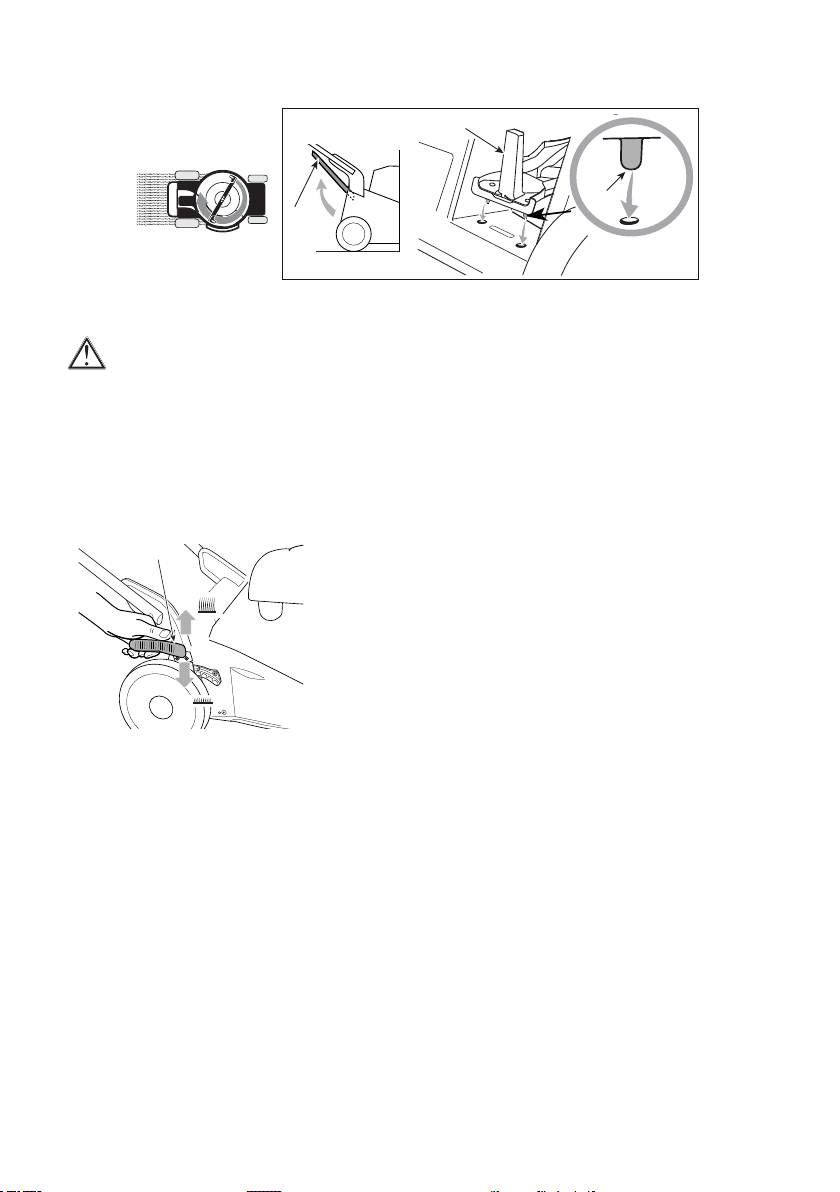
c. Preparation for grass mowing and mulching (Figure 10)
Lift the rear discharge guard (Fig.10.A) and t the chute cap (Fig.10.B) in the discharge opening, keeping it slightly
tilted to the right. Fasten it by tting the two pins (Fig.10.B.1) into the holes provided until clicks into place.
A
B
B.1
ADJUSTING THE HEIGHT OF CUT
Do this when the cutting blade is stationary.
The height of cut adjustment not only determines the length of the cut grass, it also controls the airow which carries
clippings into the collector. If the discharge chute becomes blocked, increase the airow by raising the height of cut.
To prevent blockages when cutting long, thick grass, set the adjustment to the highest setting and cut the grass; then
cut it again on a lower setting.
To adjust the height of cut:
• Stop the engine and disconnect the spark plug
• Put the mower on a level surface
• Adjust the cutting height by using the designated lever (Fig.11.A) that lifts or lowers the chassis to the required
position.
A
STARTING YOUR MOWER
Read and understand the Safety Precautions before using your mower.
• Put Mounteld 4-stroke oil, part number MX855, available from any Mounteld stockist or B&Q store, SAE 30 or
10W-30 oil, in the oil ller (Figure 12). Do not overll. Oil tank capacity is 0,44 litre.
• Fill the fuel tank with UNLEADED petrol. Use only clean, fresh petrol - stale fuel may contain deposits that will
clog the carburettor. Unleaded fuel can start to go stale after just 30 days. We recommend the use of Mounteld
universal fuel stabiliser. Do not overll, the petrol level should be below the bottom of the fuel tank neck. Do not
over tighten the fuel cap. The fuel cap breathes through the threads of the cap and over tightening can cause the
engine to cut out.
• Ensure that the spark plug lead is securely connected to the spark plug.
Figure 10
Figure 11
Loading ...
Loading ...
Loading ...