Easy 3-Step
Installation Guide
Before removing the
protective liner from the
adhesive, do a dry run and
test each step to make sure
the installation will work,
as you might not be able to
reposition the SecureHold
adhesive after it sticks.
Important:
Qdos wants to keep your
children safe and for that
we need you to do your part
by carefully reading and
following the instructions
below.
For installation videos and
FAQs go to: QdosSafety.com
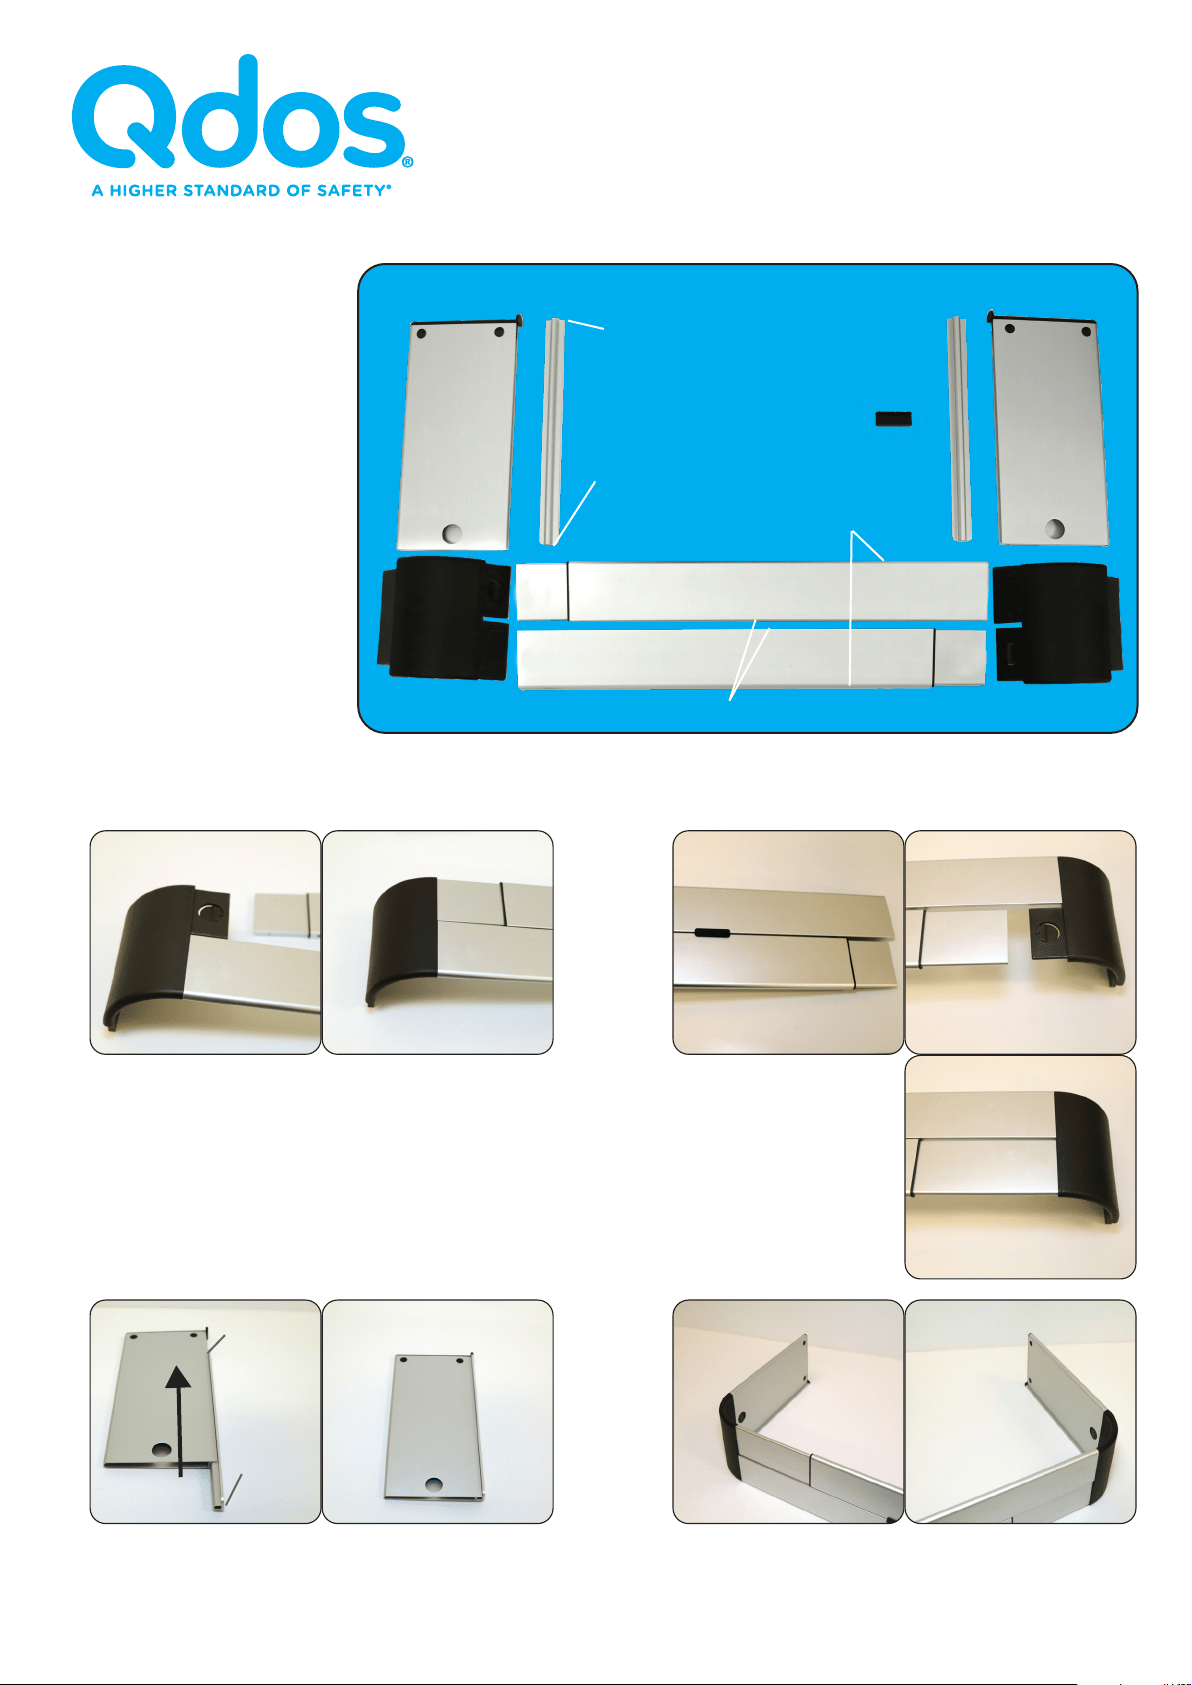
• First attach the wider end of a Front Panel
to the bottom of the Left Corner (B1). Ensure
rounded edge of this front panel is facing
down and push until it locks into place.
• Second attach the narrower end of the other
Front Panel to the top of the Left Corner (B1).
Ensure rounded edge is facing up and push
until it locks into place.
• If your stove is 30” or
wider, slide the Spacer in
between the long front
panels.
• Then attach the two Front
Panels to the Right Corner
(B2) and push until they
lock into place
Step 1 – Assembly
A B
Adhesive
Stove Guard
Parts List:
• Finally attach left Side Panel (C1) to the Left Corner
(B1). With the hole on the inside push until it locks
into place. Repeat for right Side Panel (C2) to the
Right Corner (B2).
• Next slide the Side Rails (C) in on the
underside of the Side Panels, with the flat
ends first that match up to the plastic end
caps of the side panels.
C D
Left corner (B1)
Right corner (B2)
Side rail (D)
Side rail (D)
Rounded end
Flat end
Right Panel (C2)
Left Panel (C1)
Front panel
Spacer
Rounded
Edge
Flat Edge
flat end
rounded
end
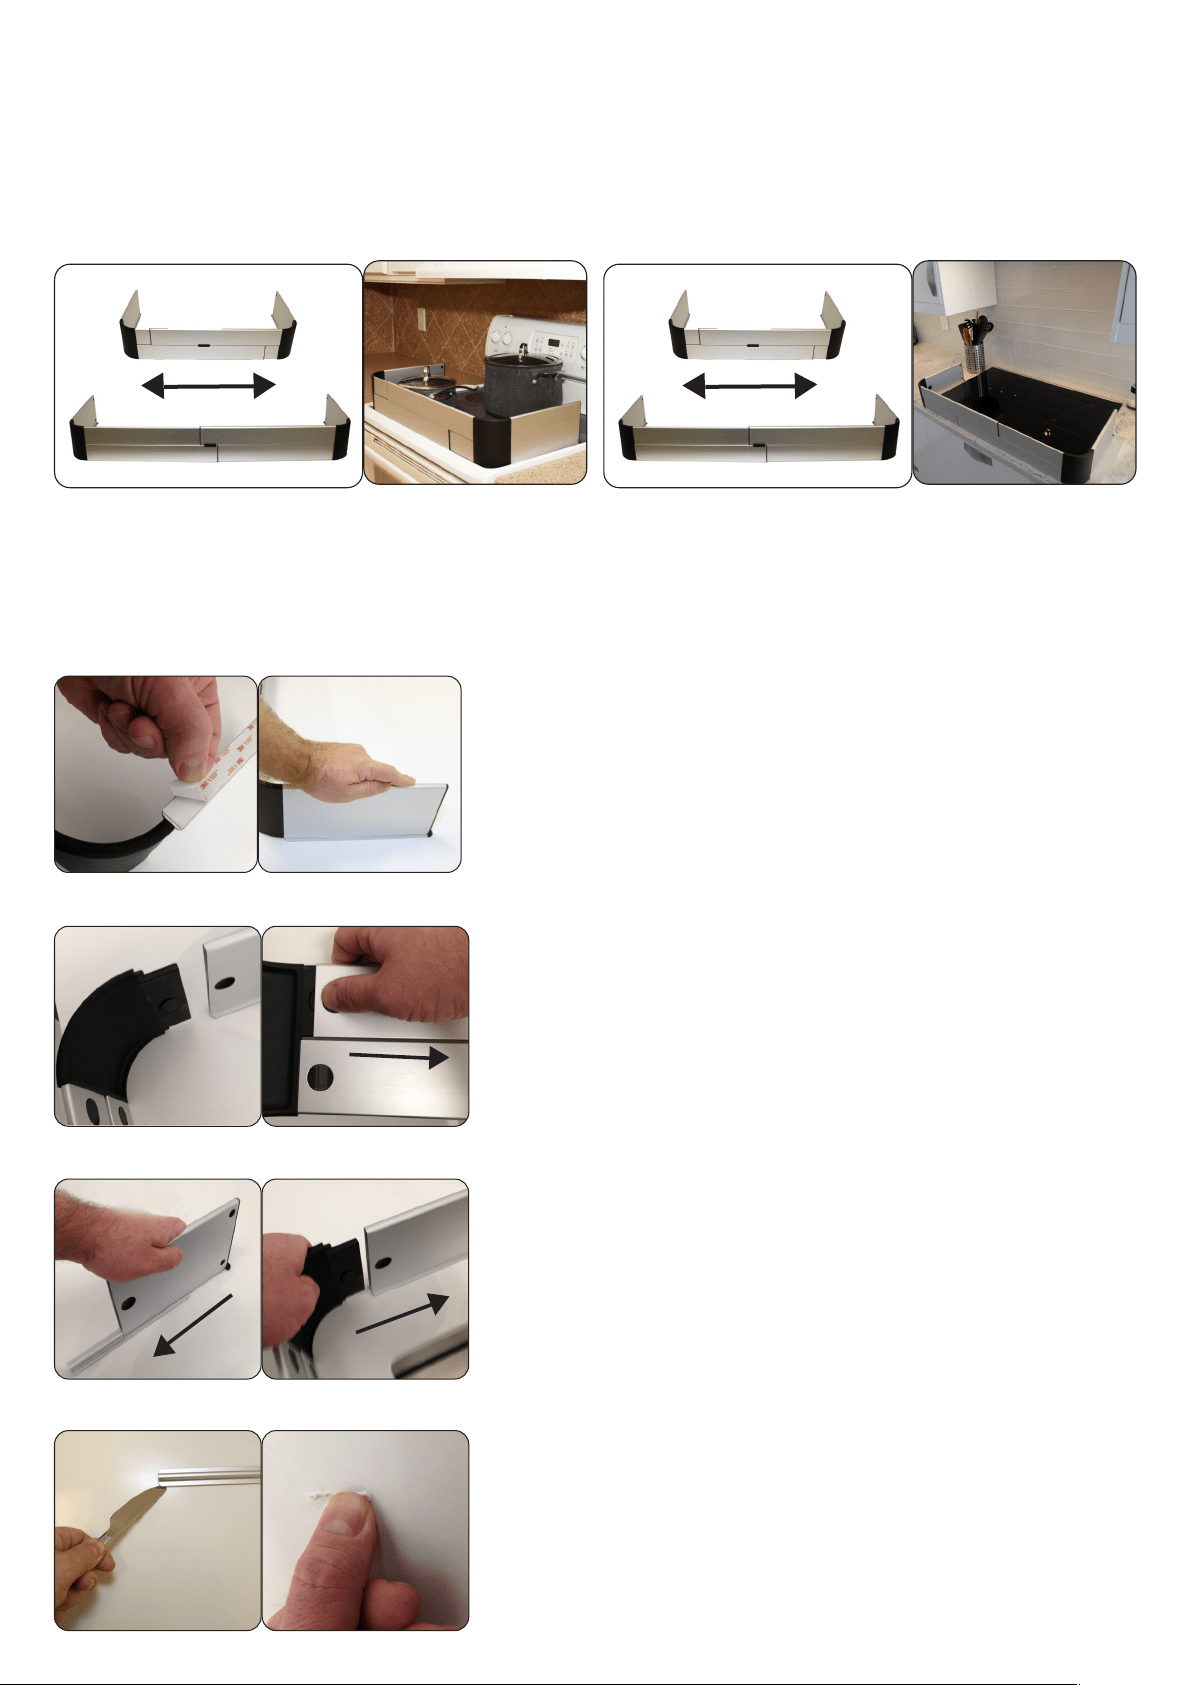
• Use a rounded knife to carefully lift under the Side Rails until
they come o.
• For remaining tape residue, use a finger to simply rub it away. If
any residue still remains, use a cleaner that will not damage the
surface you are removing the residue from. There is no way to
test all possible surfaces SecureHold Adhesive will be applied
to; please use caution when removing to avoid damaging the
surface. SecureHold adhesive may cause damage to some
surfaces.
• Adjust the width by pulling on the corners until
the Side Rails hit a smooth surface close to the
edge of the stove top.
• Adjust the depth so the front is supported by the
stove top as well.
• Thoroughly clean the area the side rails will be adhered to
with rubbing alcohol to remove any grease and then dry
surface.
• Set the assembled Stove Guard in place making sure it is sized
for width and positioned correctly for depth, as you might not
be able to reposition the SecureHold adhesive after it sticks.
• Remove protective liners from the adhesive tape on both Side
Rails.
• Attach the Stove Guard in the desired position and press
firmly on the side panels for 30 seconds.
• Adjust the width by pulling on the corners so the
Side Rails hit the countertop beside the cook top.
• Adjust the depth to ensure the front is supported
by the countertop as well.
Step 3 – Installation
• Push the tabs on the inside of the side panels until the corners
release and remove front.
• Push each of the tabs on the inside o both front panels to
release from the corners.
• Finally slide the side panels forward of the rails.
• We recommend that you hand wash all parts. If using a
dishwasher, place all parts on the TOP RACK ONLY.
Note: Some dishwasher detergents are harsh and may cause the
aluminum to discolor over time.
• Slide the side panels onto the rails with the holes on the inside
towards stove/cooktop.
• Connect the front panels to the corners
• Push the corners into the side panels until they lock into place.
Temporary Removal for Cleaning
Reassembly
Complete Removal
Stovetop OR Cooktop
07/ 2 1
I
MPORTANT INFORMATION FOR GAS STOVES AND COOKTOPS! When cooking with gas, a lot of heat from the gas
burner radiates around the pot or pan, especially when turned to high. This radiating heat and the proximity of the pot
or pan to the Stove Guard can cause the Stove Guard to get hot to the touch. Due to this radiating heat from the gas,
always keep the pot or pan at least 3” (7.5 cm) from the inside of the Stove Guard, or use one of the rear burners when
cooking with gas. Electric stove tops or cooktops don’t radiate heat in the same manner and here we recommend to
keep the pot or pan 1” (2.5 cm) from the inside of the Stove Guard. Please keep this in mind when installing the Stove
Guard.
Step 2 – Positioning:
