ENGLISH
2012-11-20
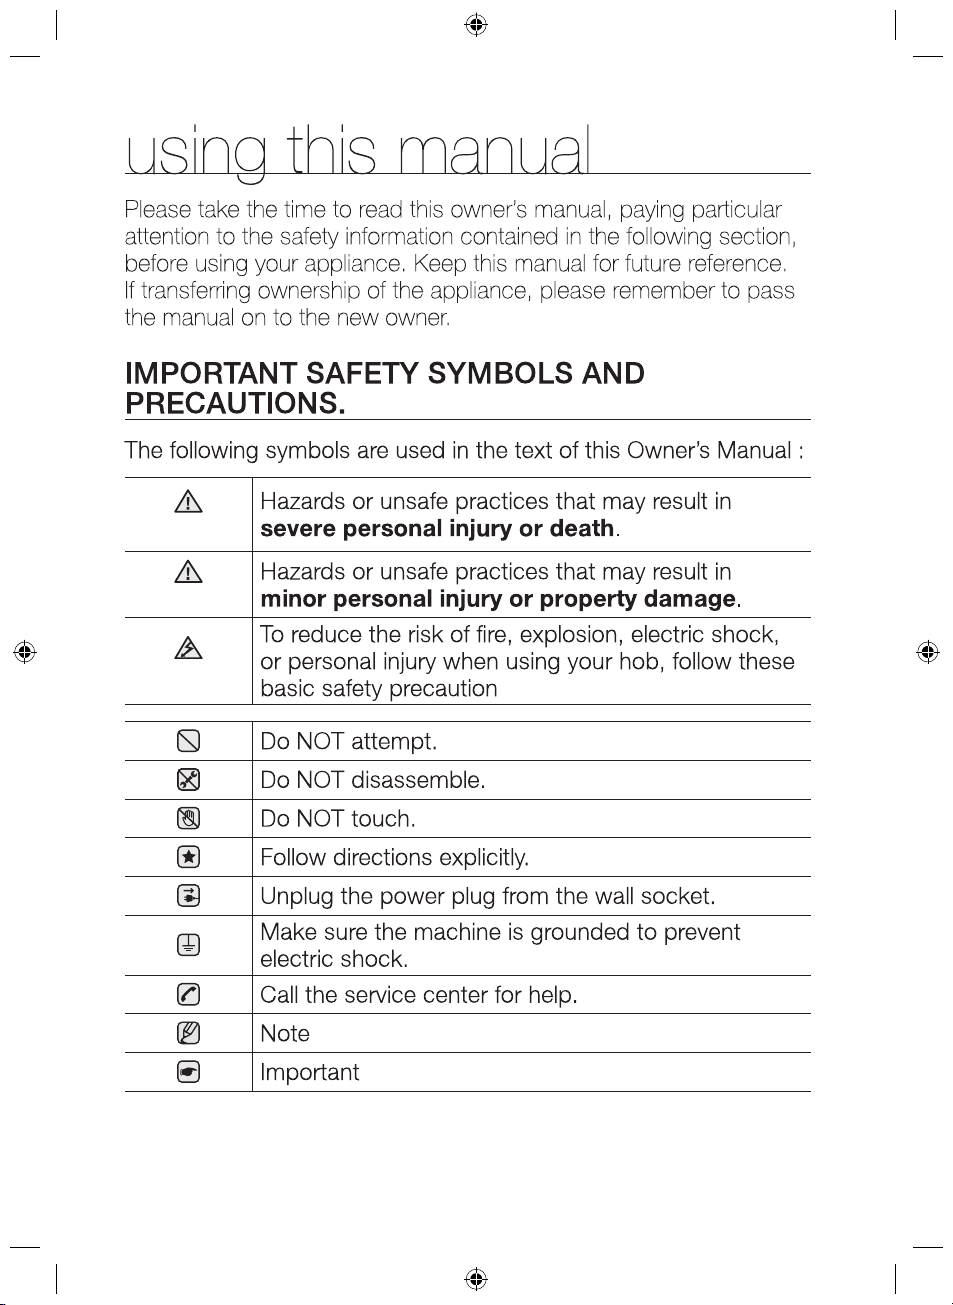
2_ using this manual
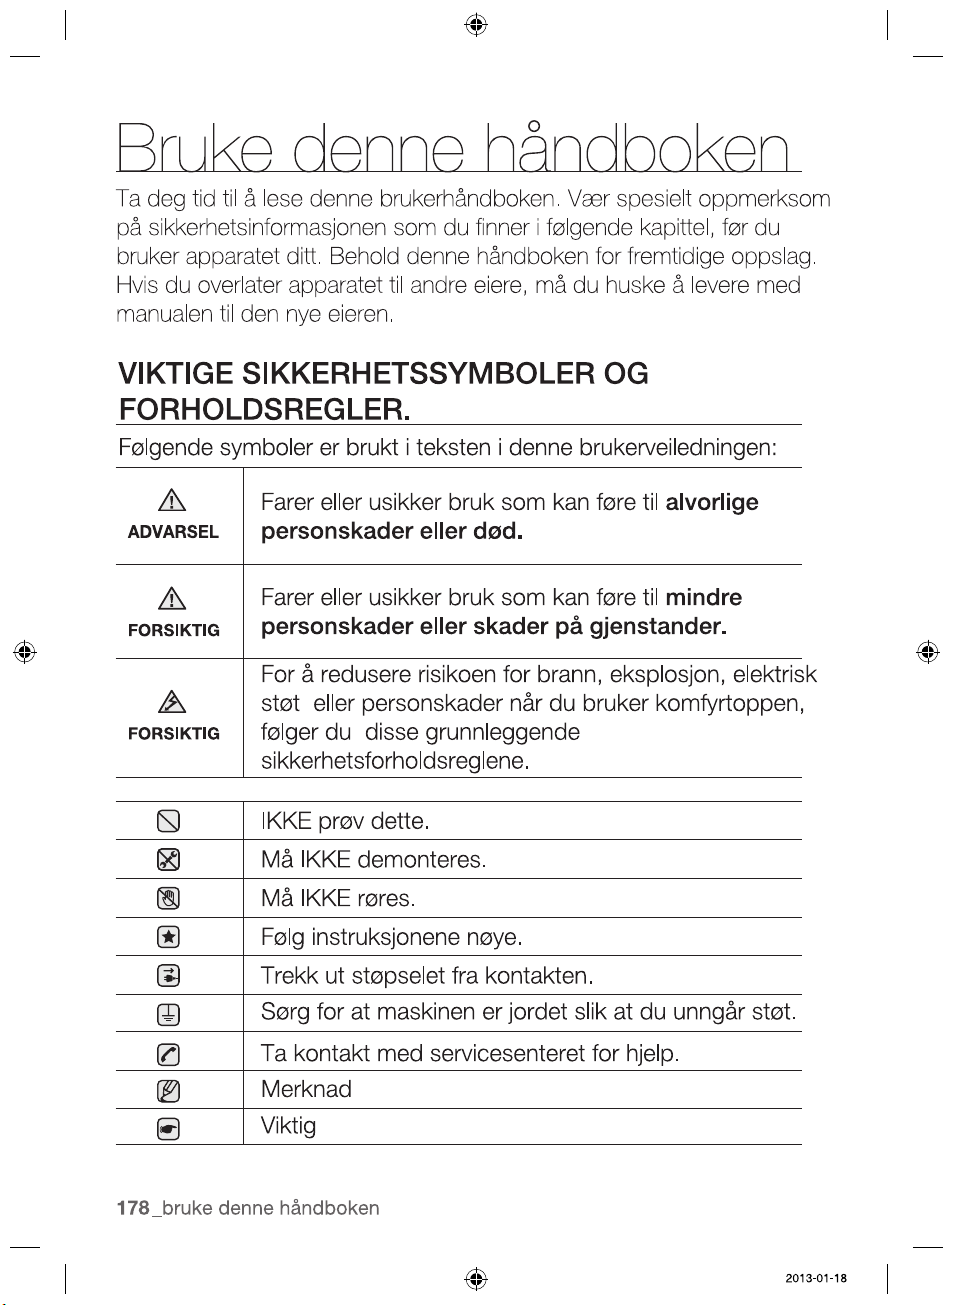
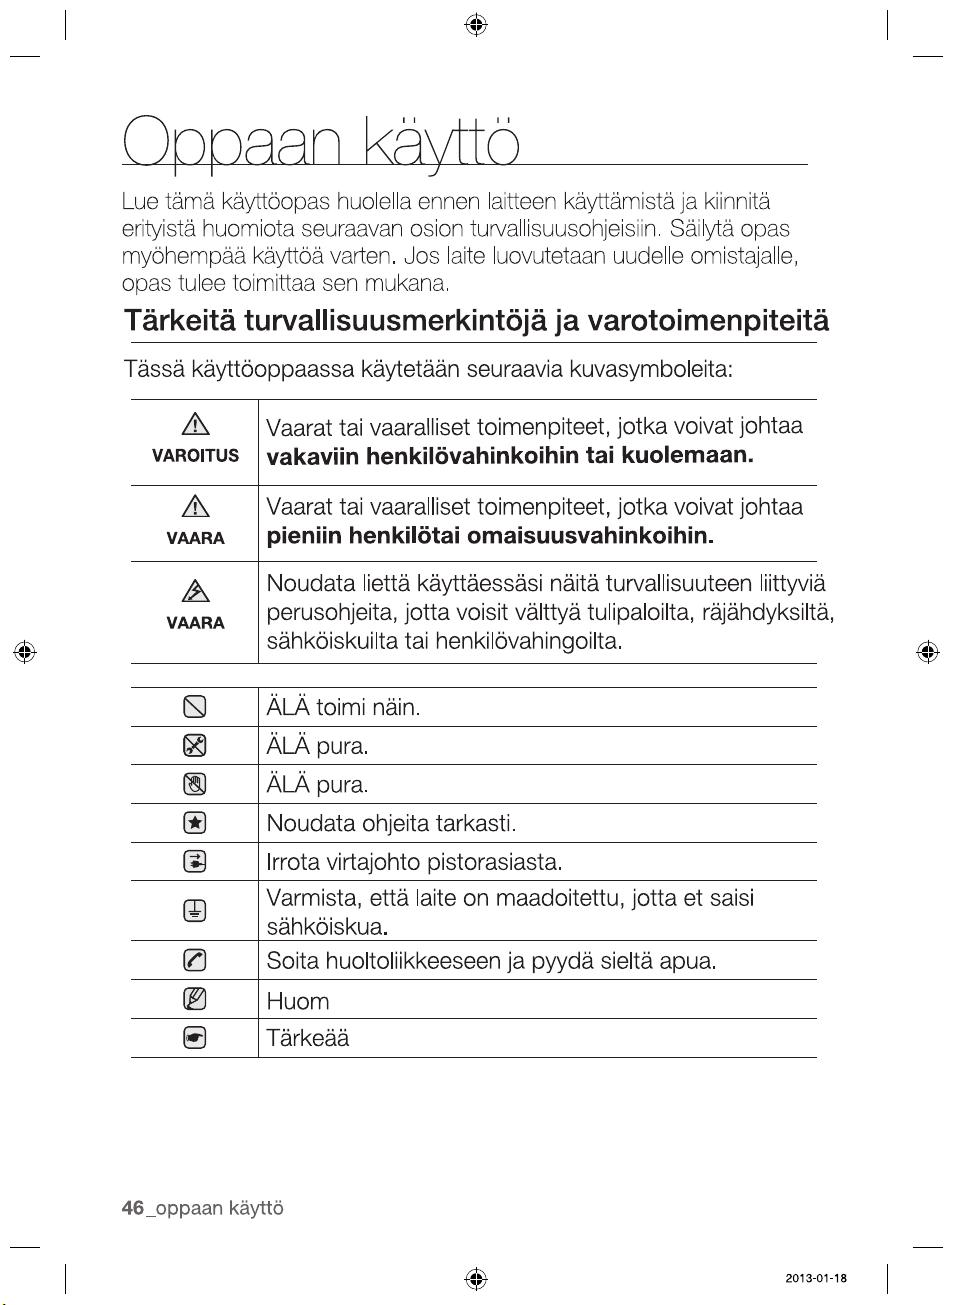
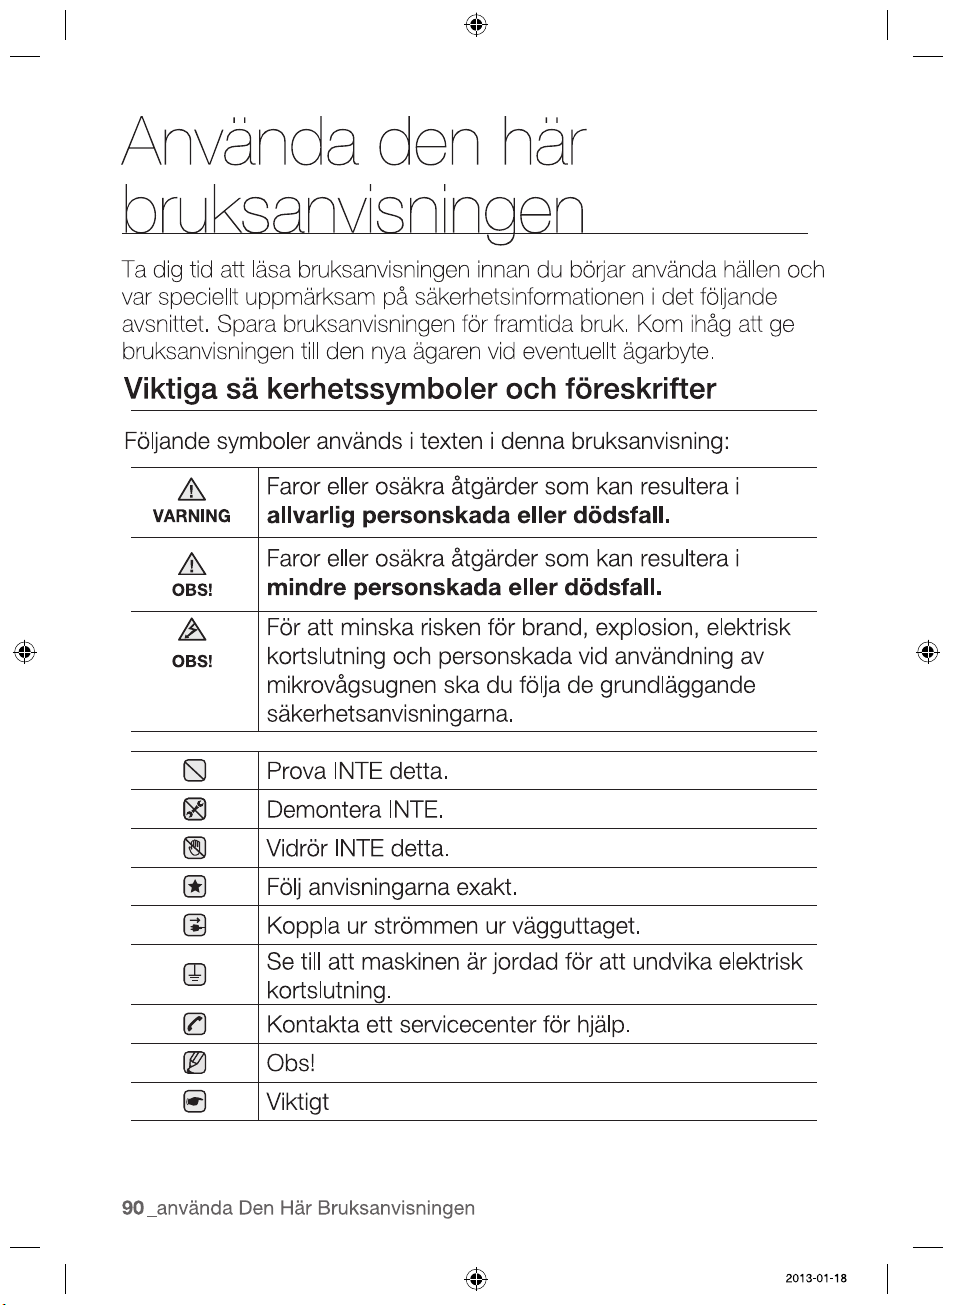
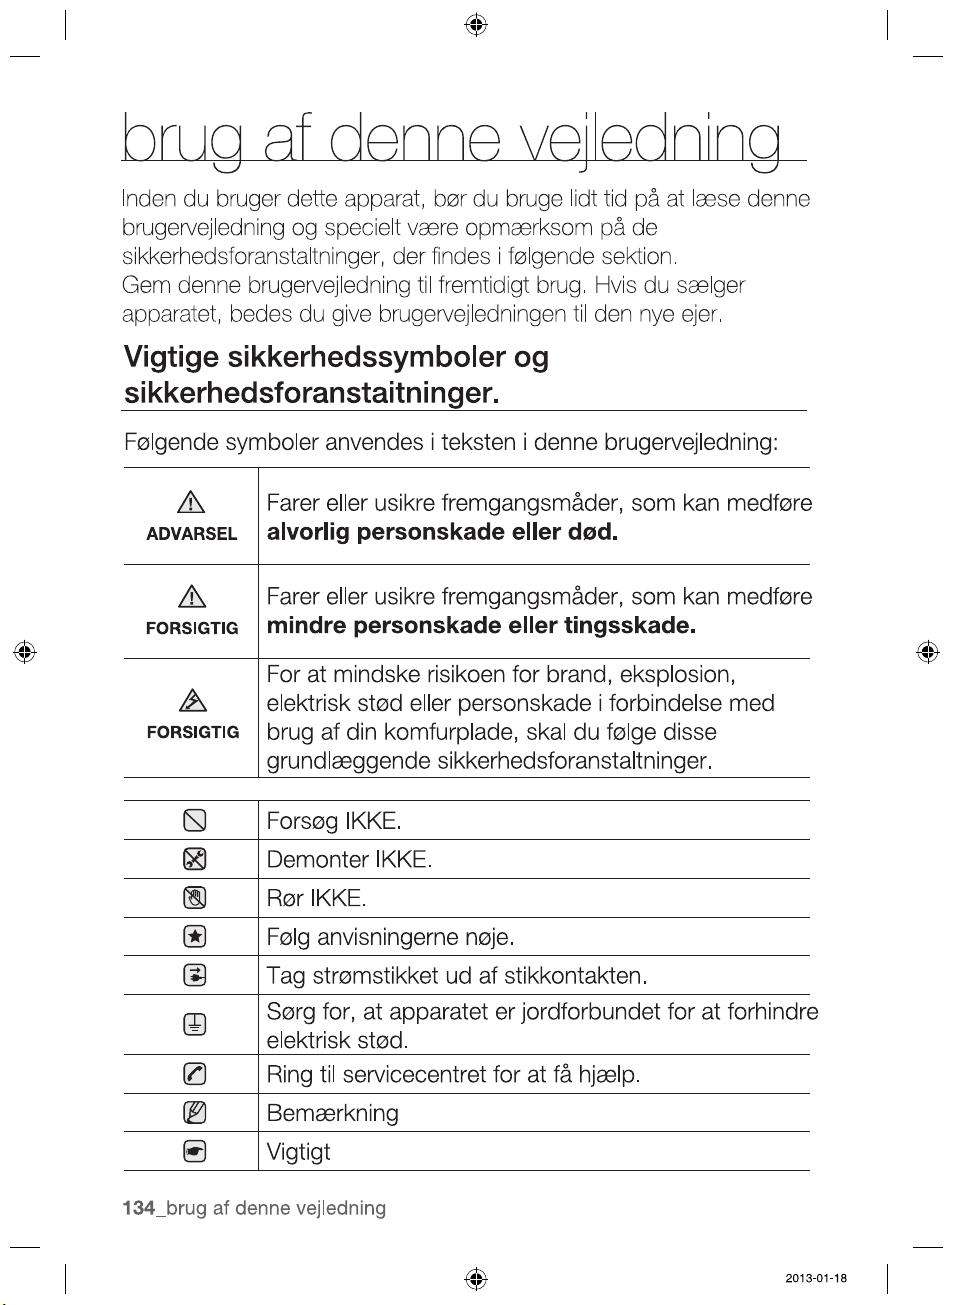
WARNING
CAUTION
CAUTION
2012-11-20
safety instructions _3
SAFETY INSTRUCTIONS
WARNING
2012-11-20
WARNING
4_ safety instructions
WARNING
2012-11-20
safety instructions _5
SEVERE WARNING SIGNS FOR INSTALLATION
WARNING
SAFETY INSTRUCTIONS
2012-11-20
6_ safety instructions
WARNING
2012-11-20
safety instructions _7
-
SAFETY INSTRUCTIONS
WARNING
2012-11-20
8_ safety instructions
2012-11-20
safety instructions _9
SAFETY INSTRUCTIONS
over without warning
2012-11-20
10_ safety instructions
CAUTION SIGNS FOR USING
CAUTION
2012-11-20
safety instructions _11
SAFETY INSTRUCTIONS
the lid (Model which has lid only).
2012-11-20
12_ safety instructions
WARNING
CAUTION SIGNS FOR CLEANING
WARNING
2012-11-20
SAFETY INSTRUCTIONS
safety instructions _13
CORRECT DISPOSAL OF THIS PRODUCT
(WASTE ELECTRICAL & ELECTRONIC EQUIPMENT)
WARNING
WARNING
2012-11-20
14_ disposal instructions
REGULATIONS AND COMPLIANCE
This appliance meets the following standards:
•EN
60335 - 1 and EN 60335 - 2 - 6, relating to the safety of
electrical appliances for household use and similar purposes;
•
EN 60350, or DIN 44546 / 44547 / 44548, relating to the
operating features of electric cookers, hobs, ovens, and grills for
household use;
•EN 55011
•EN 55014-2
•EN 61000 - 3 - 2; and
•EN 61
000 - 3 - 3, relating to basic requirements for
electromagnetic compatibility (EMC).
This appliance complies with the following EU Directives:
•2006/95/EC,LowVoltageDirective
•
2004/108/EEC, Electromagnetic Compatibility Directive
SAFETY INSTRUCTIONS FOR THE INSTALLER
•
•
•
•
•
WARNING
2012-11-20
16_ installing the hob
casing of the hob.
Shut off power to circuit before connecting wires to
circuit.
WARNING
WARNING
WARNING
2012-11-20
installing the hob _17
INSTALLING THE HOB
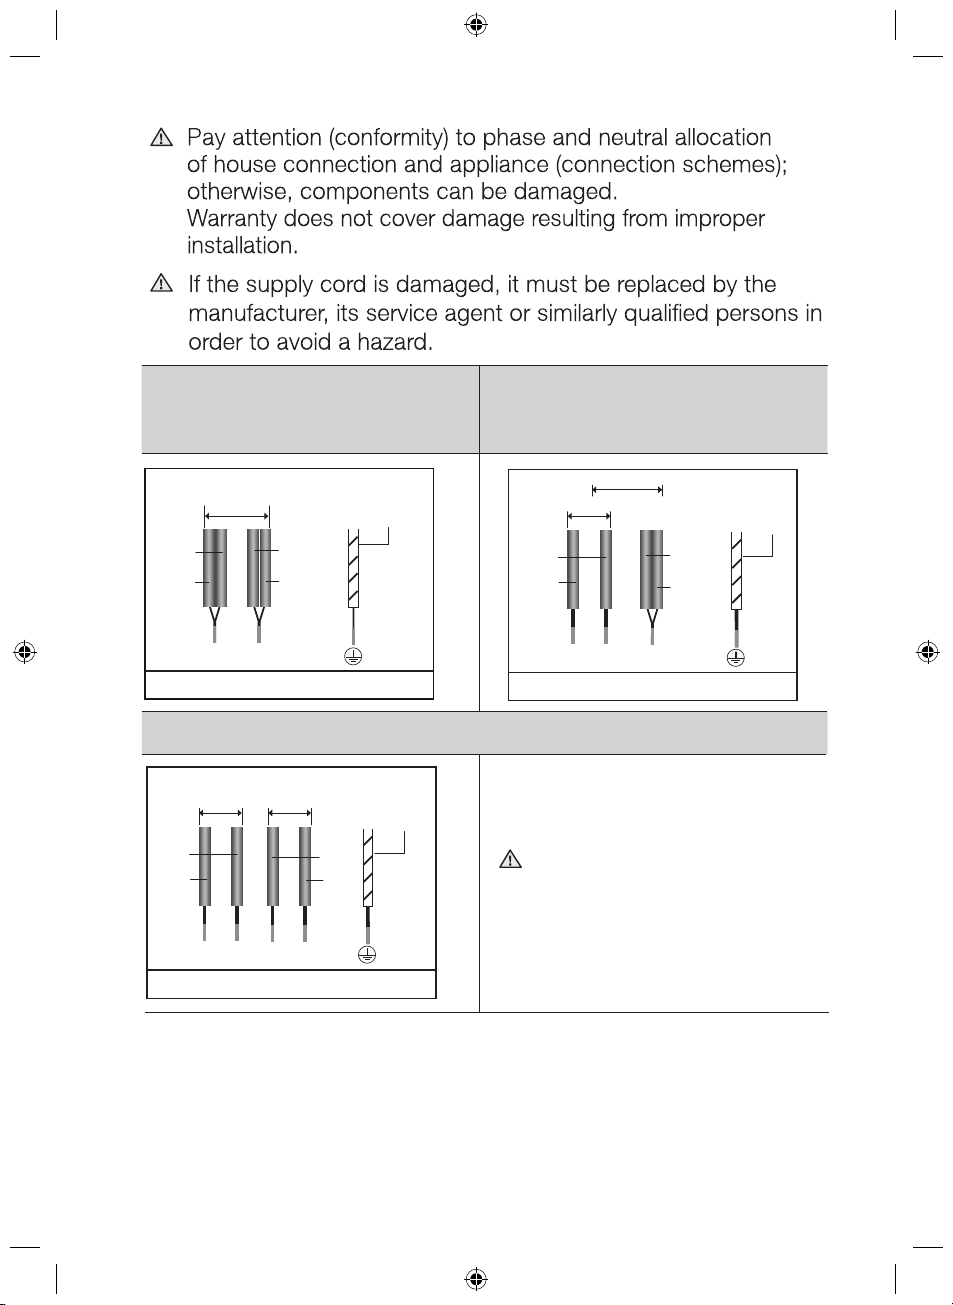
WARNING
WARNING
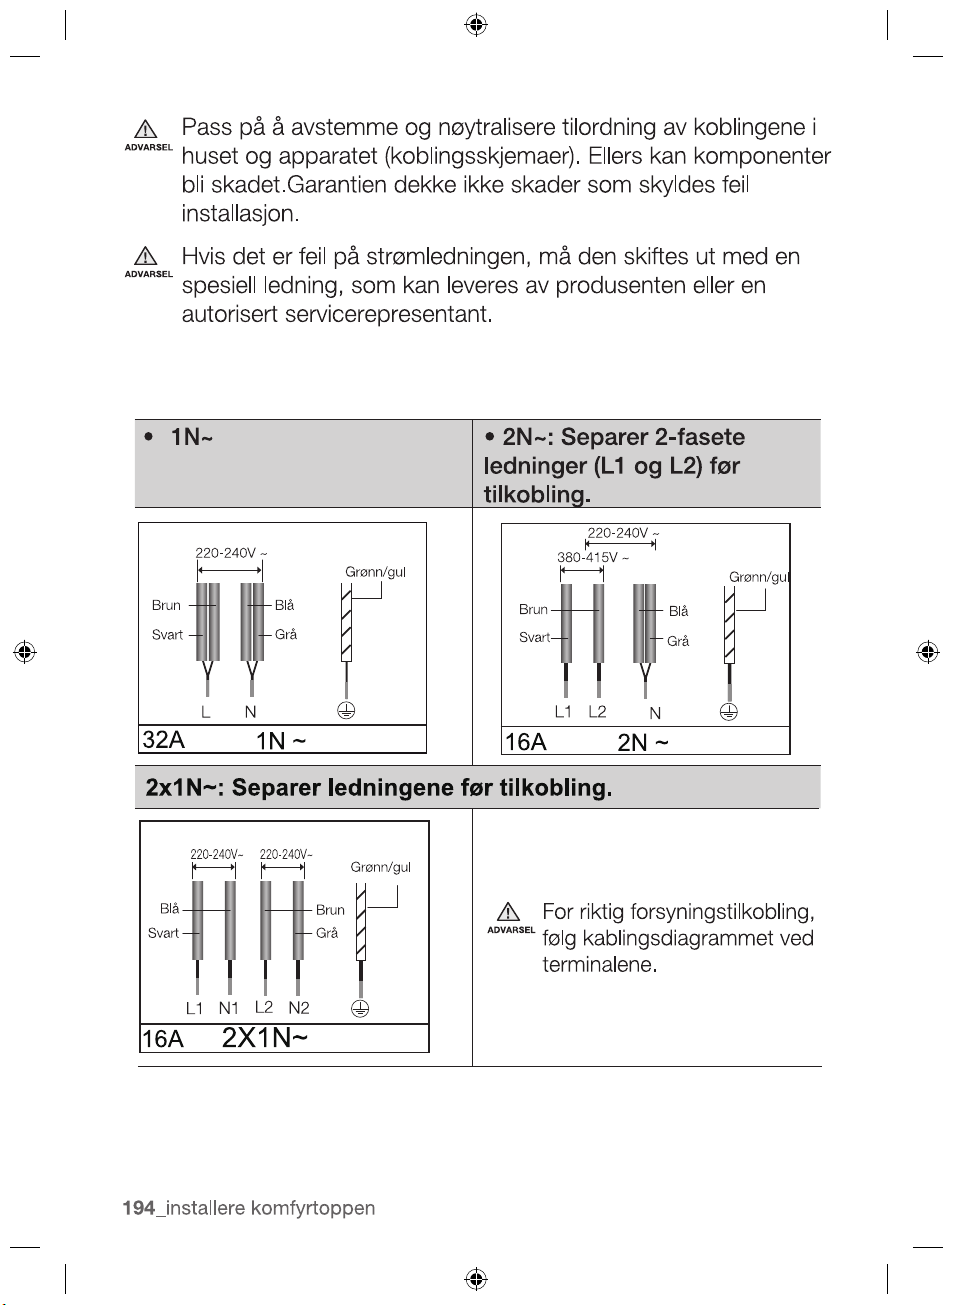
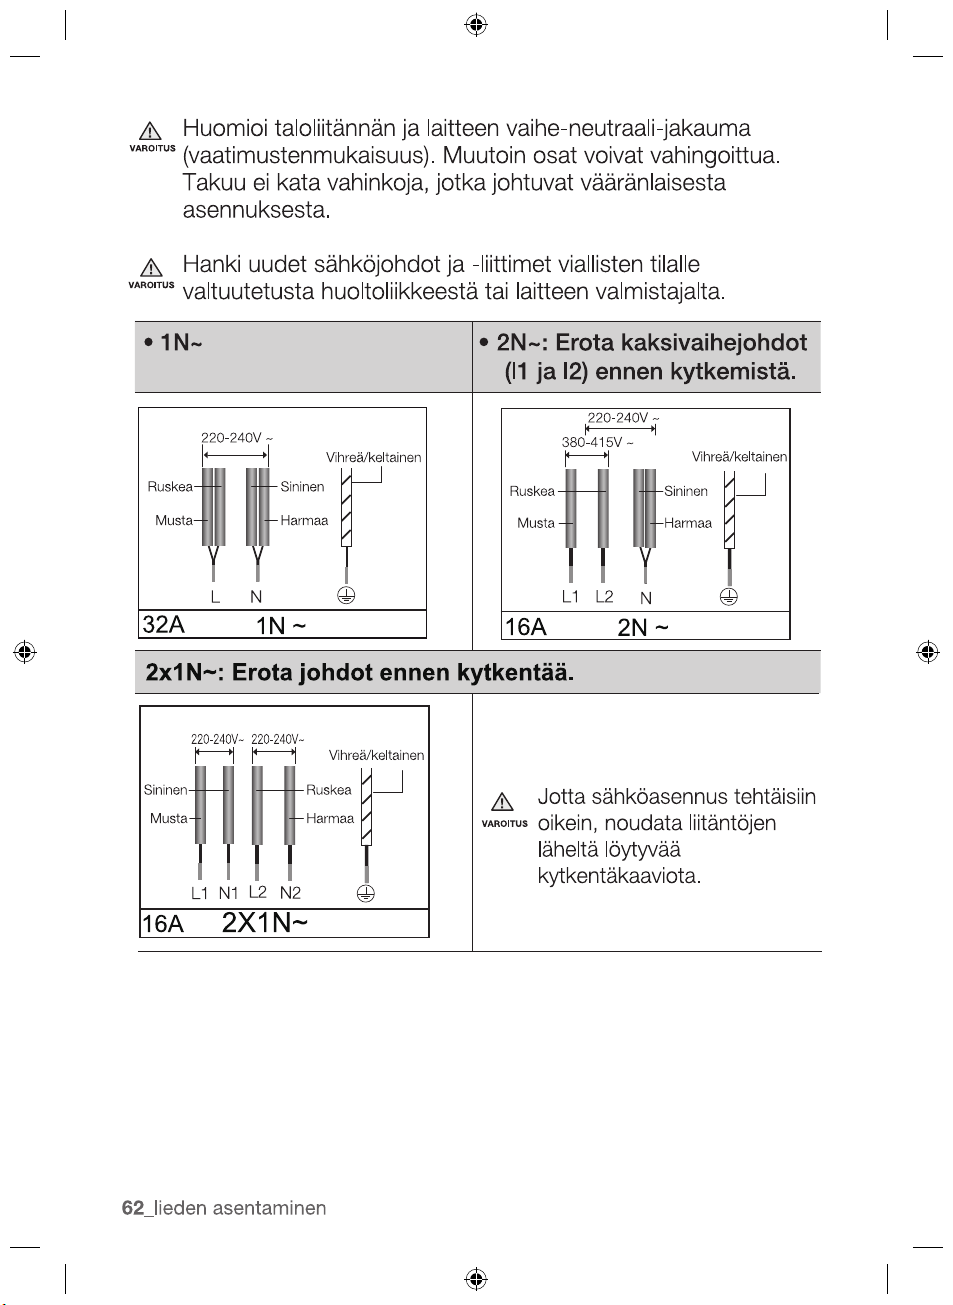
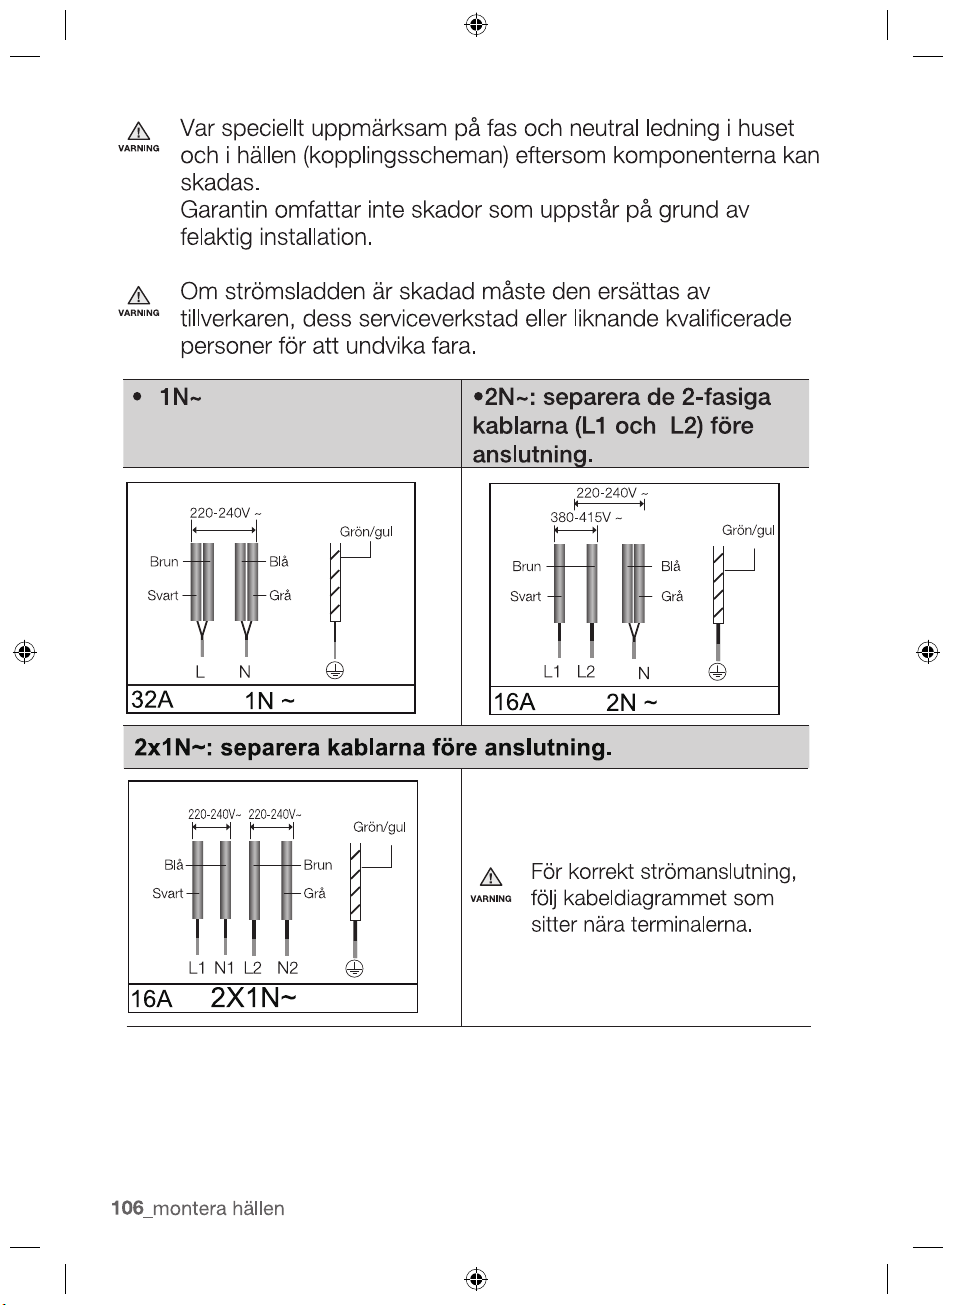
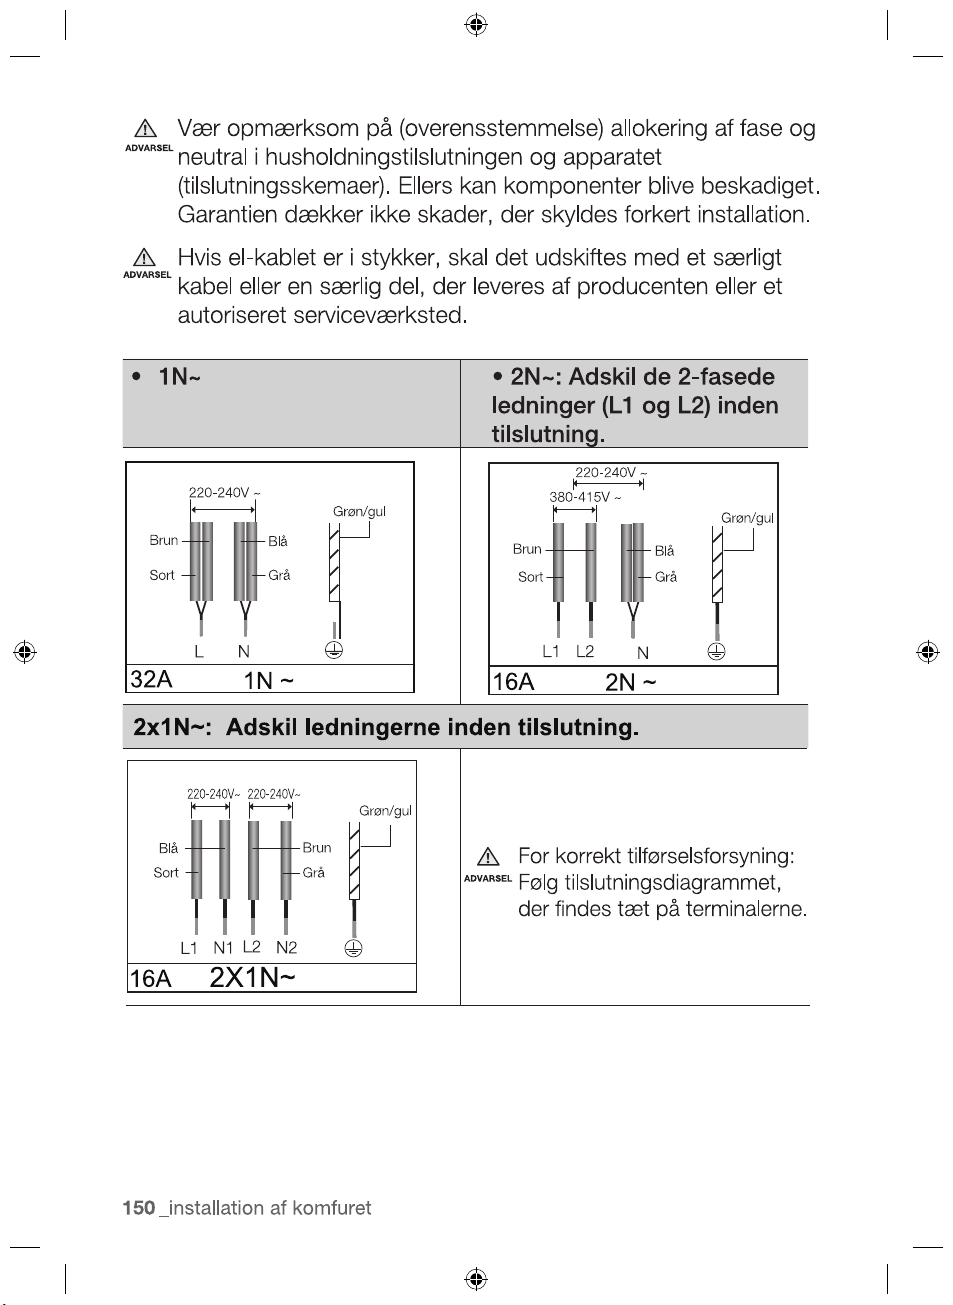
•1N ~ •
2N ~ :
Separate the 2-phase
wires (L1 and L2) before
connection.
L N
1N ~
N
2N ~
L1 L2
Brown
Black
Green/Yellow
220-240V ~
380-415V ~
Brown
Black
Green/Yellow
220-240V ~
Blue
Gray
Blue
Gray
attached near the terminals.
WARNING
2X1N~
For correct supply connection,
follow the wiring diagram
2012-11-20
2x1N~:
Separate the wires before connection.
32A
16A
16A
N1
L1
L2
Brown
Black
Green/Yellow
Blue
Gray
N2
220-240V~ 220-240V~
18_ installing the hob
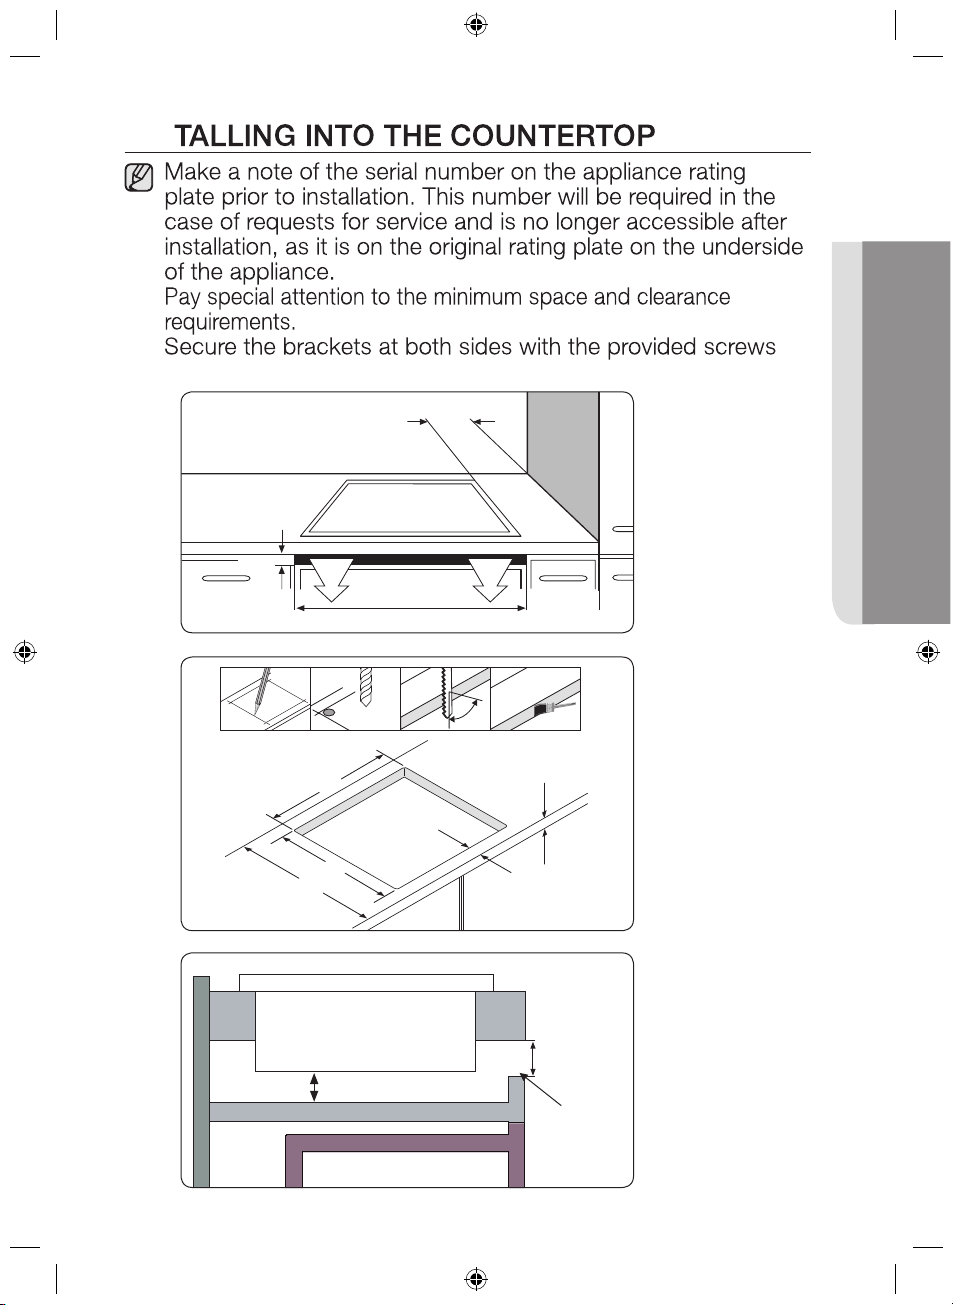
INS
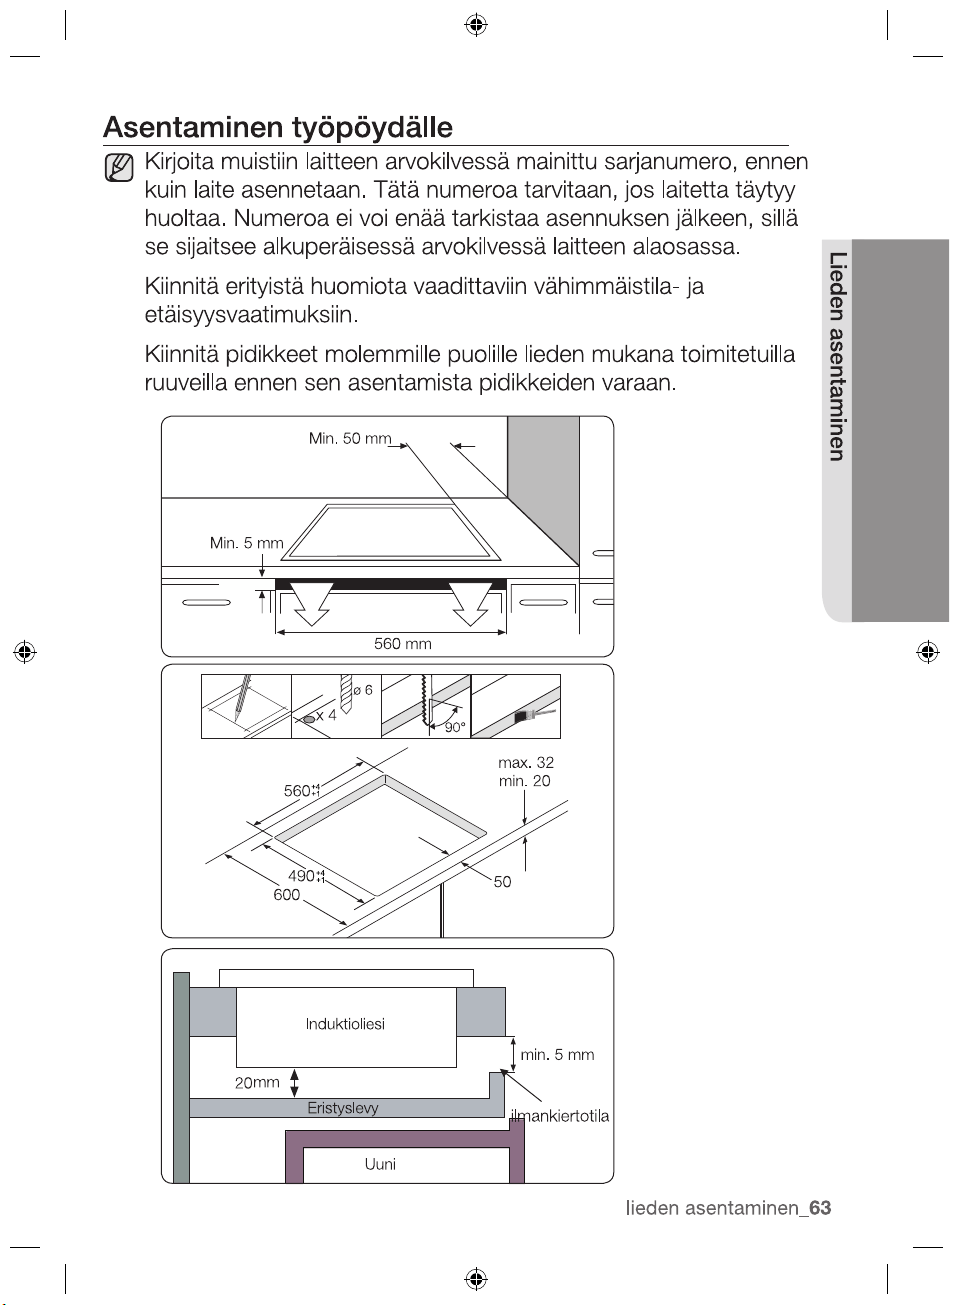
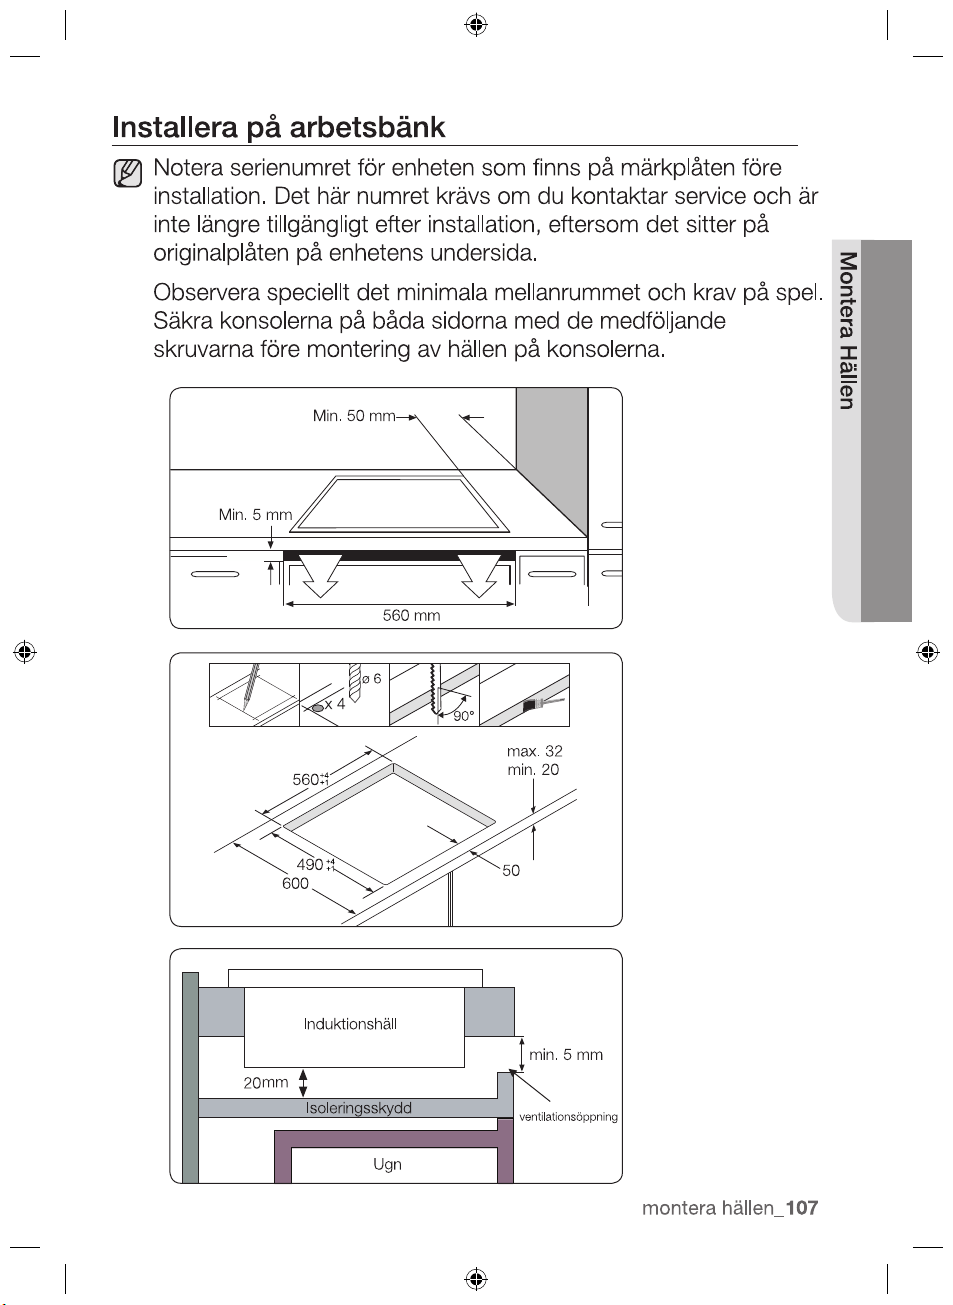
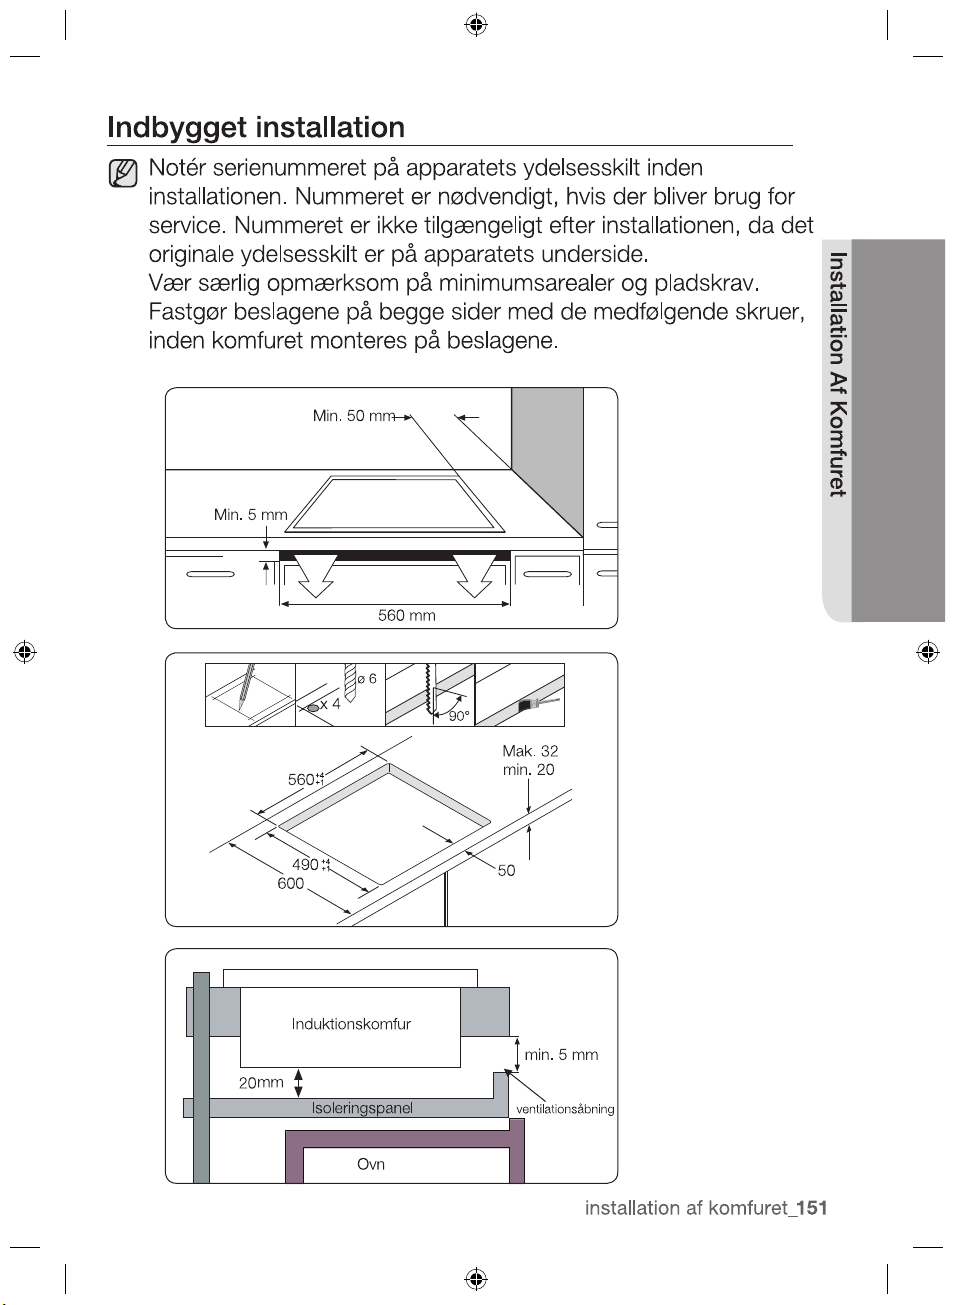
560
min. 20
50
490
600
Min. 50 mm
Min. 5 mm
560 mm
Induction Hob
ventilation gap
min. 5 mm
Insulation Panel
Oven
+4
+1
+4
+1
mm
20
x 4
ø 6
90°
2012-11-20
before installation.
max. 32
installing the hob _19
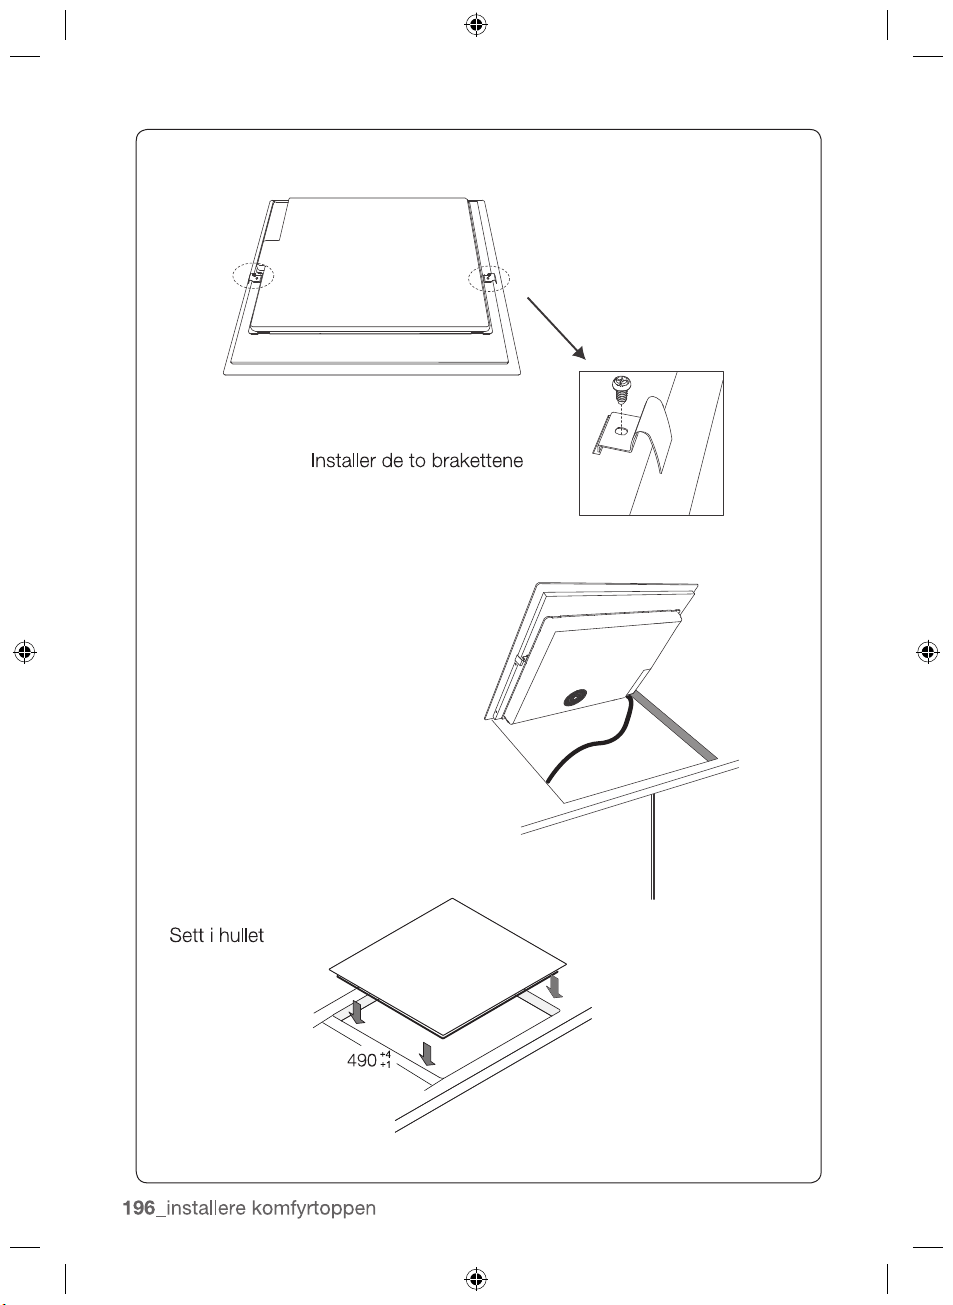
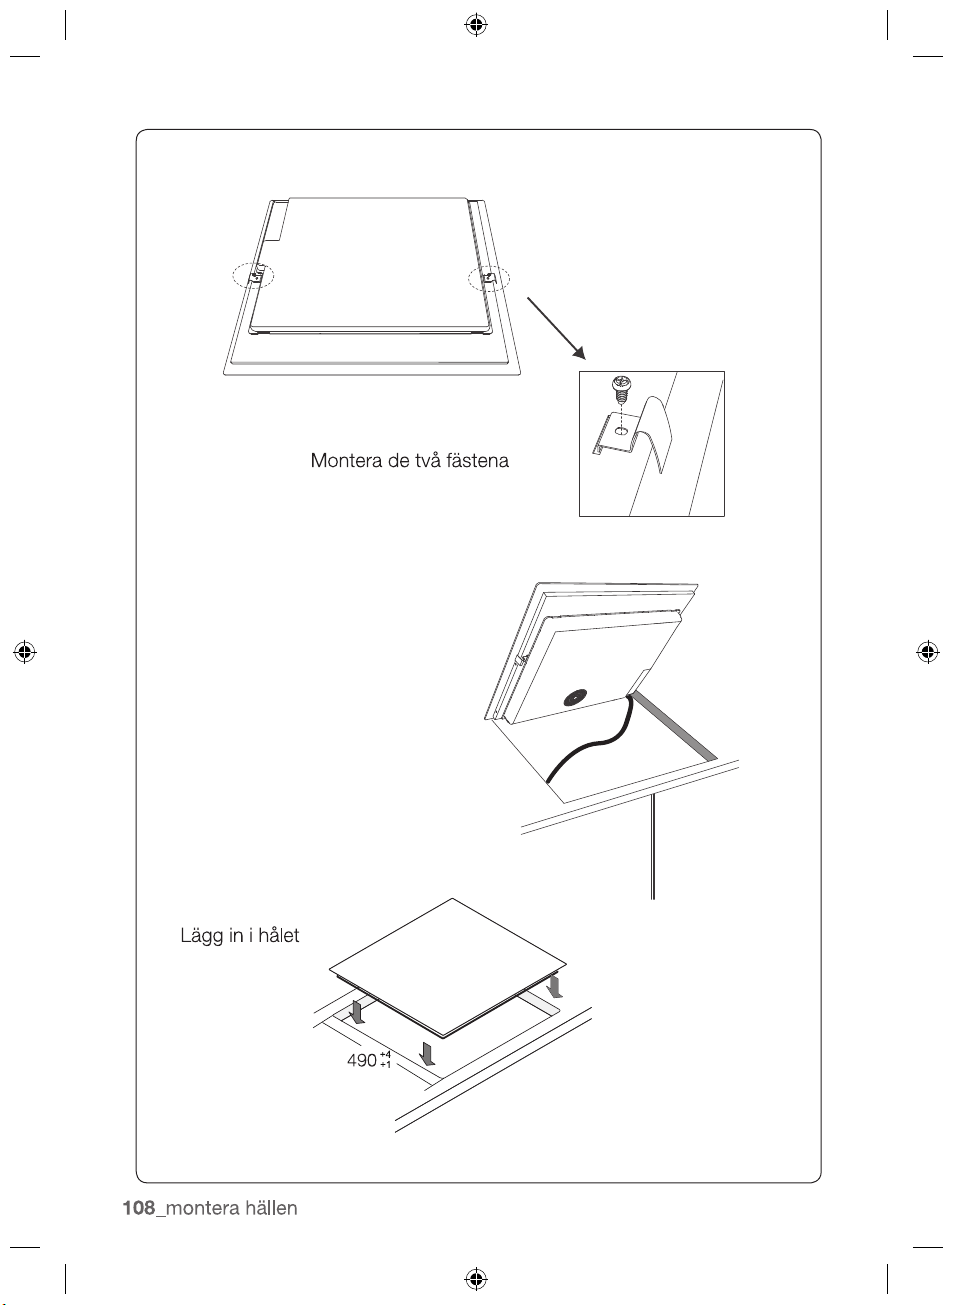
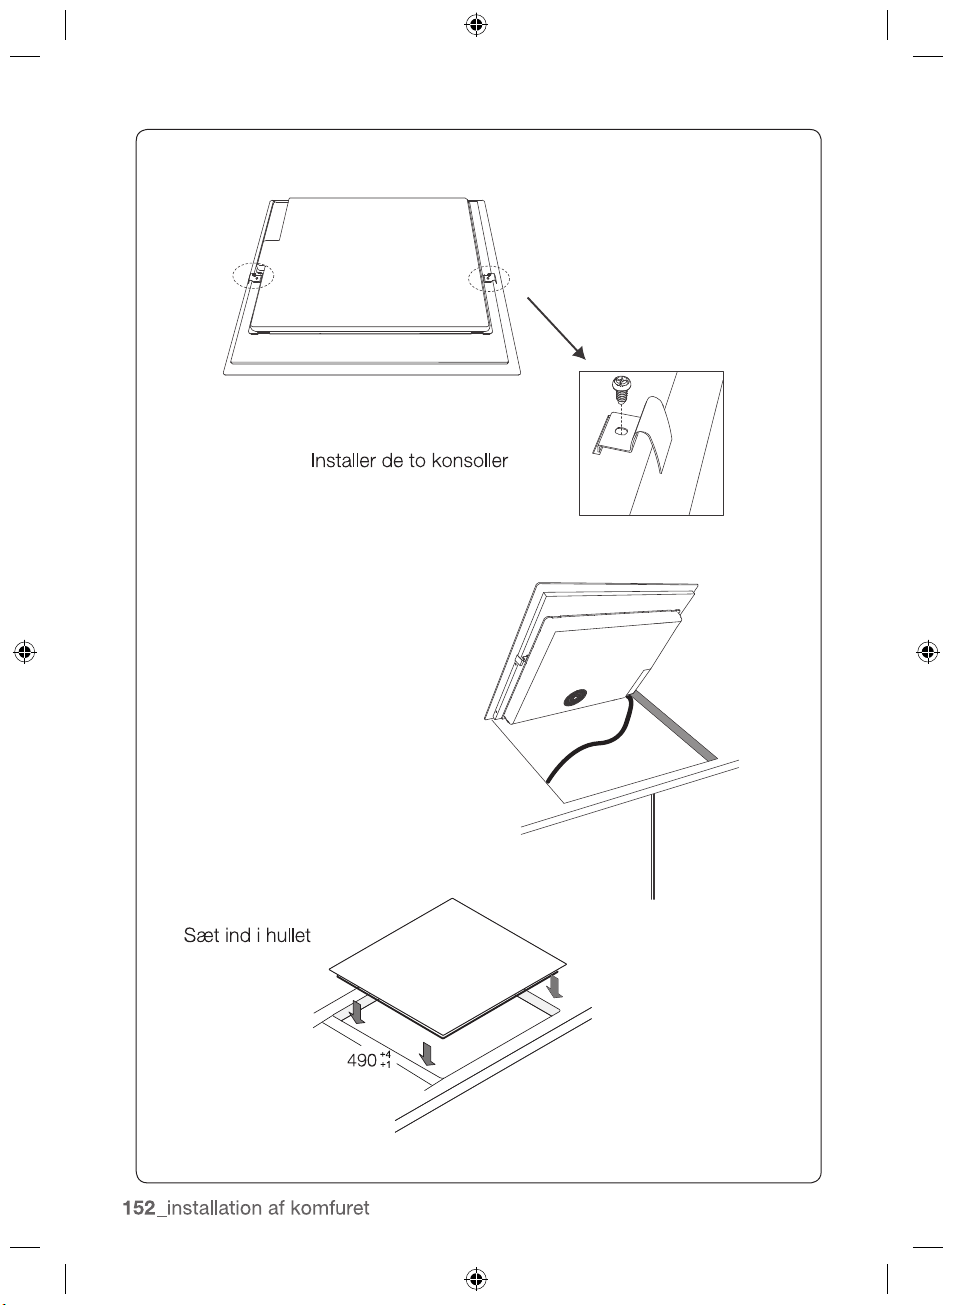
INSTALLING THE HOB
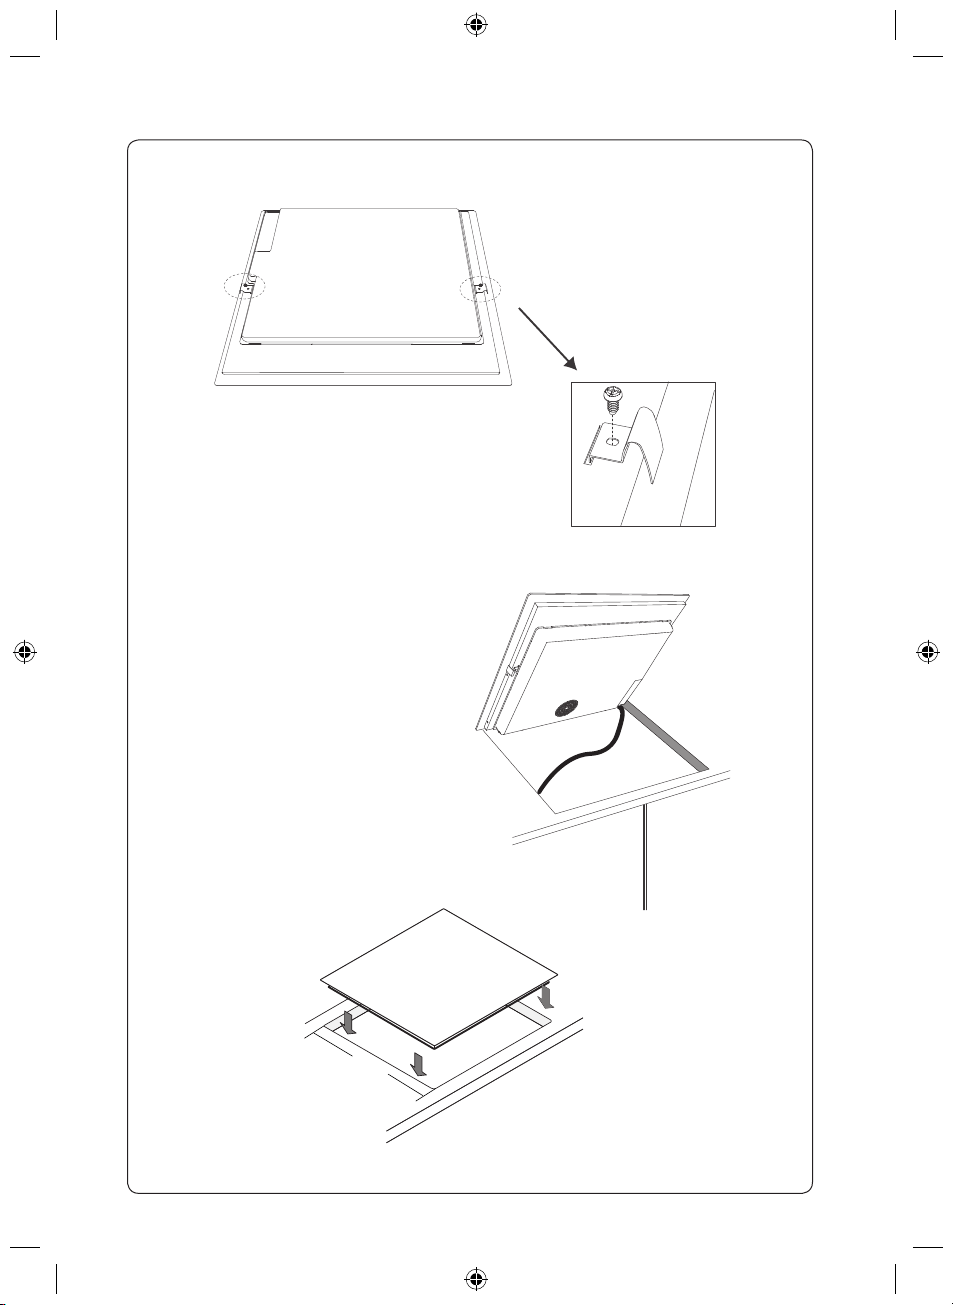
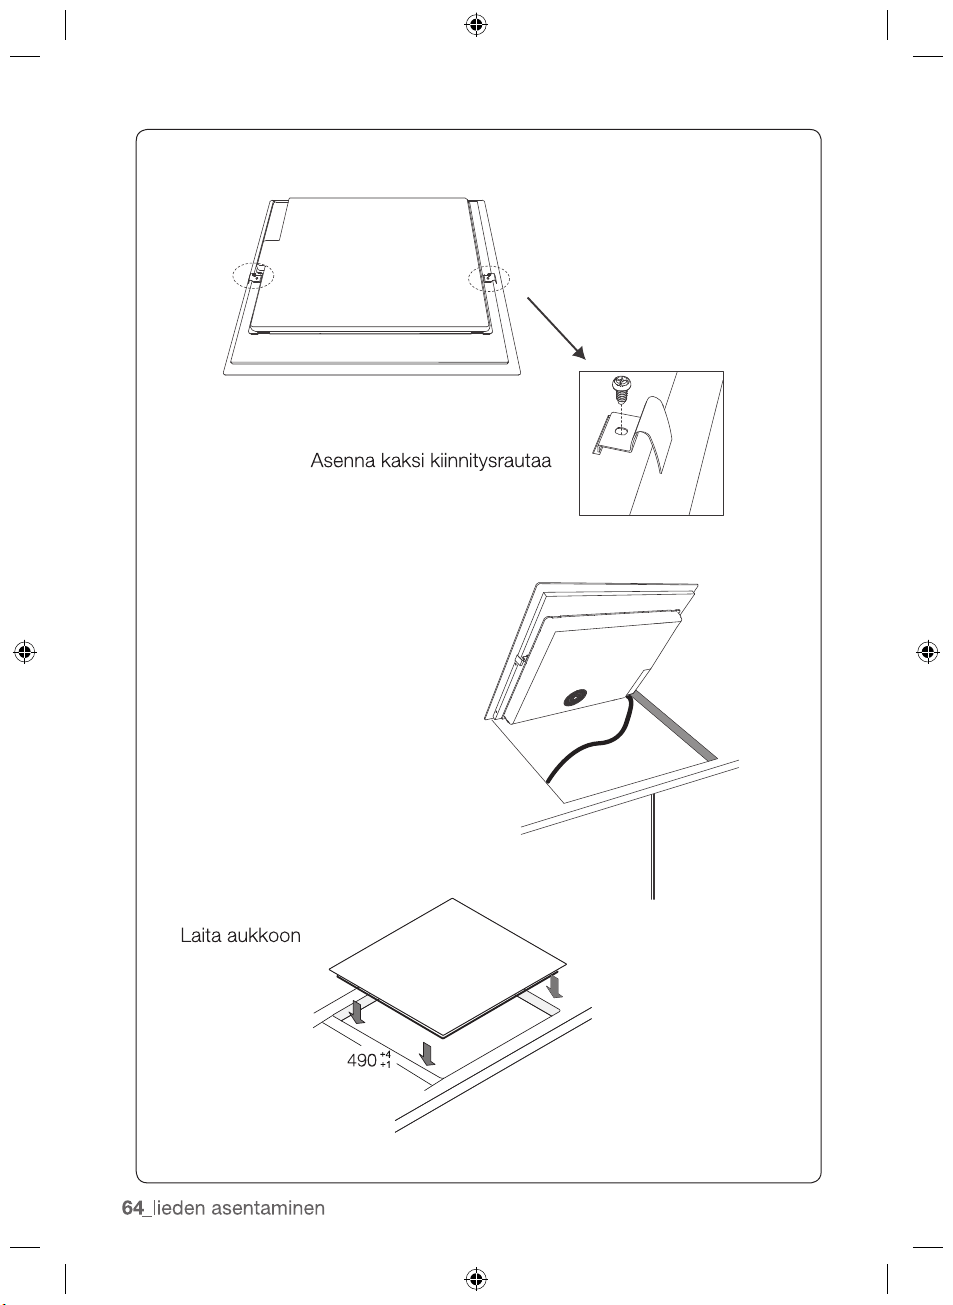
Install the two brackets
Put into the hole
490
+4
+1
2012-11-20
20_ installing the hob
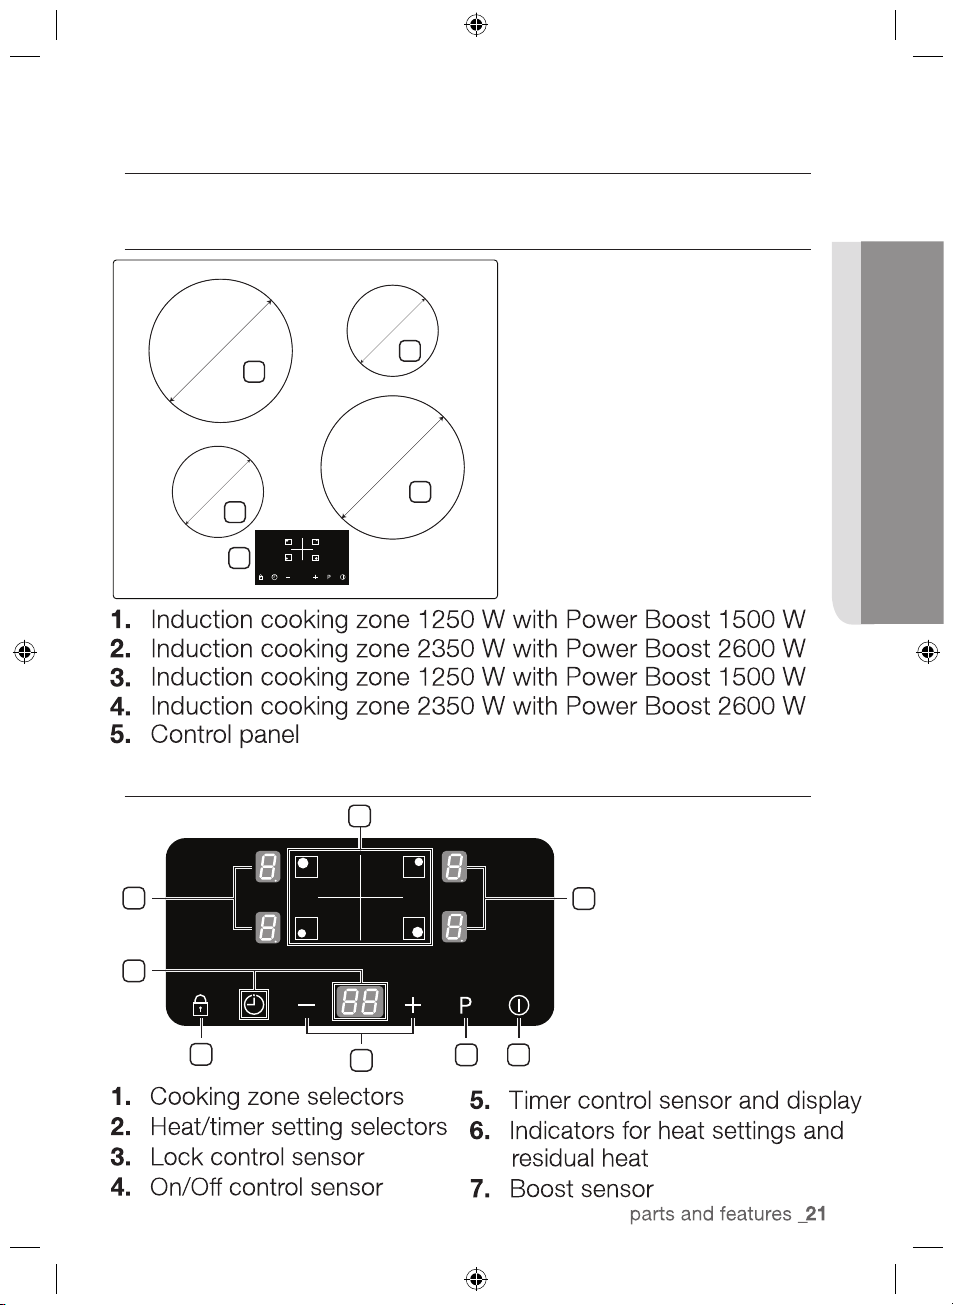
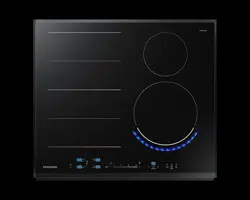
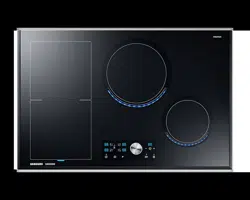
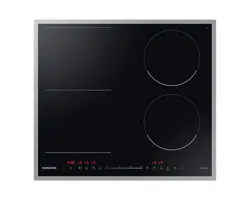
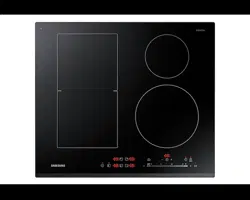
parts and features
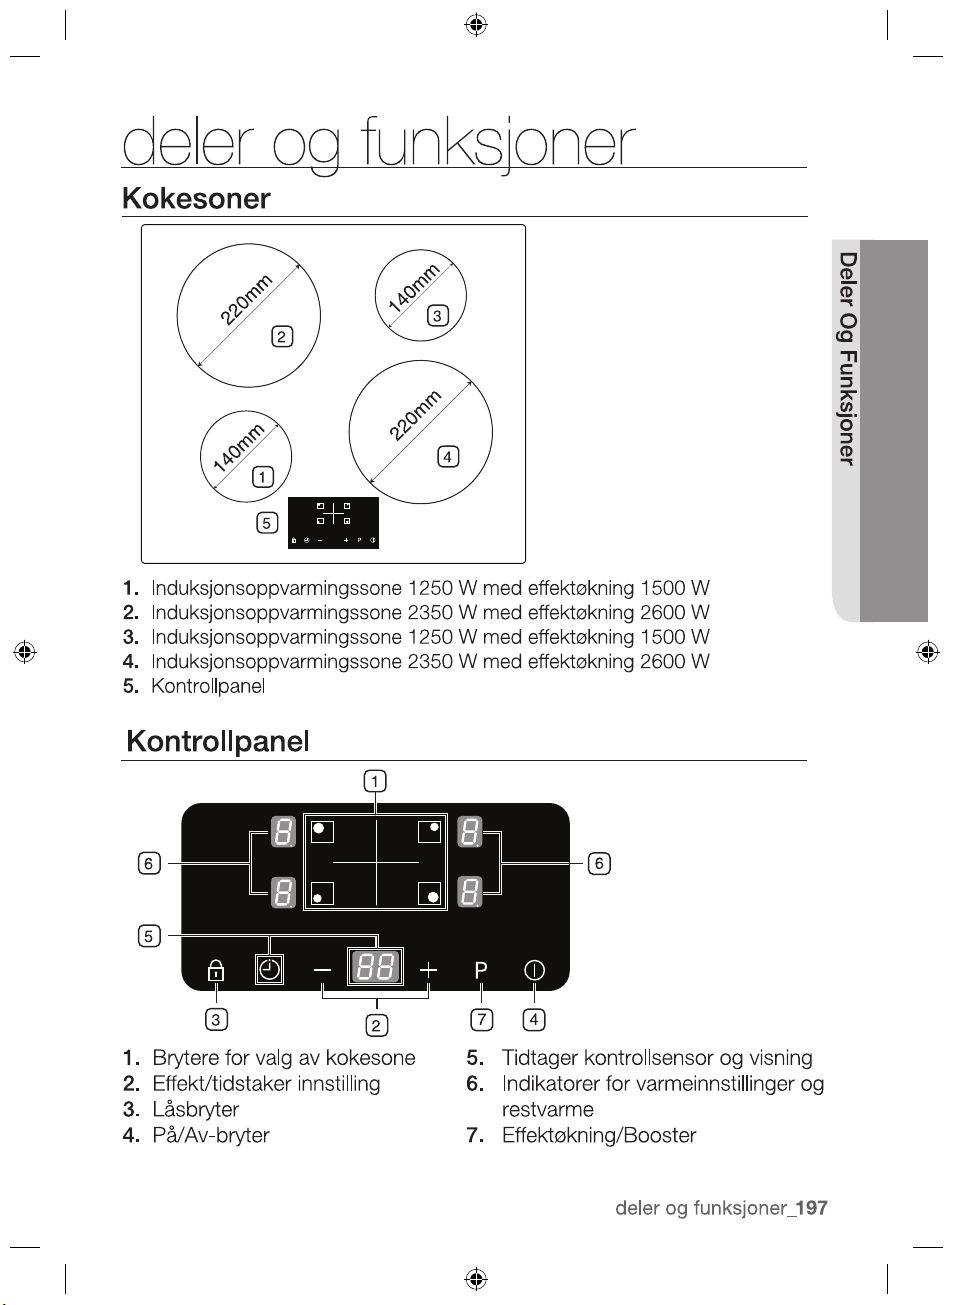
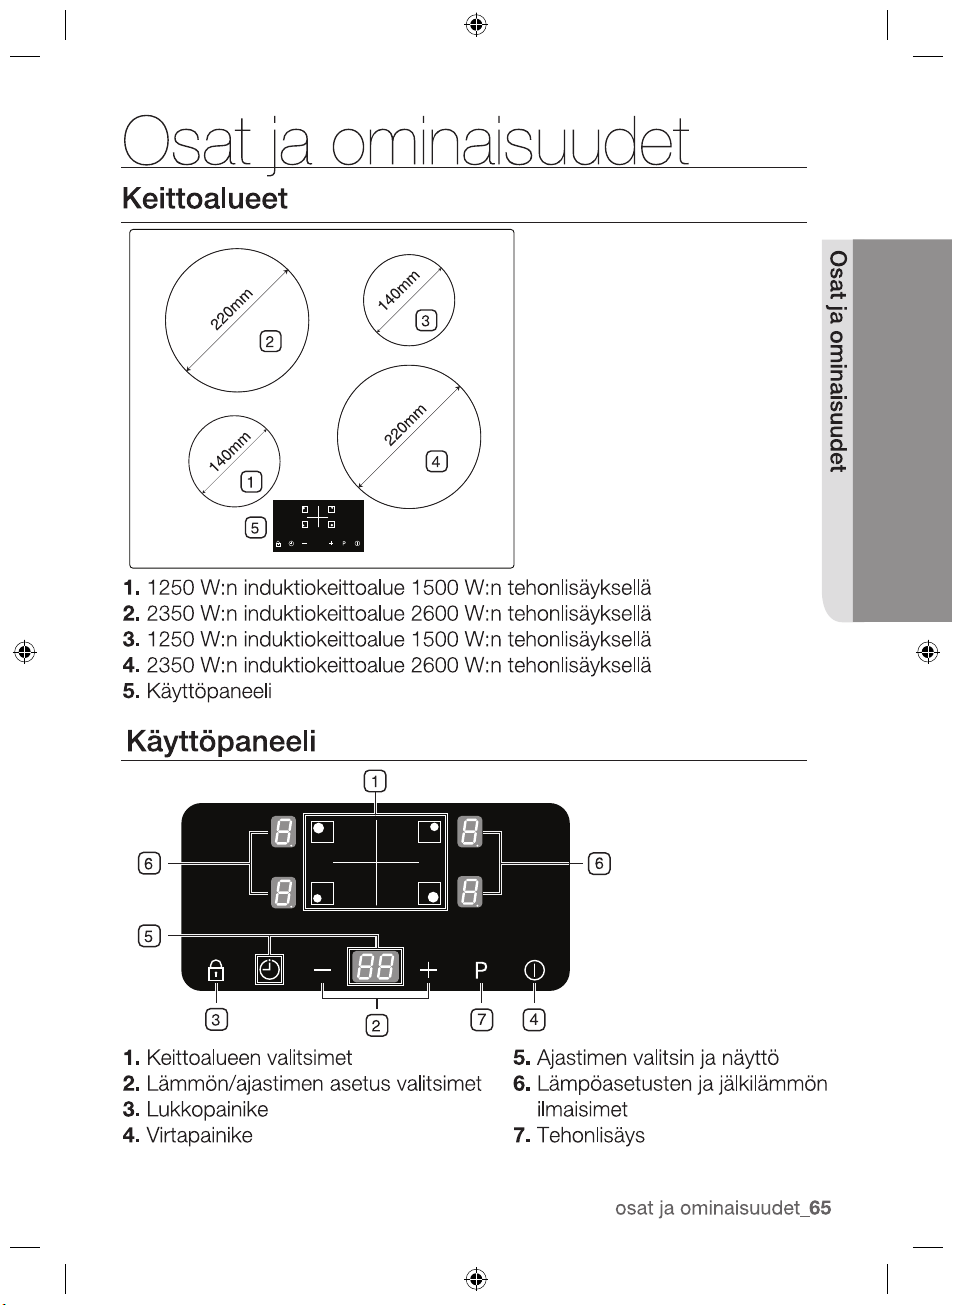
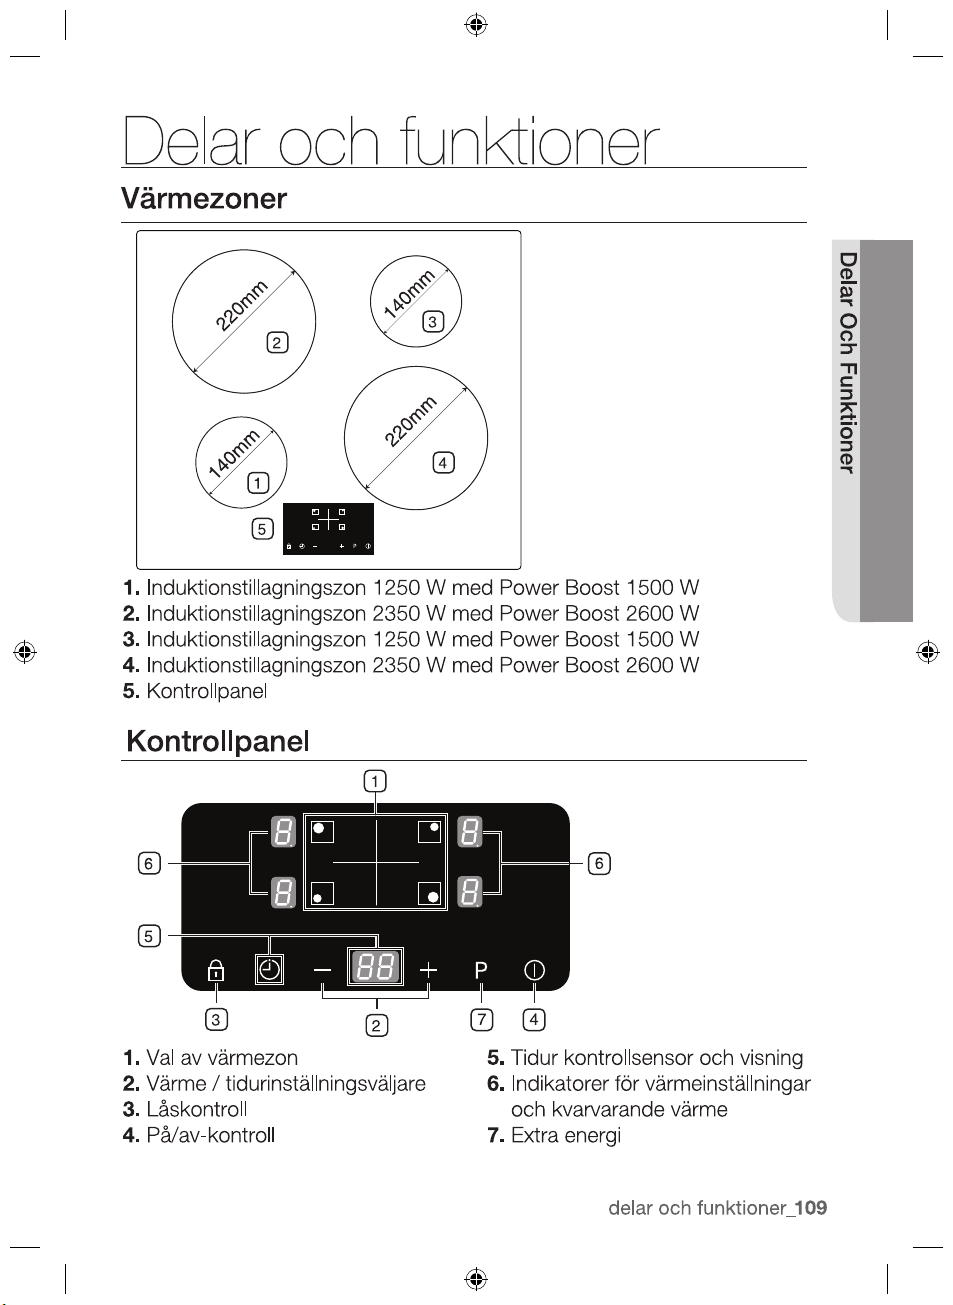
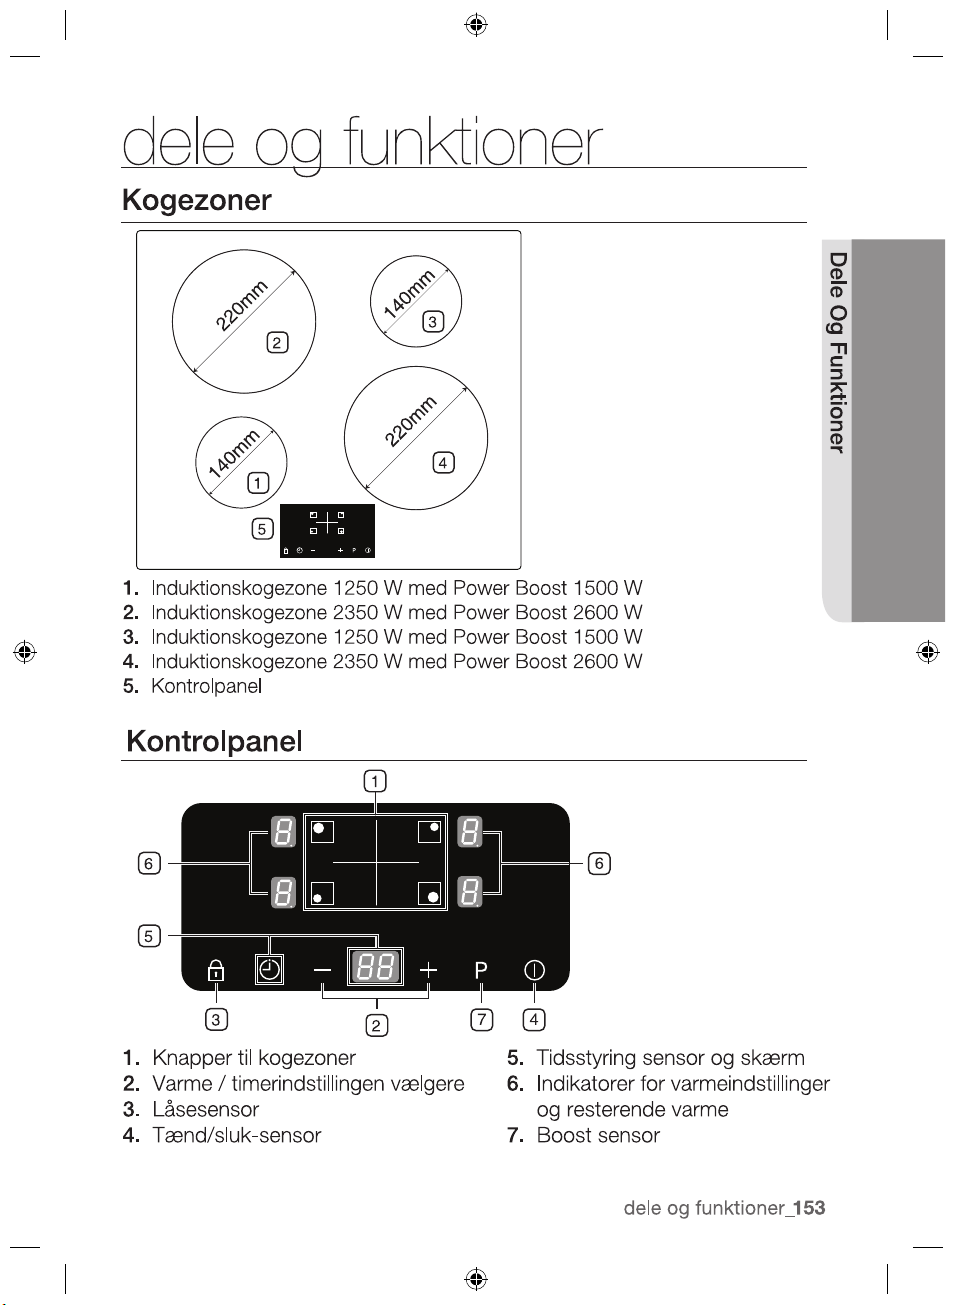
COOKING ZONES
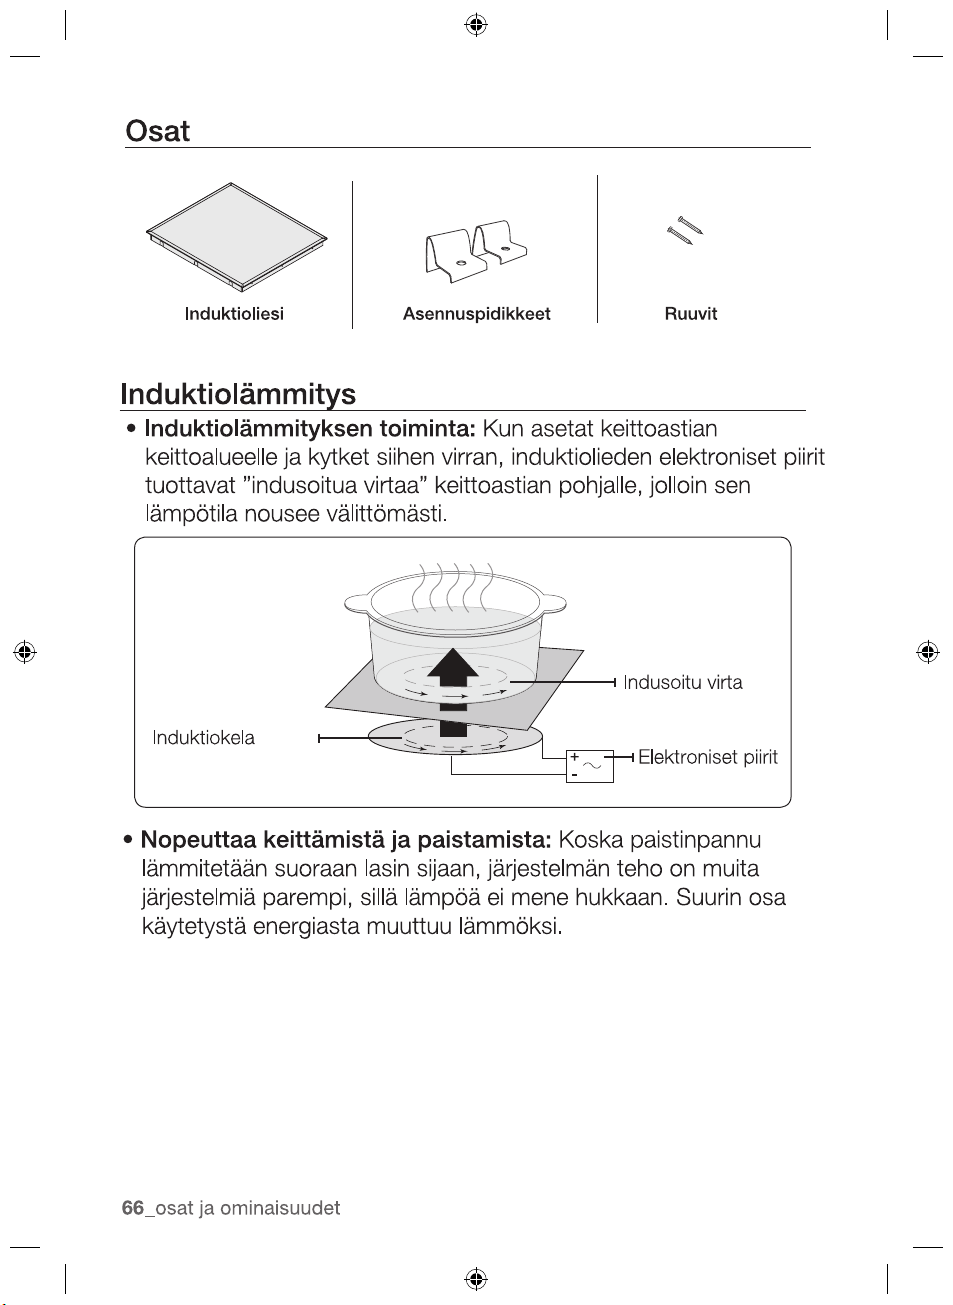
CONTROL PANEL
1
3
4
5
2
220mm
220mm
140mm
140mm
1
6
3
7 4
5
2
6
2012-11-20
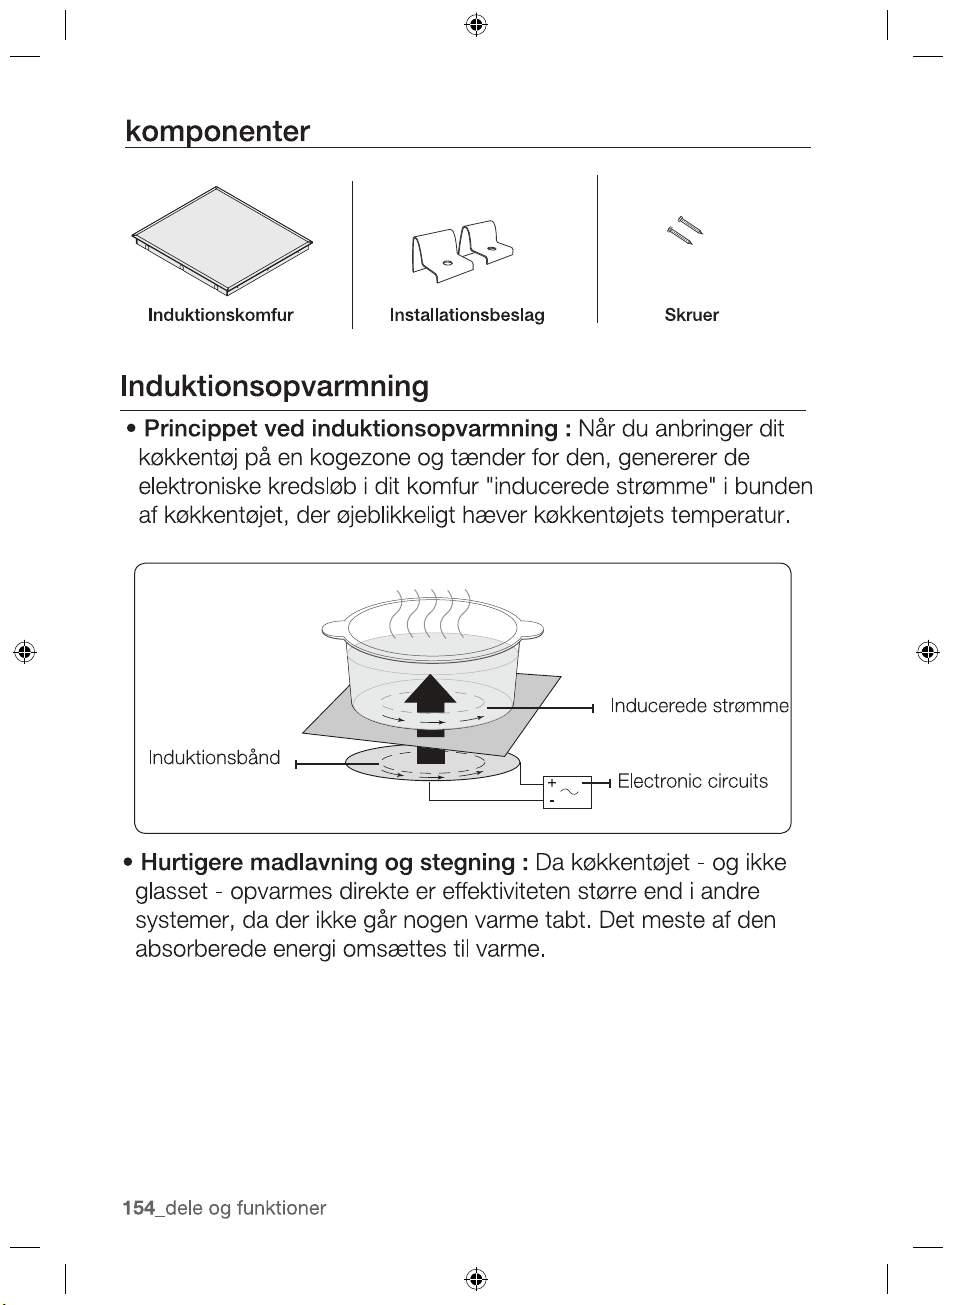
PARTS AND FEATURES
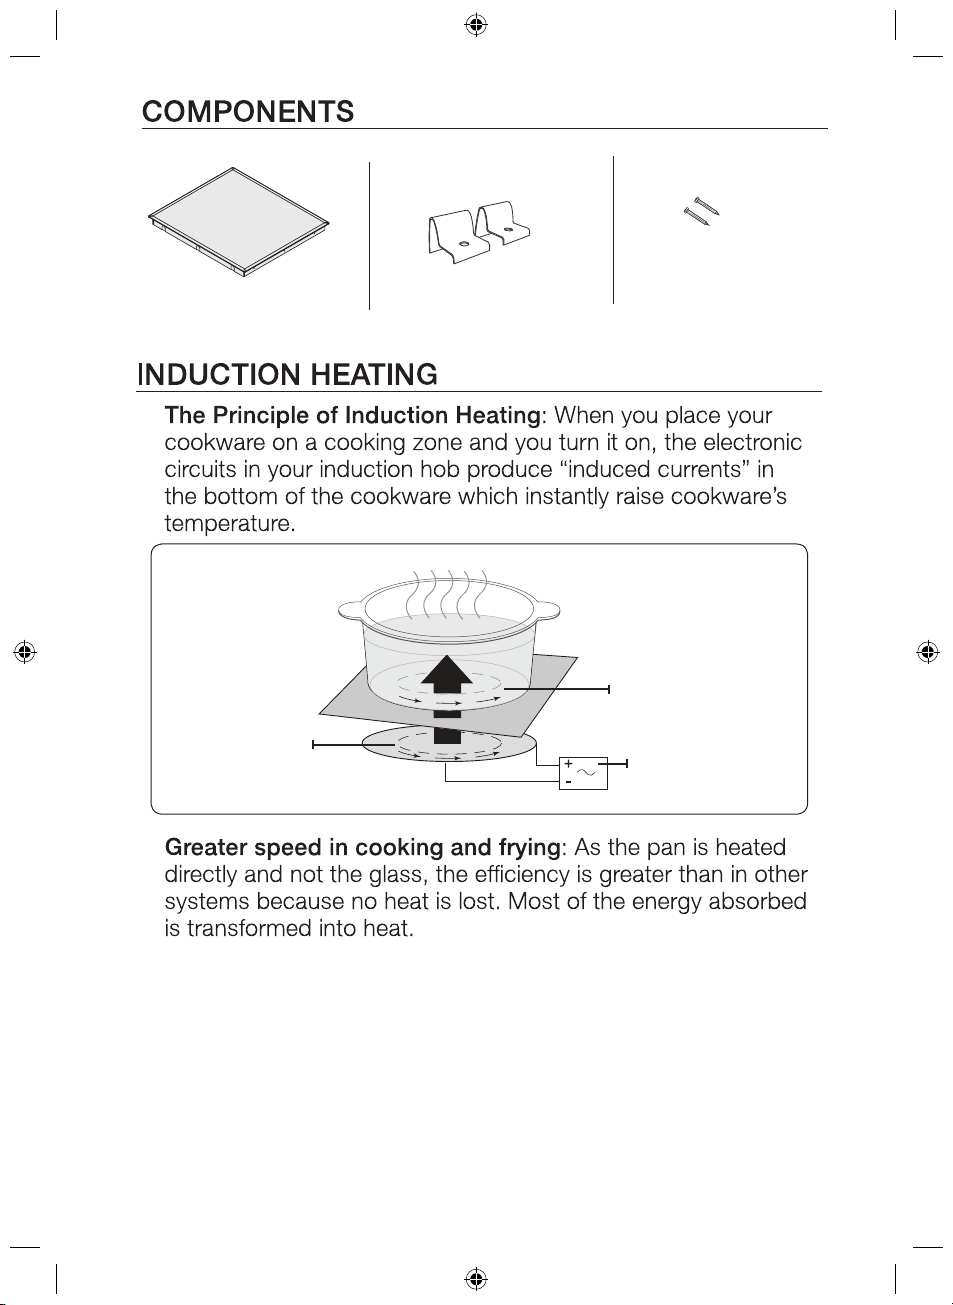
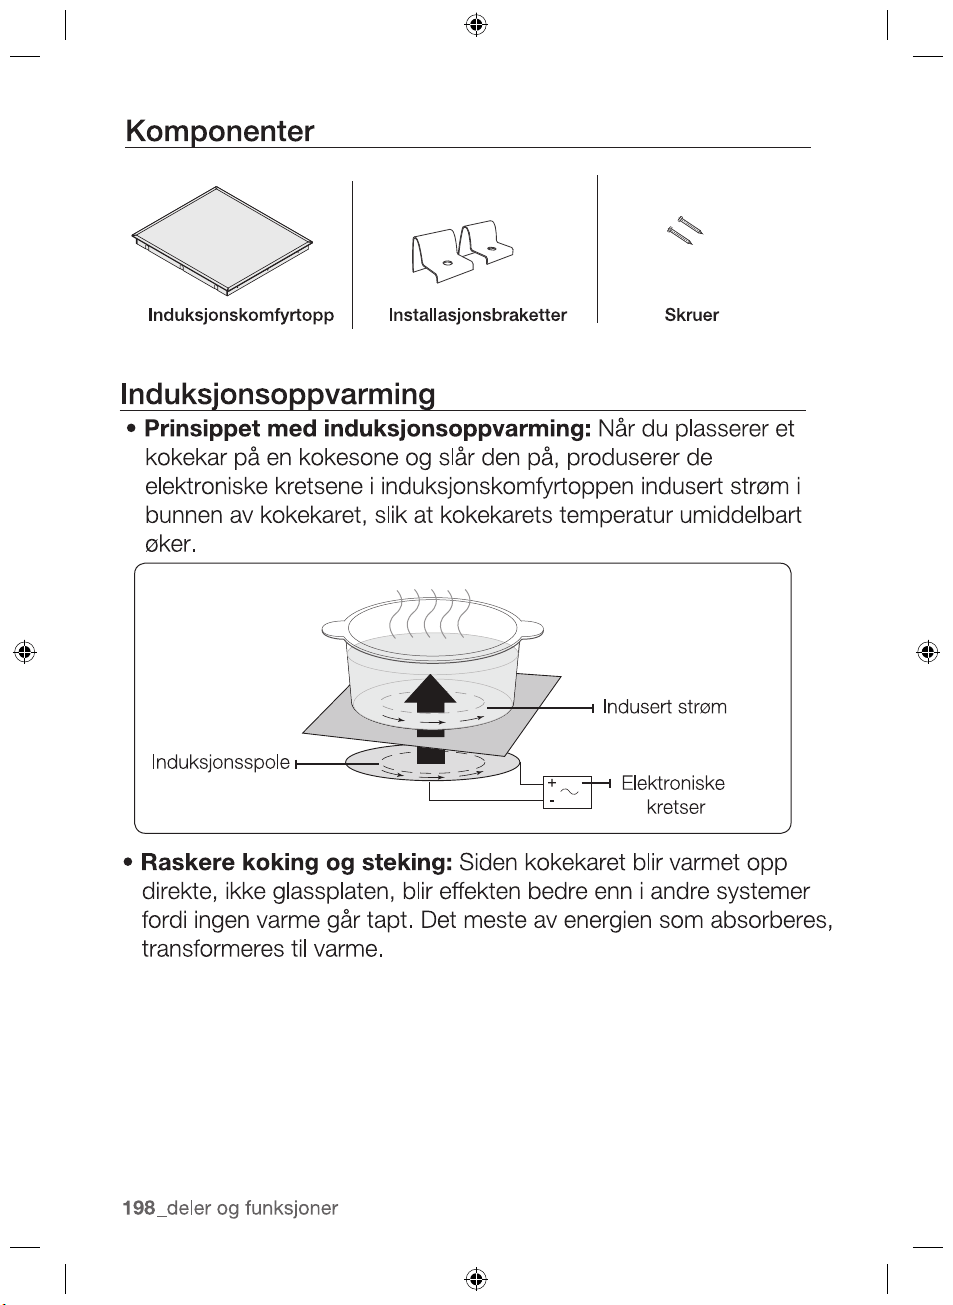
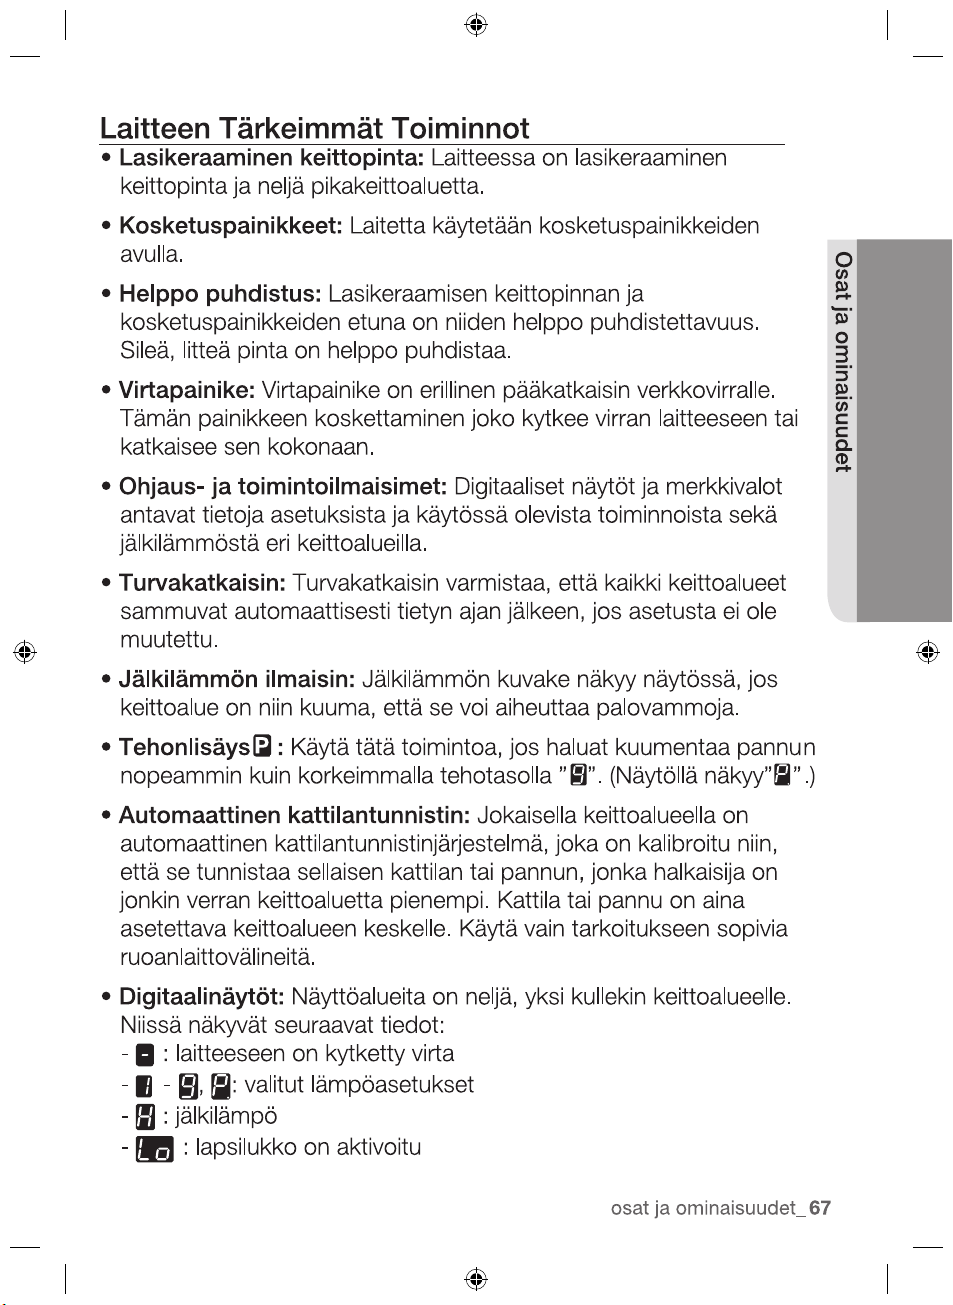
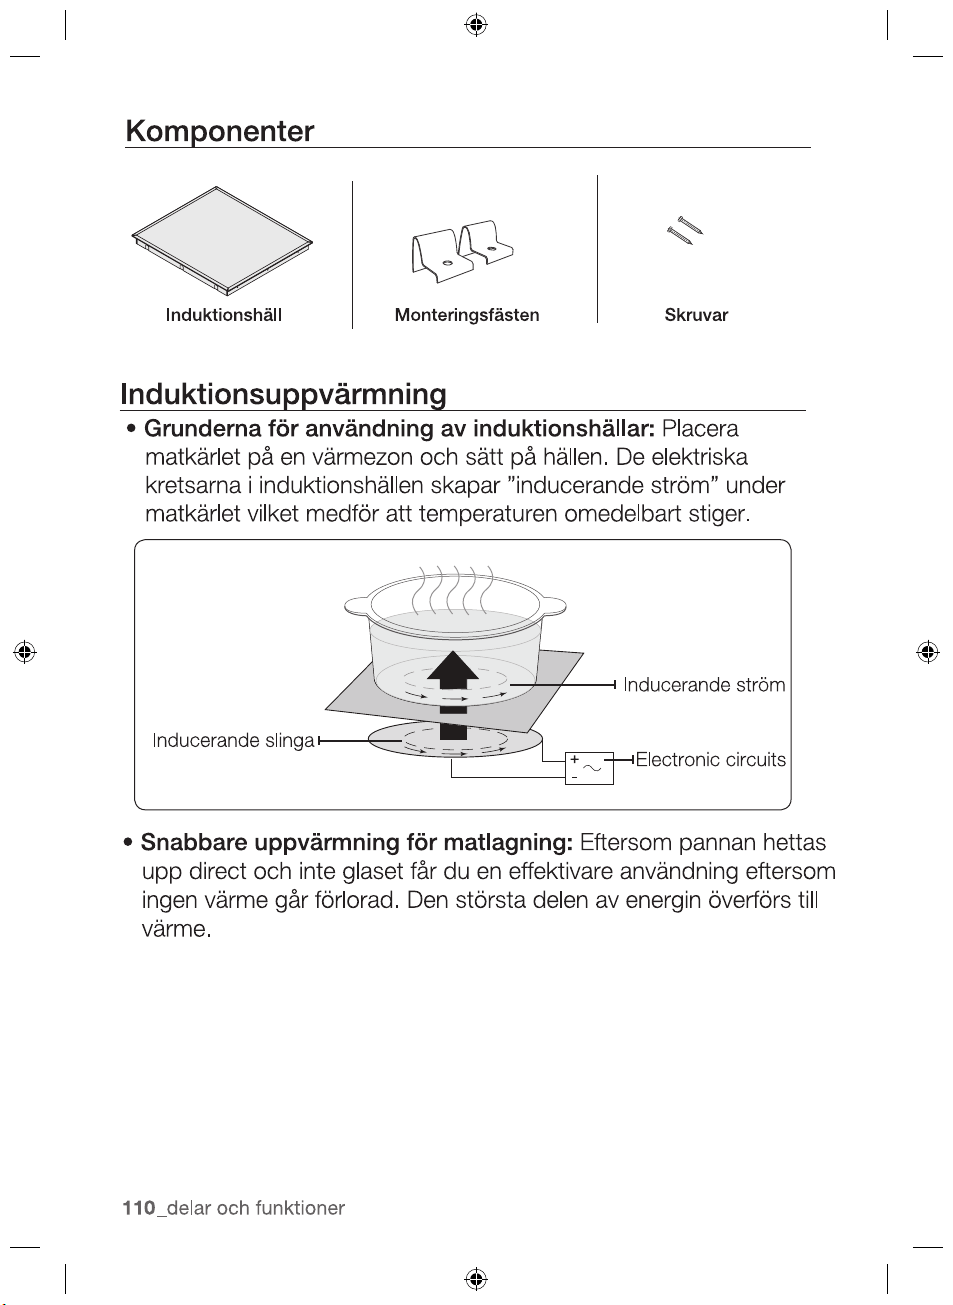
•
•
Induction coil
Induced currents
Electronic circuits
Induction hob Installation brackets Screws
2012-11-20
22_ parts and features
•
•
•
•
•
•
•
•Power Boost : U
se this function to heat up the contents of
the pan faster than maximum power level ‘ ’. (The display will
show ‘ ’.)
•
•
-
-
to ,
-
-
2012-11-20
parts and features _23
PARTS AND FEATURES
-
cookware)
-
If cookware is unsuitable or too small or no cookware has
-
2012-11-20
24_ parts and features
O
the appliance will need to be switched on again using the main
On/Off control
sensor after the liquid or the cloth has been
removed .
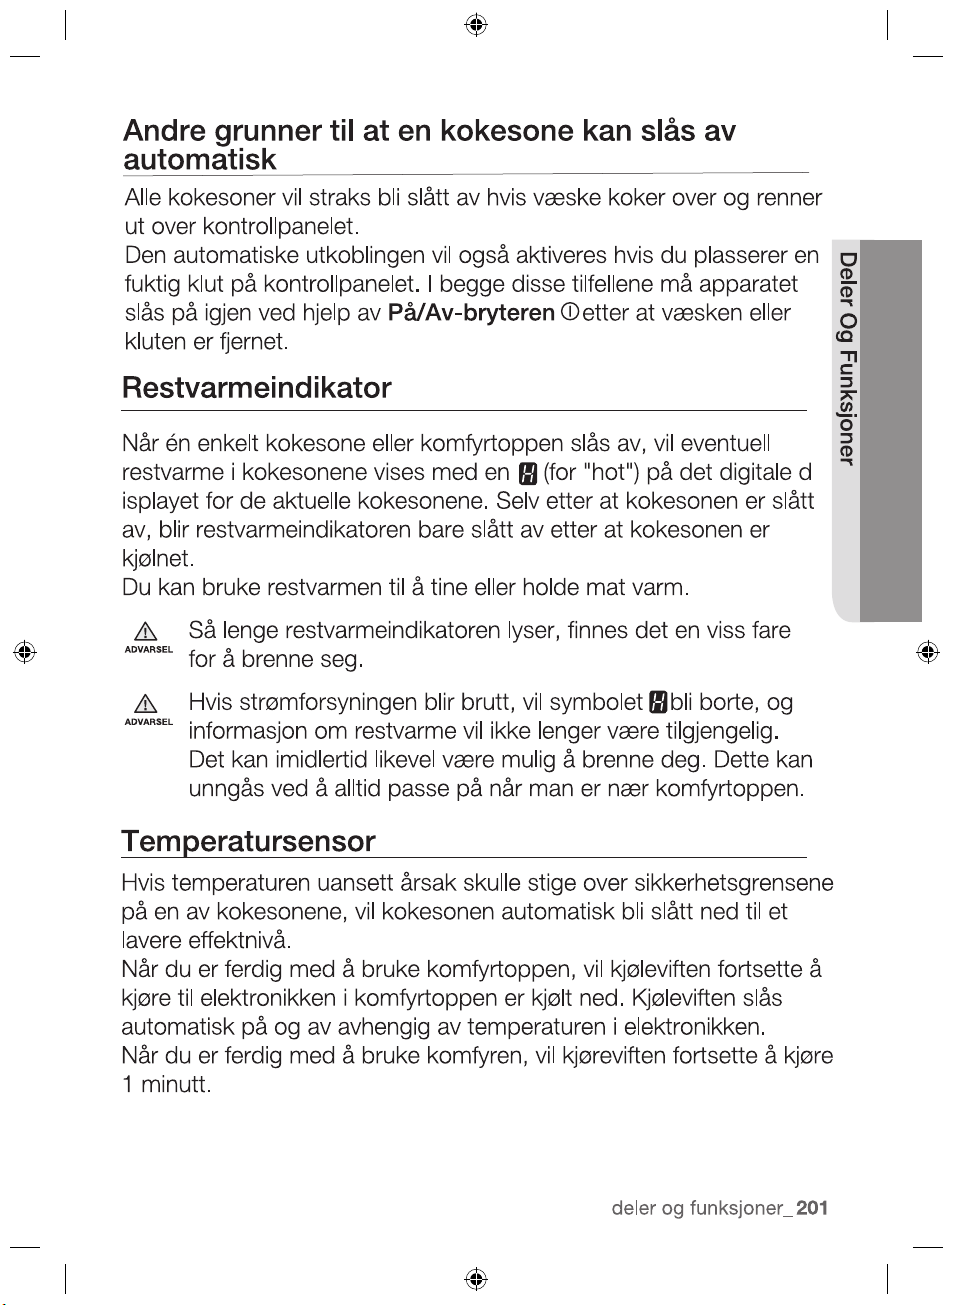
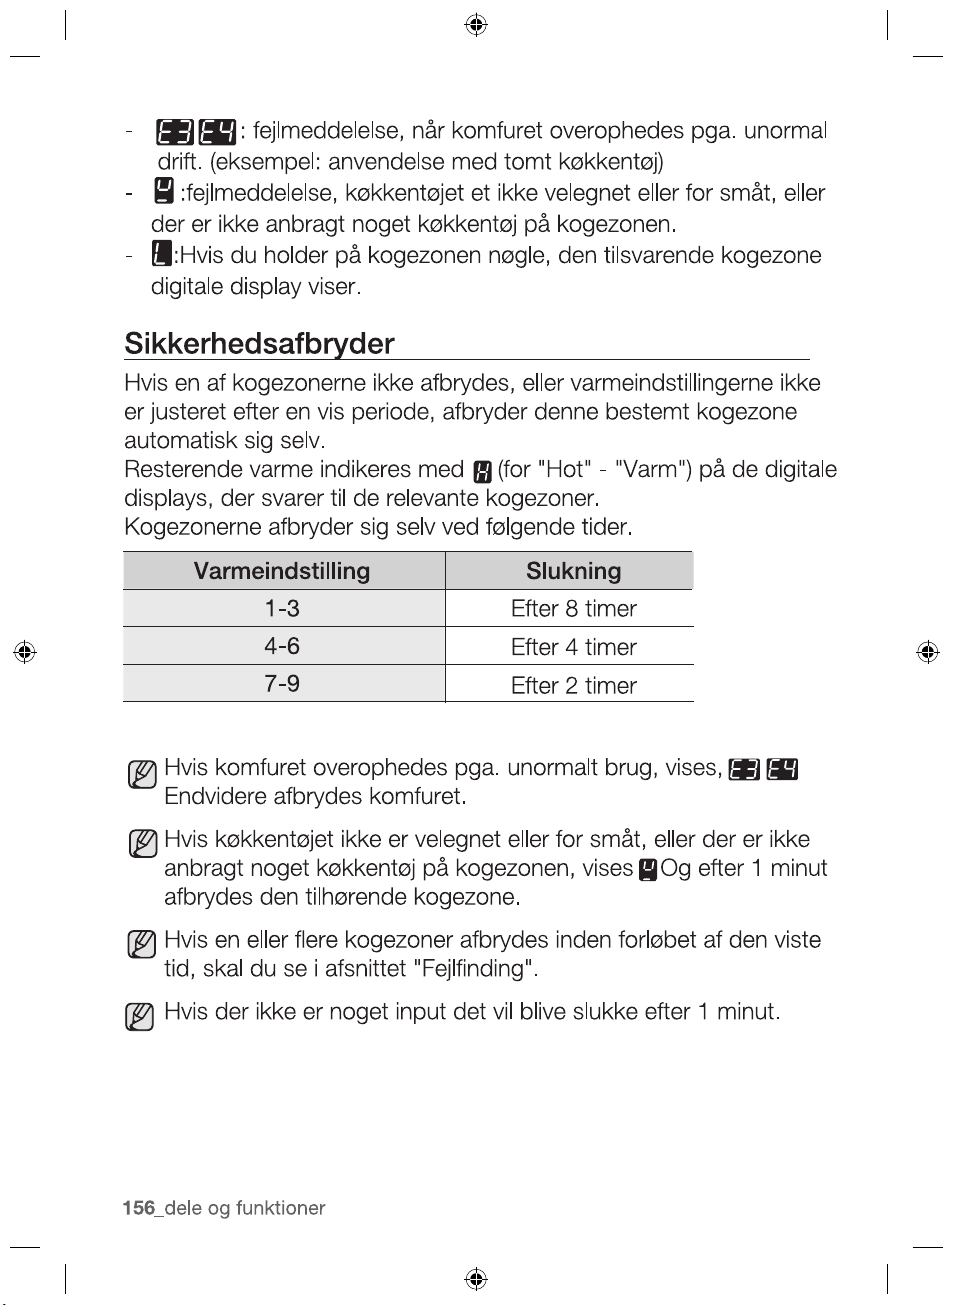
RESIDUAL HEAT
INDICATOR
presence of residual heat is shown with an (for “hot”) in the
If the power supply is interrupted, the
symbol will go out
WARNING
WARNING
2012-11-20
ther reasons why a cooking zone can switch itself off
parts and features _25
PARTS AND FEATURES
WARNING
INITIAL CLEANING
Wipe the ceramic glass surface with a damp cloth and ceramic
hob glass cleaner.
Do not use caustic or abrasive cleaners. The surface could be
damaged.
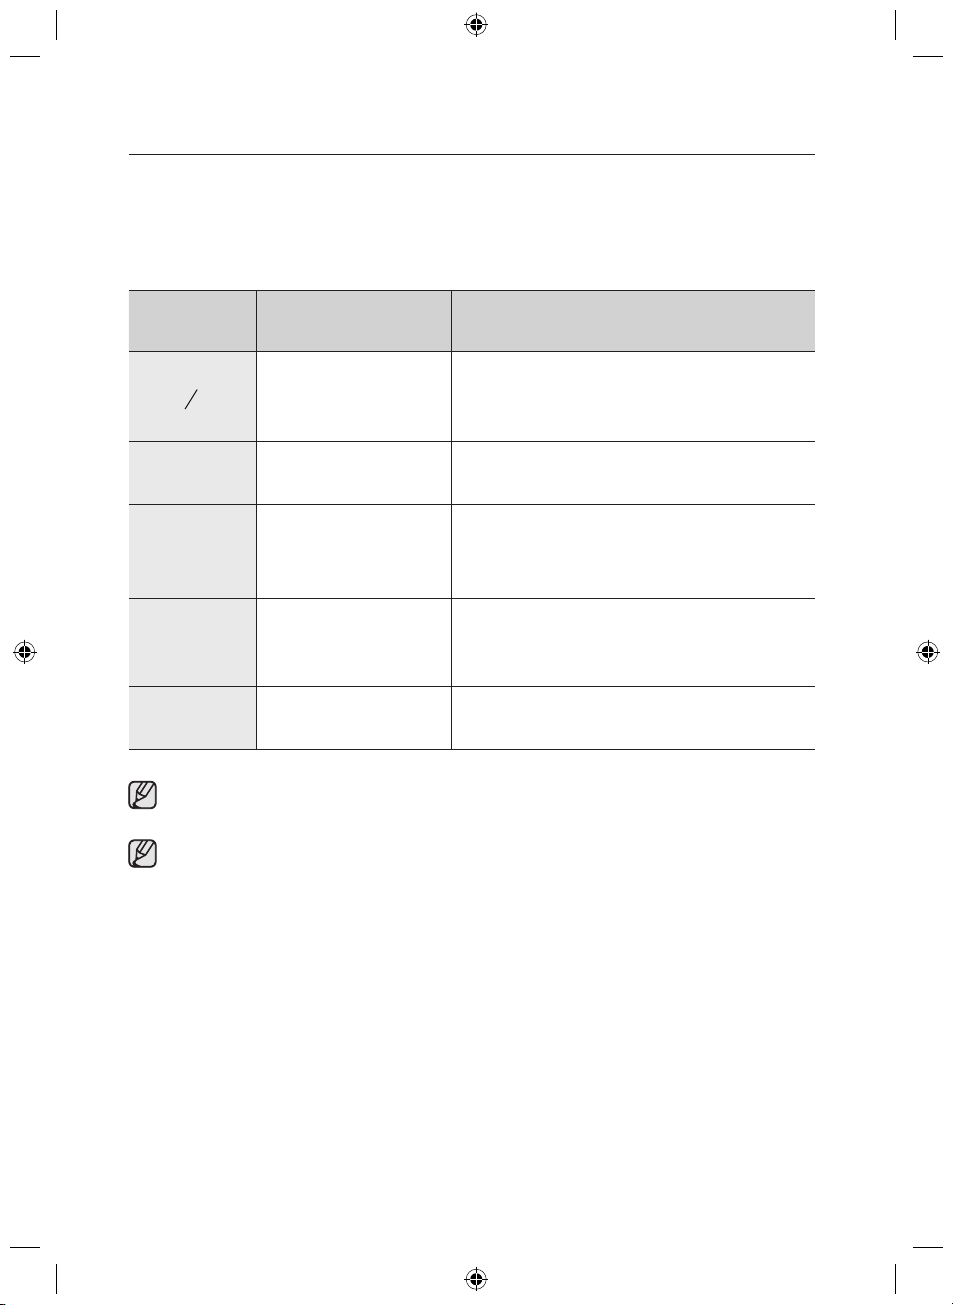
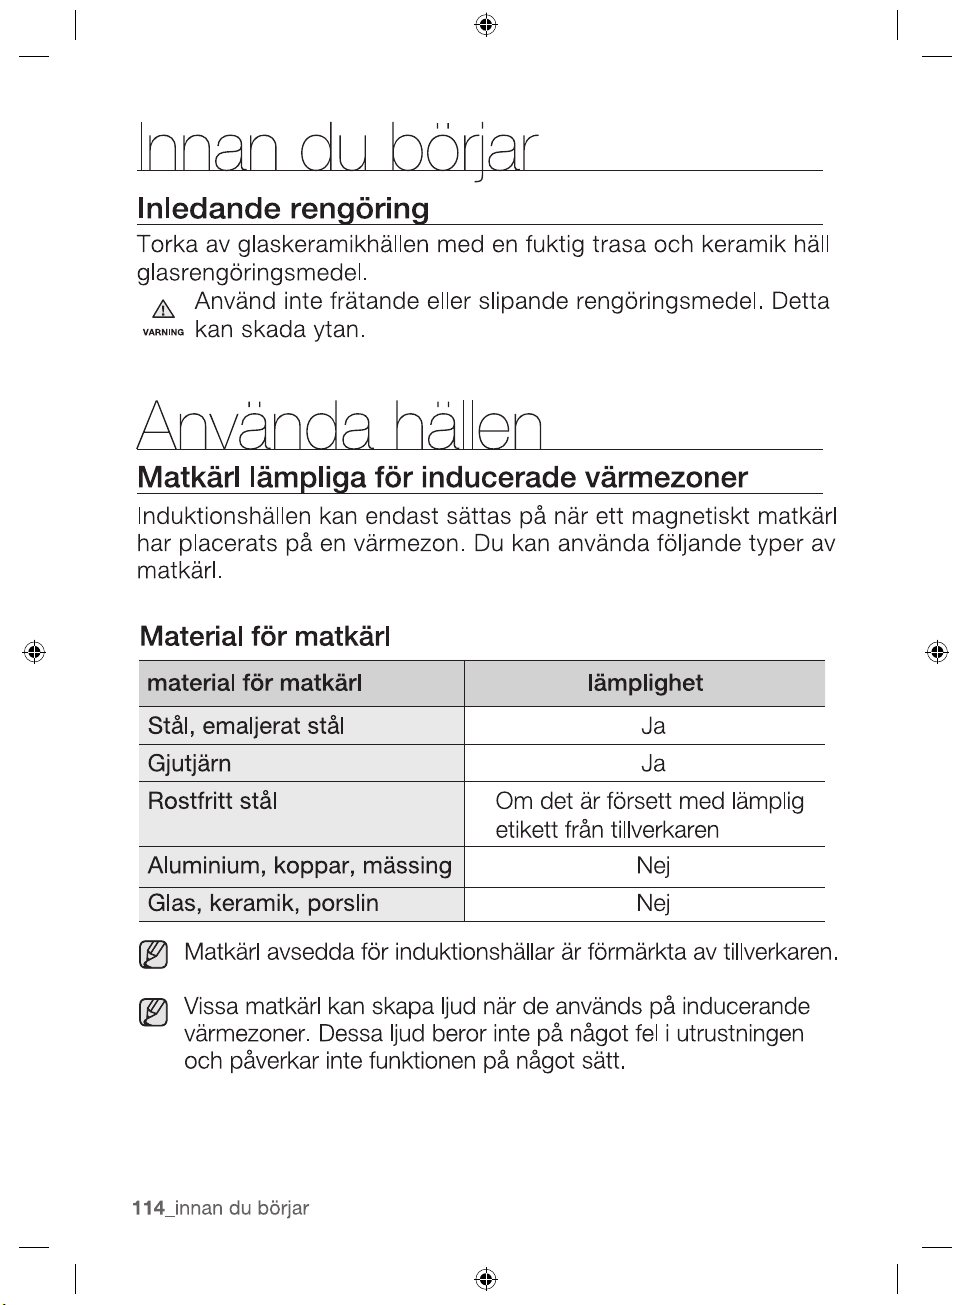
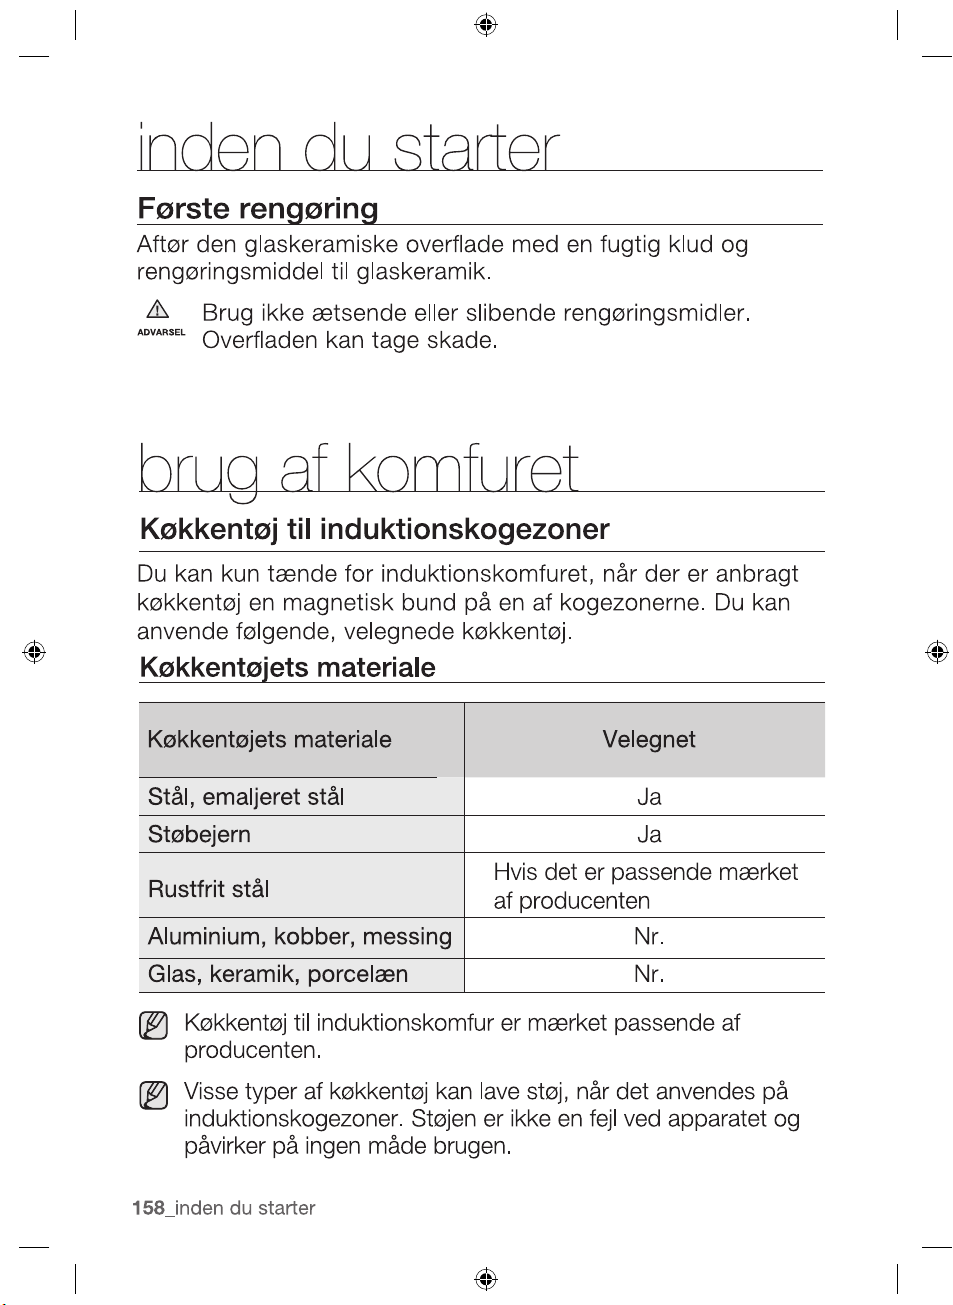
COOKWARE FOR INDUCTION COOKING ZONES
The induction hob can only be turned on when a cookware with
a magnetic base is placed on one of the cooking zones. You can
use the following suitable cookware.
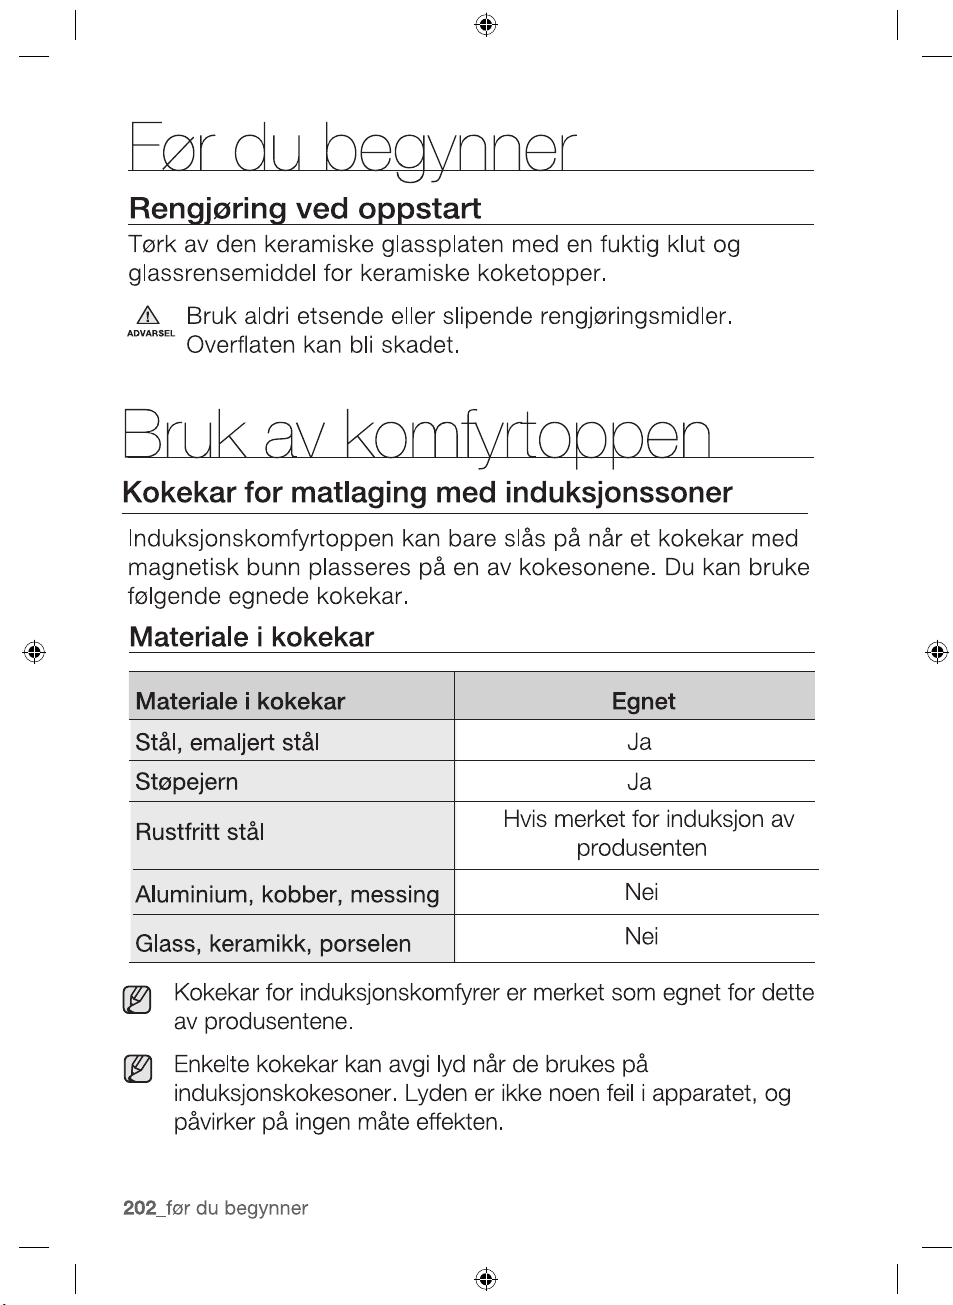
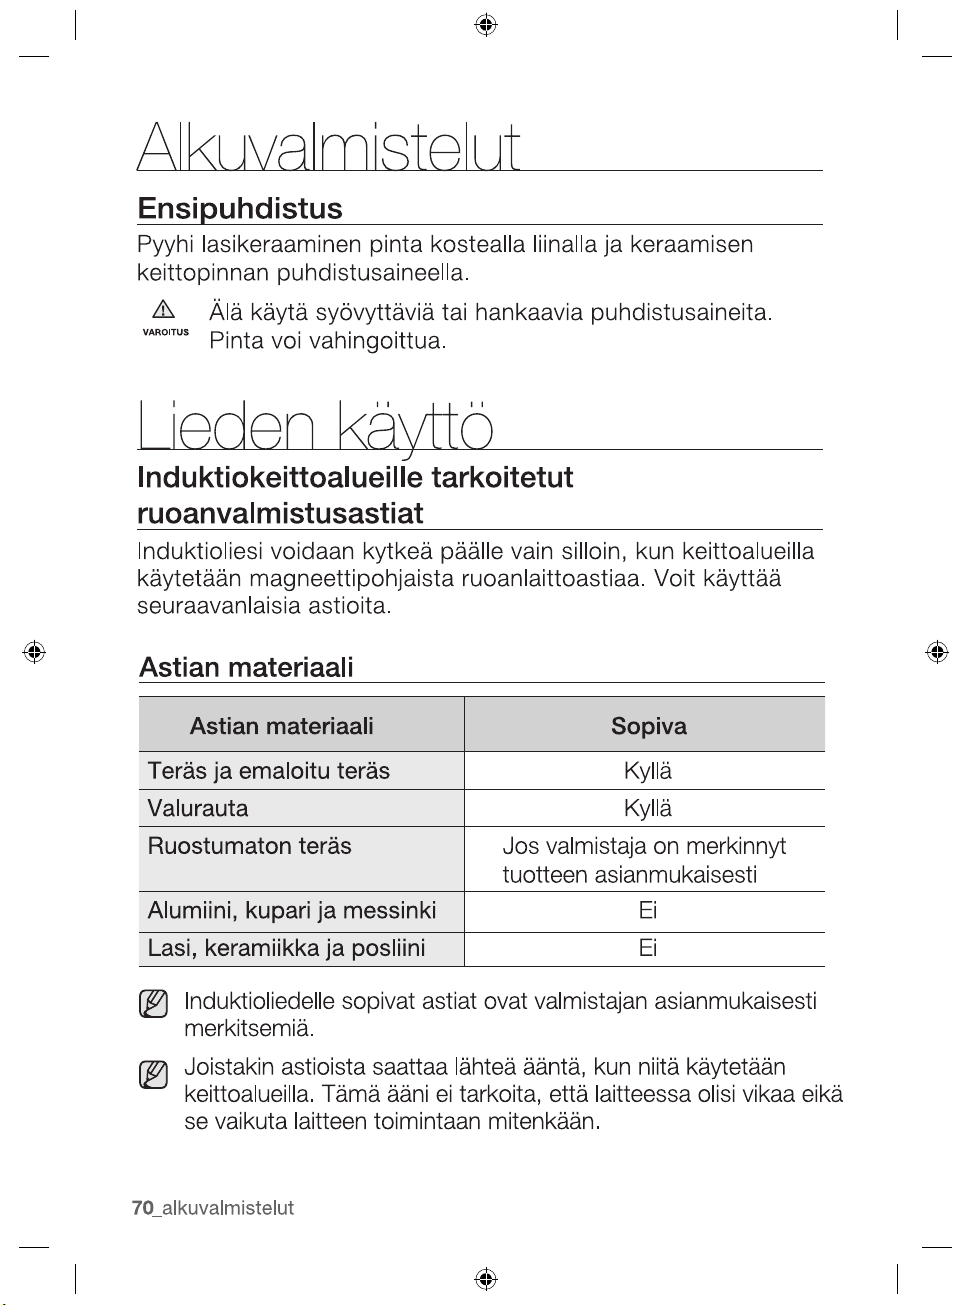
Cookware material
Cookware material Suitable
Steel, Enamelled steel Yes
Cast iron Yes
Stainless steel If appropriately labelled by the
manufacturer
Aluminium, Copper, Brass No
Glass, Ceramic, Porcelain No
Cookware for induction hob is labelled as suitable by the
manufacturer.
Certain cookware can make noise when being used on
induction cooking zones. These noise are not a fault in the
appliance and do not affect operation in any way.
2012-11-20
26_ before you begin
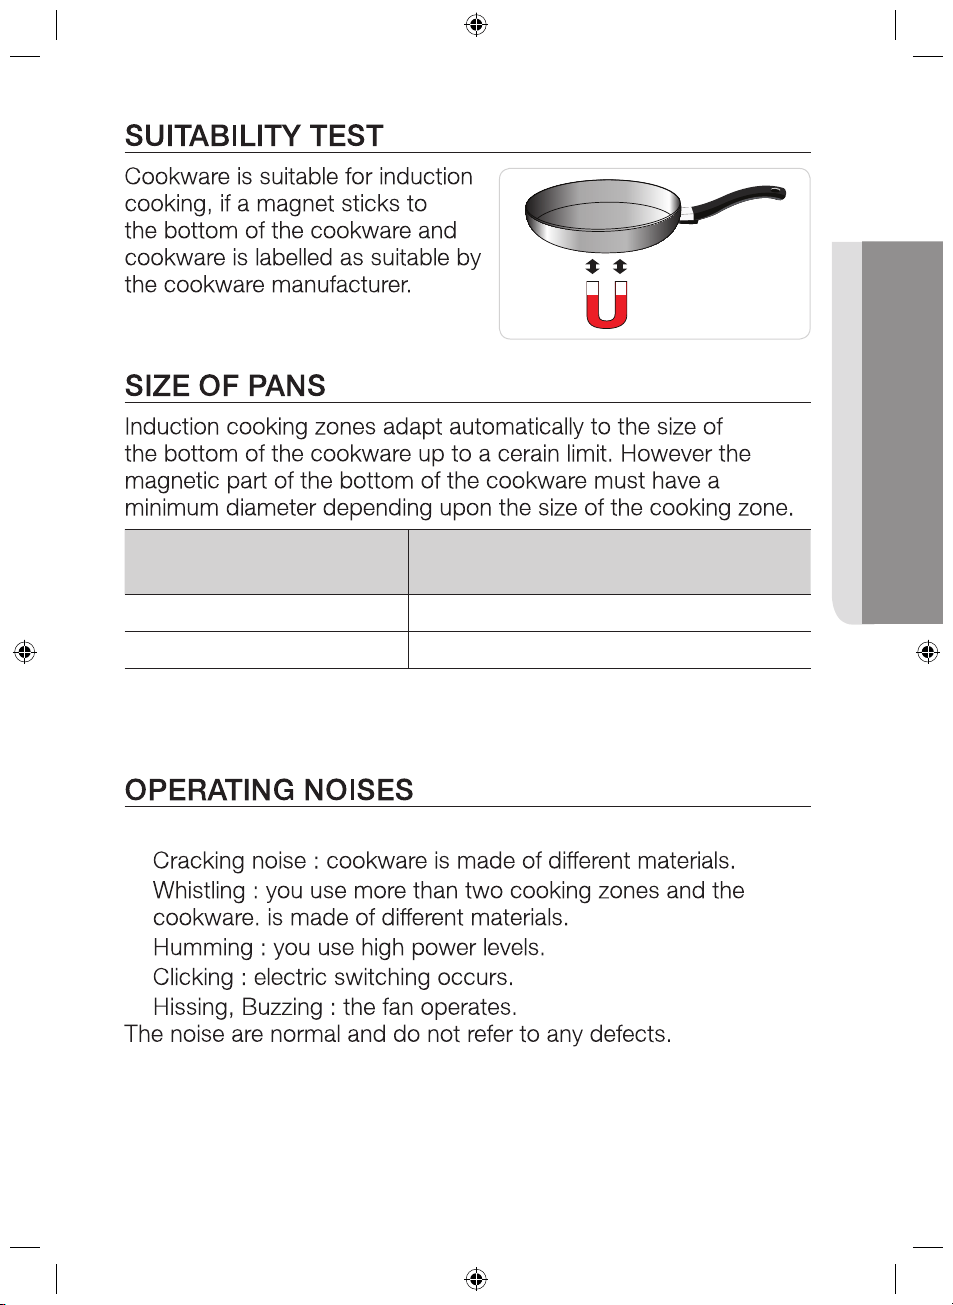
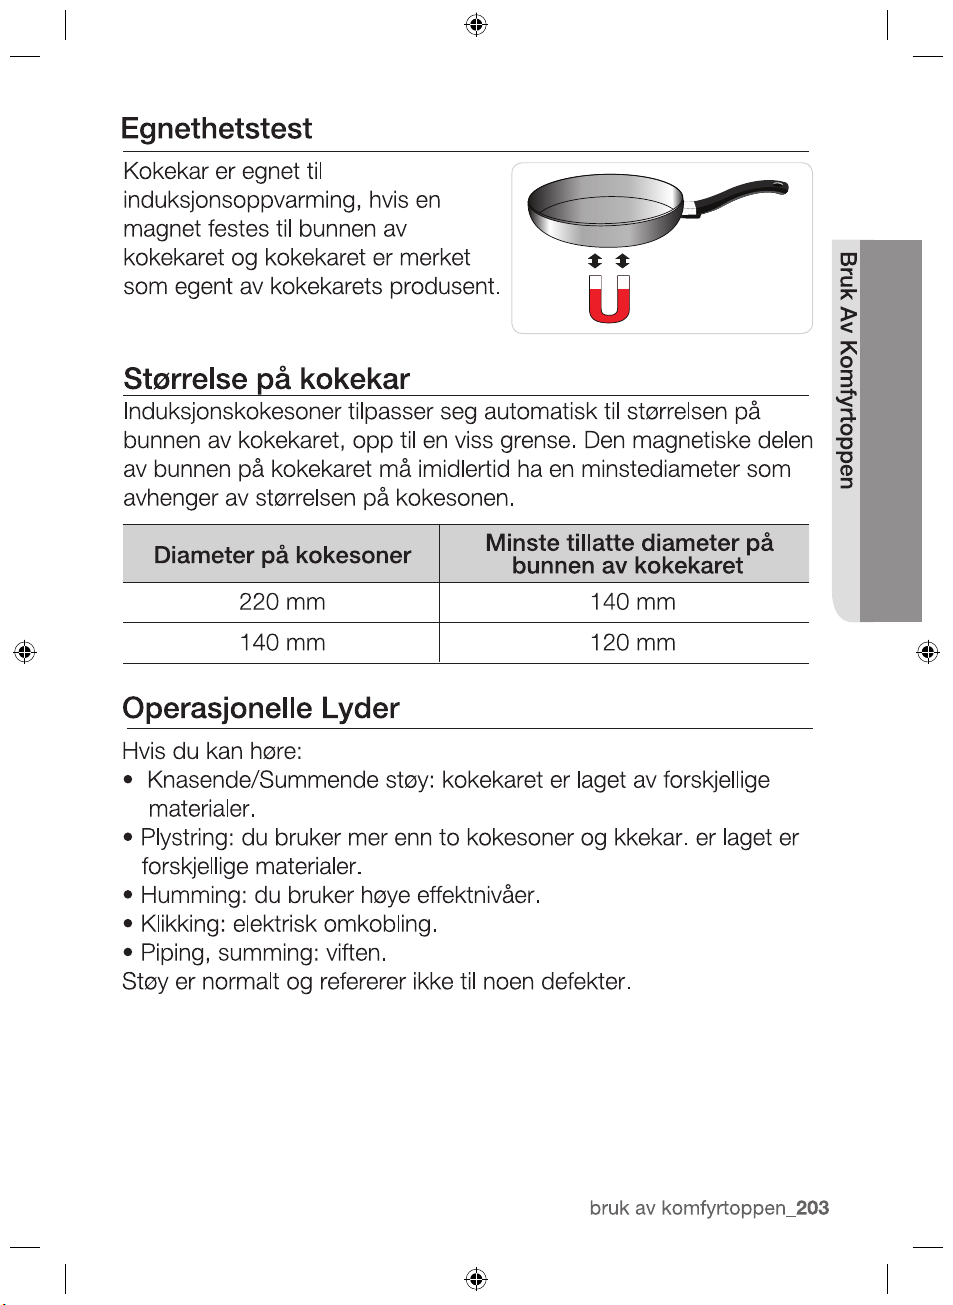
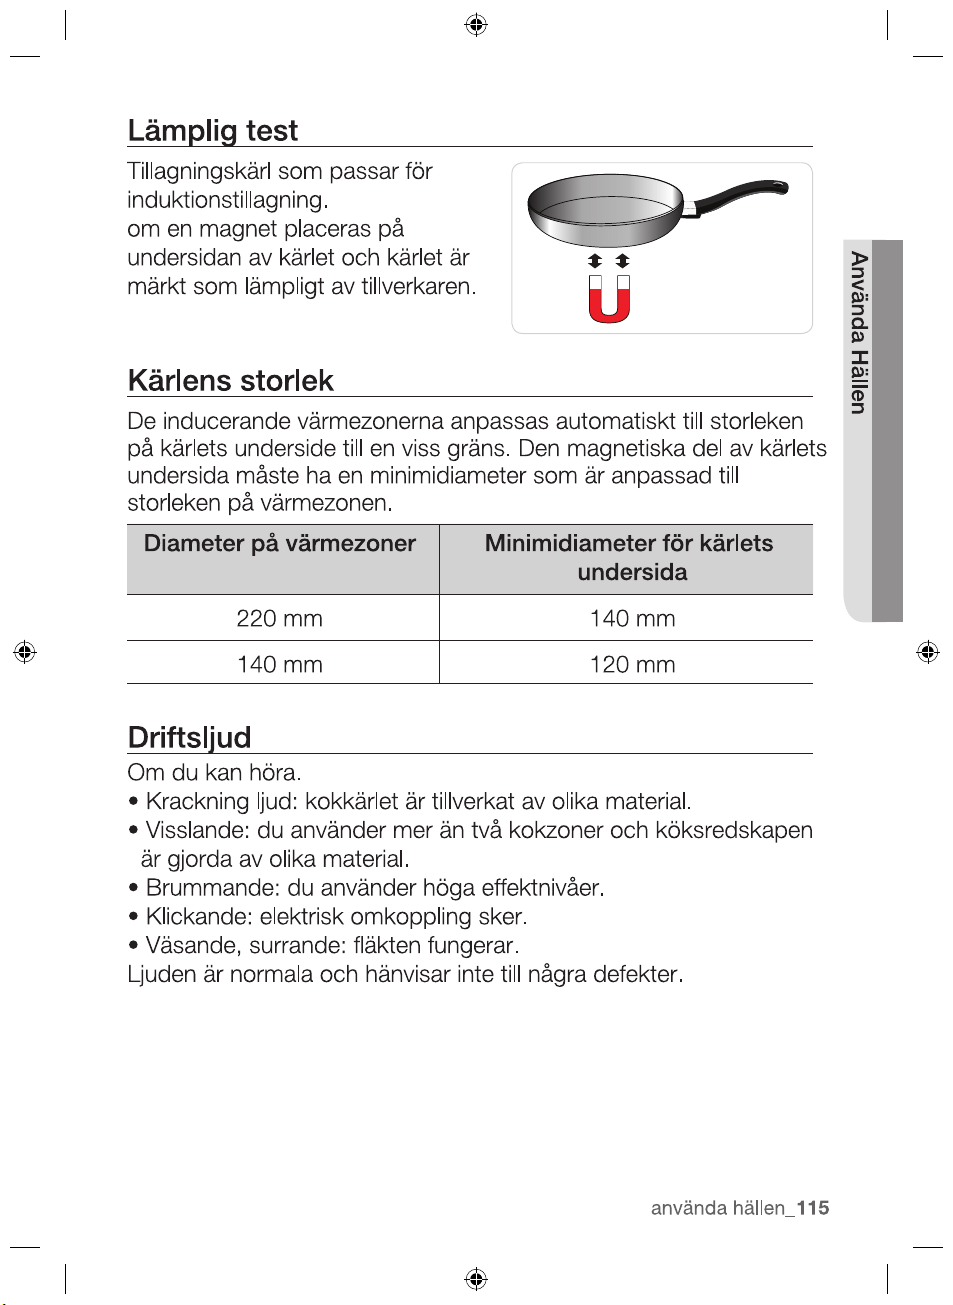
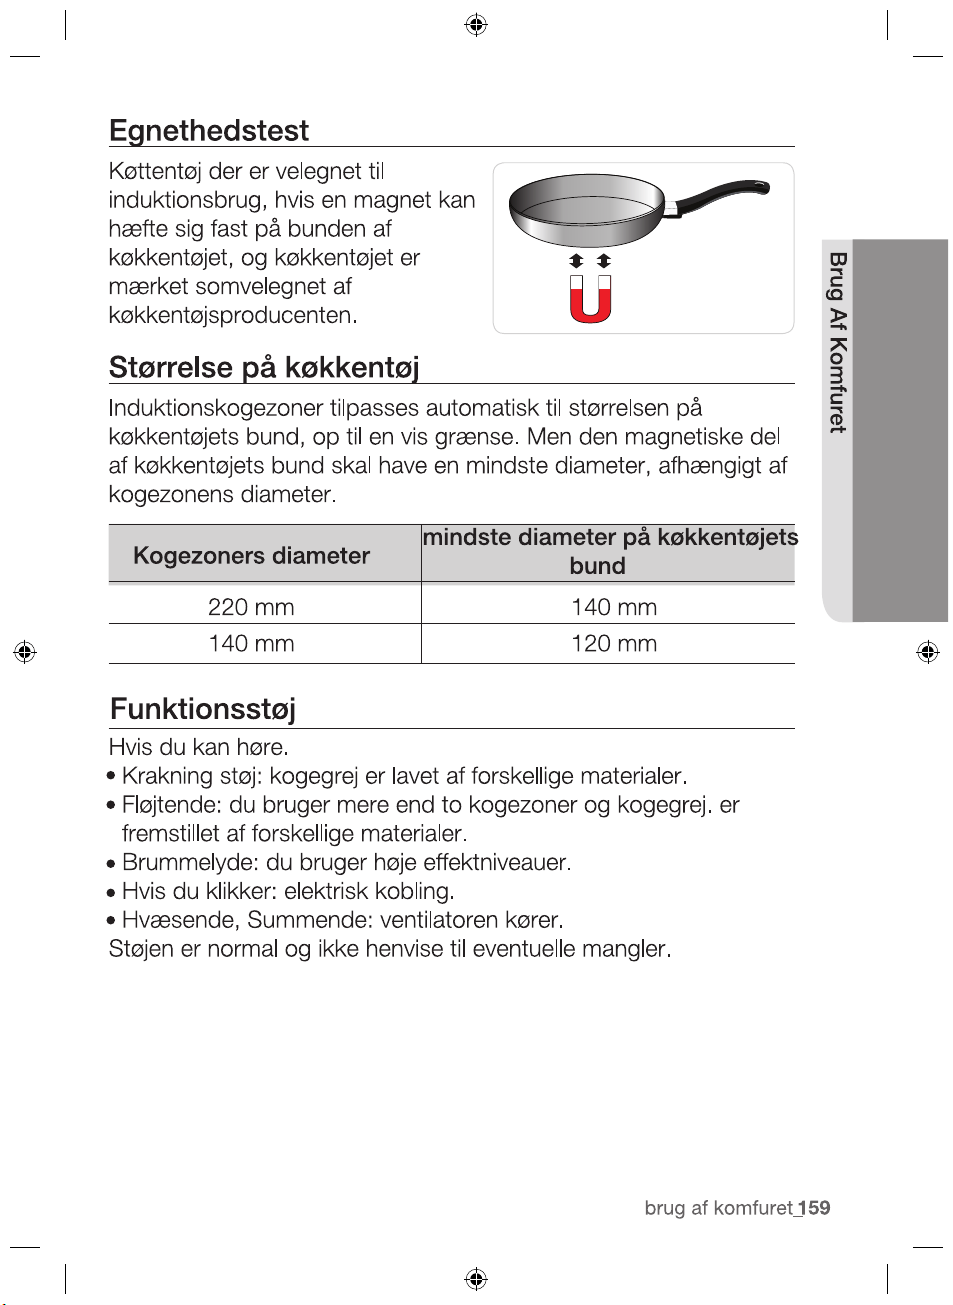
Diameter of cooking
zones
Minimum diameter of the bottom
of the cookware
220 mm 140 mm
120 mm
If you can hear.
•
•
•
•
•
140 mm
2012-11-20
hob use _27
HOB USE
U
•
•
•
•
•
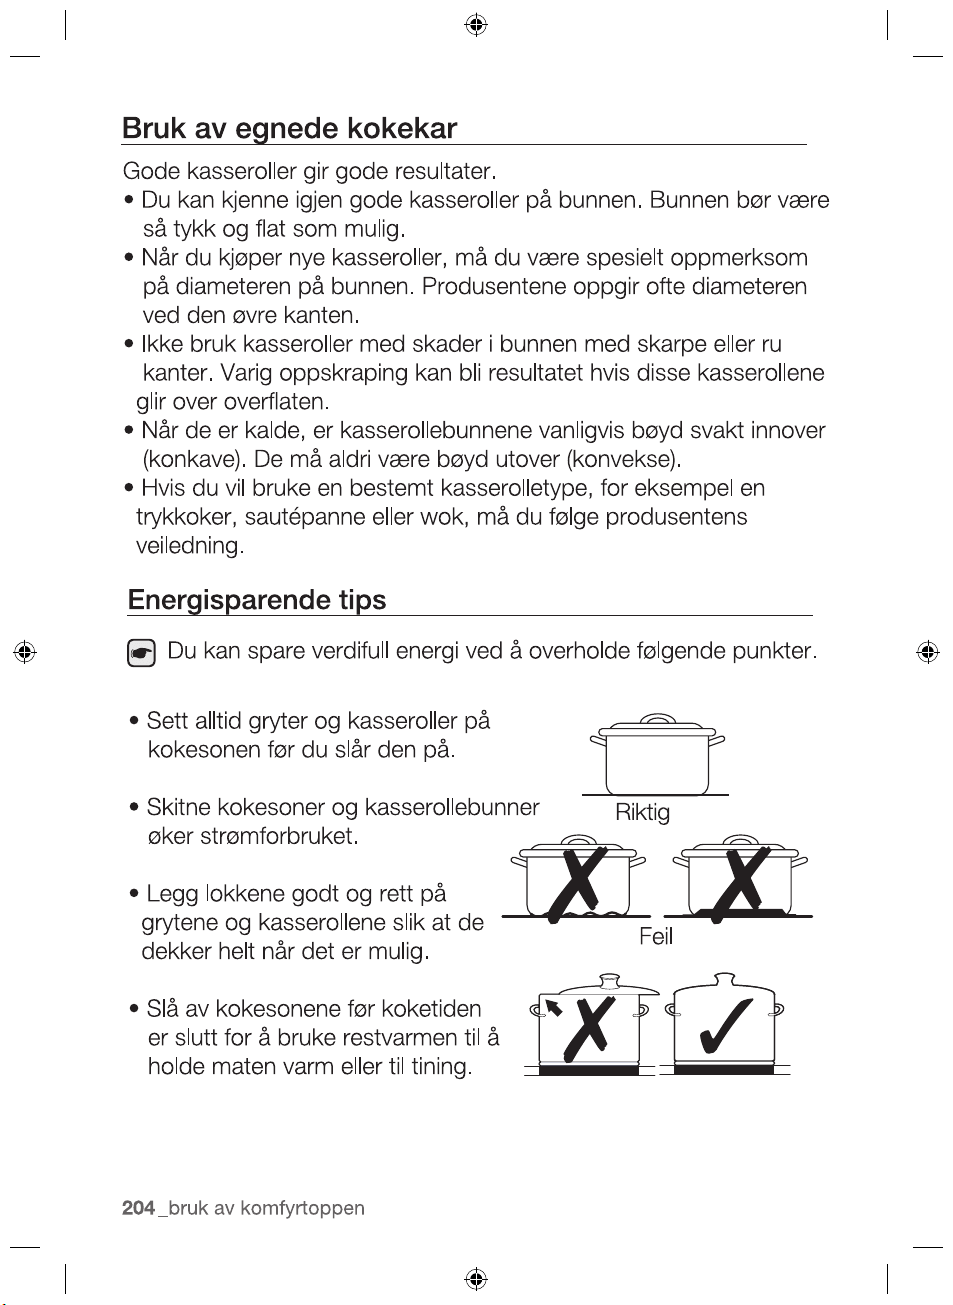
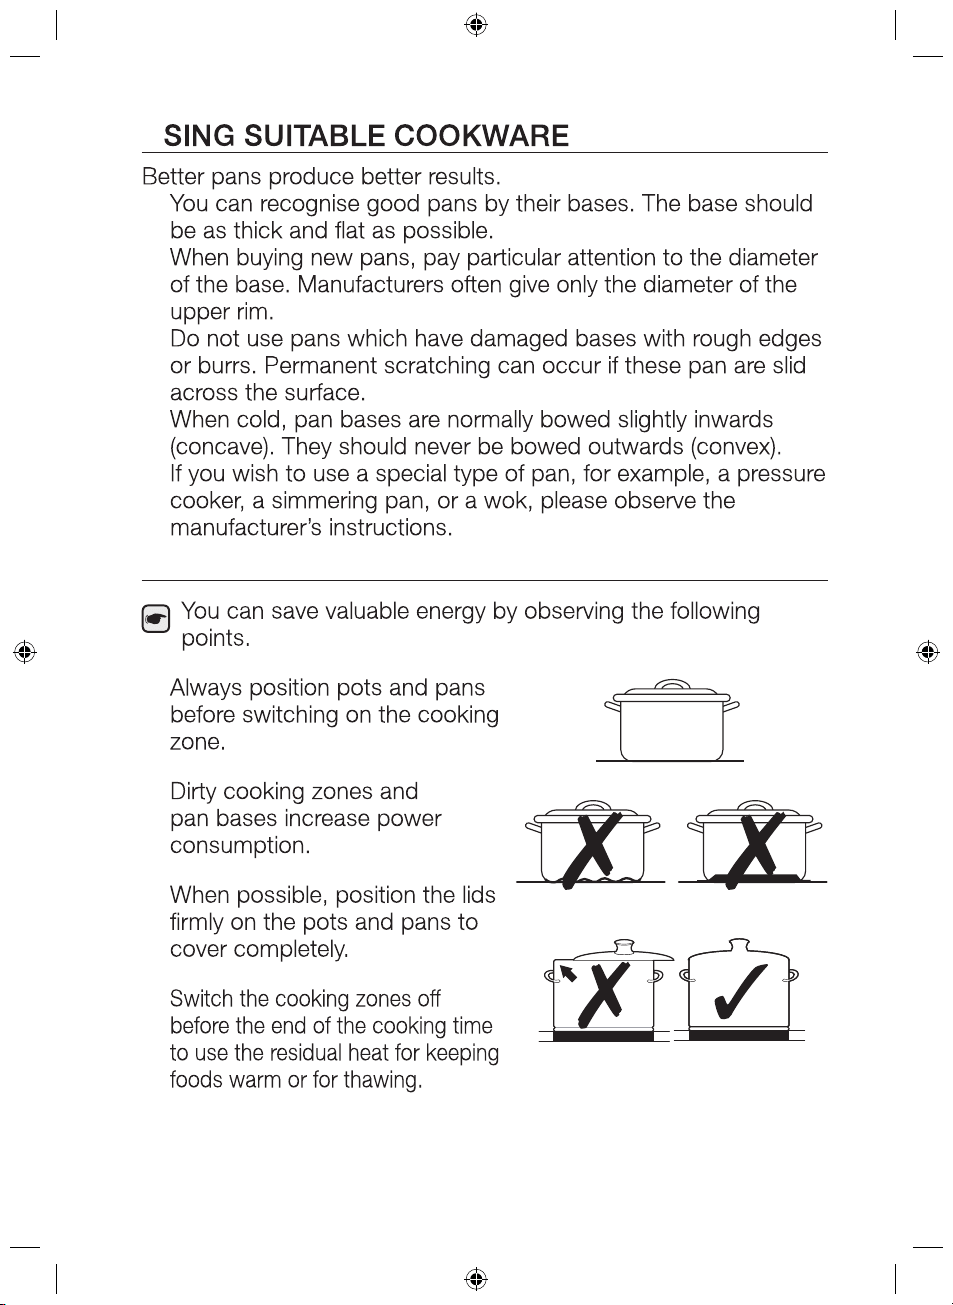
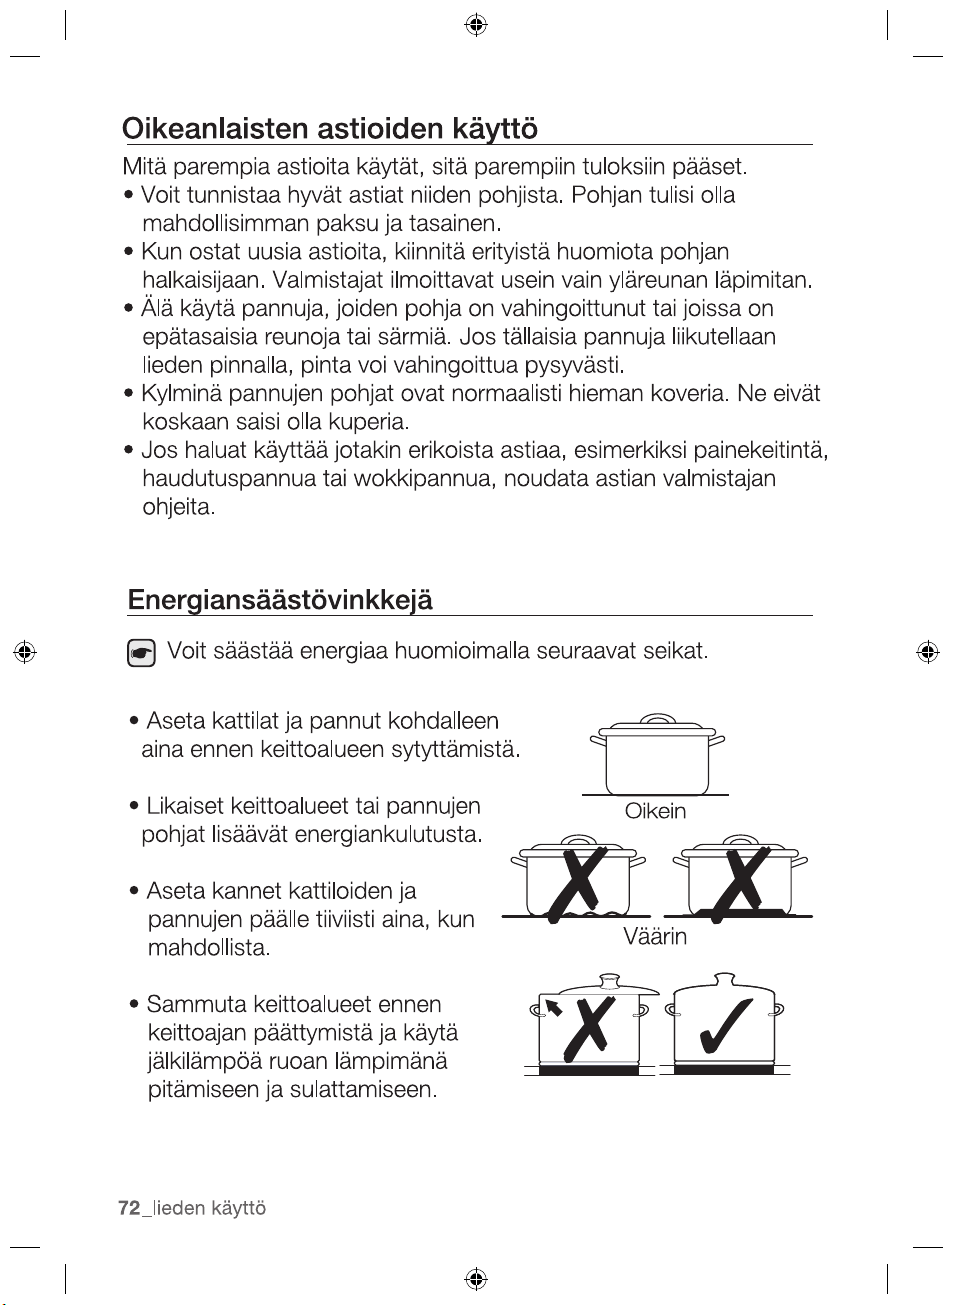
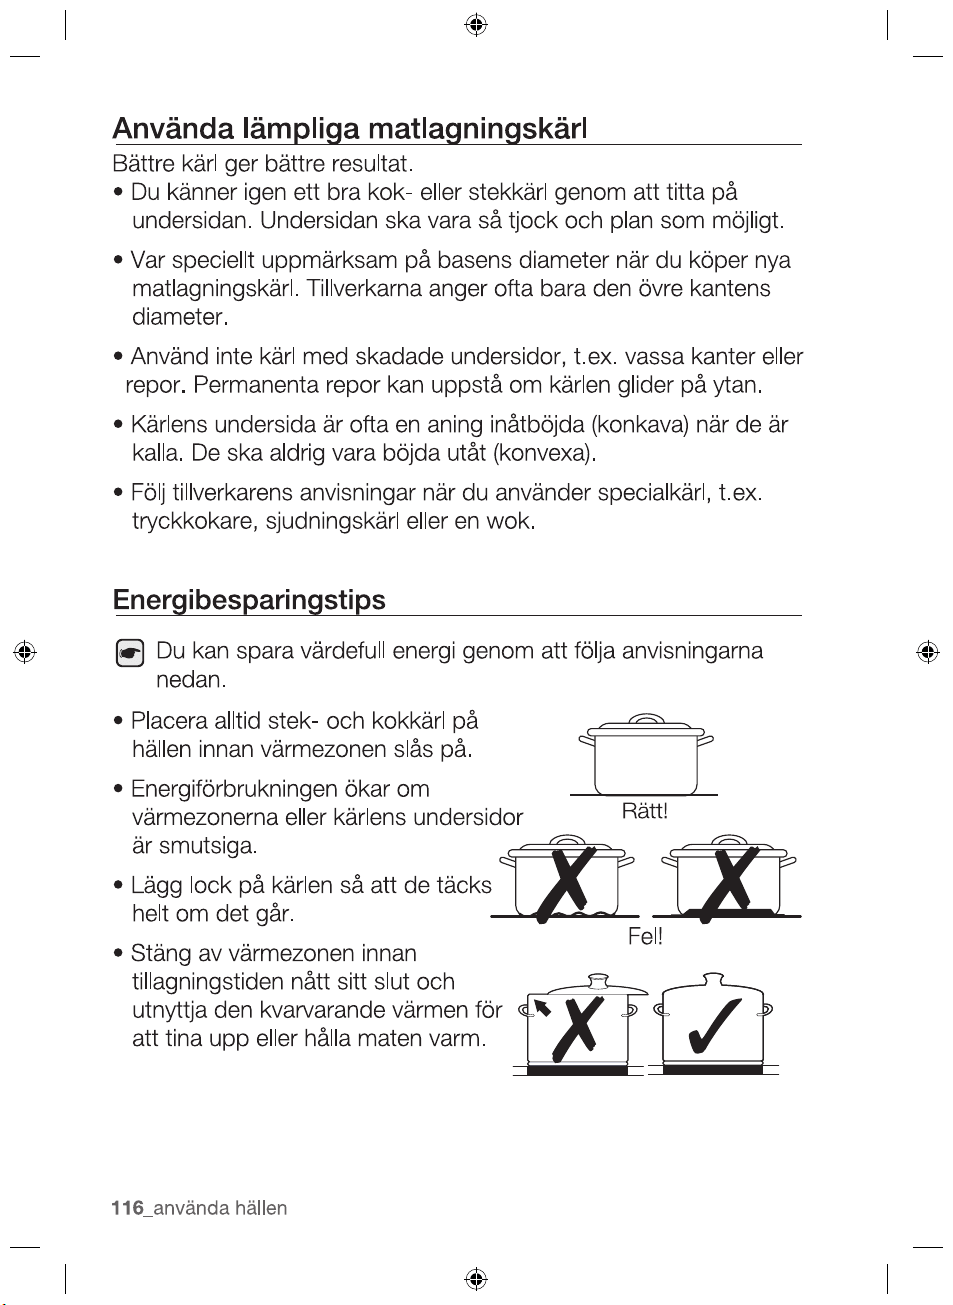
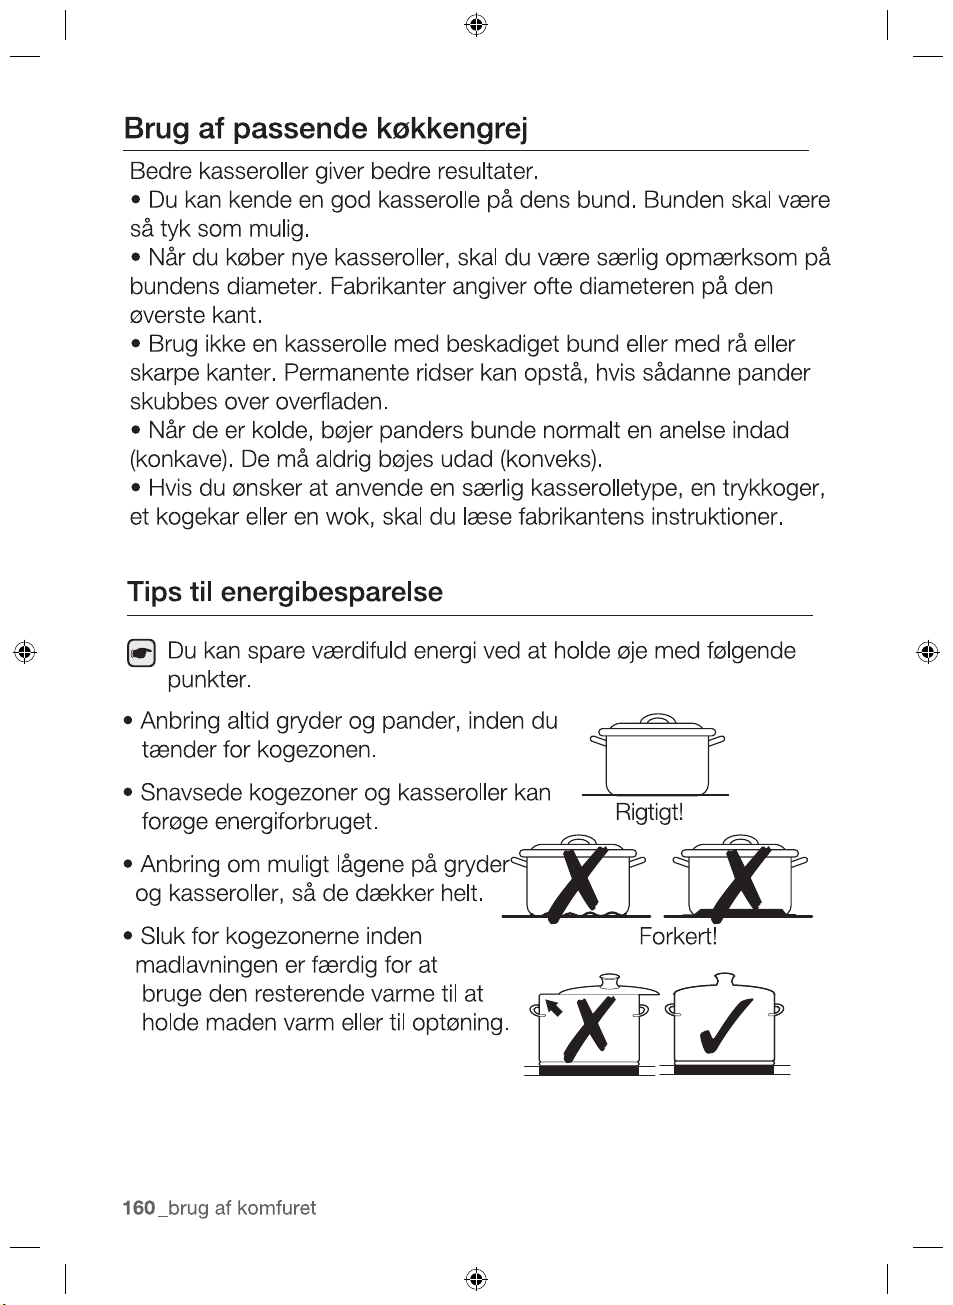
Energy saving tips
•
•
•
•
Right!
Wrong!
2012-11-20
28_ hob use

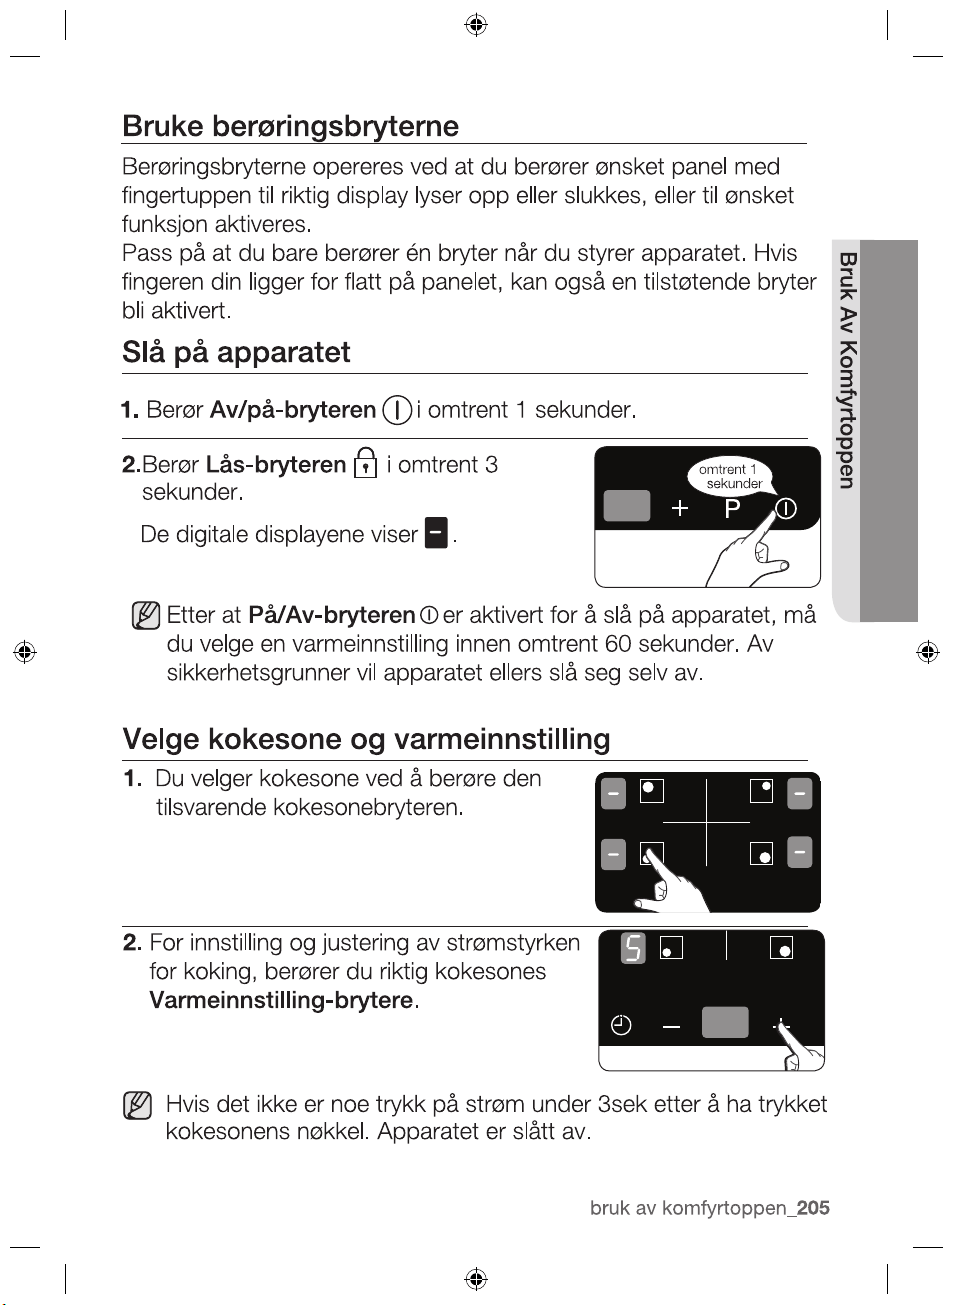
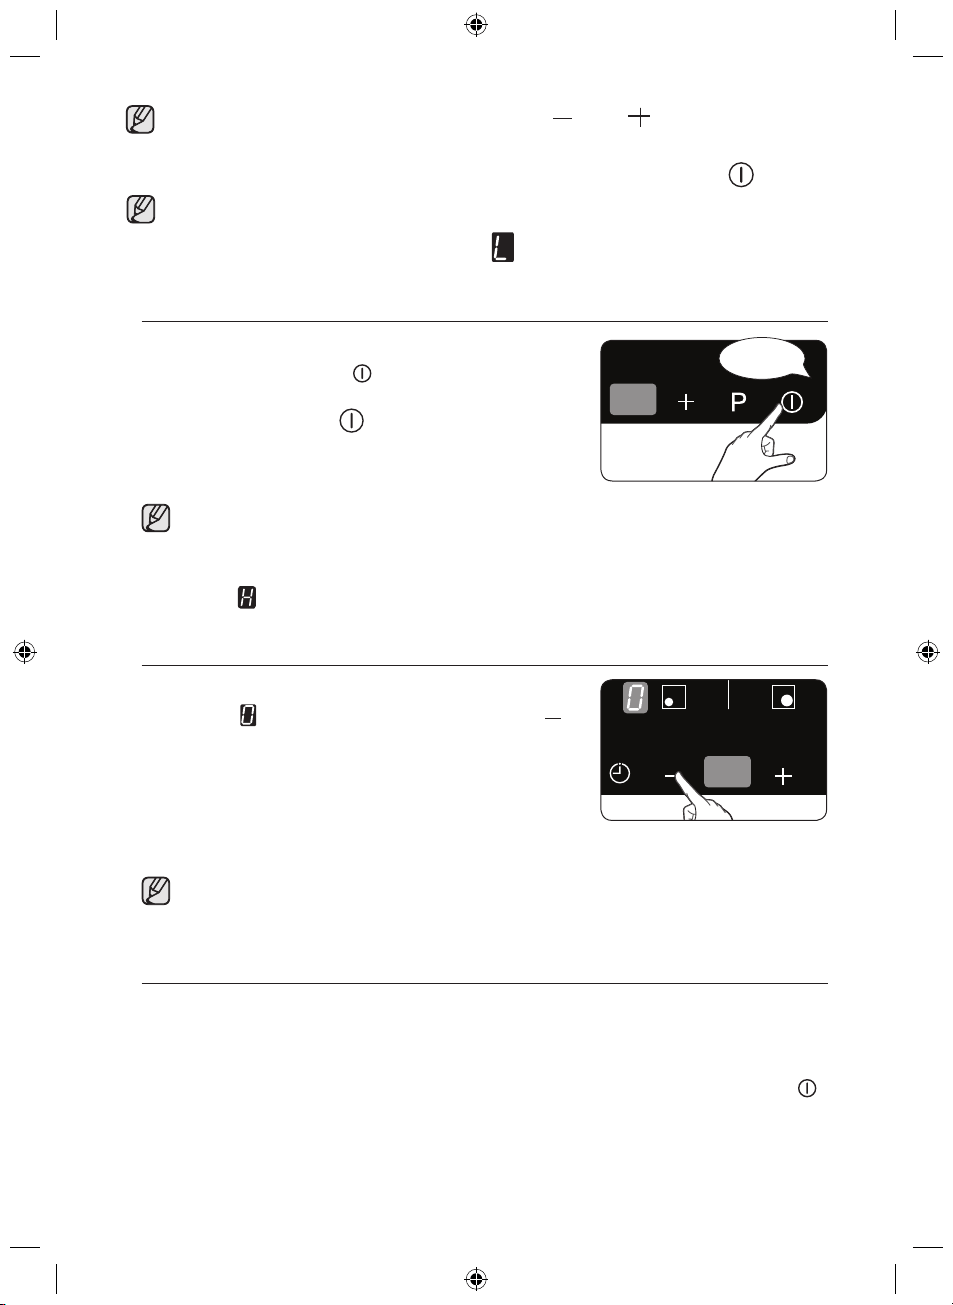
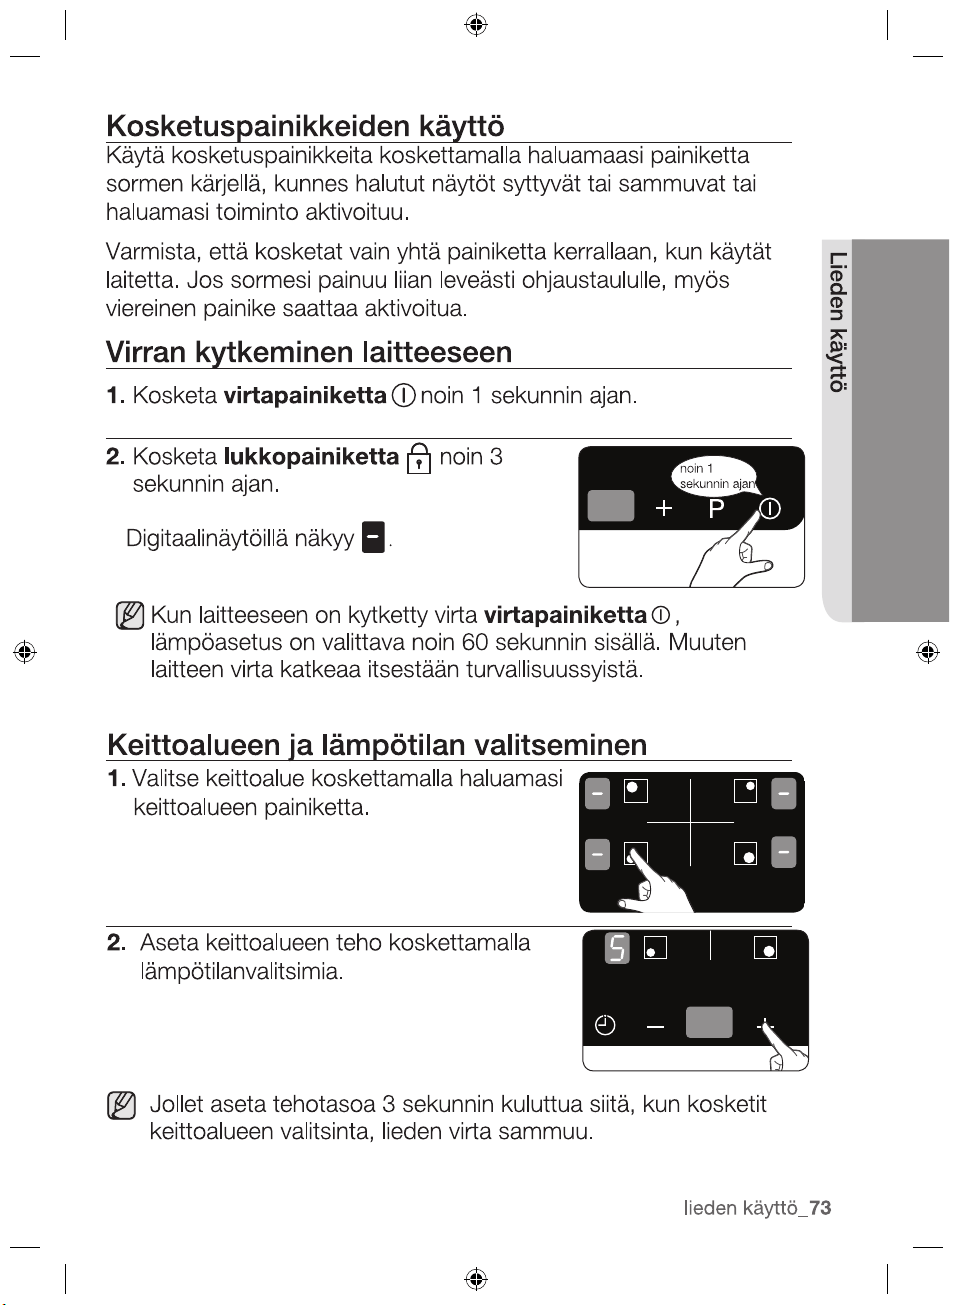
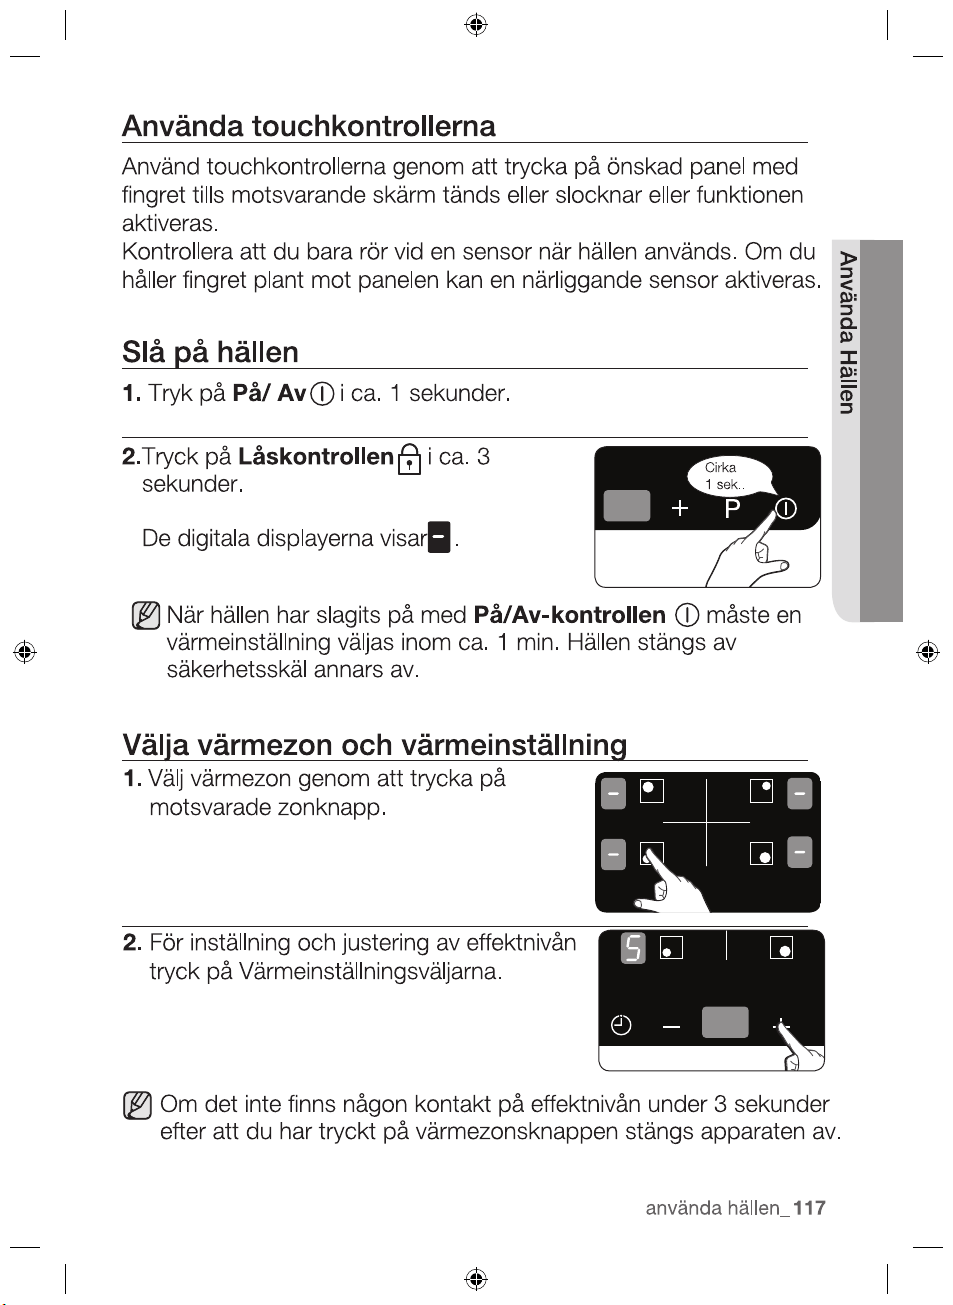
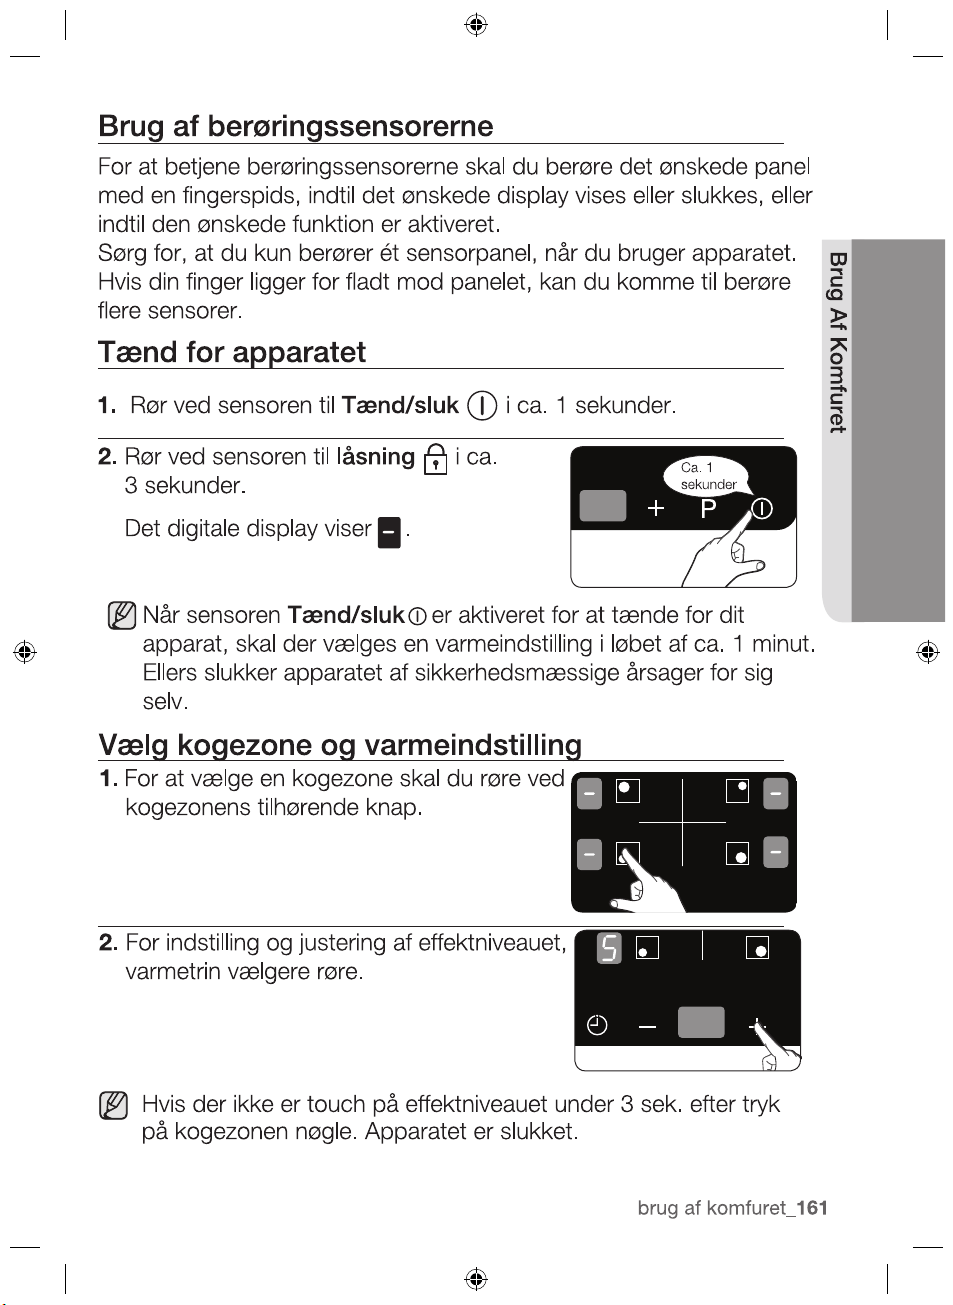
1. T
ouch the
sensor for approximately 1 seconds.
2.
After the On/Off control
sensor has been actuated to
switch on your appliance, a heat setting must be selected
within approximately 1 minutes. Otherwise, the appliance will
switch itself off for safety reasons.
SELECT
COOKING ZONE AND HEAT SETTING
1.
For selecting the cooking zone, touch
the corresponding cooking zone’s key.
2.
For setting and adjusting the power
level, touch the Heat setting
selectors.
Lock control
On/Off
The digital displays will show
.
Touch the sensor for
approximately 3 seconds.
approx
1 sec.
2012-11-20
If there are no touch at power level during 3sec after pressing
the
cooking zone's key the appliance is switched off.
,
hob use _29
HOB USE
approx
1 sec.
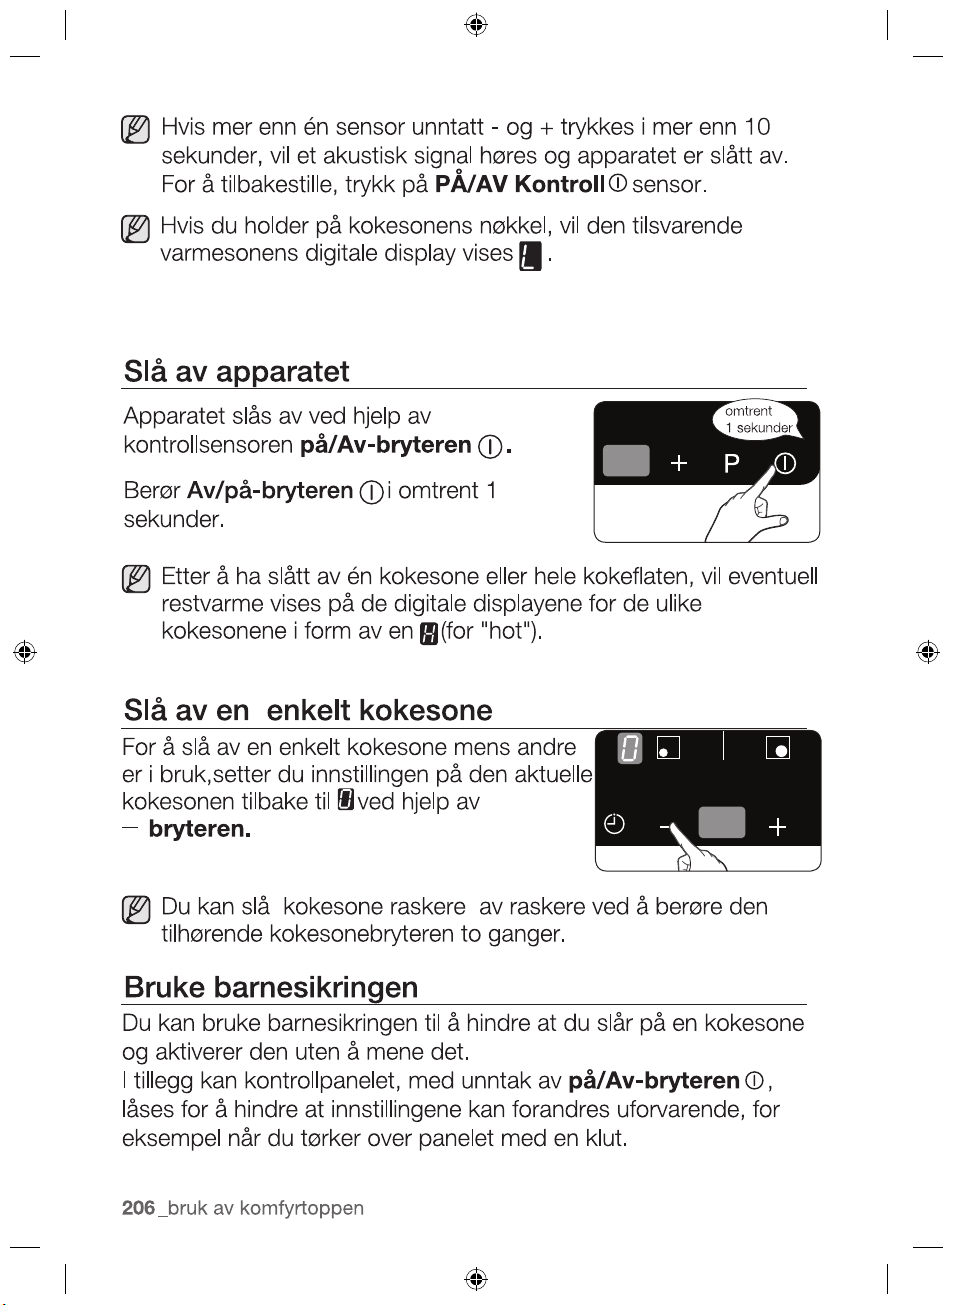
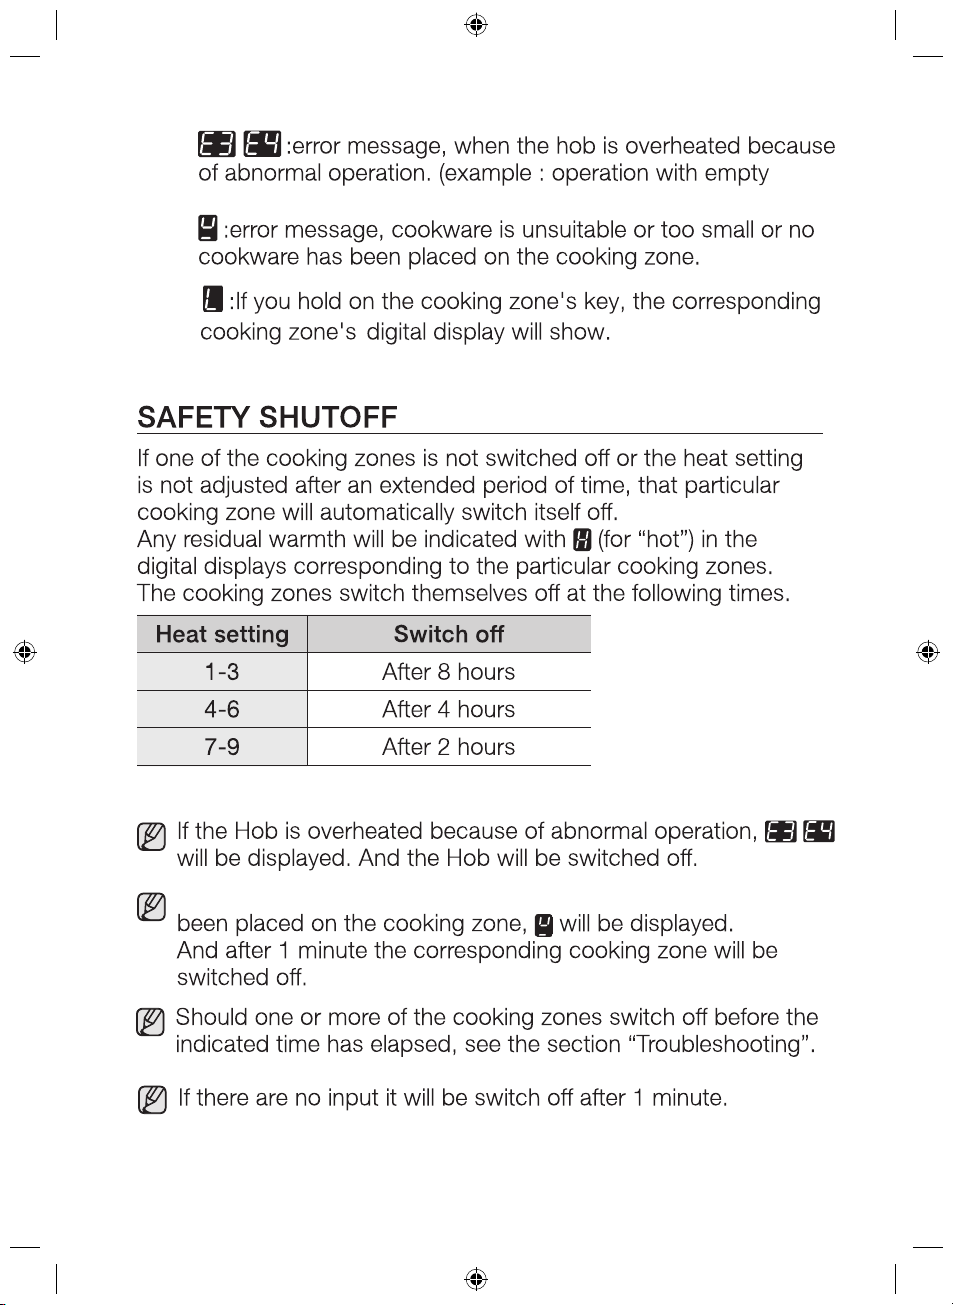
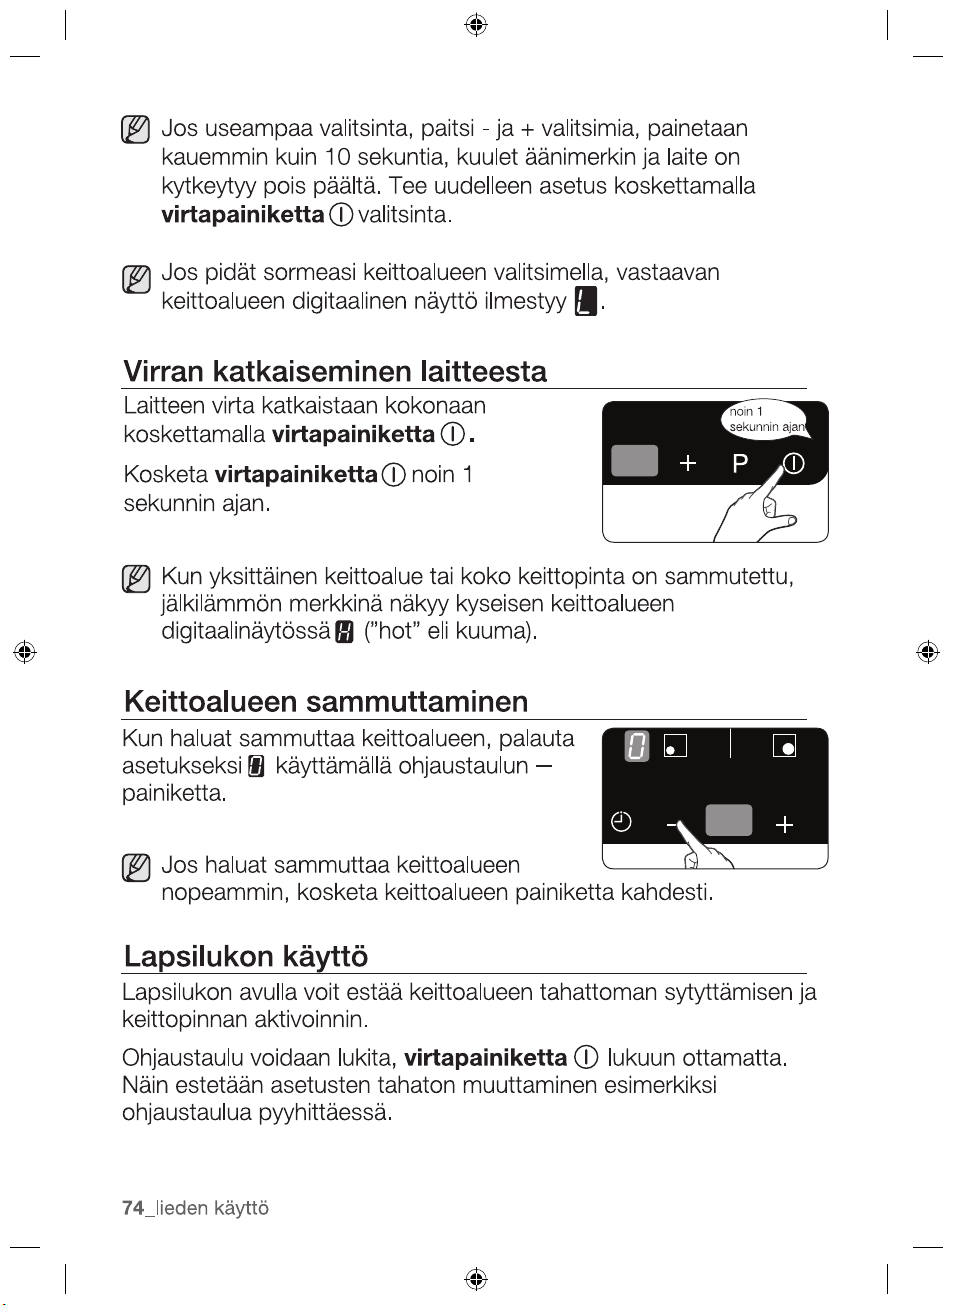
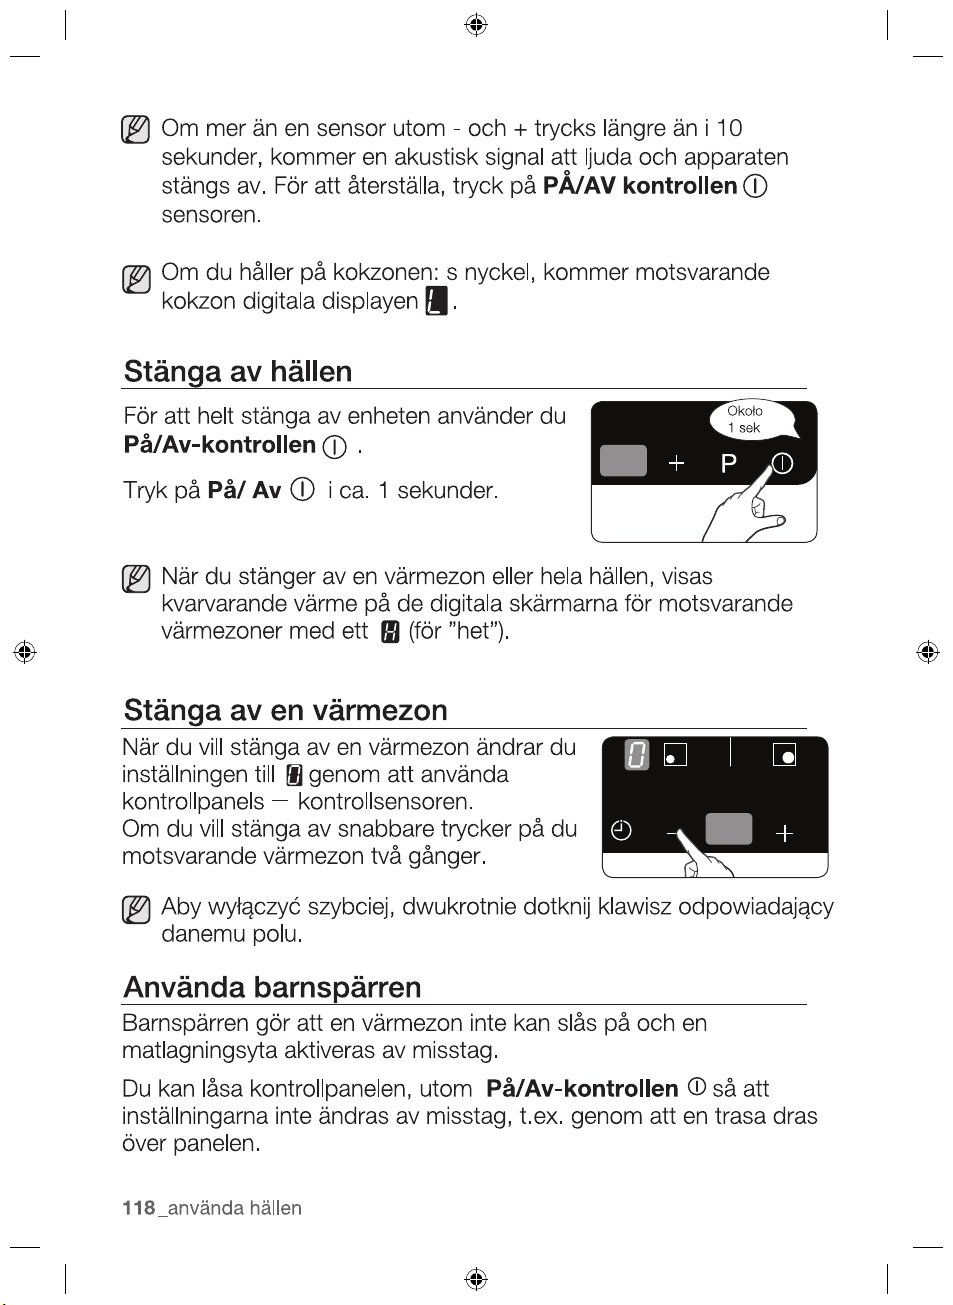
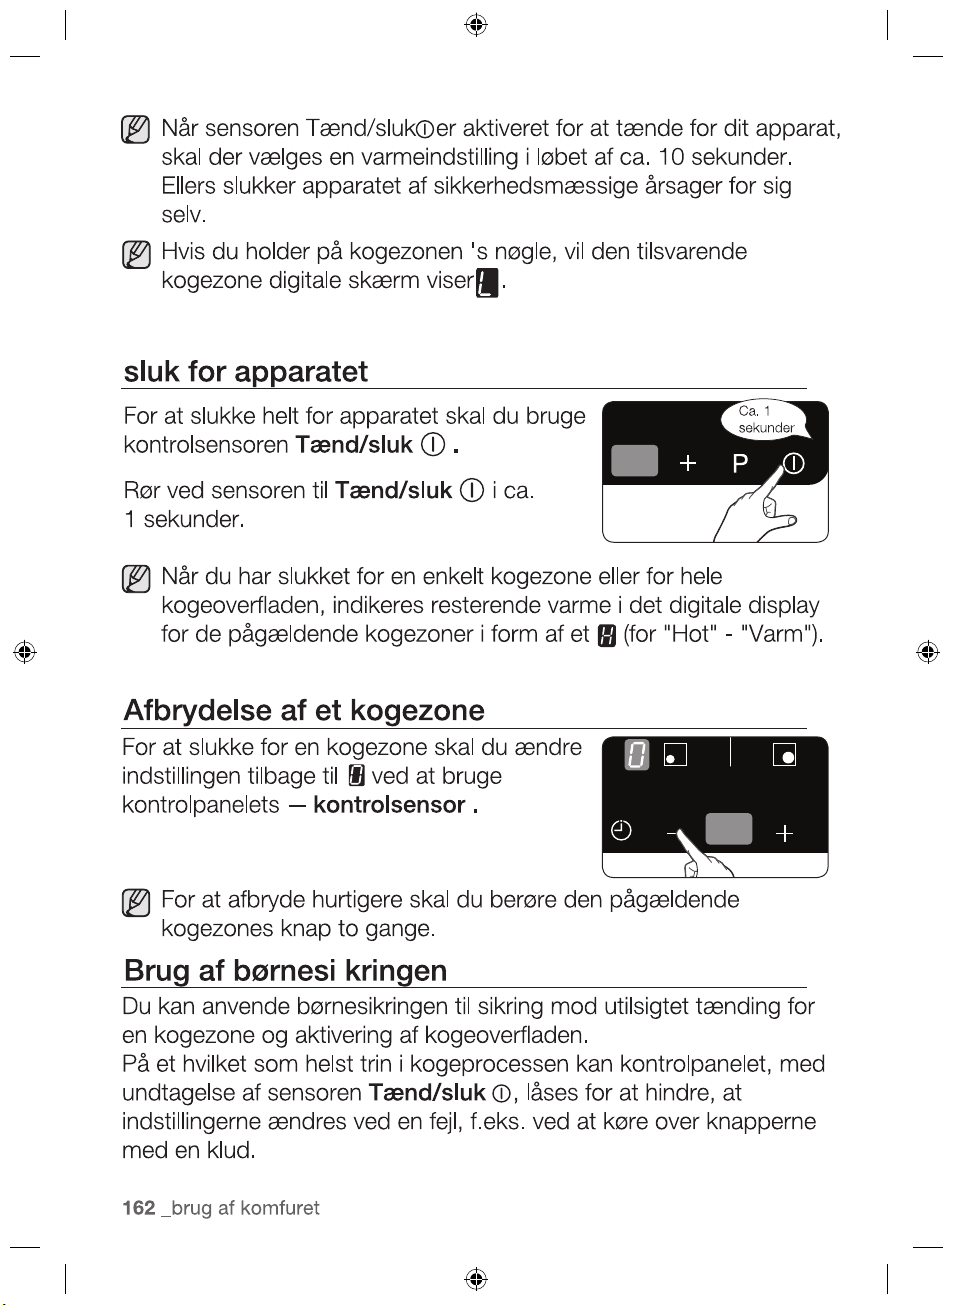
SWITCHING THE APPLIANCE OFF
To completely switch off the appliance, use
the On/Off control
sensor.
After switching off a single cooking zone or the entire cooking
surface, the presence of residual heat will be indicated in the
digital displays of the corresponding cooking zones in the form
of an (for “hot”).
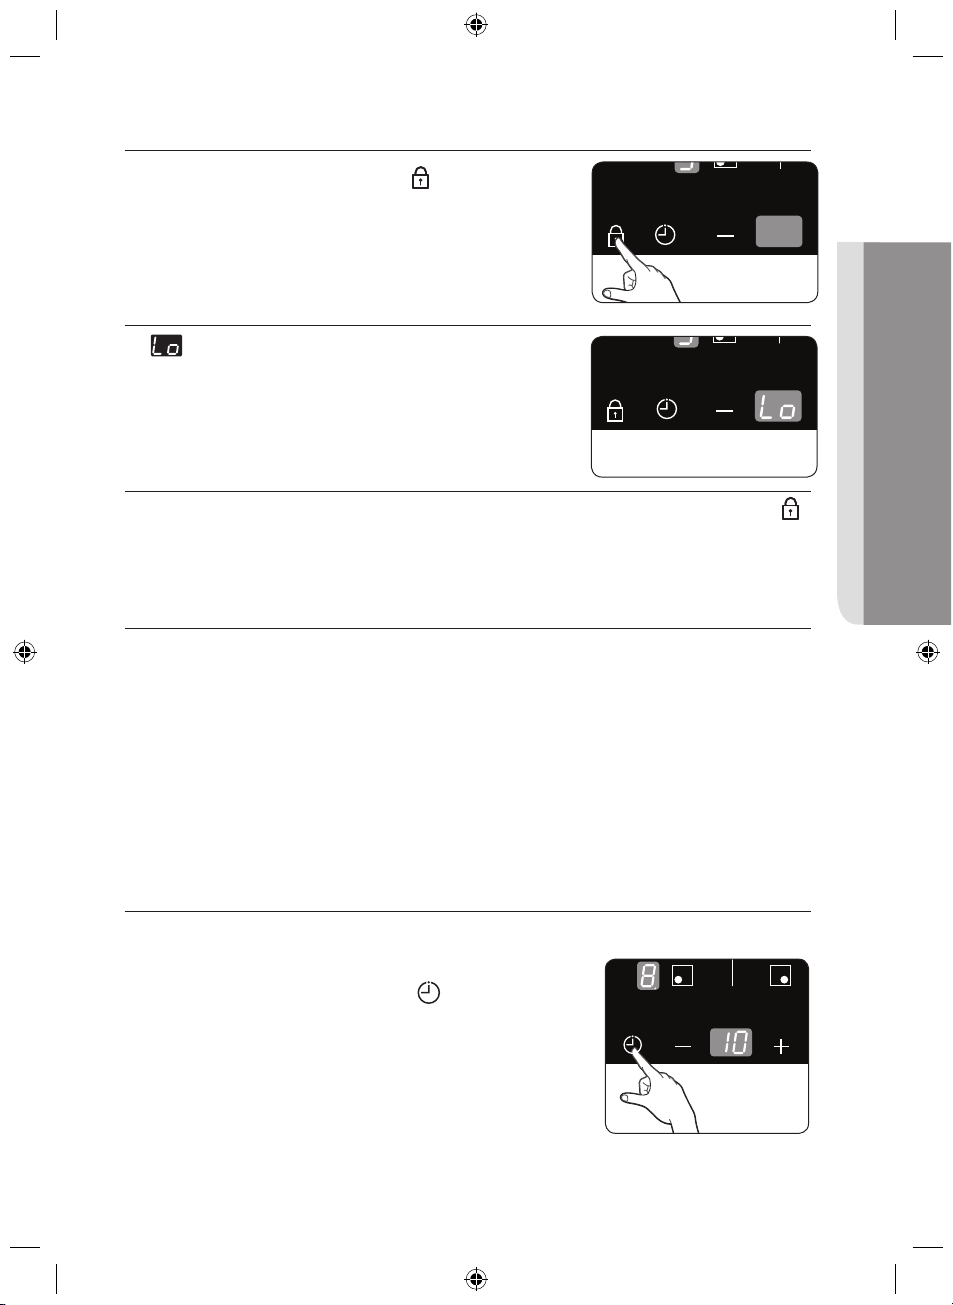
SWITCHING A COOKING ZONE OFF
To switch off a cooking zone, return the
setting to by using the control panel’s
control sensor.
To switch off more quickly, touch the corresponding cooking
zone’s key twice.
USING THE CHILD SAFETY LOCK
You can use the child safety lock to safeguard against
unintentionally turning on a cooking zone and activating the cooking
surface.
Also the control panel, with the exception of the On/Off control
sensor, can be locked in order to prevent the settings from being
changed unintentionally, for example, by wiping over the panel with
a cloth.
digital display will show
If you hold on the cooking zone' s key,the corresponding cooking
zone' s
Touch the
On/Off
sensor for
approximately 1 second.
2012-11-20
On/Off control
sensor.
An acoustic
signal will sound
and the appliance
is switched off.
To reset, touch the
except the and
If more than one sensor
is pressed for longer
than 10 seconds,
30_ hob use
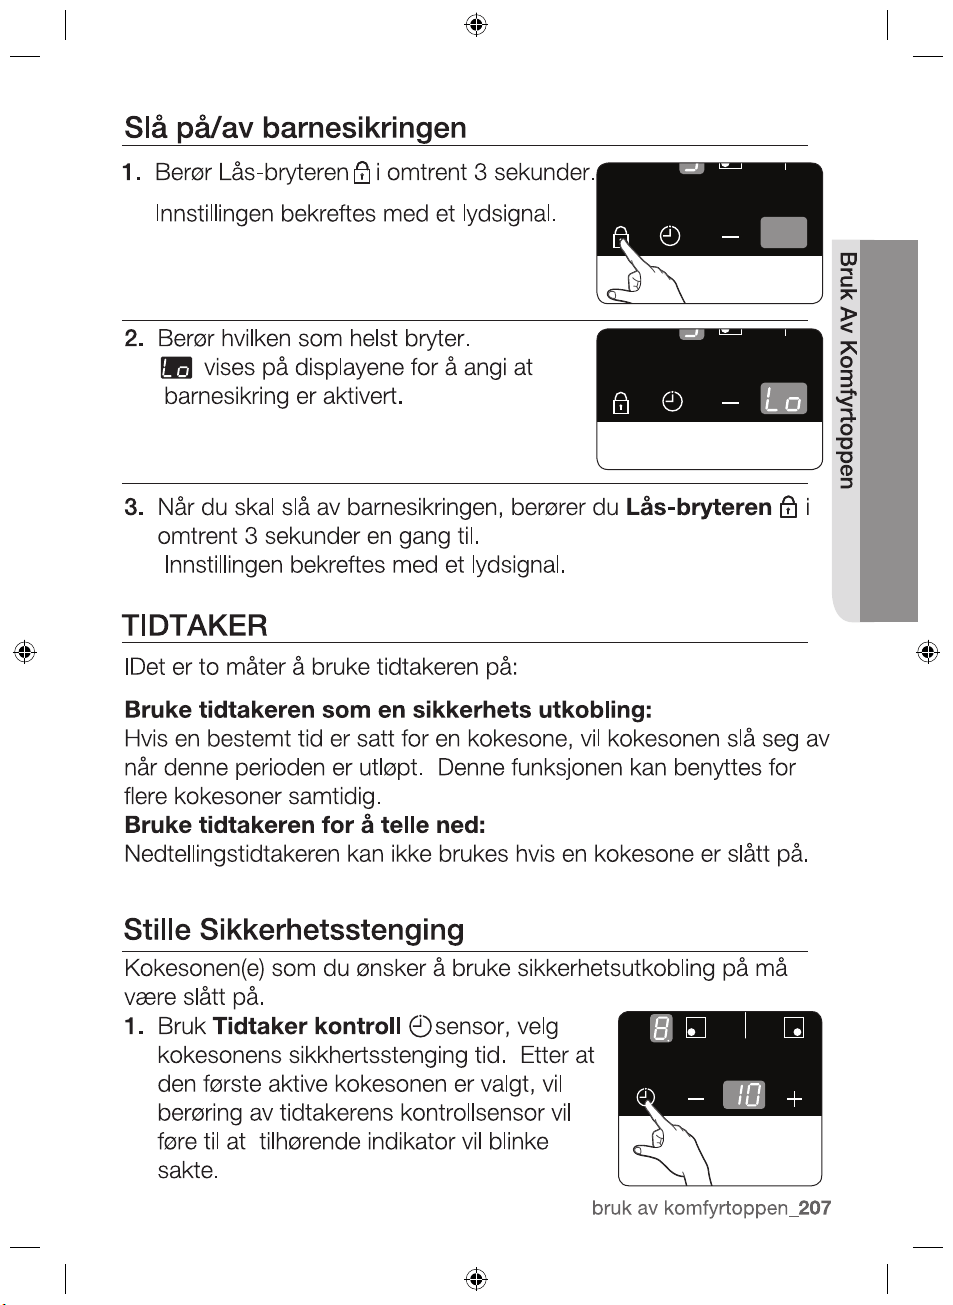
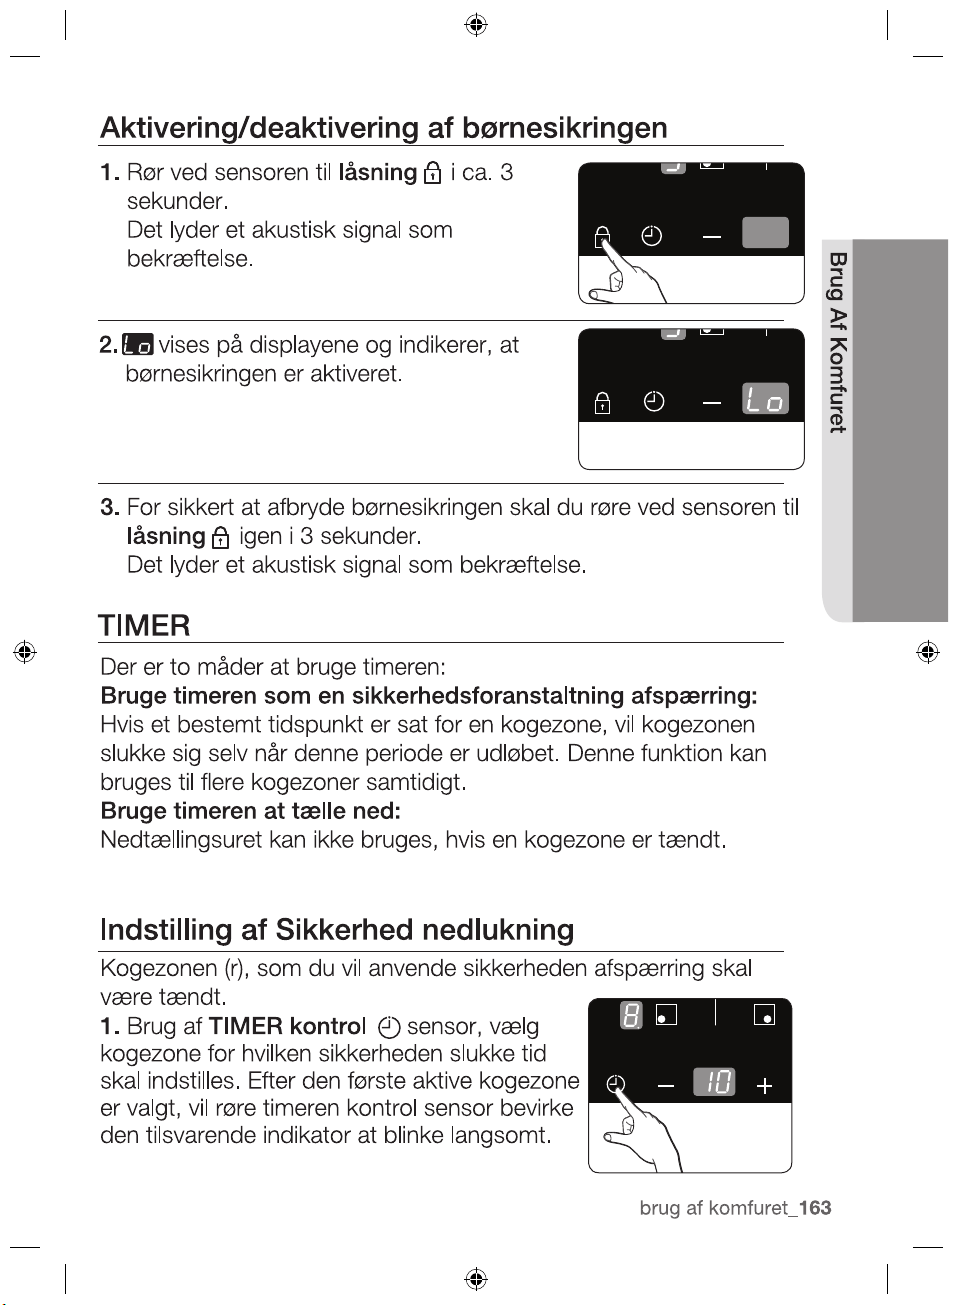
Switching the child safety lock on / off
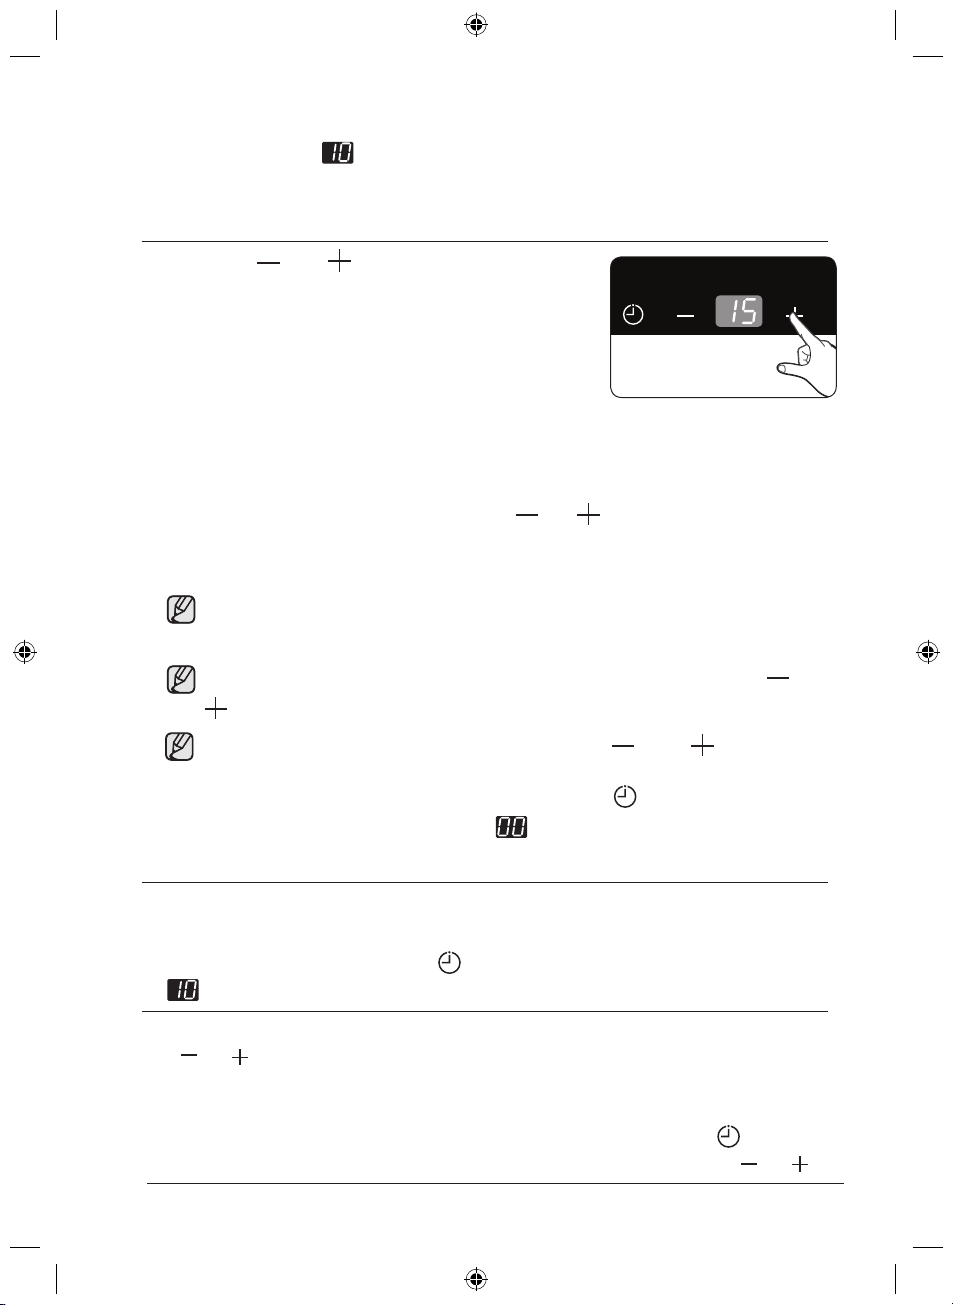
1. Touch the Lock control
sensor for
approximately 3 seconds.
An acoustic signal will sound as
confirmation.
2.
will appear in the displays, indicating
the child safety lock has been activated.
3.
For switching the child safety lock off, touch the Lock control
sensor again for 3 seconds.
An acoustic signal will sound as confirmation.
TIMER
There are two ways to use the timer:
Using the timer as a safety shutoff:
If a specific time is set for a cooking zone, the cooking zone will
shut itself off once this period of time has elapsed. This function
can be used for multiple cooking zones simultaneously.
Using the timer to count down:
The countdown timer cannot be used if a cooking zone has been
switched on.
Setting the safety shutoff
The cooking zone(s) for which you want to apply the safety shutoff
must be switched on.
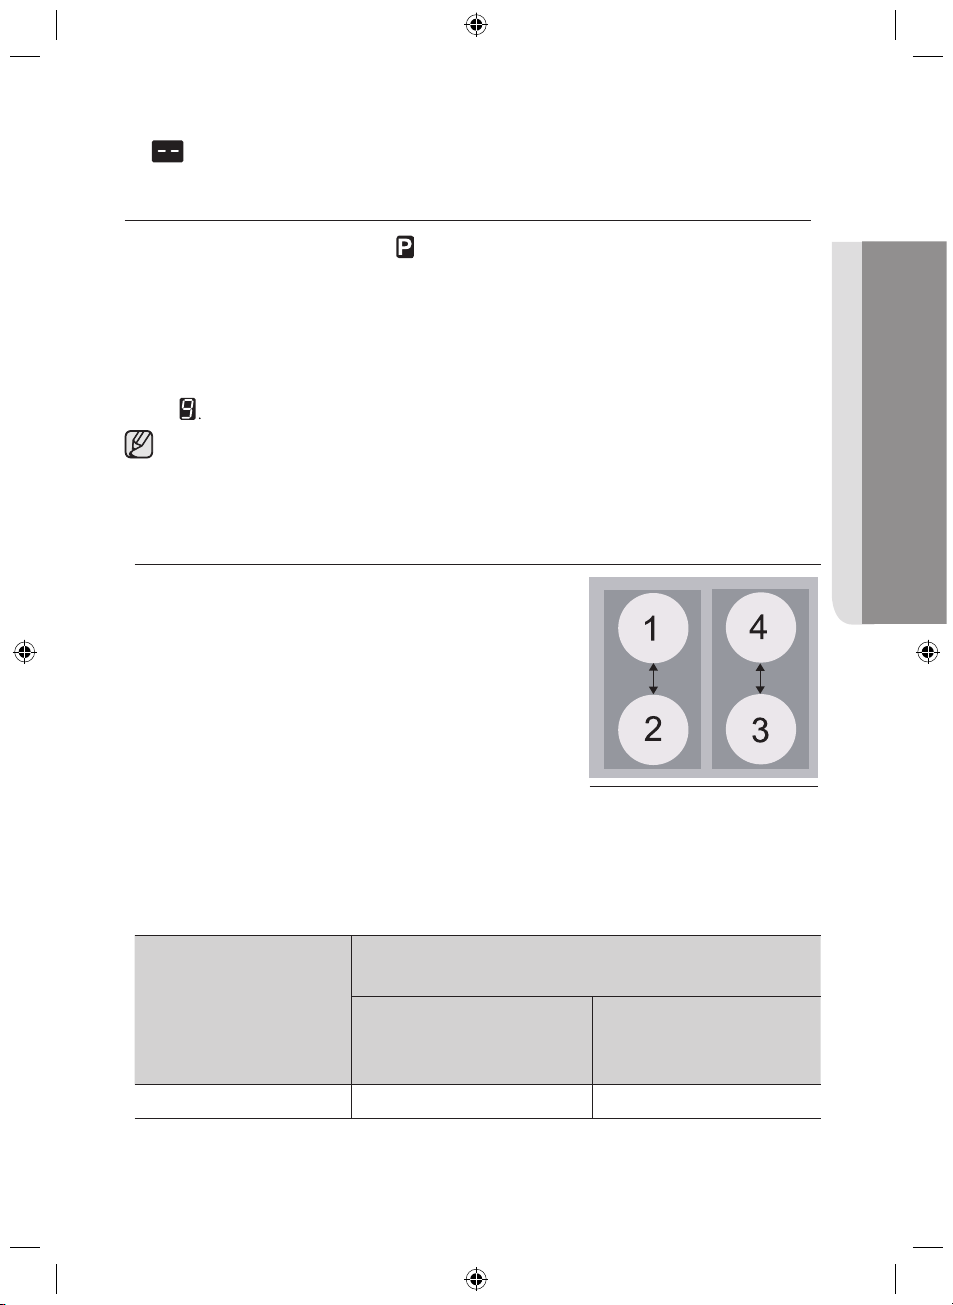
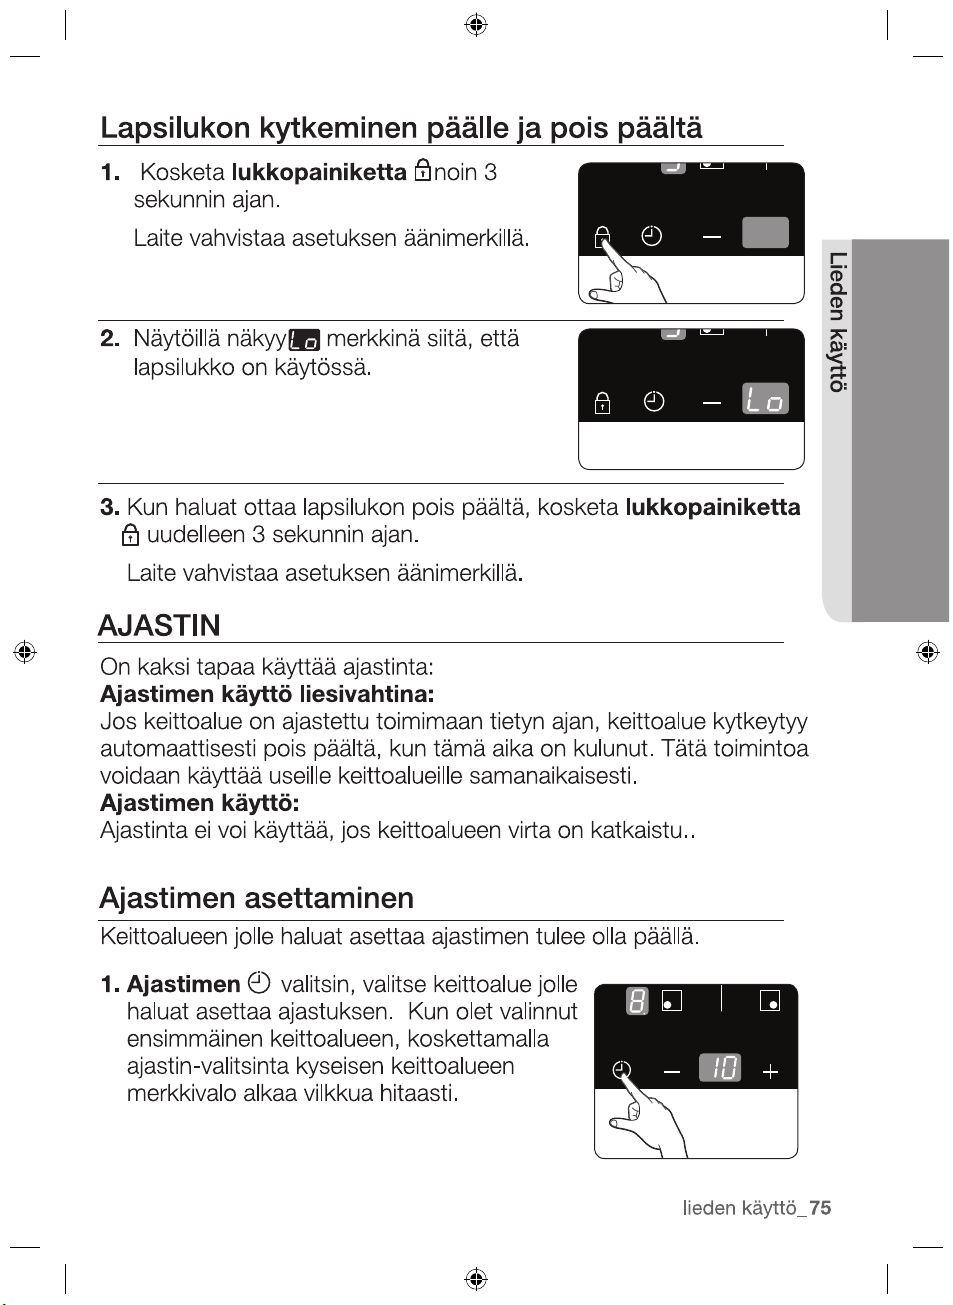
1.
Using the Timer control
sensor,
select the cooking zone for which the
safety shutoff time is to be set.
After the first active cooking zone is
selected, touching the timer’s control
2012-11-20
hob use _31
HOB USE
sensor will cause the corresponding indicator to flash slowly.
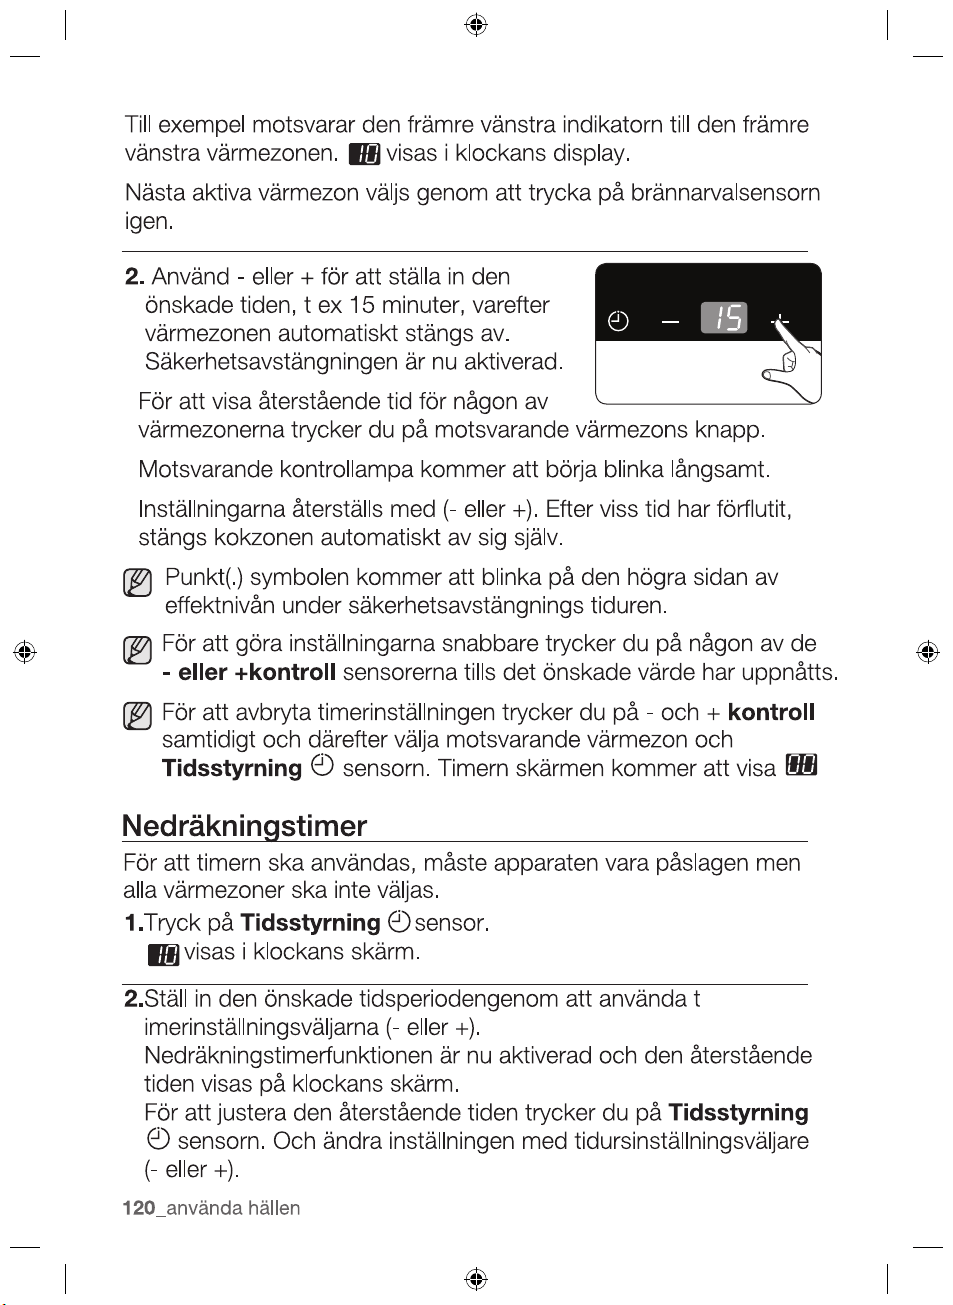
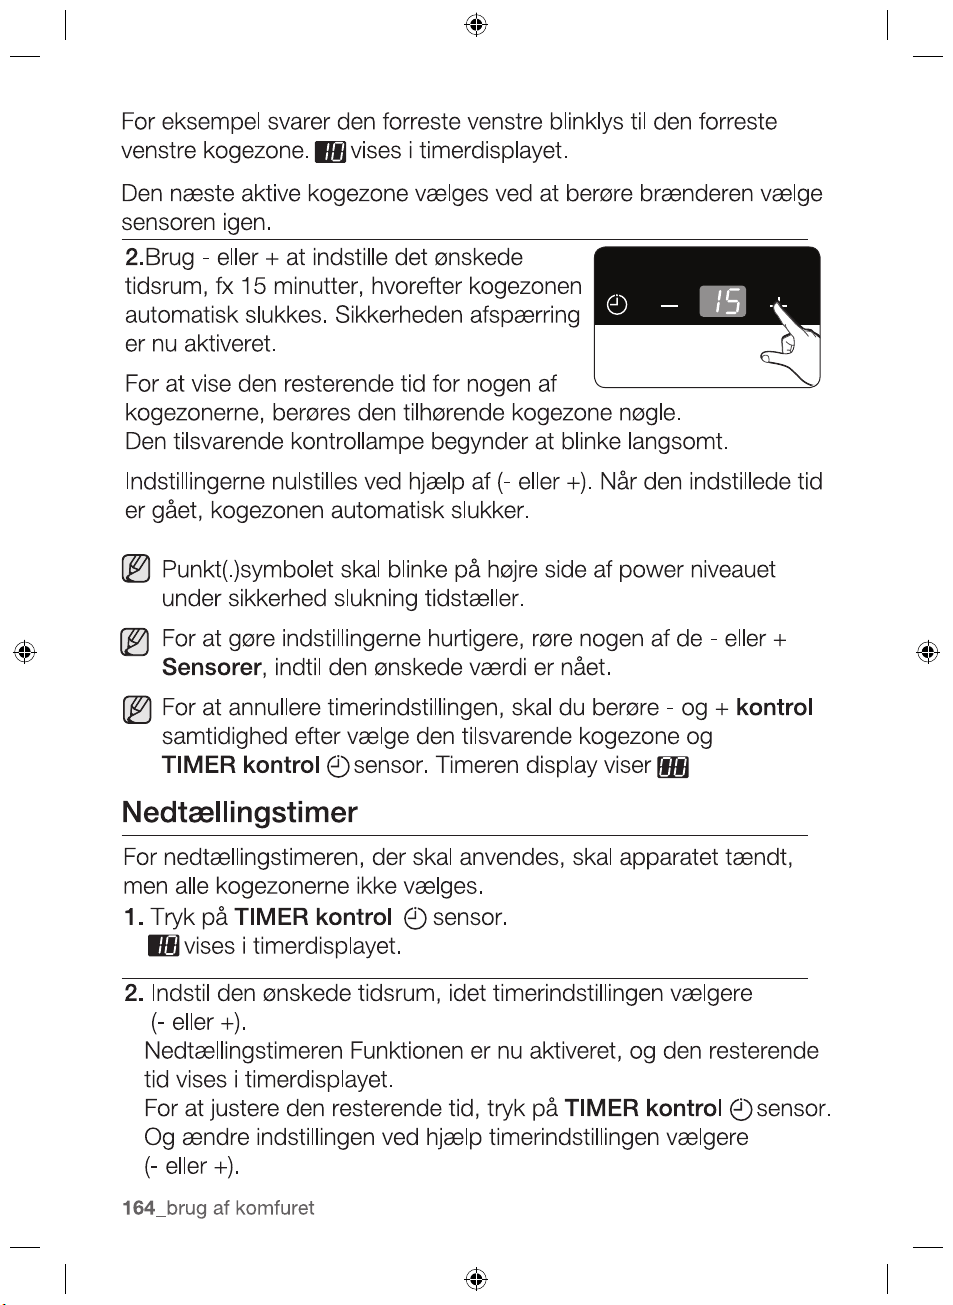
For example, the front left indicator corresponds to the front left
cooking zone. will appear in the timer display.
The next active cooking zone is selected by touching the
sensor again.
2.
Countdown timer
For the countdown timer to be used, the appliance must be
switched on but all the cooking zones do not be selected.
1.
Touch the Timer control
sensor.
will appear in the timer display.
2.
Set the desired period of time using the Timer setting selectors
(
or ).
The countdown timer function is now activated and the
remaining time appears in the timer display.
sensor.
and change the setting using the Timer setting selectors ( or ).
The settings are reset using the
( or ). After the
To make the settings more quickly, touch any of the or
control selectors
corresponding cooking zone’s key.
touch the
To cancel the timer setting,touch the and
simultaneity after
Timer control
To display the time remaining for any
of the cooking zones,
The corresponding control indicator
will begin to blink slowly.
set
period of time has elapsed,
the cooking zone automatically
switches itself off.
and the sensor.
The timer display will
show
Use the
or
automatically switch itself off.
The safety shutoff is now activated.
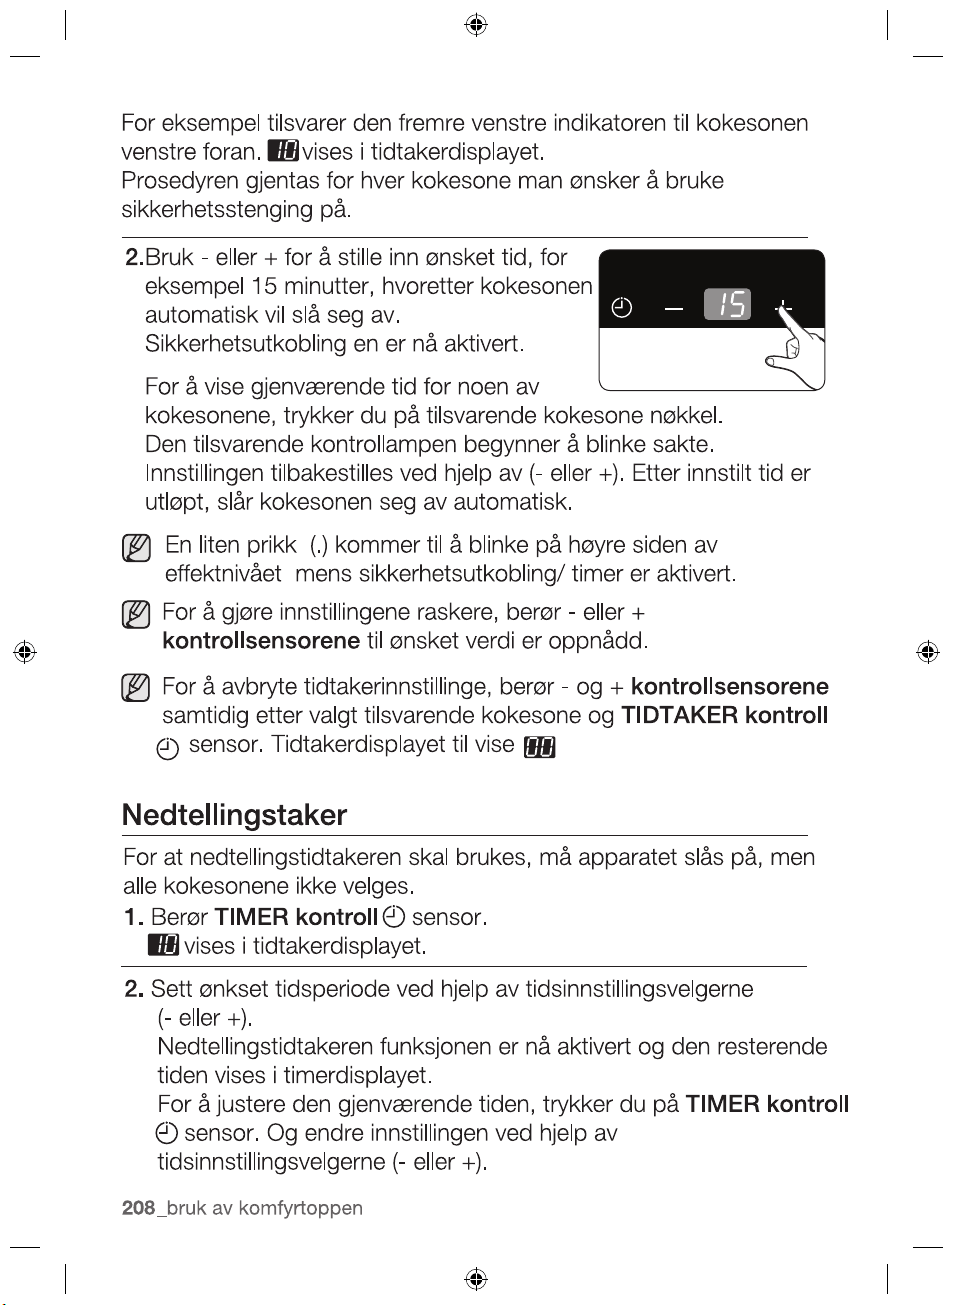
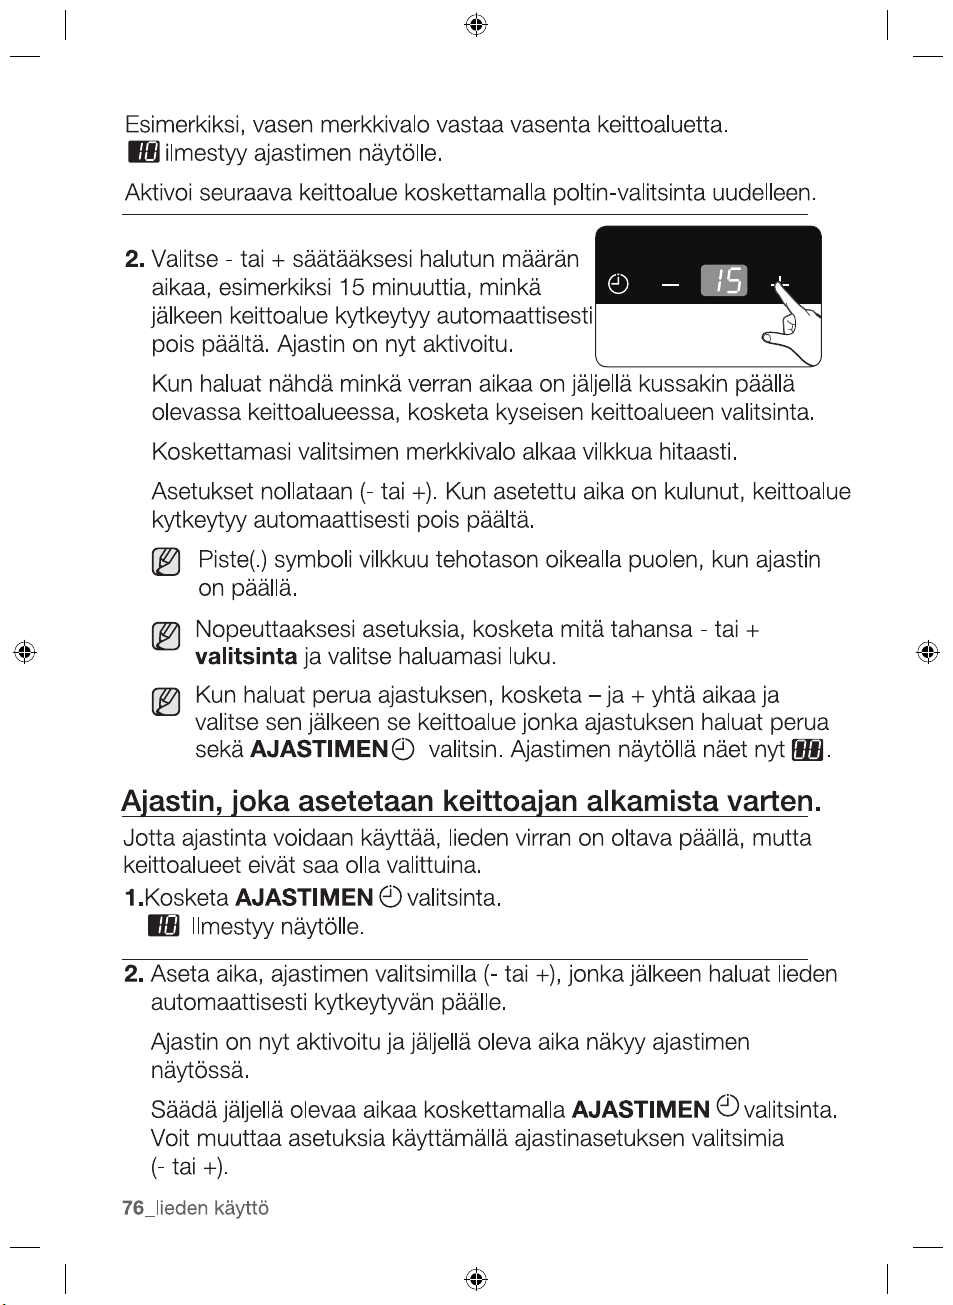
to set the desired
amount
of time, for example, 15
minutes,
after which the cooking zone
will
burner select
2012-11-20
until the desired value is reached.
To adjust the remaining time, touch the
Timer control
32_ hob use
control
selectors
select the corresponding
cooking zone
Dot(.) symbol will flash on the right side of power level
during safety shutoff timer.
POWER BOOST
CONTROL
The power boost function
makes additional power available to
the each cooking zones. (example : bring a large volume of water
to the boil)
The power boost function is activated for maximum 5 minutes for
each cooking zones.
After these times, the cooking zones automatically return to power
level
In certain circumstances, the Power boost function may be
deactivated automatically to protect the internal electronic
components of the hob.
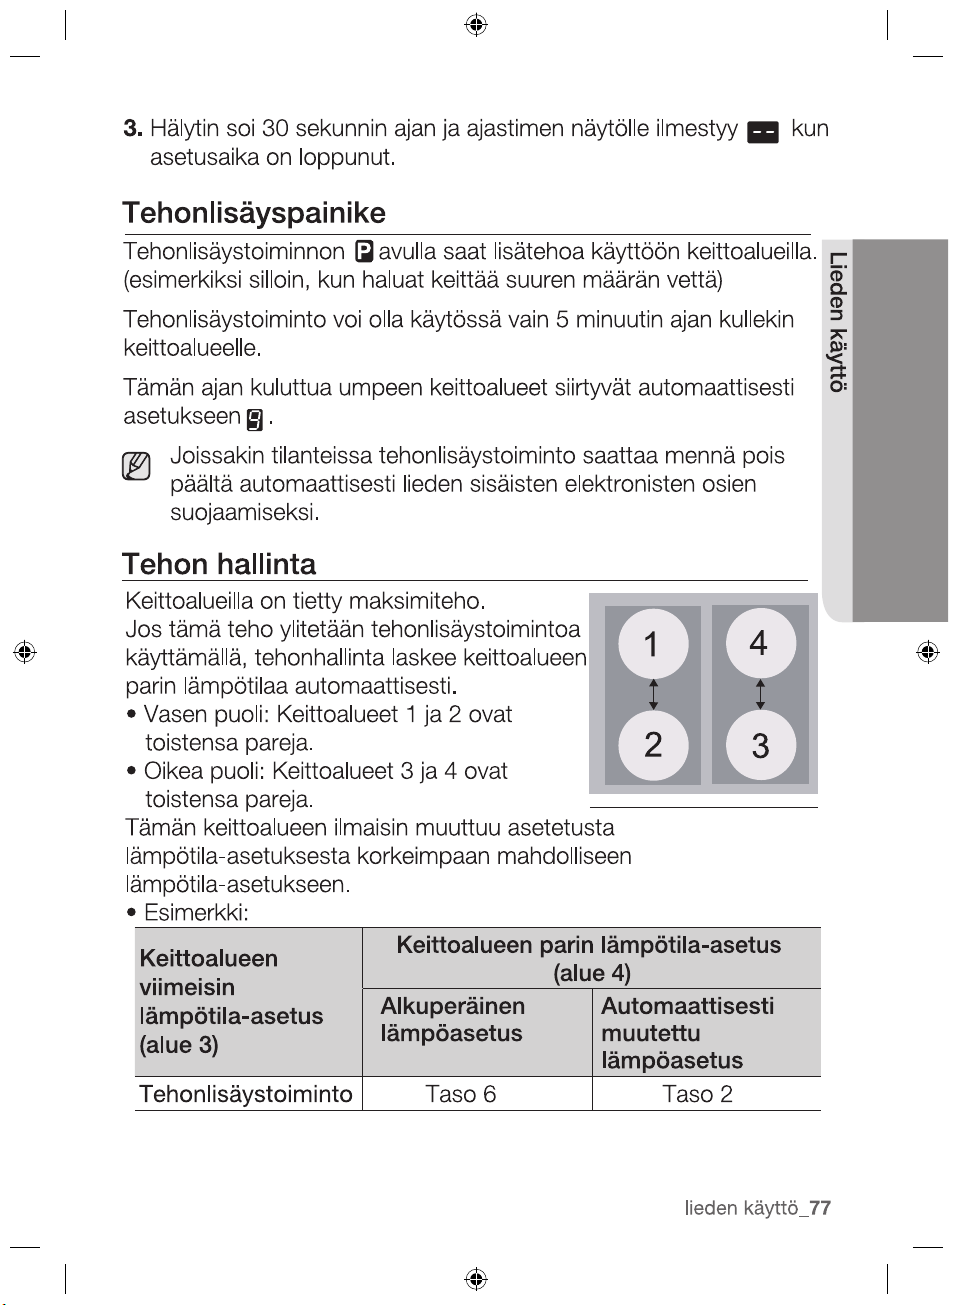
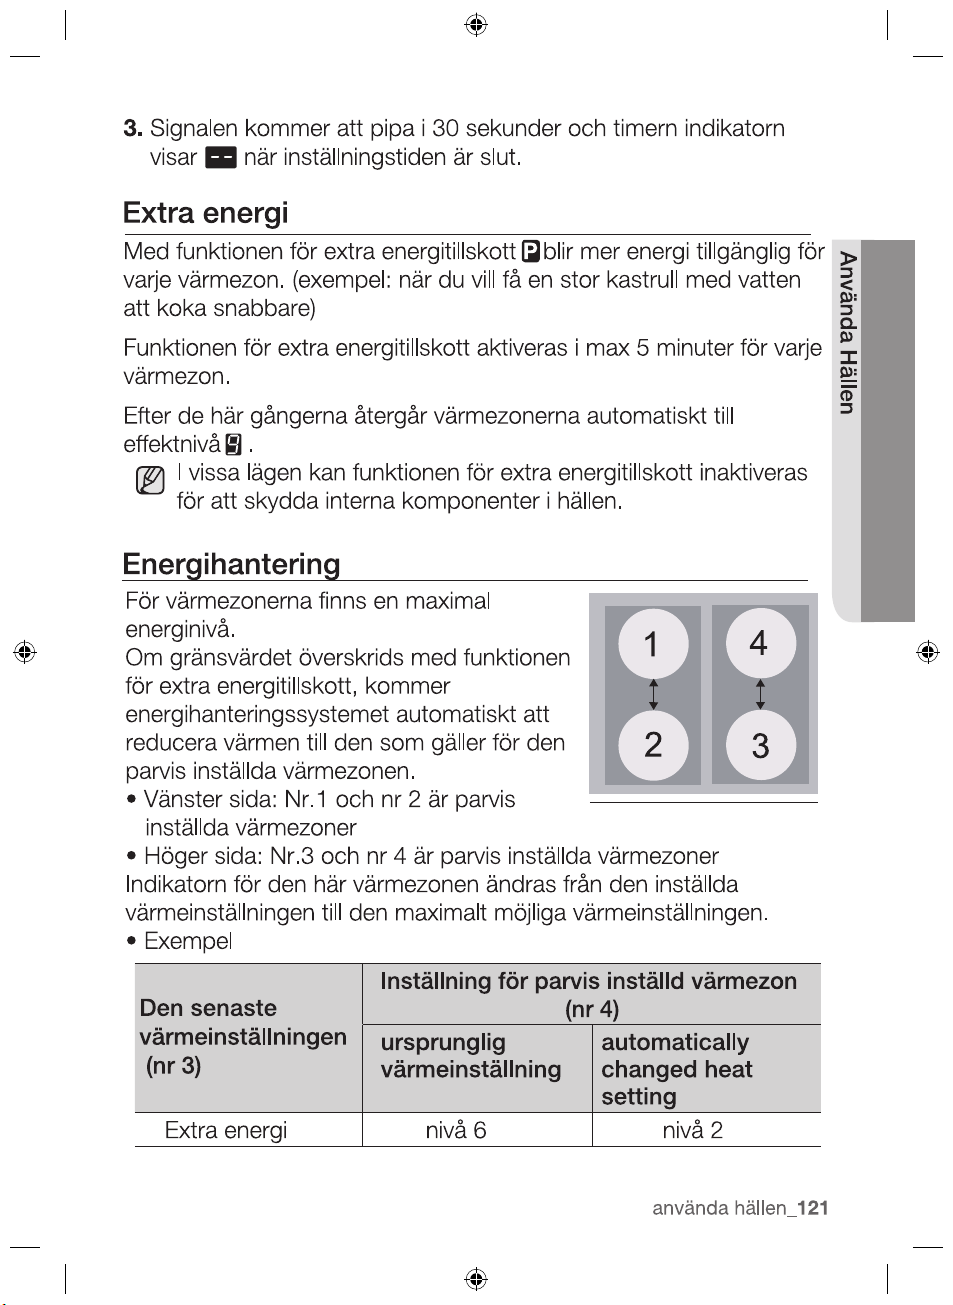
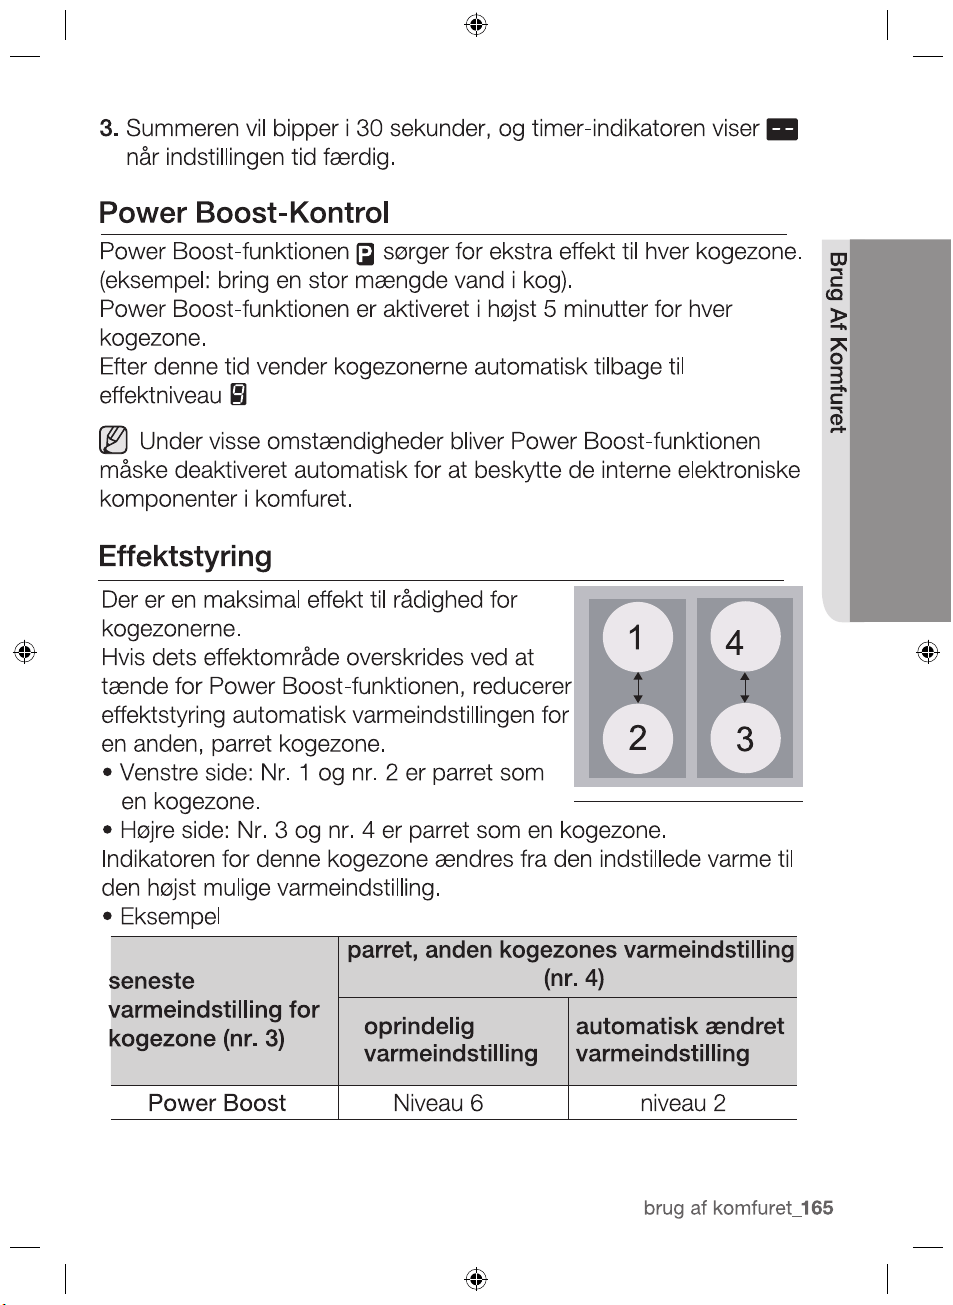
POWER MANAGEMENT
The cooking zones have a maximum
power available to them.
If this power range is exceeded by
switching on the power boost function ,
Power Management automatically reduced
the heat setting of paired another cooking
zone.
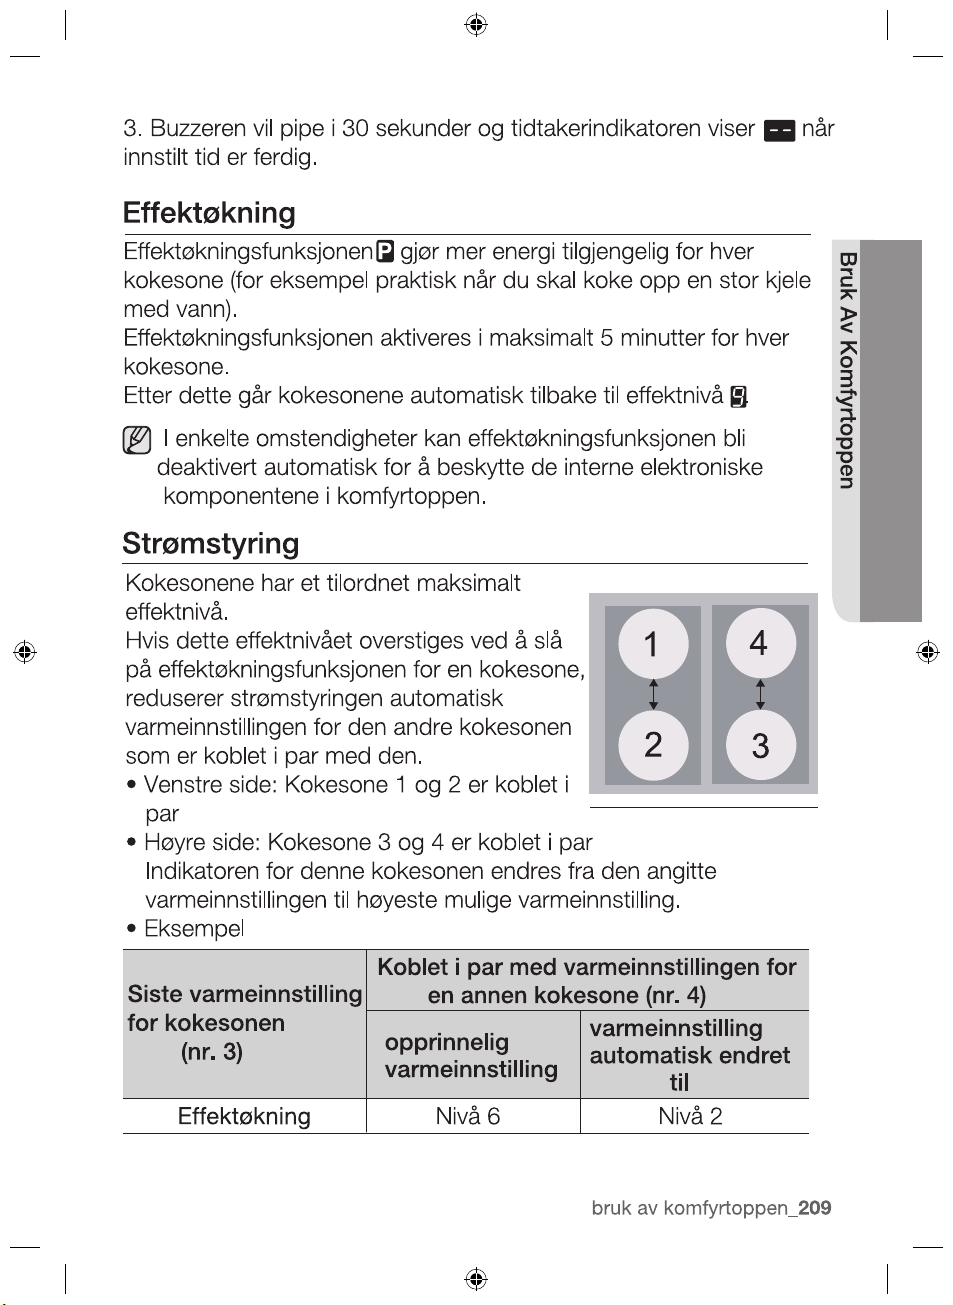
•Left side : No.1 and No.2 is paired
cooking zone
•Right side : No.3 and No.4 is paired cooking zone
The indicator for this cooking zone changes from the heat setting
set to maximum possible heat setting.
•Example
Last heat setting
of cooking zone
(No.3)
Paired another cooking zone’s heat
changed heat
setting
Power Boost 6 level 2 level
2012-11-20
3.
setting time finished.
Buzzer will beeps for 30 seconds and the timer indicator shows
when the
hob use _33
HOB USE
O
riginal heat setting
Automatically
setting (No.4)
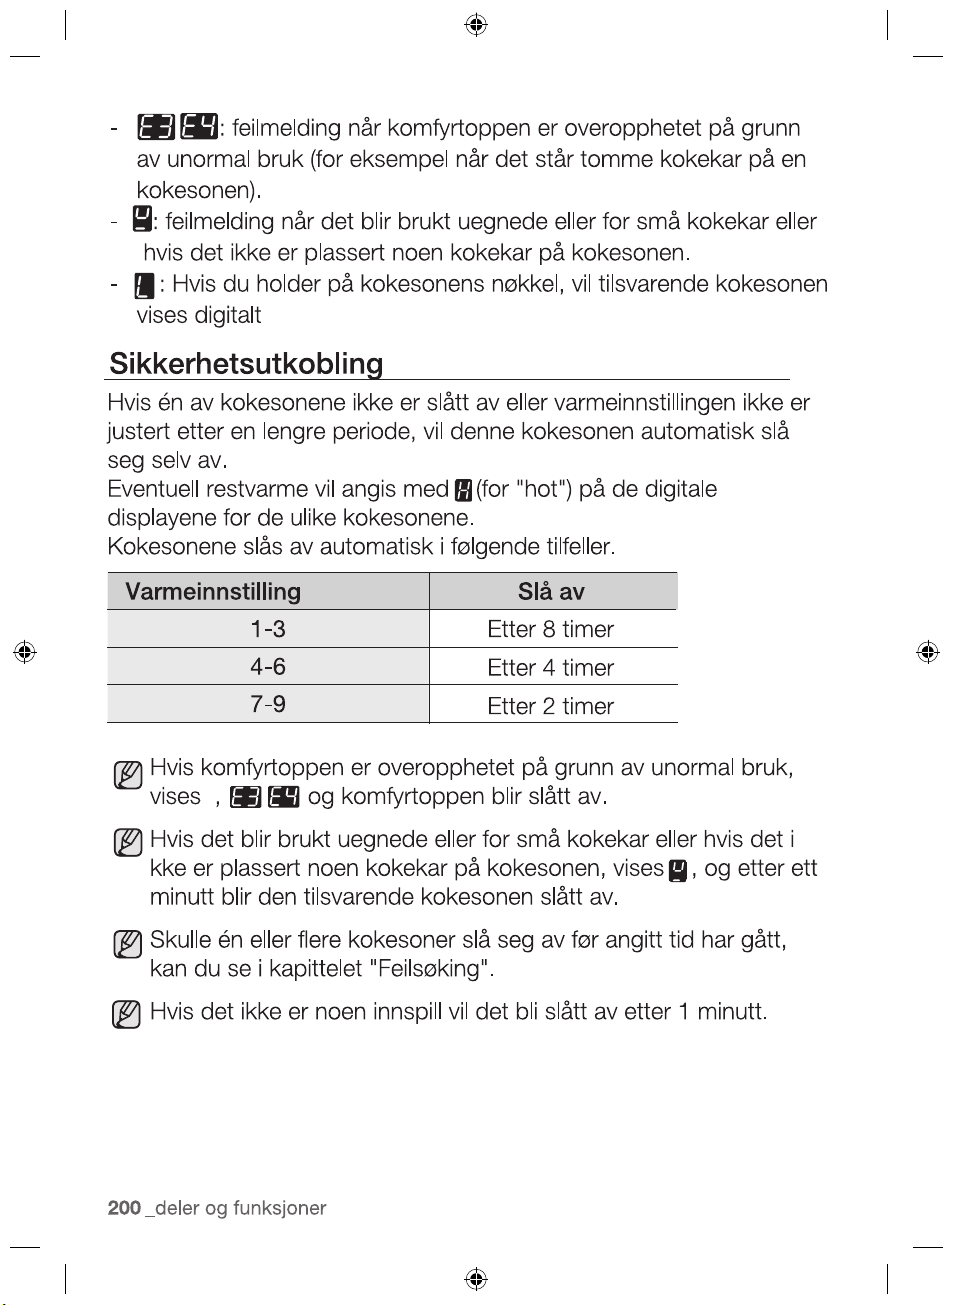
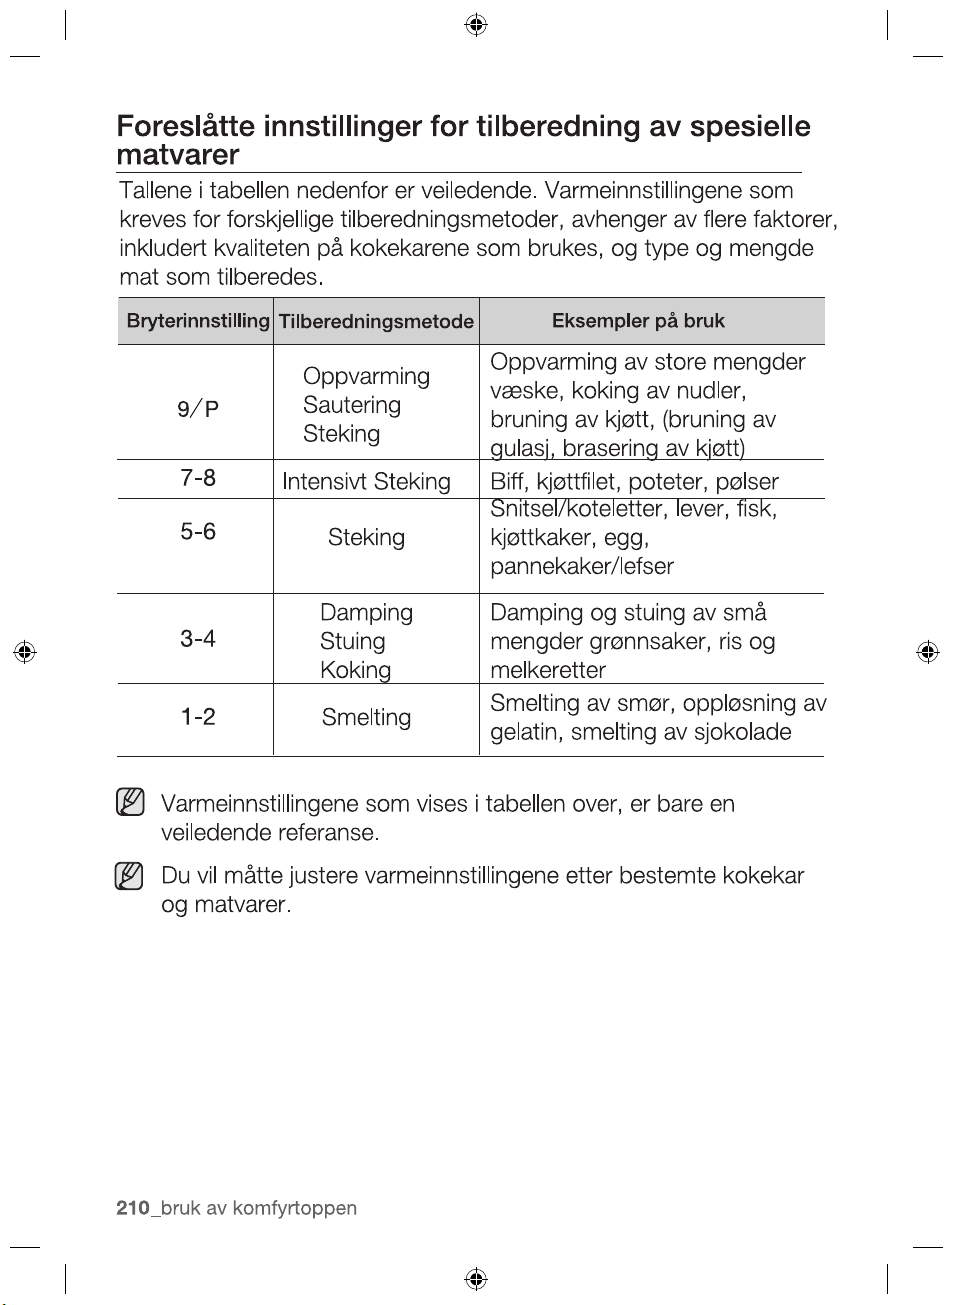
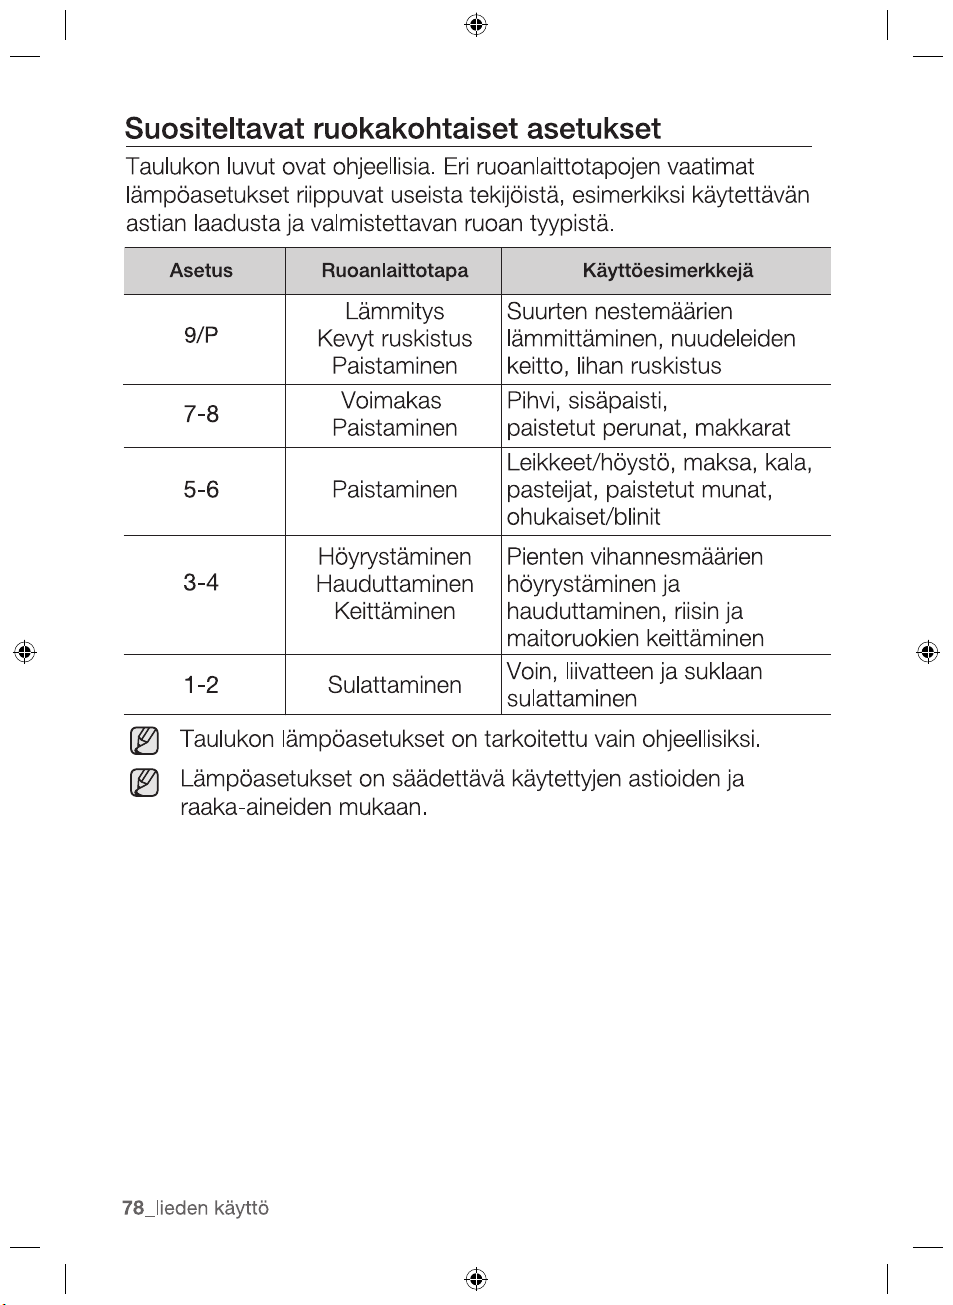
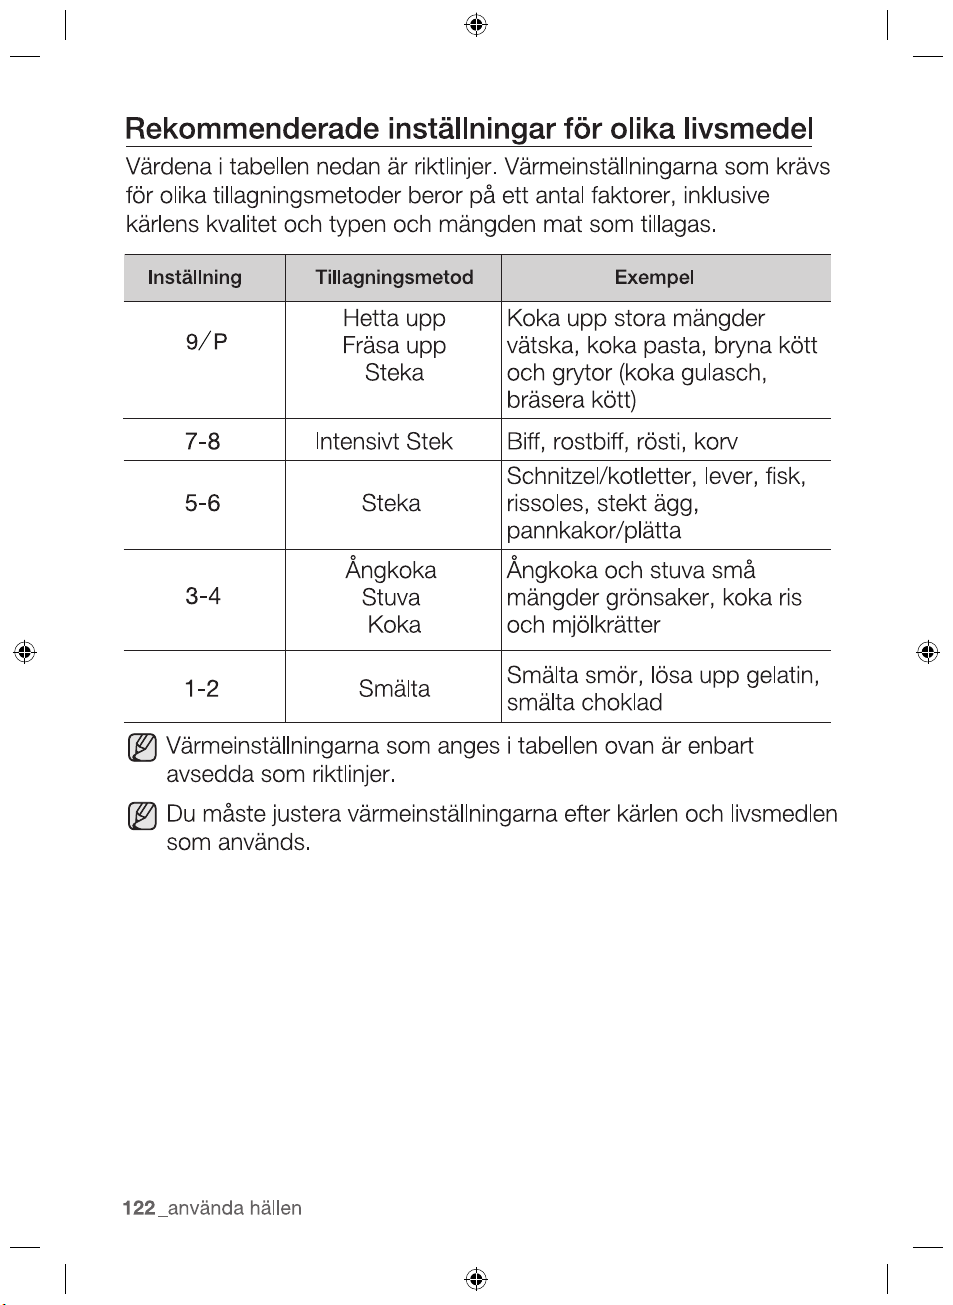
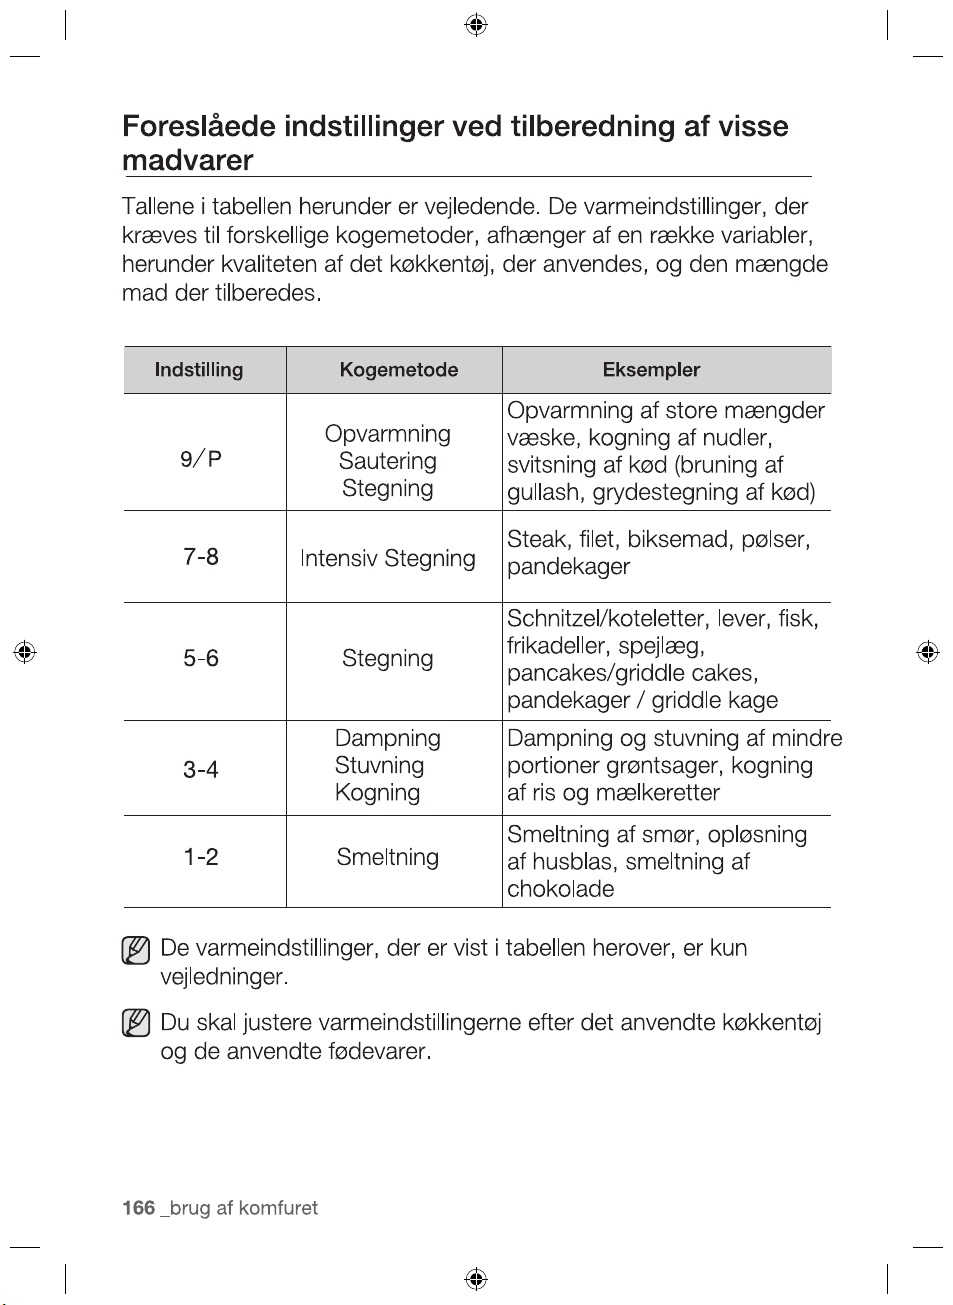
SUGGESTED SETTINGS FOR COOKING
SPECIFIC FOODS
The figures in the table below are guidelines. The heat settings
required for various cooking methods depend on a number of
variables, including the quality of the cookware being used and the
type and amount of food being cooked.
The heat settings indicated in the table above are provided
only as guidelines for your reference.
You will need to adjust the heat settings according to specific
cookware and foods.
2012-11-20
34_ hob use
Switch
Setting
Cooking method Examples for Use
Warming
Sautéing
Frying
Warming large amounts of liquid,
boiling noodles, searing meat,
(browning goulash,braising meat)
7-8
Intensive
Frying
Steak, Srloin, Hash Brown,
5-6 Frying
Schnitzel / chops, Liver, Fish,
Rissoles, Fried egg
3-4
Steaming
Stewing
Steaming and stewing of small
amount of vegetables, Boiling
rice and milk dishes
1-2 Melting
Meltingbutter,dissolvinggelatin,
melting chocolate
9 P
Sausages
pancakes/Griddle cakes
cleaning and care
HOB
Cleaning agents must not come into contact with a heated
ceramic glass surface: All cleaning agents must be removed
with adequate amounts of clean water after cleaning because
they can have a caustic effect when the surface becomes
WARNING
Clean the ceramic glass surface after each use when it is still
warm to the touch. This will prevent spillage from becoming
burnt onto the surface. Remove scales, watermarks, fat
drippings and metallic discolouration with the use of a
commercially available ceramic glass or stainless steel cleaner.
Light Soiling
1. Wipe the ceramic glass surface with a damp cloth.
2. Rub dry with a clean cloth. Remnants of cleaning agent must
not be left on the surface.
3.
Thoroughly clean the entire ceramic glass cooking surface once
a week with a commercially available ceramic glass or stainless
steel cleaner.
4. Wipe the ceramic glass surface using adequate amounts of
clean water and rub dry with a clean lint - free cloth.
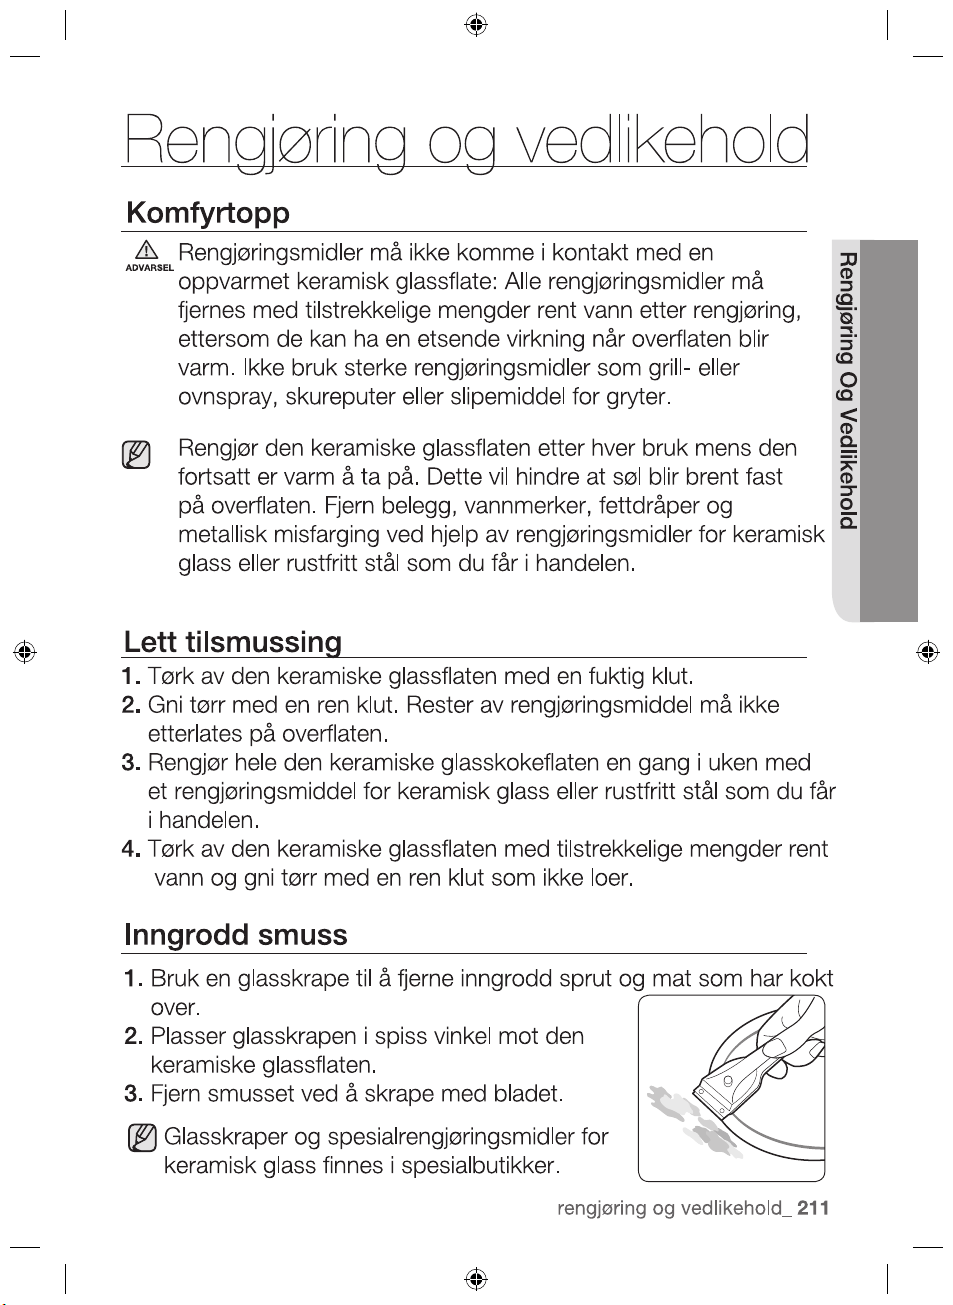
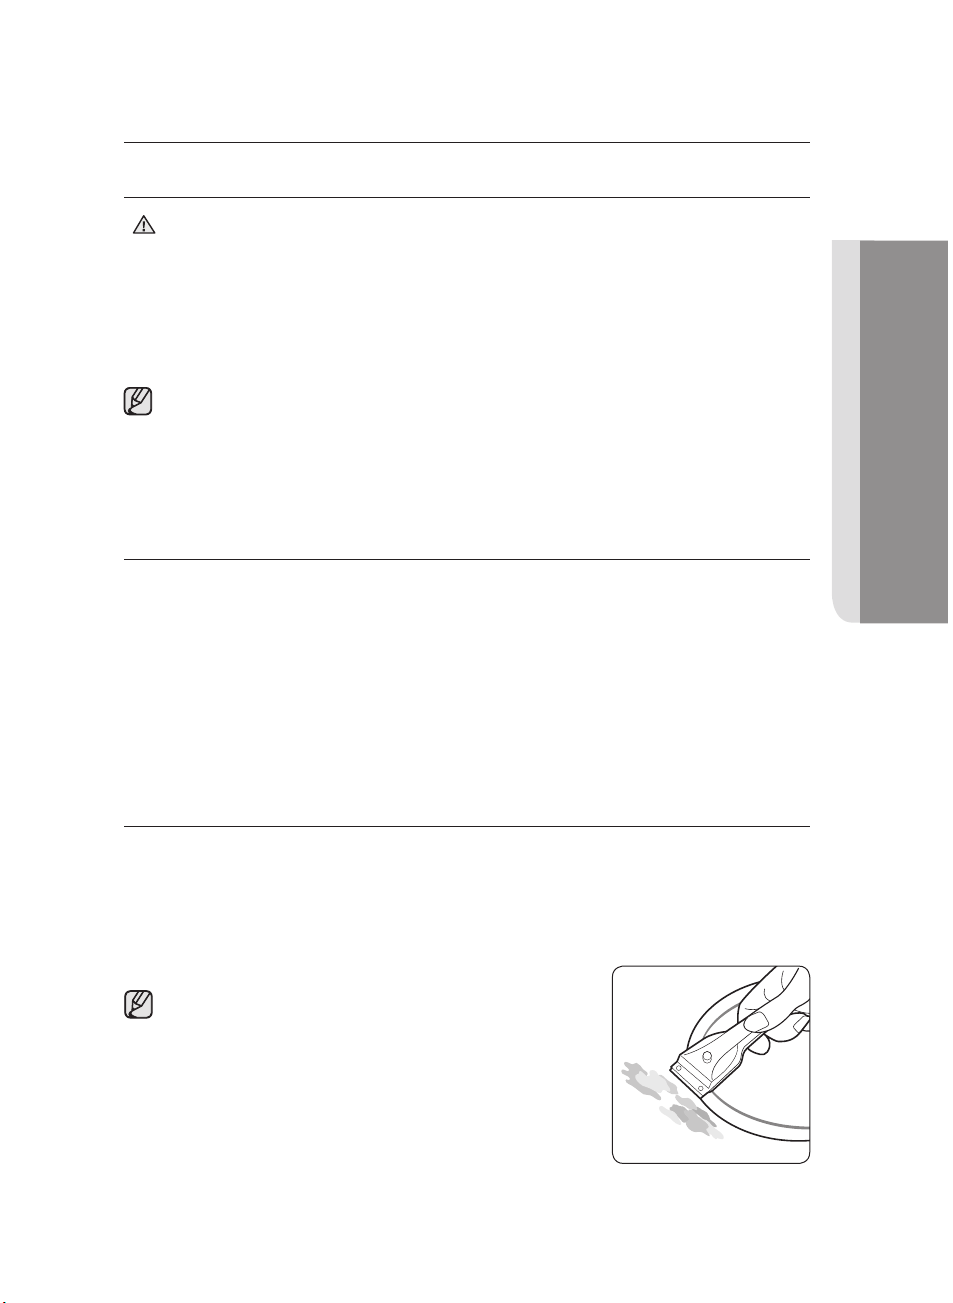
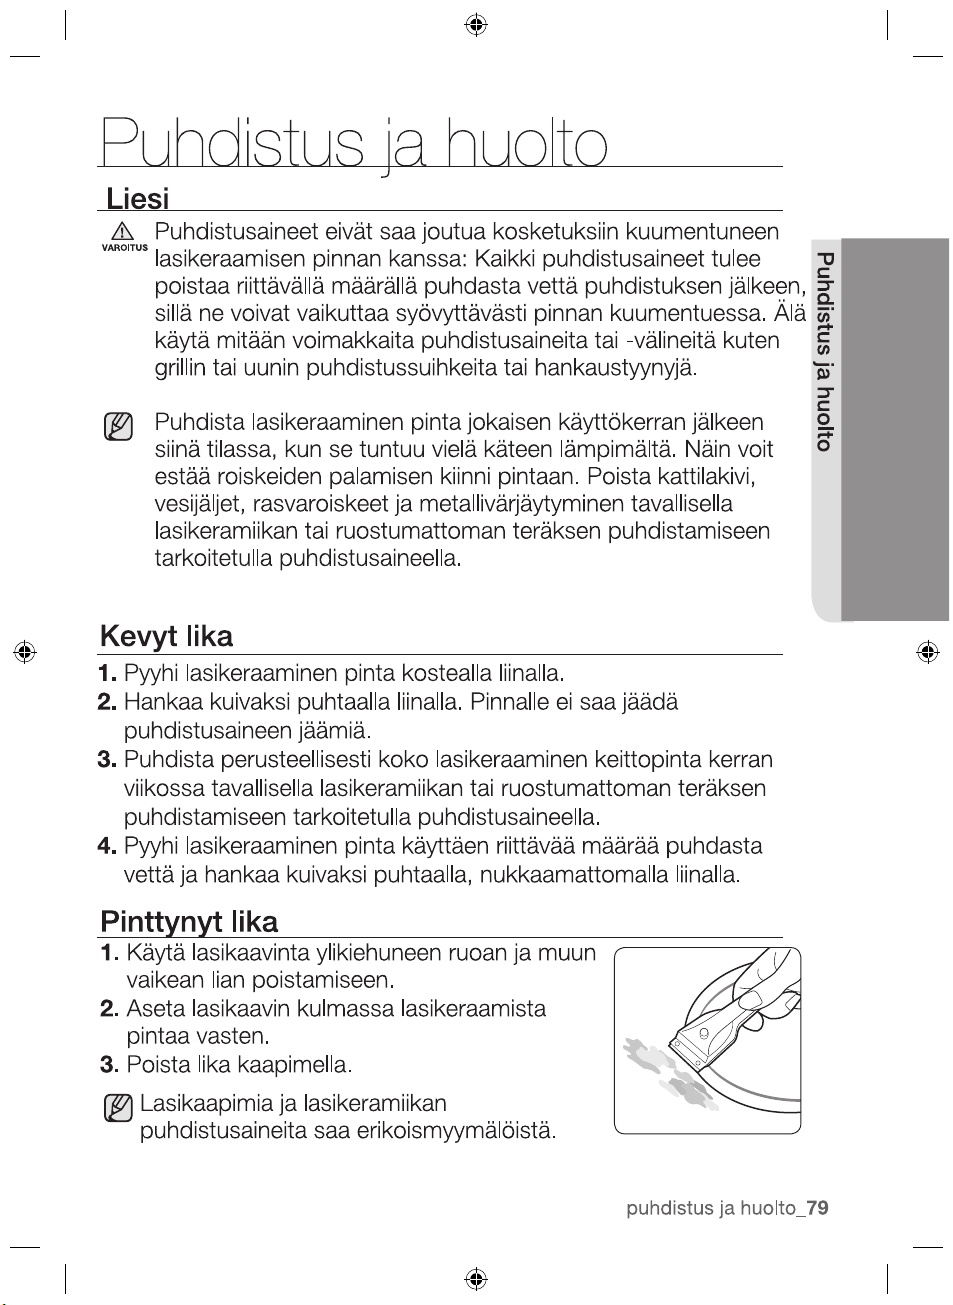
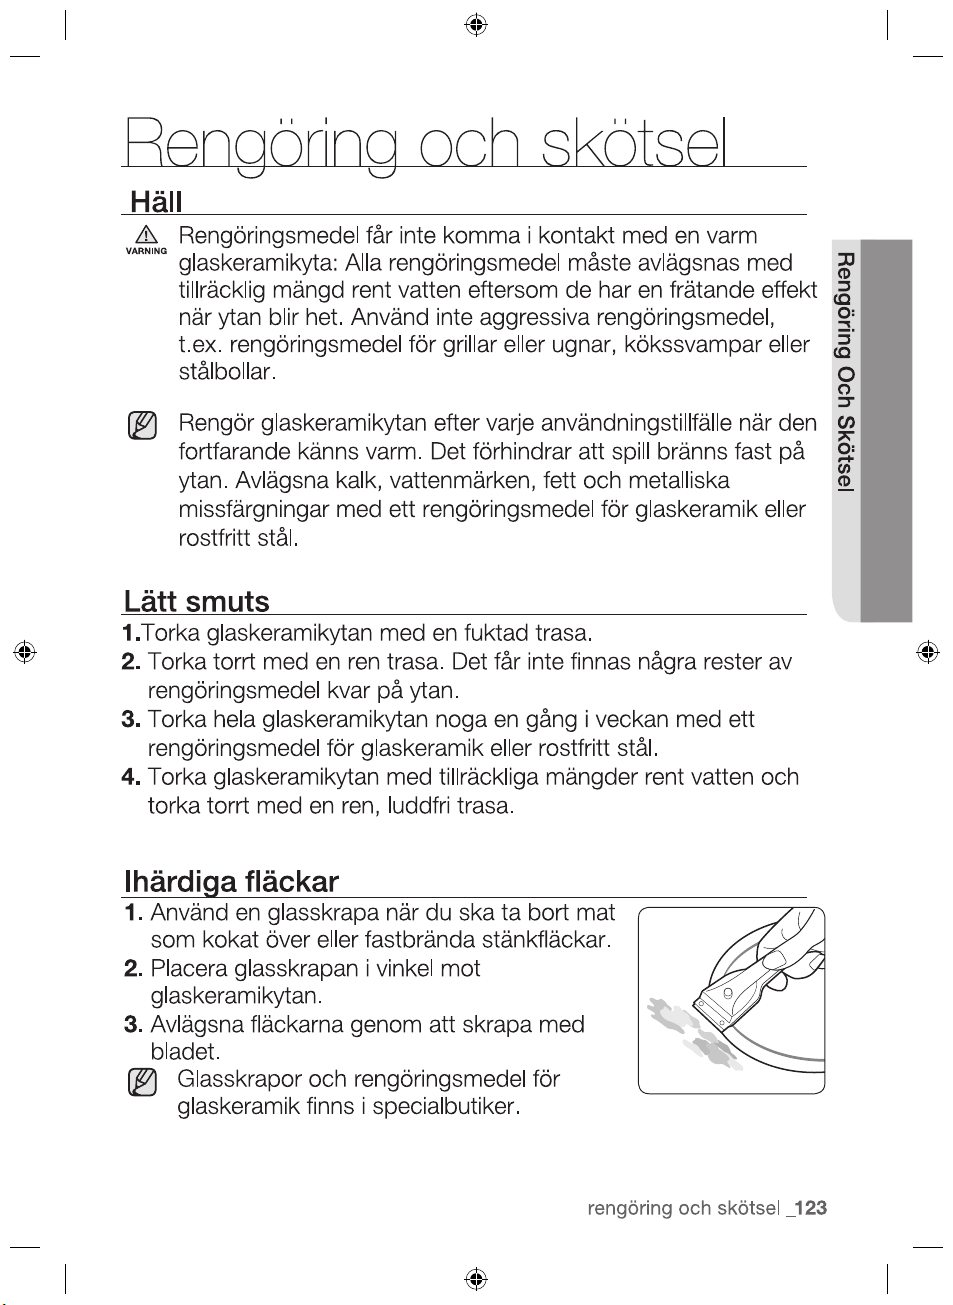
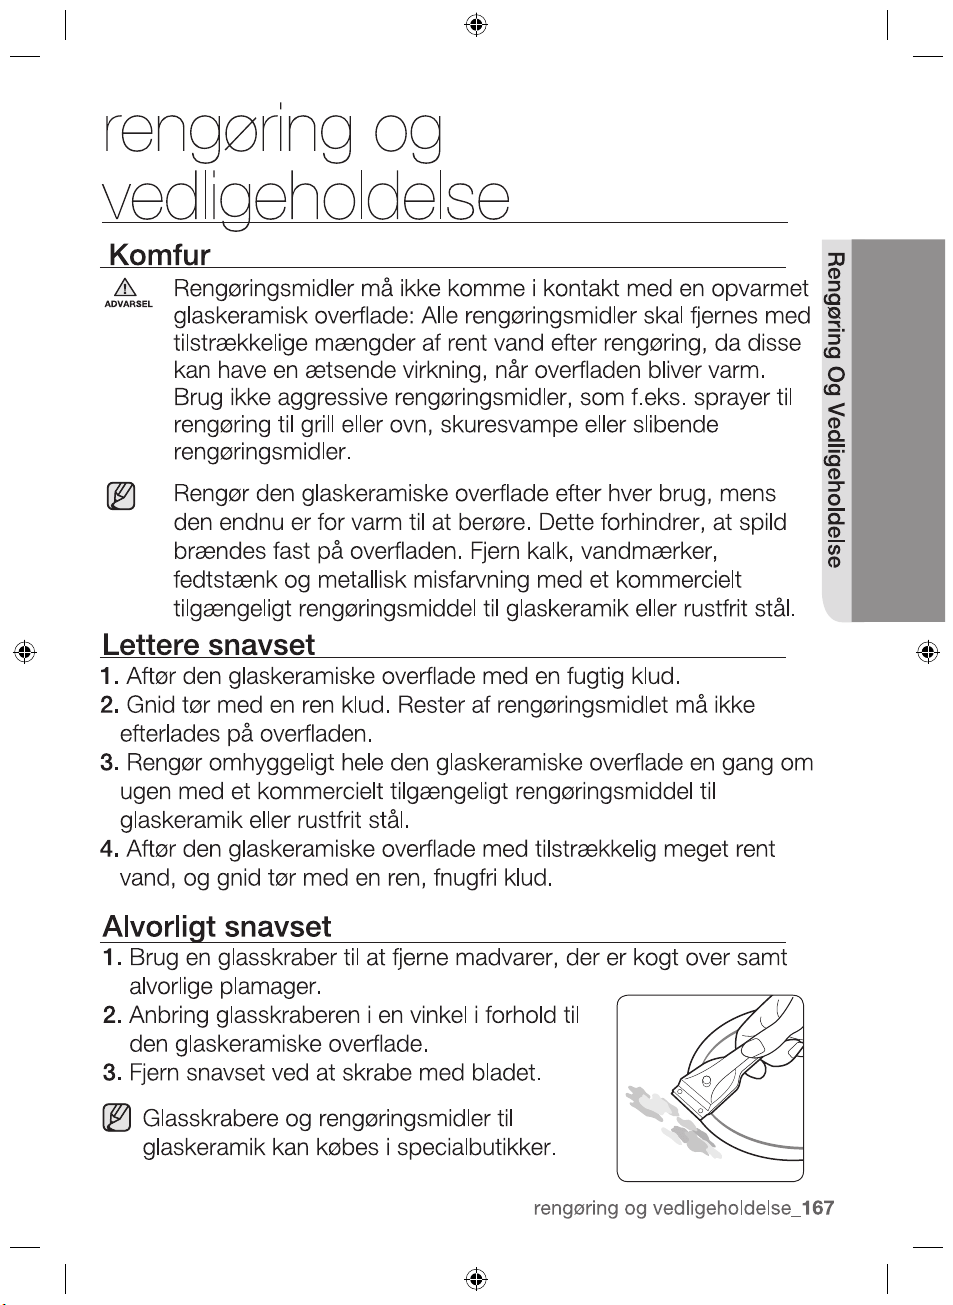
Stubborn Soiling
1. To remove food that has boiled over and stubborn splashes,
use a glass scraper.
2. Place the glass scraper at an angle to the ceramic glass
surface.
3. Remove soiling by scraping with the blade.
Glass scrapers and ceramic glass
cleaners are available from specialty
retailers.
hot. Do not use any aggressive cleaners such as grill or oven
sprays, scouring pads or abrasive pan cleaners.
CLEANING AND CARE
cleaning and care _35
_cleaning and care
36
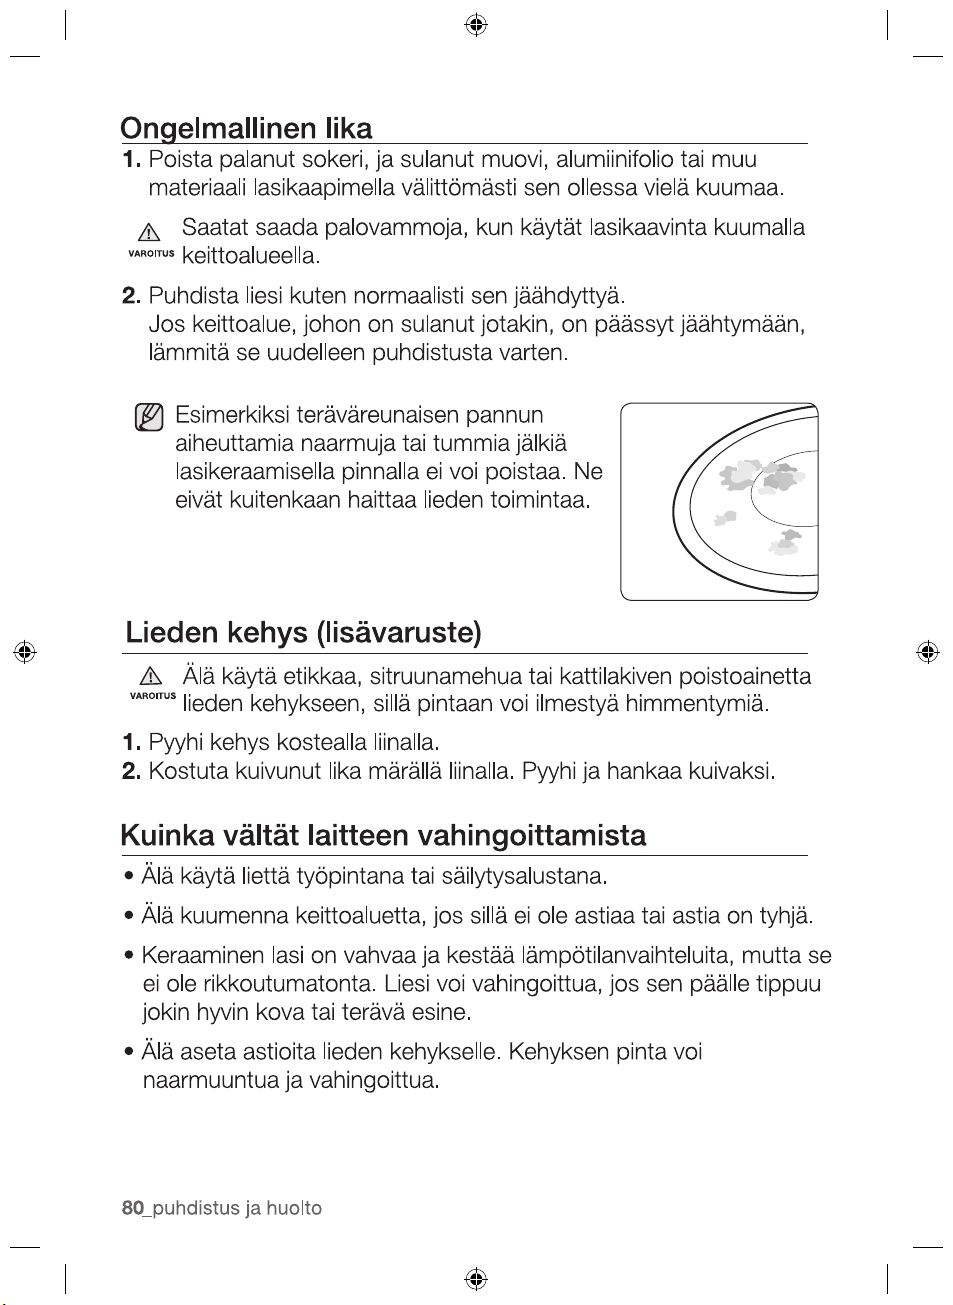
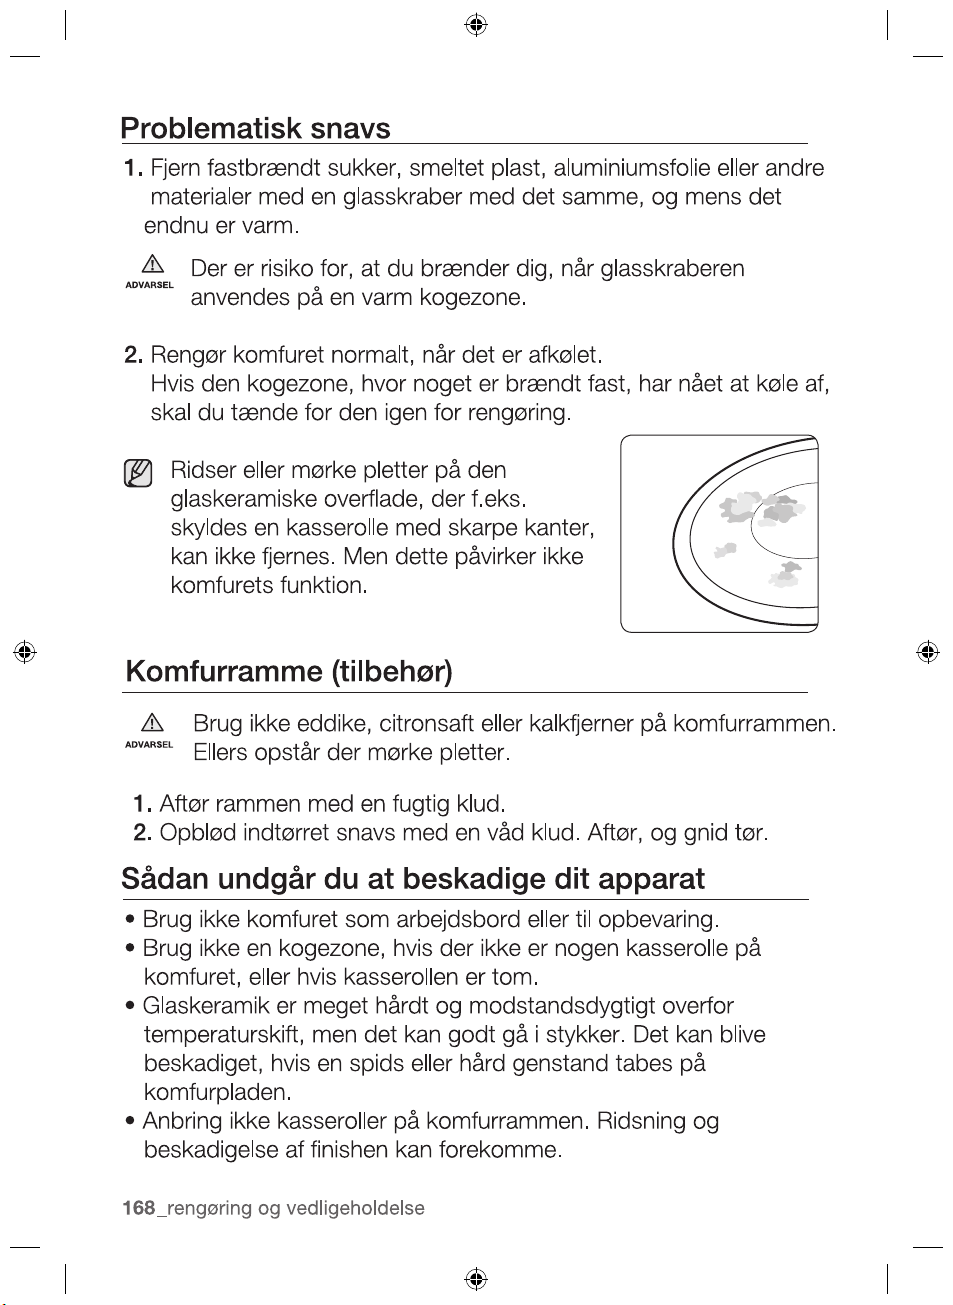
Problem Dirt
1. Remove burnt-on sugar, melted plastic, aluminium foil or other
materials with a glass scraper immediately and while still hot.
There is a risk of burning yourself when the glass scraper is
used on a hot cooking zone:
WARNING
2012-11-20
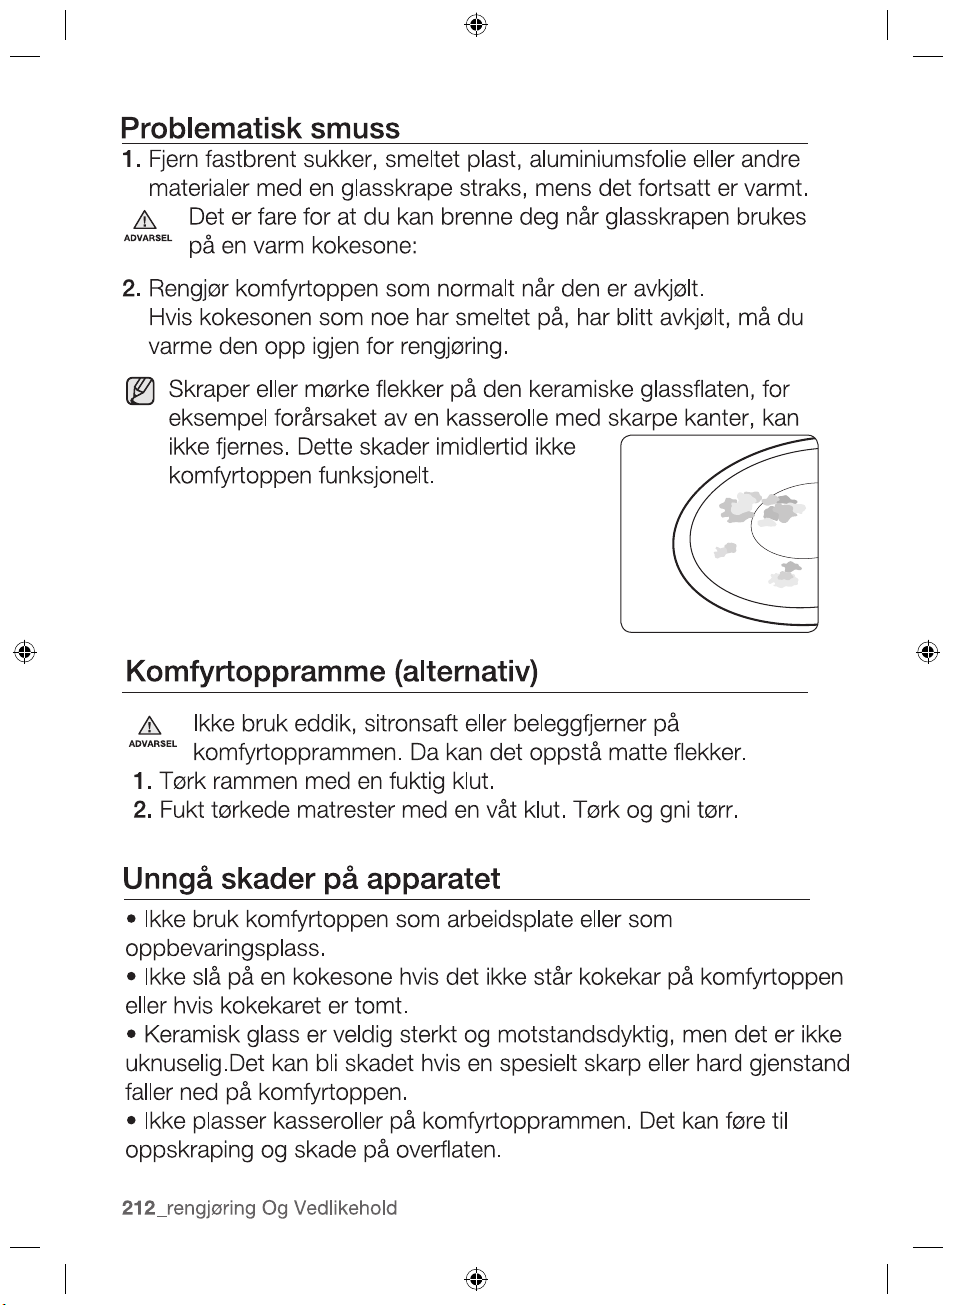
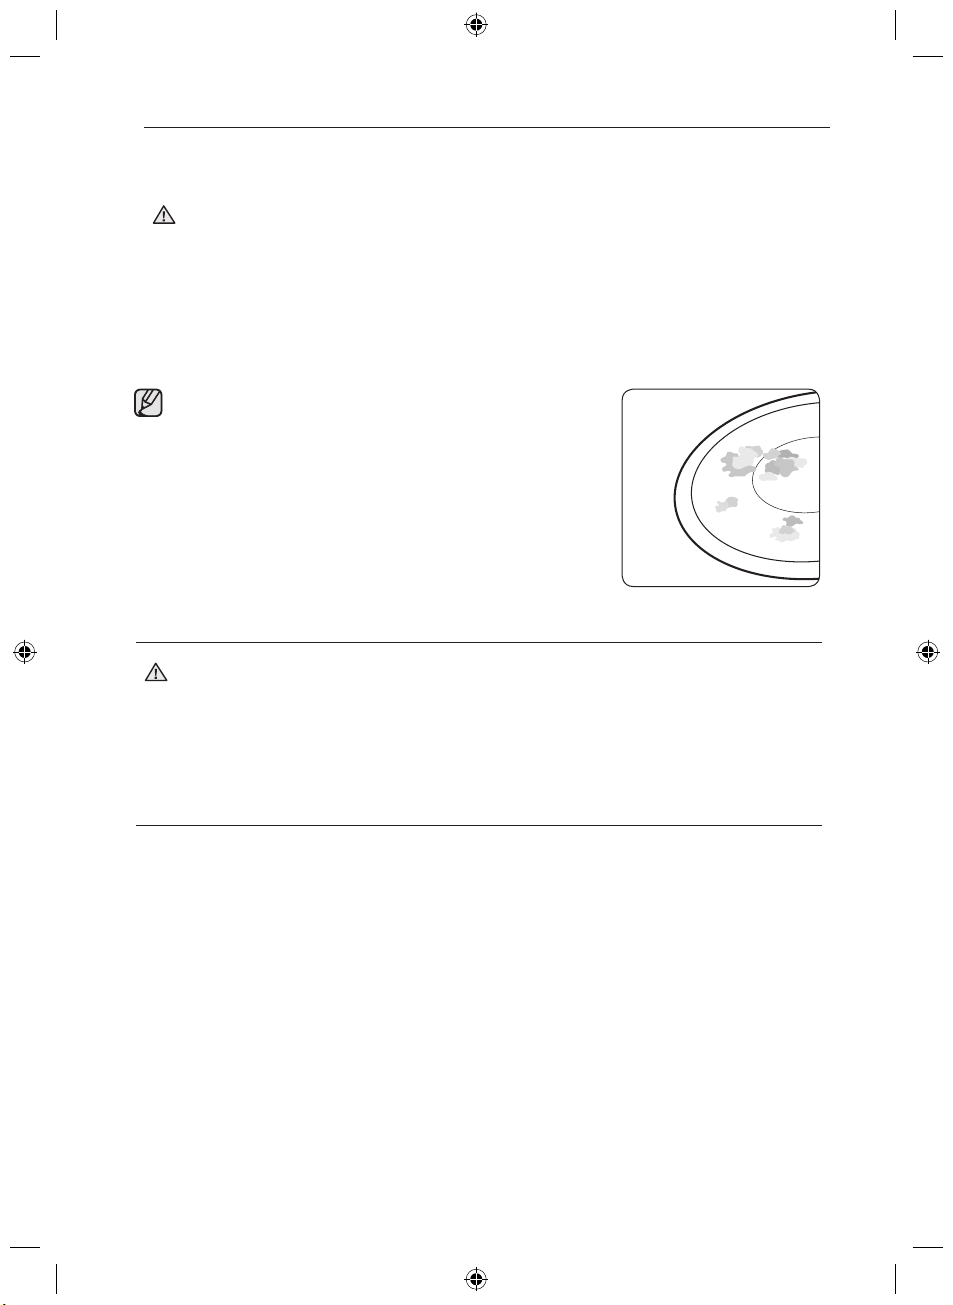
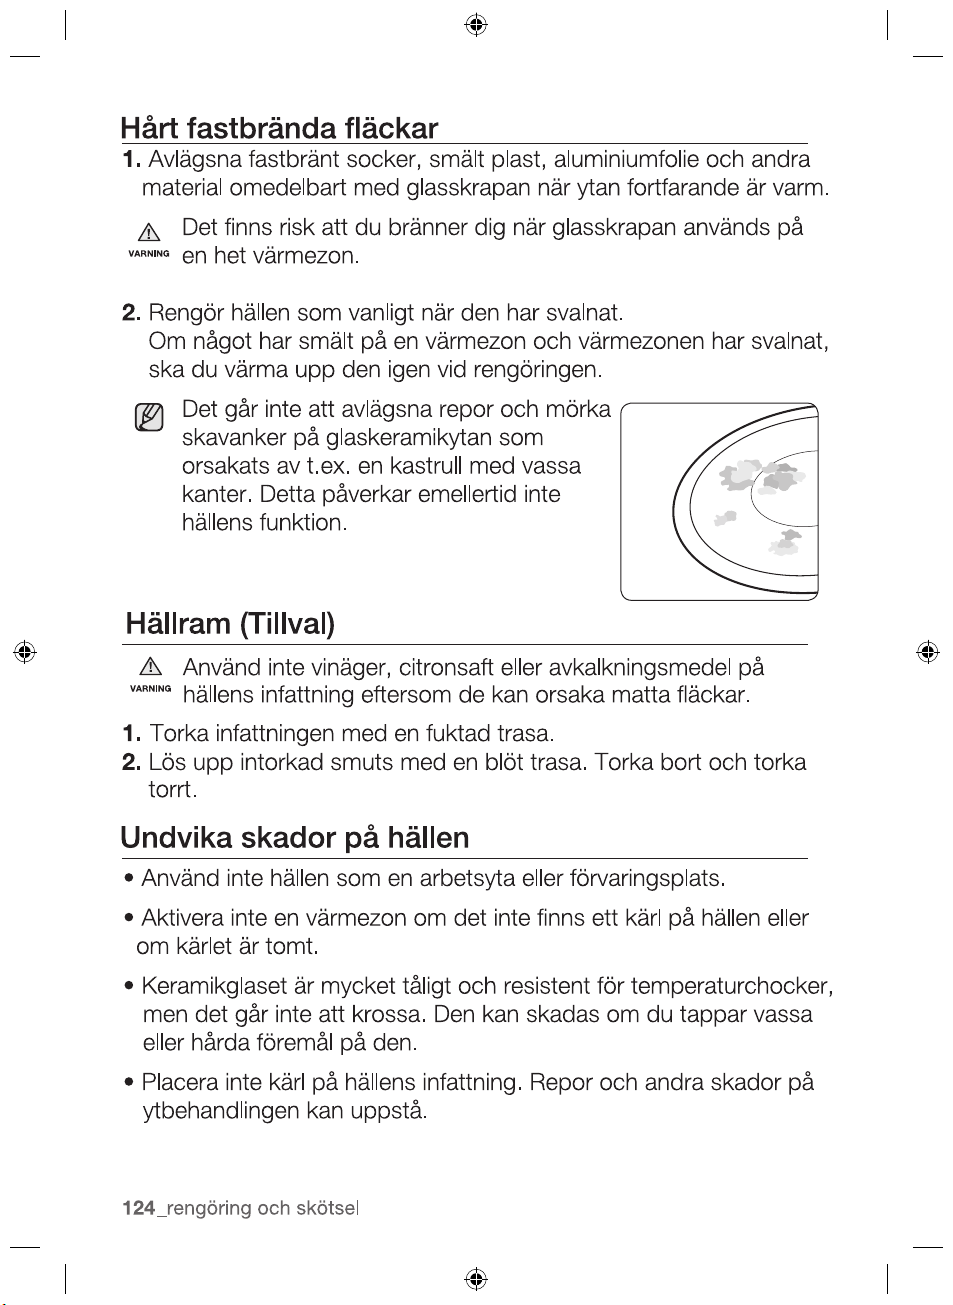
Scratches or dark blemishes on the
ceramic glass surface, caused, for
example, by a pan with sharp edges,
cannot be removed. However, they do not
impair the function of the hob.
HOB FRAME (OPTION)
Do not use vinegar, lemon juice or scale remover on the hob
frame; otherwise dull blemishes will appear.
1. Wipe the frame with a damp cloth.
2. Moisten dried debris with a wet cloth. Wipe and rub dry.
TO AVOID DAMAGING YOUR APPLIANCE
•Do not use the hob as a work surface or for storage.
•Do not operate a cooking zone if there is no pan on the hob or
if the pan is empty.
•Ceramic glass is very tough and resistant to temperature shock,
but it is not unbreakable. It can be damaged by a particularly
sharp or hard object dropping onto the hob.
•Do not place pans on the hob frame. Scratching and damage
to the finish may occur.
•Avoid spilling acidic liquids, for example, vinegar, lemon juice
and descaling agents, onto the hob frame, since such liquids
can cause dull spots.
WARNING
2. Clean the hob as normal when it has cooled down.
If the cooking zone on which something has melted has been
allowed to cool, warm it up again for cleaning.
•If sugar or a preparation containing sugar comes into contact
with a hot cooking zone and melts, it should be cleaned off
immediately with a kitchen scraper while it is still hot. If allowed
to cool, it may damage the surface when removed.
•Keep all items and materials that could melt, for example,
plastics, aluminium foil and oven foils, away from the ceramic
glass surface. If something of this nature melts onto the hob, it
must be removed immediately with a scraper.
CLEANING AND CARE
2012-11-20
cleaning and care _37
38_ warranty and service
warranty and service
FAQS AND TROUBLESHOOTING
A fault may result from a minor error that you can correct yourself
with the help of the following instructions. Do not attempt any
further repairs if the following instructions do not help in each
specific case.
Repairs to the appliance are to be performed only by a
qualified service technician. Improperly effected repairs may
result in considerable risk to the user. If your appliance needs
repair, please contact your customer service centre.
What should I do if the cooking zones are not functioning?
Check for the following possibilities:
•The fuse in the house wiring (fuse box) is intact. If the fuses trip
a number of times, call an authorised electrician.
•The appliance is properly switched on.
•The control indicators in the control panel are illuminated.
•The cooking zone is switched on.
•The cooking zones are set at the desired heat settings.
What should I do if the cooking zones will not switch on?
Check for the following possibilities:
•A period of more than 1 minute has elapsed between when
the On/Off button was actuated and the desired cooking zone
switches on (see the section “Switching the appliance on”).
•The control panel is partially covered by a damp cloth or liquid.
What should I do if the display except for the residual
warmth indicator suddenly disappears?
This could be a result of one of two possibilities:
•The On/Off sensor was accidentally actuated.
•The control panel is partially covered by a damp cloth or liquid.
WARNING
2012-11-20
warranty and service _39
WARRANTY AND SERVICE
What should I do if, after the cooking zones have been
Check for the following possibility:
•The cooking zone was only briefly used and therefore did not
become hot enough. If the cooking zone is hot, please call the
customer service centre.
What should I do if the cooking zone will not switch on or off?
This could be due to one of the following possibilities:
•The control panel is partially covered by a damp cloth or liquid.
•The child safety lock is on.
What should I do if the display is illuminated?
What should I do if the
display is illuminated?
Check for the following:
•Cookware is unsuitable or too small or no cookware has been
placed on the cooking zone
•
If you use suitable cookware, displayed message will automatically
disapear.
What should I do if the cooling fan runs after the hob is
turned off?
Check for the following:
2012-11-20
Check for the following:
The hob is overheated because of abnormal operation.
After hob is cooled down, press the “On/Off” control
sensor for resetting.
•
•
•
If you request a service call because of an error made in operating
the appliance, the visit from the customer service technician may
incur a charge even during the warranty period.
continue to run 1 minute by itself for cooling down.
When you have fnished using the hob, the cooling fan will
switched off, residual warmth is not indicated in the display?

40_ warranty and service
SERVICE
Before calling for assistance or service, please check the section
“Troubleshooting.”
If you still need help, follow the instructions below.
Is it a technical fault?
If so, please contact your customer service centre.
Always prepare in advance for the discussion. This will ease the
process of diagnosing the problem and also make it easier to
decide if a customer service visit is necessary.
Please take note of the following information.
•What form does the problem take?
•Under what circumstances does the problem occur?
When calling, please know the model and serial number of your
appliance. This information is provided on the rating plate as
follows:
•Model description
•S/N code (15 digits)
We recommend that you record the information here for easy
reference.
Model:
Serial number:
When do you incur costs even during the warranty period?
•lf you could have remedied the problem yourself by applying
one of the solutions provided in the section “Troubleshooting”.
•lf the customer service technician has to make several service
calls because he was not provided with all of the relevant
information before his visit and as a result, for example, has to
make additional trips for parts. Preparing for your phone call as
described above will save you the cost of these trips.
2012-11-20
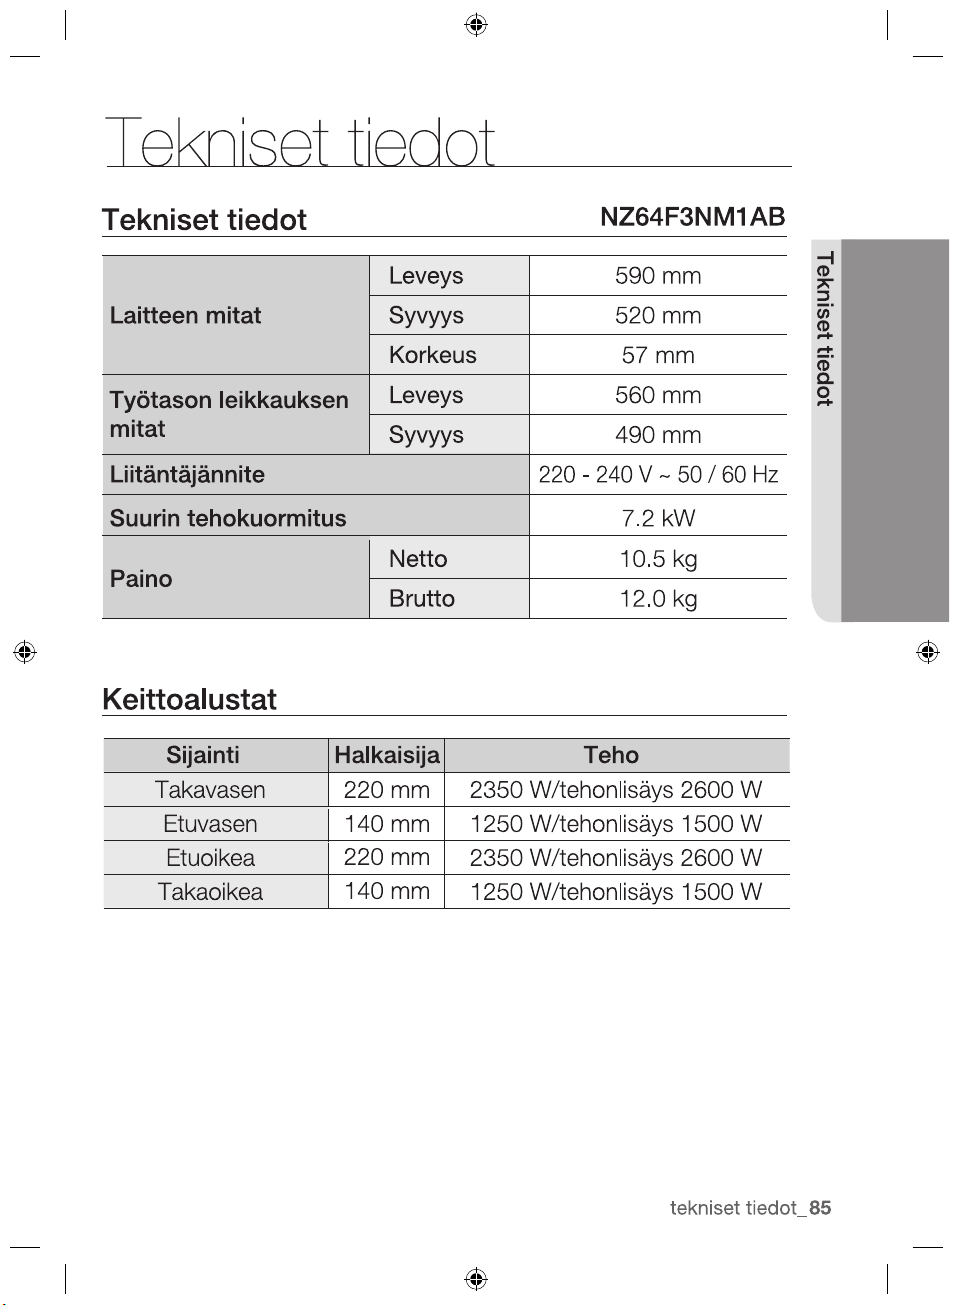
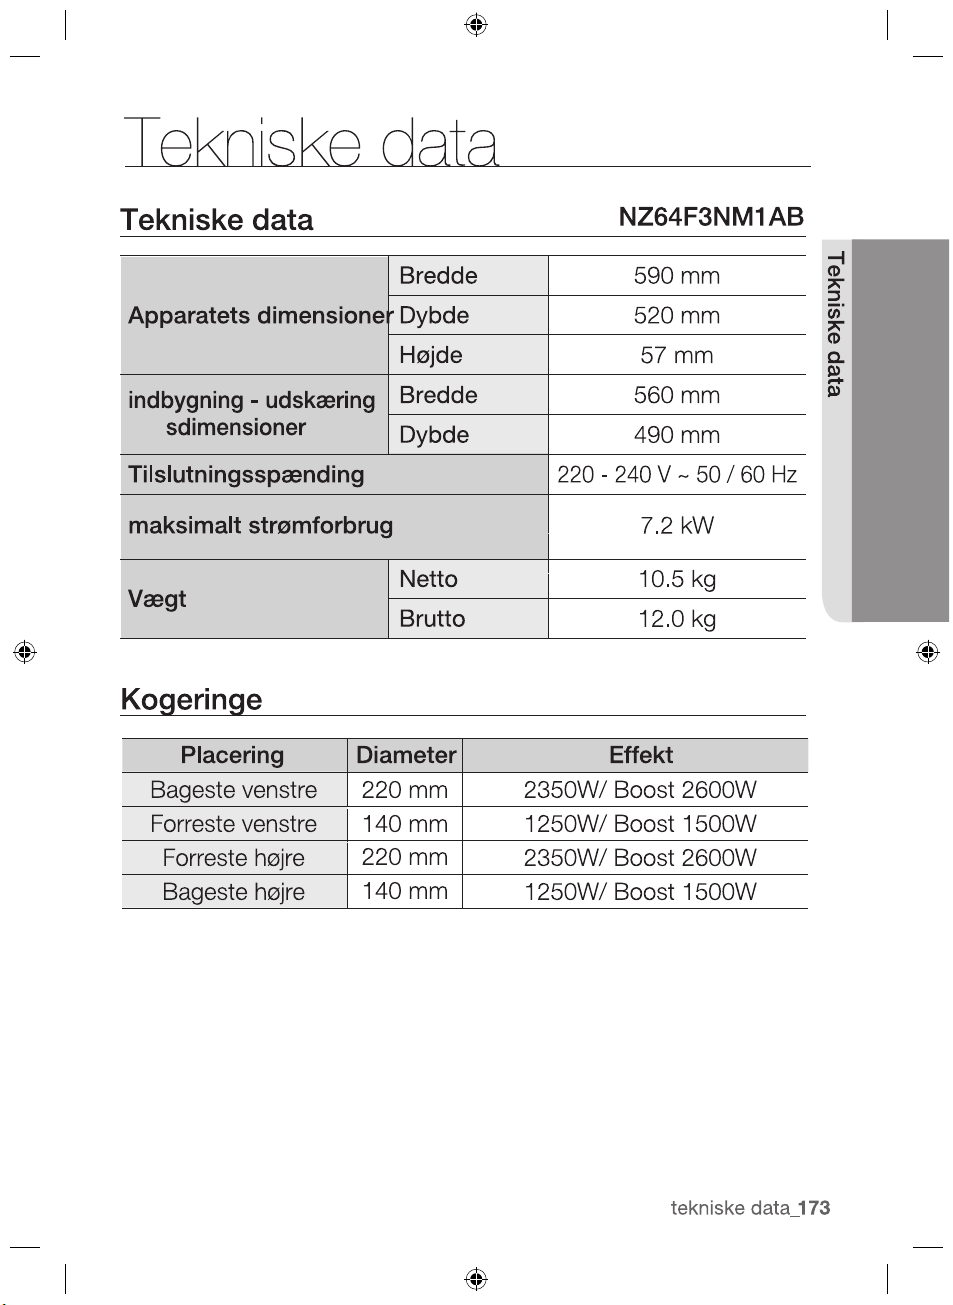
technical data _41
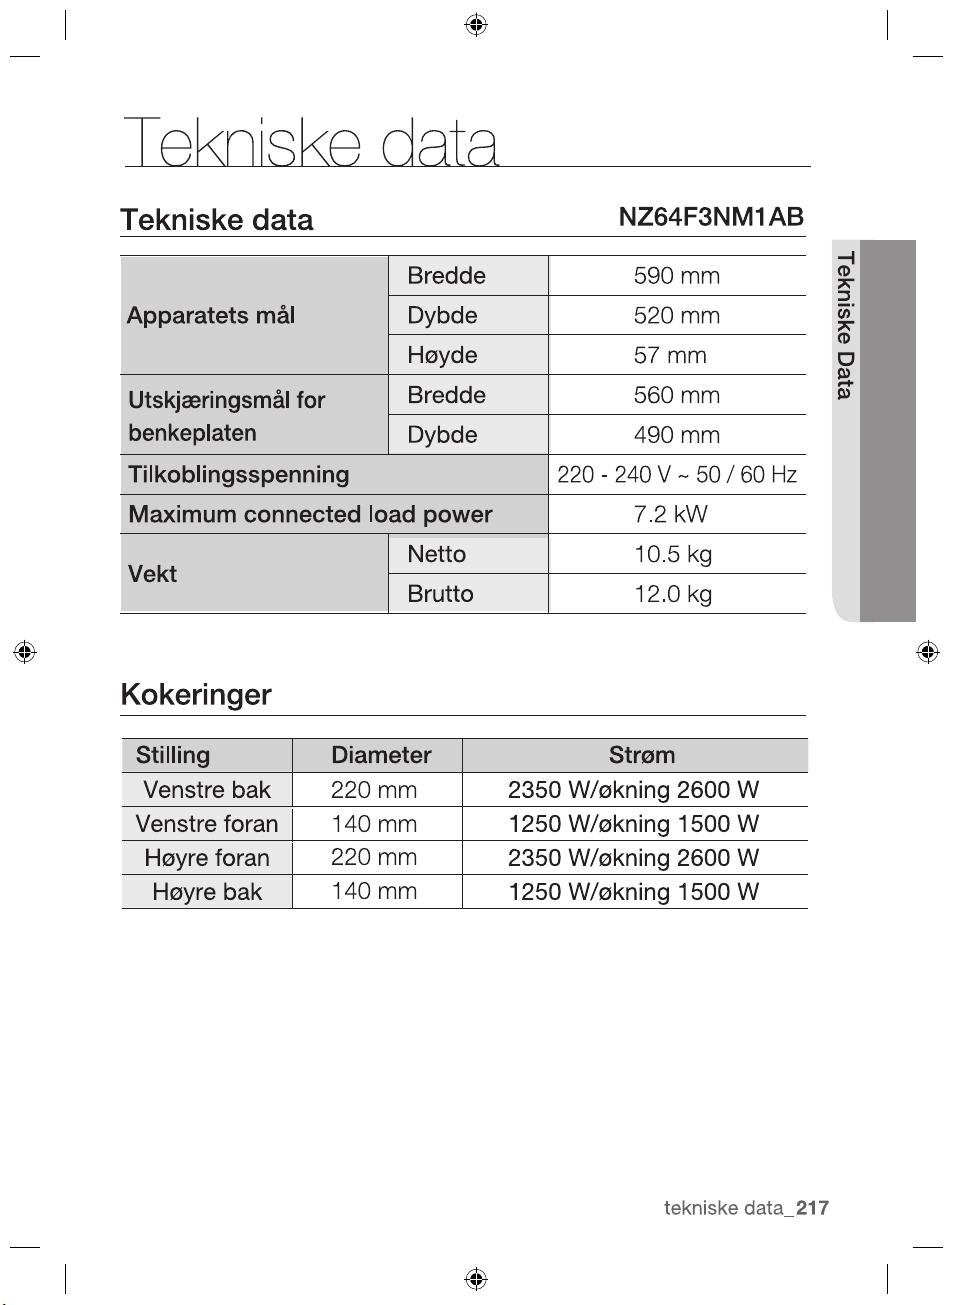
TECHNICAL DATA
technical data
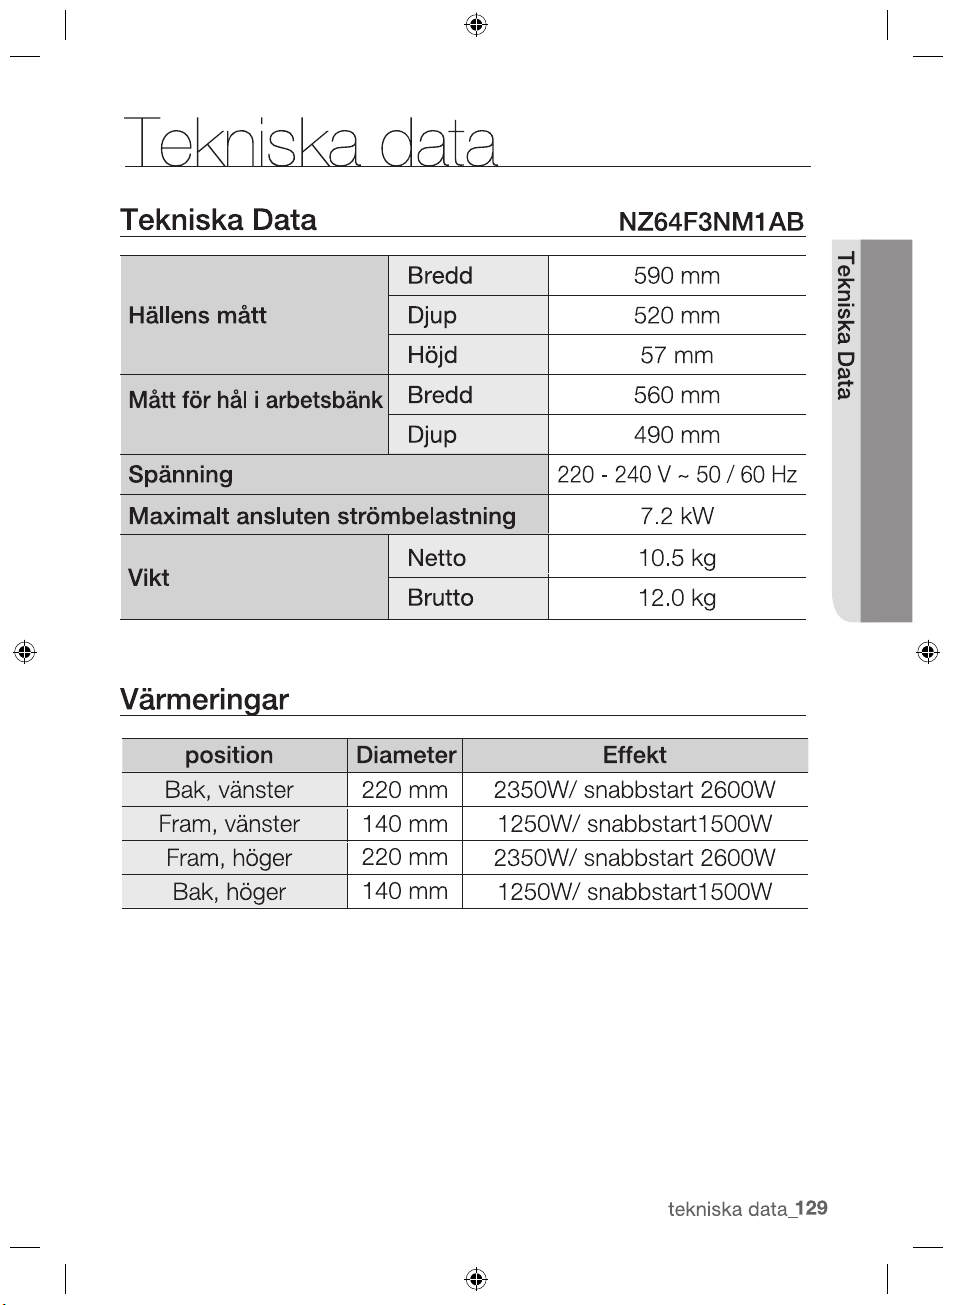
TECHNICAL DATA
Appliance dimensions
Width 590 mm
Depth 520 mm
Height 57 mm
Worktop cut - out
dimensions
Width 560 mm
Depth 490 mm
Connection voltage
220 - 240 V ~ 50 / 60 Hz
Maximum connected load power 7.2 kW
Weight
Net 10.5 kg
Gross 12.0 kg
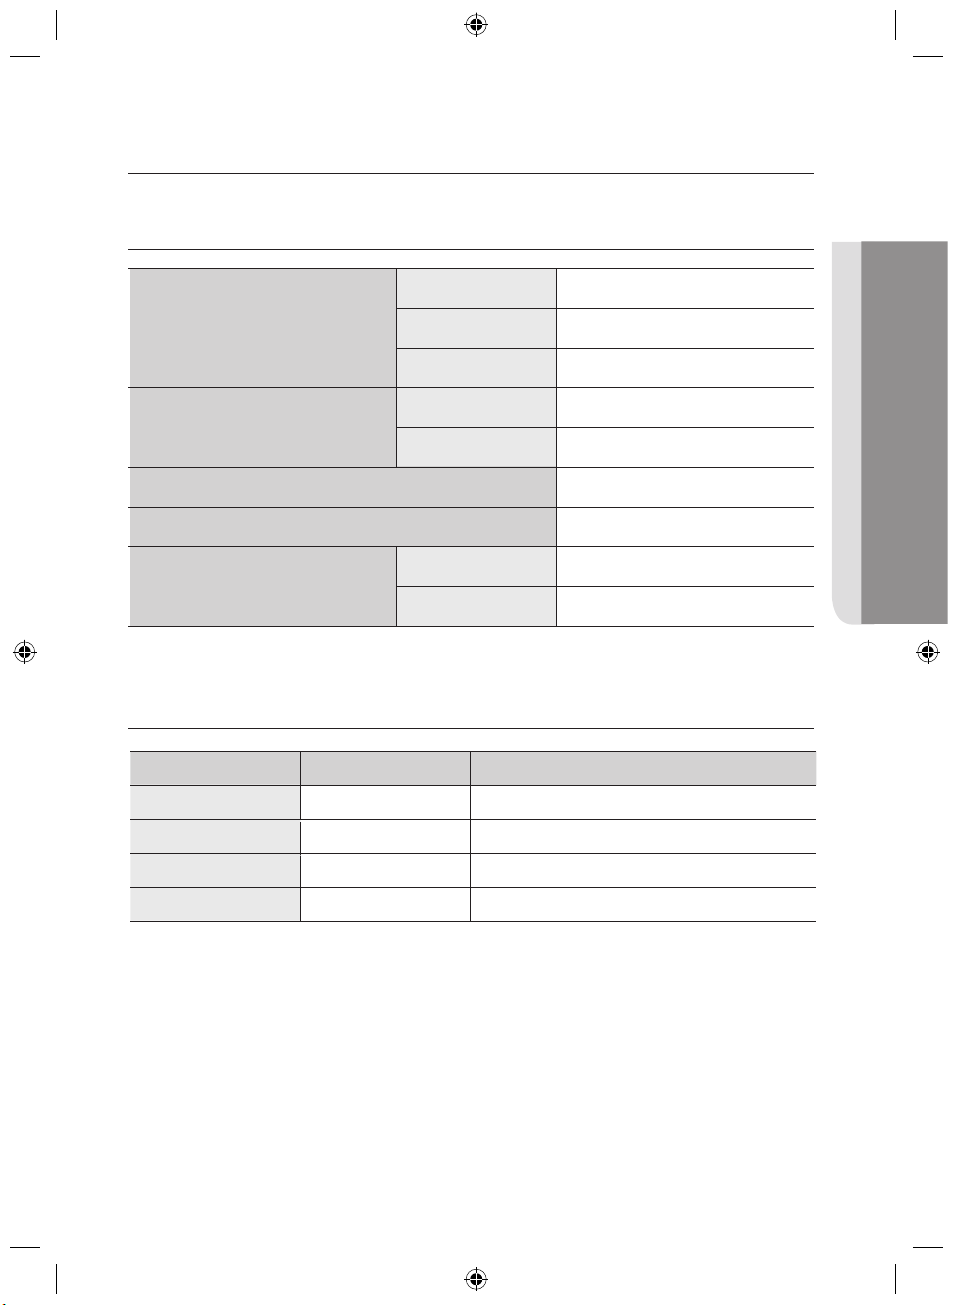
COOKING ZONES
Position Diameter Power
Rear left 220 mm
2350 W / Boost 2600 W
Front left
140 mm
Front right
2350 W / Boost 2600 W
Rear right
220 mm
140 mm
NZ64F3NM1AB
1250 W / Boost 1500 W
1250 W / Boost 1500 W

note
2012-11-20

note
2012-11-20
2012-11-20
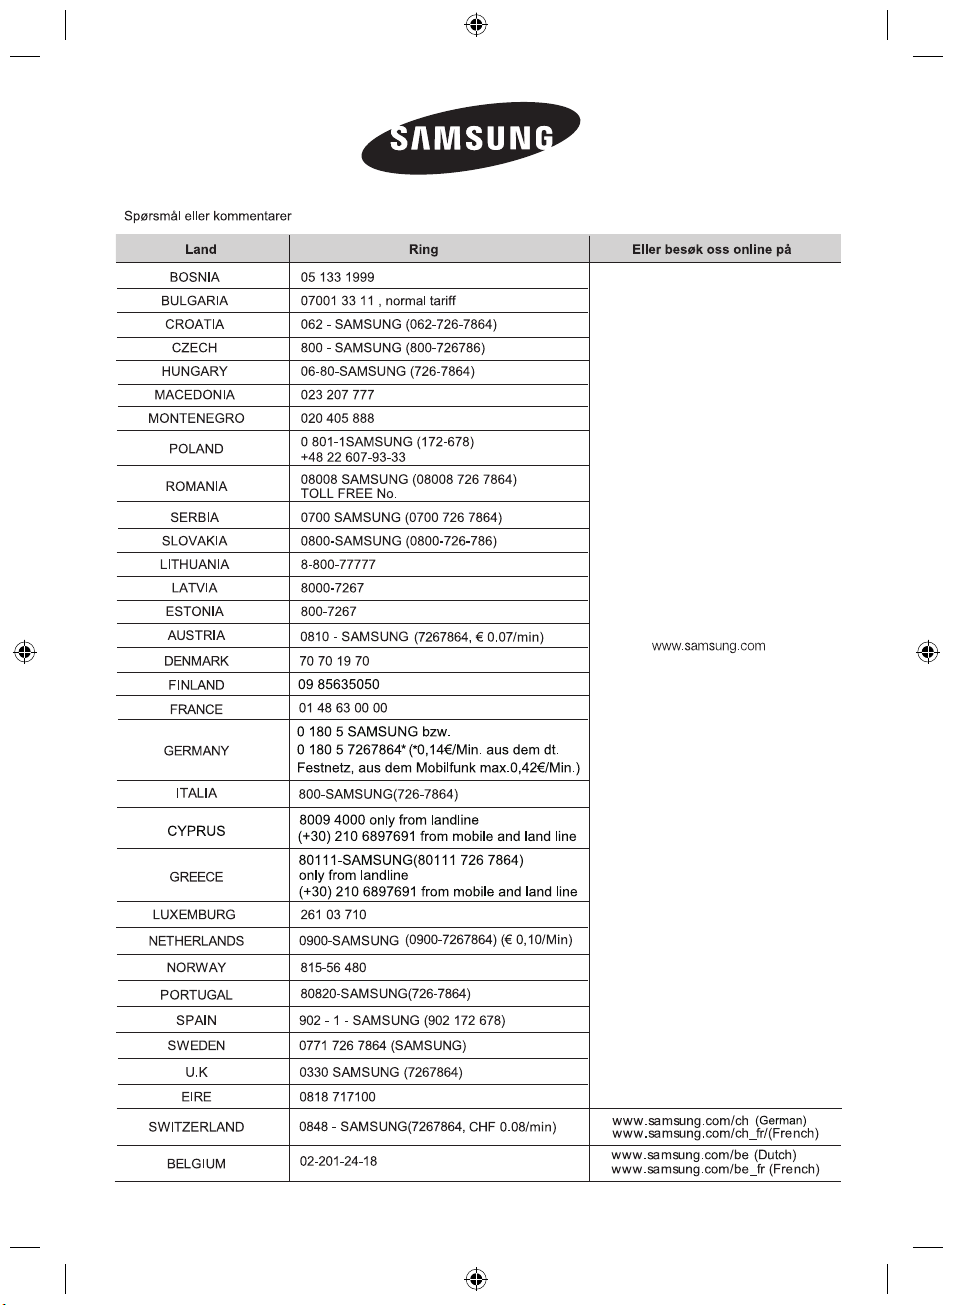
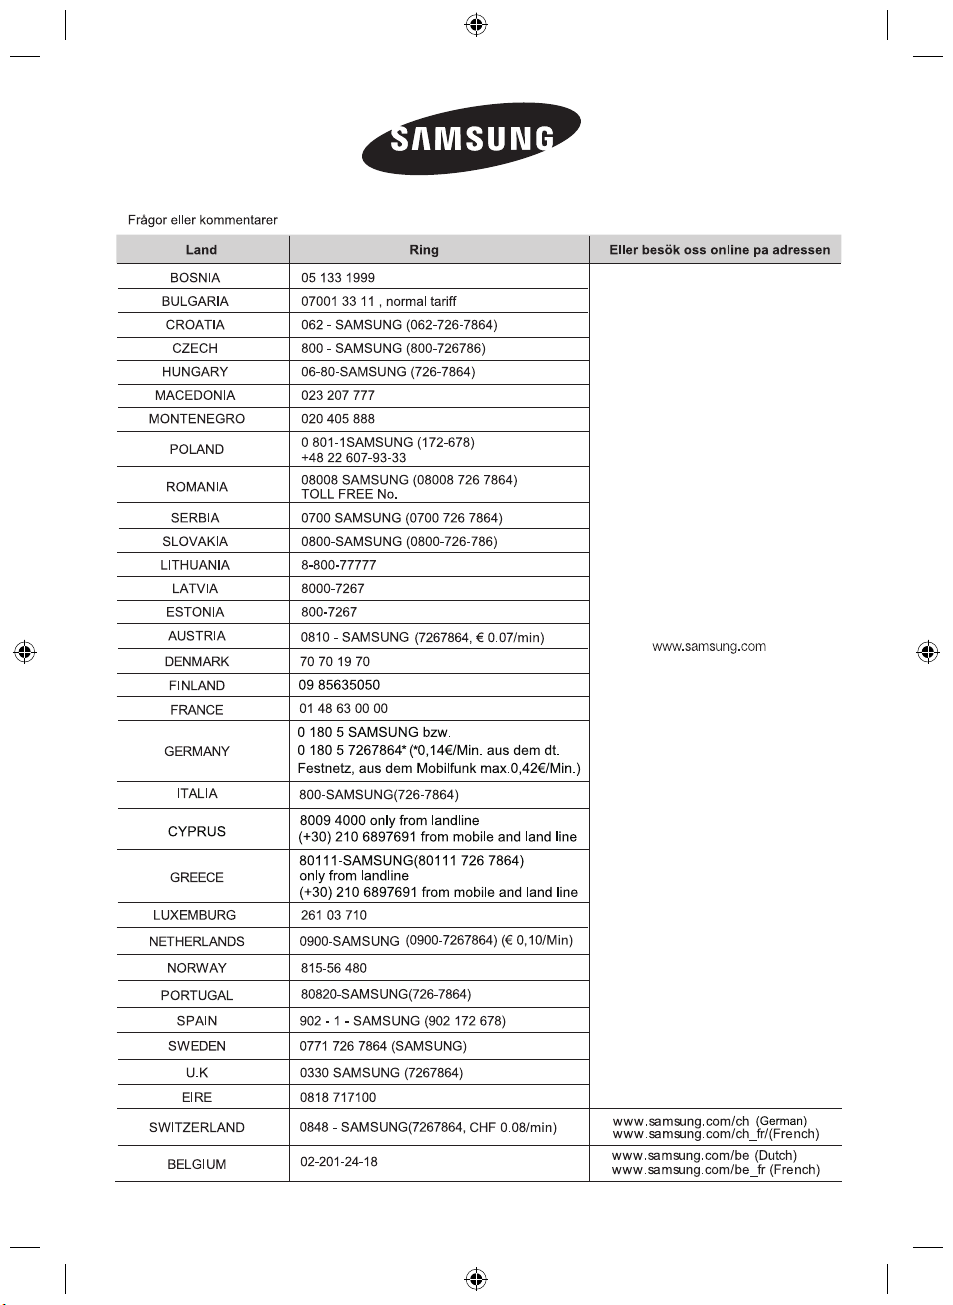
BOSNIA 05 133 1999
CROATIA 062 - SAMSUNG (062-726-7864)
CZECH 800 - SAMSUNG (800-726786)
POLAND
0 801-1SAMSUNG (172-678)
+48 22 607-93-33
ROMANIA
08008 SAMSUNG (08008 726 7864)
TOLL FREE No.
SERBIA 0700 SAMSUNG (0700 726 7864)
LATVIA 8000-7267
ESTONIA 800-7267
www.samsung.com
DENMARK 70 70 19 70
FINLAND
FRANCE
01 48 63 00 00
GERMANY
GREECE
ITALIA
LUXEMBURG 261 03 710
NETHERLANDS
0900-SAMSUNG
(0900-7267864) (€ 0,10/Min)
NORWAY 815-56 480
PORTUGAL
80820-SAMSUNG(726-7864)
SPAIN 902 - 1 - SAMSUNG (902 172 678)
SWEDEN 0771 726 7864 (SAMSUNG)
SWITZERLAND
0848 - SAMSUNG(7267864,
CHF 0.08/min)
U.K 0330 SAMSUNG (7267864)
EIRE 0818 717100
www.samsung.com/ch
www.samsung.com/ch_fr/(French)
www.samsung.com/be (Dutch)
www.samsung.com/be_fr (French)
800-SAMSUNG(726-7864)
AUSTRIA
0810 - SAMSUNG
(7267864, € 0.07/min)
BELGIUM
02-201-24-18
CYPRUS
(+30) 210 6897691 from mobile and land line
(German)
SLOVAKIA 0800-SAMSUNG (0800-726-786)
BULGARIA 07001 33 11 , normal tariff
HUNGARY 06-80-SAMSUNG (726-7864)
MACEDONIA 023 207 777
MONTENEGRO
LITHUANIA 8-800-77777
020 405 888
09 85635050
0 180 5 SAMSUNG bzw.
Festnetz, aus dem Mobilfunk max.0,42€/Min.)
*
*
0 180 5 7267864 ( 0,14€/Min. aus dem dt.
8009 4000 only from landline
(+30) 210 6897691 from mobile and land line
only from landline
80111-SAMSUNG(80111 726 7864)


2012-11-20
BOSNIA 05 133 1999
CROATIA 062 - SAMSUNG (062-726-7864)
CZECH 800 - SAMSUNG (800-726786)
POLAND
0 801-1SAMSUNG (172-678)
+48 22 607-93-33
ROMANIA
08008 SAMSUNG (08008 726 7864)
TOLL FREE No.
SERBIA 0700 SAMSUNG (0700 726 7864)
LATVIA 8000-7267
ESTONIA 800-7267
www.samsung.com
DENMARK 70 70 19 70
FINLAND
FRANCE
01 48 63 00 00
GERMANY
GREECE
ITALIA
LUXEMBURG 261 03 710
NETHERLANDS
0900-SAMSUNG
(0900-7267864) (€ 0,10/Min)
NORWAY 815-56 480
PORTUGAL
80820-SAMSUNG(726-7864)
SPAIN 902 - 1 - SAMSUNG (902 172 678)
SWEDEN 0771 726 7864 (SAMSUNG)
SWITZERLAND
0848 - SAMSUNG(7267864,
CHF 0.08/min)
U.K 0330 SAMSUNG (7267864)
EIRE 0818 717100
www.samsung.com/ch
www.samsung.com/ch_fr/(French)
www.samsung.com/be (Dutch)
www.samsung.com/be_fr (French)
800-SAMSUNG(726-7864)
AUSTRIA
0810 - SAMSUNG
(7267864, € 0.07/min)
BELGIUM
02-201-24-18
CYPRUS
(+30) 210 6897691 from mobile and land line
(German)
SLOVAKIA 0800-SAMSUNG (0800-726-786)
BULGARIA 07001 33 11 , normal tariff
HUNGARY 06-80-SAMSUNG (726-7864)
MACEDONIA 023 207 777
MONTENEGRO
LITHUANIA 8-800-77777
020 405 888
09 85635050
0 180 5 SAMSUNG bzw.
Festnetz, aus dem Mobilfunk max.0,42€/Min.)
*
*
0 180 5 7267864 ( 0,14€/Min. aus dem dt.
8009 4000 only from landline
(+30) 210 6897691 from mobile and land line
only from landline
80111-SAMSUNG(80111 726 7864)