Loading ...
Loading ...
Loading ...
diono.comCambria® 2
18 19
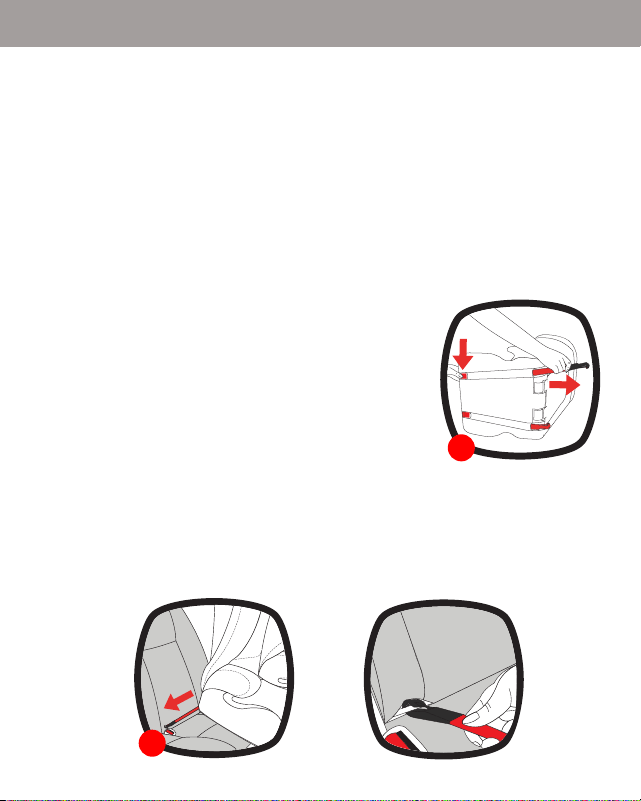
3. While pushing booster against
vehicle seat, pull one adjuster
strap tight and then the other.
Make sure that both LATCH/UAS
connectors are securely attached
to the vehicle’s lower anchors.
4. Booster seat should rest firmly
on vehicle seat bottom and touching the vehicle
seat back. A gap is acceptable as long as the head
support is touching the vehicle seat back or
headrest. The entire seat bottom
should sit flat on the vehicle seat.
IMPORTANT: Try to position
backrest in full contact with
vehicle seat back. It may also be
necessary to adjust the recline
angle of the booster seat to match
that of the vehicle seat.
NOTE: Even with LATCH/UAS connectors properly
attached and adjusted, child seat will still have
movement against the vehicle seat back and bottom.
IMPORTANT: DO NOT use LATCH/UAS if installation
interferes with vehicle seat belt.
IMPORTANT: When using booster seat in center
seating position, make sure it is stable and does not
rock from side-to-side.
3
WARNING! Unsecured objects can become flying
hazards and can cause serious injury in an accident. If
your vehicle is equipped with lower anchors, Diono
always recommends installation utilizing the LATCH/
UAS connectors with this booster seat.
To improve safety and performance, this booster seat is
equipped with a lower anchorage system that allows
secure attachment to a vehicle’s lower anchor locations.
1. Disengage LATCH/UAS connectors
from storage slots and lay booster
seat on its side. While depressing
the cam lock lever, pull LATCH/UAS
connectors away from the booster
seat and extend both straps all the way.
Do not overextend connector straps.
2. Attach both LATCH/UAS connectors to the vehicle
anchors, starting with the connector that is
furthest from you. For ease of use, make sure open
end of hooks face upward during use.
1
2
INSTALLATION
INSTALLATION
4
Loading ...
Loading ...
Loading ...