Loading ...
Loading ...
Loading ...
POSUTION WELDING
WELD
In order to derive the greatest benefits from your welder,
you should practice until you can make a welded joint
in almost any conceivable position. The ability to do this
is especially useful when making repairs on machinery as
the amount of welding in most cases is small and does not
warrant disassembling the parts to weld them in the flat
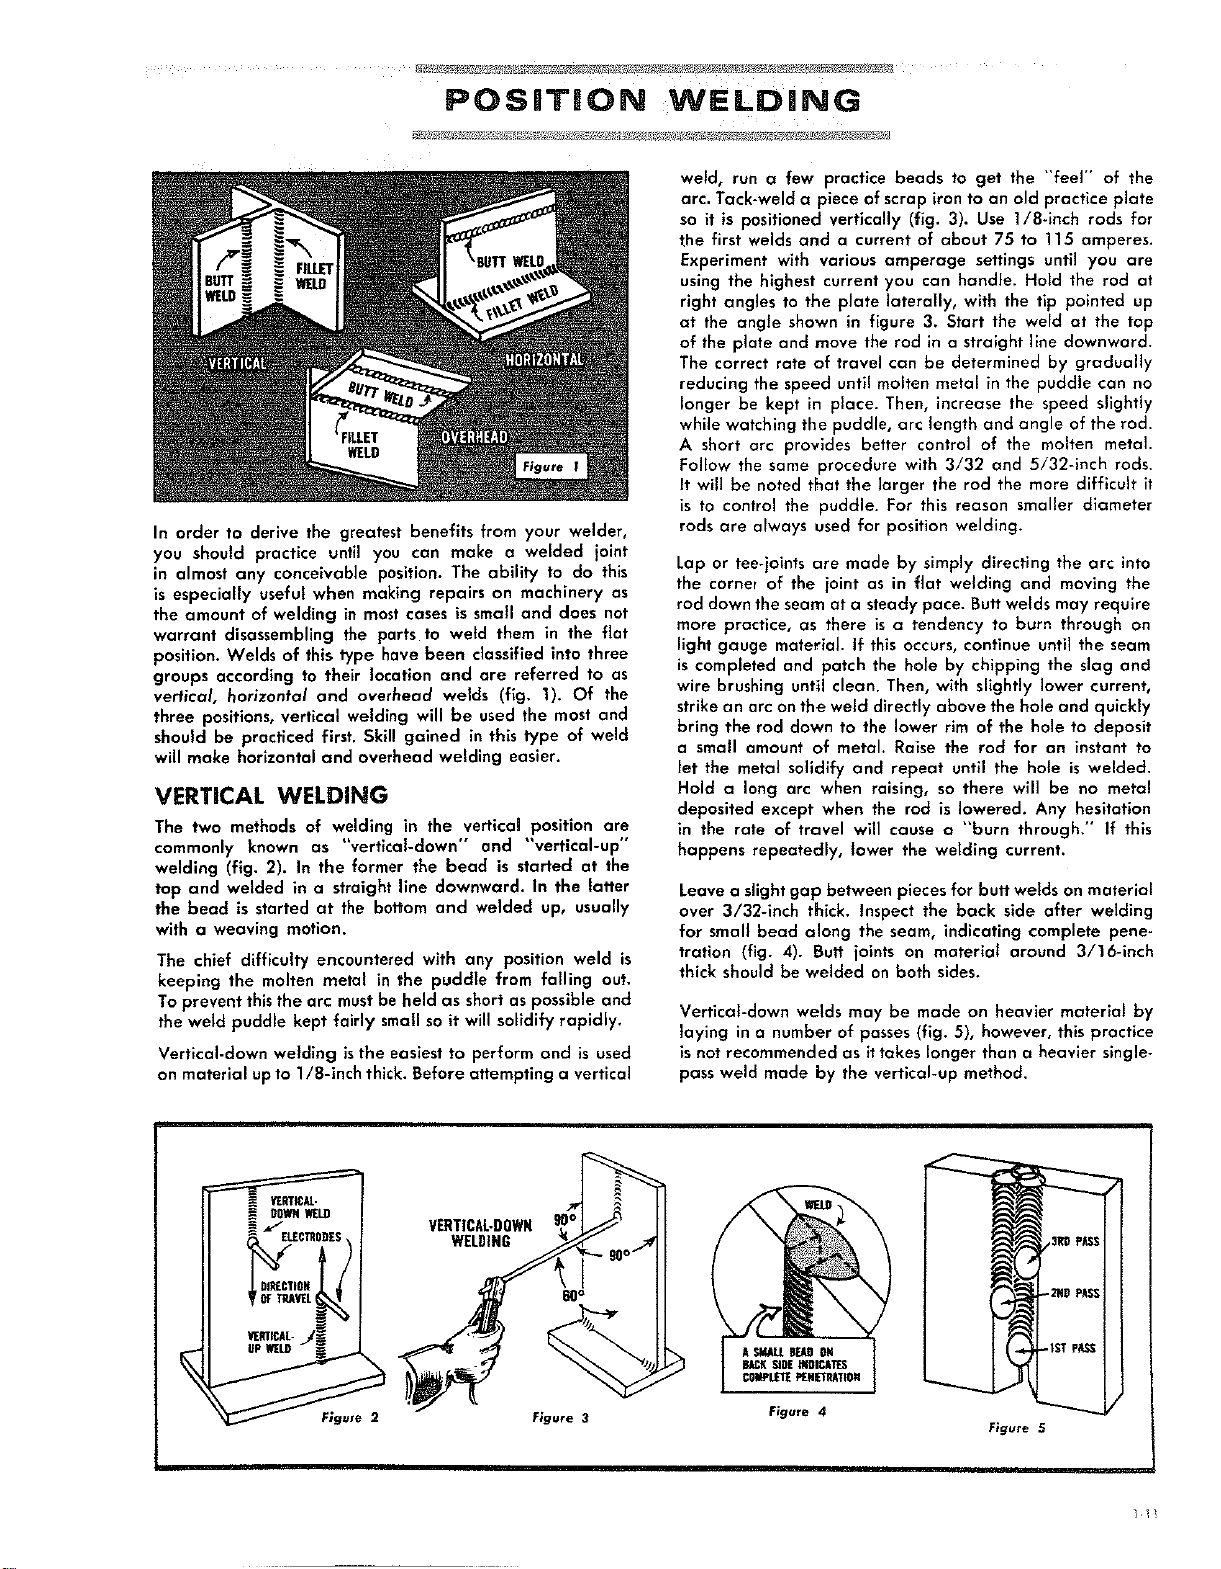
position. Welds of this type have been classified into three
groups according to their location and are referred to as
vertical, horizontal and overhead welds (fig. 1). Of the
three positions,vertical welding will be used the most and
should be practiced first. Skill gained in this type of weld
will make horizontal and overhead welding easier.
VERTICAL WELDING
The two methods of welding in the vertical position are
commonly known as "vertlcal-down" and "'vertical-up"
welding (fig. 2). In the former the bead is started at the
top and welded in a straight line downward. In the latter
the bead is started at the bottom and welded up, usually
with a weaving motion.
The chief difficulty encountered with any position weld is
keeping the molten metal in the puddle from falling out,
To prevent this the arc mustbe held as short as possible and
the weld puddle kept fairly small so it will solidify rapidly.
Vertical-down welding isthe easiest to perform and is used
on material upto l/B-inch thick. Before attempting a vertical
weld, run a few practice beads to get the "feel" of the
arc. Tack-weld a piece of scrap iron to an old practice plate
so it is positioned vertically (fig. 3). Use 1/8-inch rods for
the first welds and a current of about 75 to 115 amperes.
Experiment with various amperage settings until you are
using the highest current you can handle. Hold the rod at
right angles to the plate laterally, with the tip pointed up
at the angle shown in figure 3. Start the weld at the top
of the plate and move the rod in a straight line downward.
The correct rate of travel can be determined by gradually
reducing the speed until molten metal in the puddle can no
longer be kept in place. Then, increase the speed slightly
while watching the puddle, arc length and angle of the rod.
A short arc provides better control of the molten metal.
Follow the same procedure with 3/32 and 5/32-inch rods.
It will be noted that the larger the rod the more difficult it
is to control the puddle. For this reason smaller diameter
rods are always used for position welding.
Lap or tee-joints are made by simply directing the arc into
the corner of the joint as in flat welding and moving the
rod down the seam at a steady pace. Butt welds may require
more practice, as there is a tendency to burn through on
light gauge material. If this occurs, continue until the seam
is completed and patch the hole by chipping the slag and
wire brushing until clean. Then, with slightly lower current,
strike an arc on the weld directly above the hole and quickly
bring the rod down to the lower rim of the hole to deposit
a small amount of metal. Raise the rod for an instant to
let the metal solidify and repeat until the hole is welded.
Hold a long arc when raising, so there will be no metal
deposited except when the rod is lowered. Any hesitation
in the rate of travel will cause a "burn through." If this
happens repeatedly, lower the welding current.
Leave a slight gap between pieces for butt welds on material
over 3/32-inch thick. Inspect the back side after welding
for small bead along the seam, indicating complete pene-
tration (fig. 4). Butt joints on material around 3/16-inch
thick should be welded on both sides.
Vertical-down welds may be made on heavier material by
laying in a number of passes (fig. 5), however, this practice
isnot recommended as ittakes longer than a heavier single-
pass weld made by the vertical-up method.
DOWNWELD
IRSD£_
VERTICAL-DOWN9_
_ure 3
/3RO PASS
-2gB PSi;
ASM,ALLS_ OP4
g_K SiDE|IIOBAWN
COIIPLET_P£WET_Tt0g
Figure 4
Figure 5
iii
Loading ...
Loading ...
Loading ...