Loading ...
Loading ...
Loading ...
15
ENG
Full-integrated model
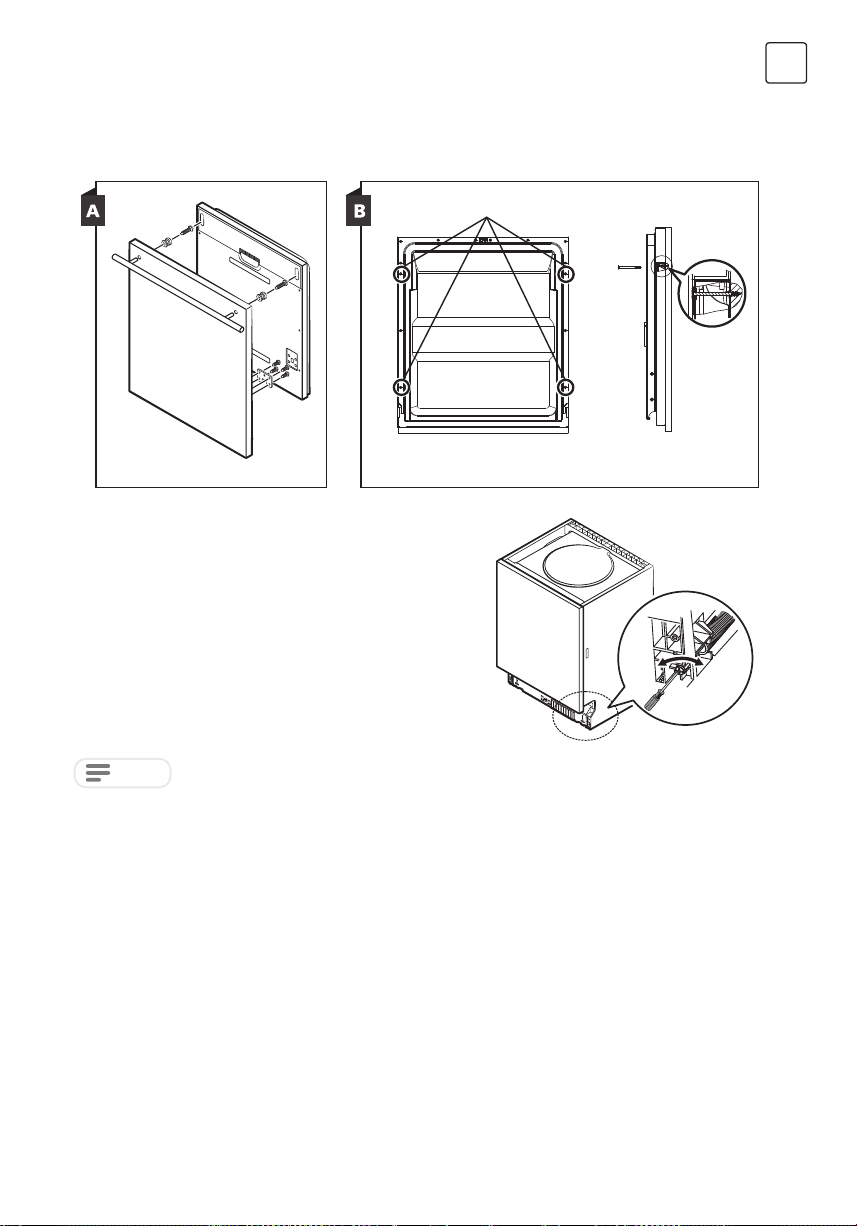
Install the hook on the aesthetic wooden panel and put the hook into the slot of the outer door of dishwasher (see
figure A). After positioning of the panel , fix the panel onto the outer door by screws and bolts (See figure B).
1. Take away the four short screws
2.Pin up the four long screws
Step 3. Tension adjustment of the door
1. The door springs are set at the factory to the proper
tension for the outer door. If aesthetic wooden panel are
installed, you will have to adjust the door spring tension.
Rotate the adjusting screw to drive the adjustor to strain
or relax the steel cable.
2. Door spring tension is correct when the door remains
horizontal in the fully opened position, yet rises to a close
with the slight lift of a finger
Step 4. Dishwasher installation steps
Please refer to the specified installation steps in the installation drawings.
NOTE
1. Affix the condensation strip under the work surface of cabinet. Please ensure the condensation strip is flush with
edge of work surface. (Step 2)
2. Connect the inlet hose to the cold water supply.
3. Connect the drain hose.
4. Connect the power cord.
5. Place the dishwasher into position. (Step 4)
6. Level the dishwasher. The rear food can be adjusted from the front of the dishwasher by turning the Philips
screw in the middle of the base of dishwasher use an Philips screw. To adjust the front feet, use a flat screw
driver and turn the front feet until the dishwasher is level. (Step 5 to Step 6)
7. Install the furniture door to the outer door of the dishwasher. (Step 7 to Step 10)
8. Adjust the tension of the door springs by using an Allen key turning in a clockwise motion to tighten the left and
right door springs. Failure to do this could cause damage to your dishwasher. (Step 11)
9. The dishwasher must be secured in place. There are two ways to do this:
A. Normal work surface: Put the installation hook into the slot of the side plane and secure it to the work surface
with the wood screws.
B. Marble or granite work top: Fix the side with Screw.
Loading ...
Loading ...
Loading ...