Loading ...
Loading ...
Loading ...
22 49-7000194 Rev. 0
Removing and Cleaning the Filters
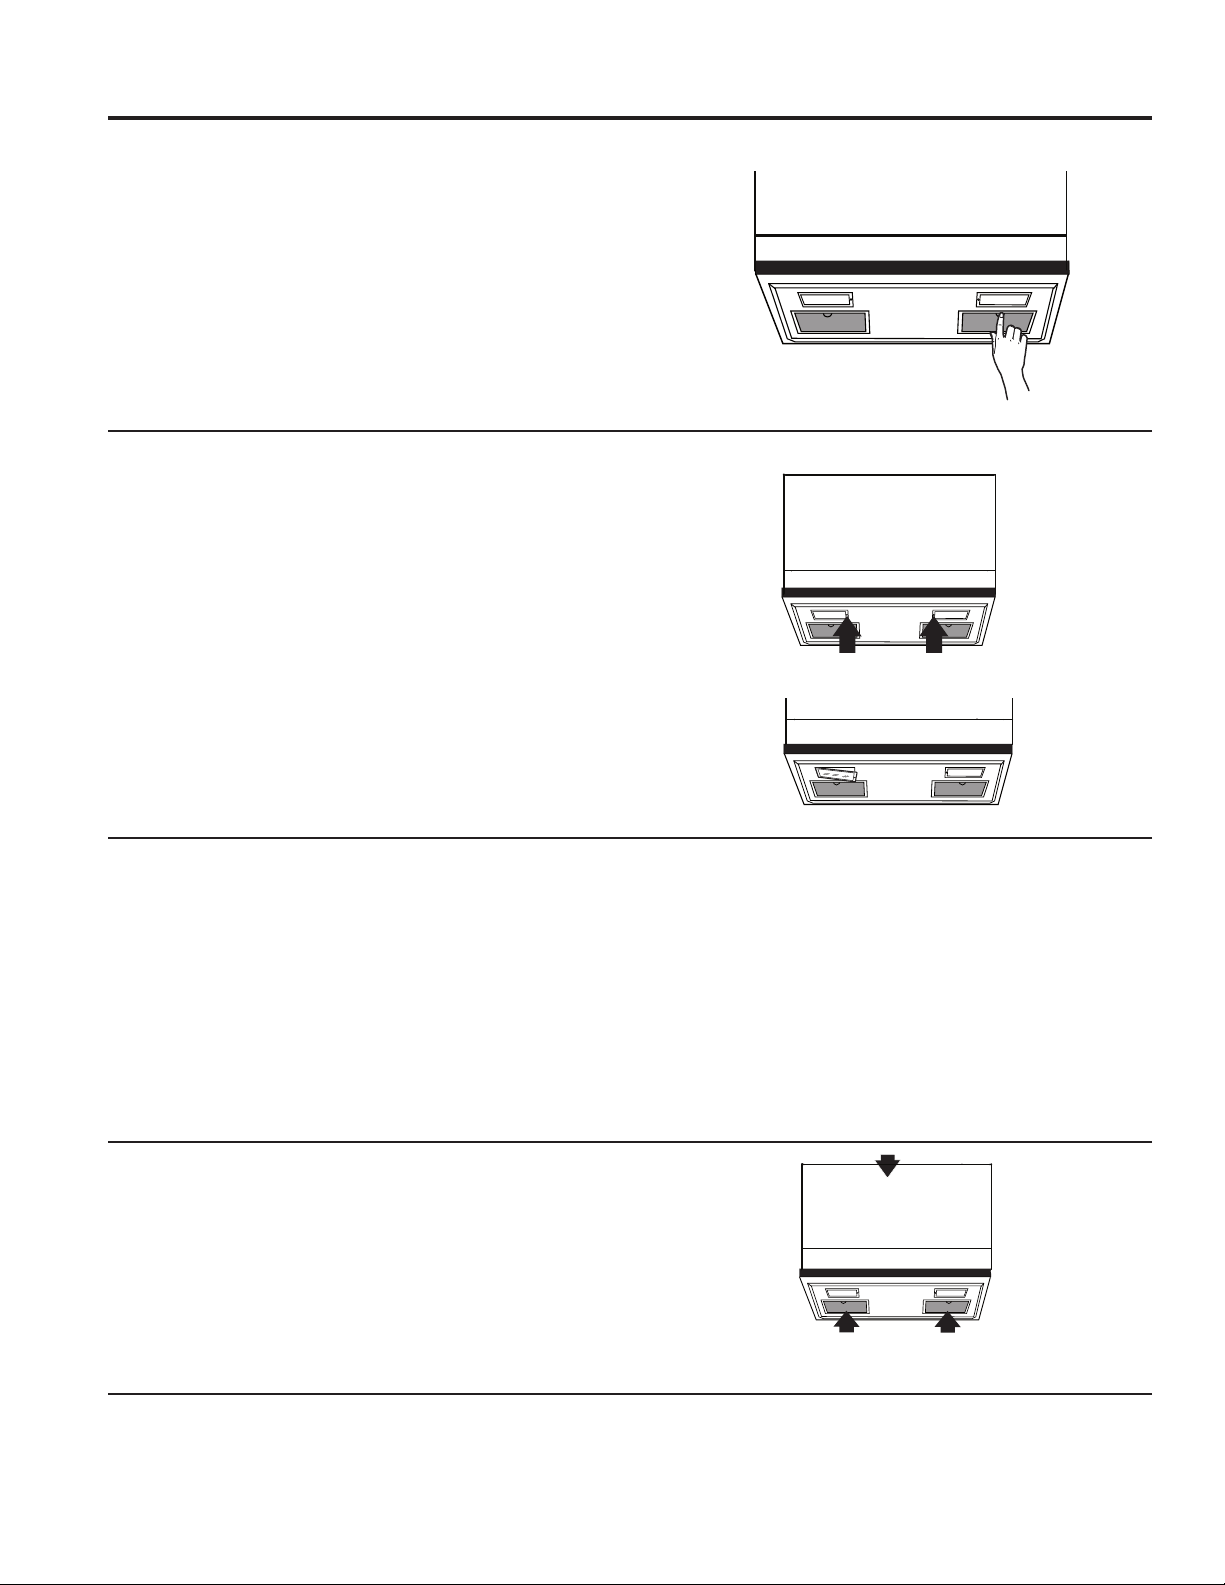
To remove, slide them to the rear using the tabs. Pull down
and out.
To clean the vent filters, soak them and then swish around
in hot water and detergent. Don’t use ammonia or ammonia
products because they will darken the metal. Light brushing
can be used to remove embedded dirt.
Rinse, shake and let dry before replacing.
To replace, slide the filters into the frame slots on the back
of each opening. Press up and to the front to lock into place.
Cooktop Lights/Nite Lights
See back cover for ordering online at
GEAppliances.com.
1. To replace the cooktop lights/nite lights, first
disconnect the power at the main fuse or circuit
breaker panel, or pull the plug.
2. One side at a time, remove the screw from the side of
the light compartment cover and lower the cover until
it stops.
3. Be sure the LED light is cool before removing. Gently
remove the LED wiring connector from LED board.
4. Replace with the new LED board and insert the wiring
plug, then raise the light cover and replace the screw.
Repeat for the other light. Connect electrical power to
the oven.
Remove screws.
Vent Fan
The vent fan has two metal reusable vent filters.
Models that recirculate air back into the room also use a
charcoal filter.
Reusable Vent Filters
The metal filters trap grease released by foods on the
cooktop. They also prevent flames from foods on the
cooktop from damaging the inside of the oven.
For this reason, the filters must always be in place when
the hood is used. The vent filters should be cleaned
once a month, or as needed.
Reusable vent filters
(on all models).
Charcoal filter
(on some models).
Replacing the Oven Cavity Light
1. Disconnect power at the main fuse or circuit breaker
panel.
2. Remove the vent plate screw located at the top of the
microwave on the left (door hinge side) using a #1
Phillips screwdriver.
3. Be sure the LED light is cool before removing.
4. Unsecure the LED light from the two clips and
carefully slide it out.
5. Gently remove the LED wiring connector from the LED
board.
6. Replace with the new LED board and insert the LED
wiring connector. See back cover for ordering online
at GEAppliances.com
7. Carefully insert the new LED board and secure it with
the two clips.
8. Replace the vent plate reinstall the screw.
9. Reconnect power to the microwave.
Care and Cleaning
CARE AND CLEANING
Loading ...
Loading ...
Loading ...