Loading ...
Loading ...
Loading ...
General Cleaning (continued)
Cleaning the Appliance (continued)
DO NOT use the surface element in self-clean mode.
During the self-clean cycle, the surface elements, when used, are subjected to high heat. Toensure maximum element life,
do not use the surface element during a self-clean cycle.
What to Expect During Cleaning
While the oven isin operation, the oven heats to temperatures much higher than those used in normal cooking. Sounds of metal
expansion and contraction are normal. Odor isalso normal asthe food soil isbeing removed. Smoke may appear through the oven
vent, located on the top of the control panel.
If heavy spillovers are not wiped up before cleaning, they may flame and cause more smoke and odor than usual. This isnormal
and safe and should not cause alarm. If available, use an exhaust fan during the self-cleaning cycle.
NOTE: A smoke eliminator in the oven vent converts most of the soil into a colourless vapor.
Setting the Controls for a Clean Cycle
For the setting of the clean cycle, refer to the section on the timer or Electronic oven control.
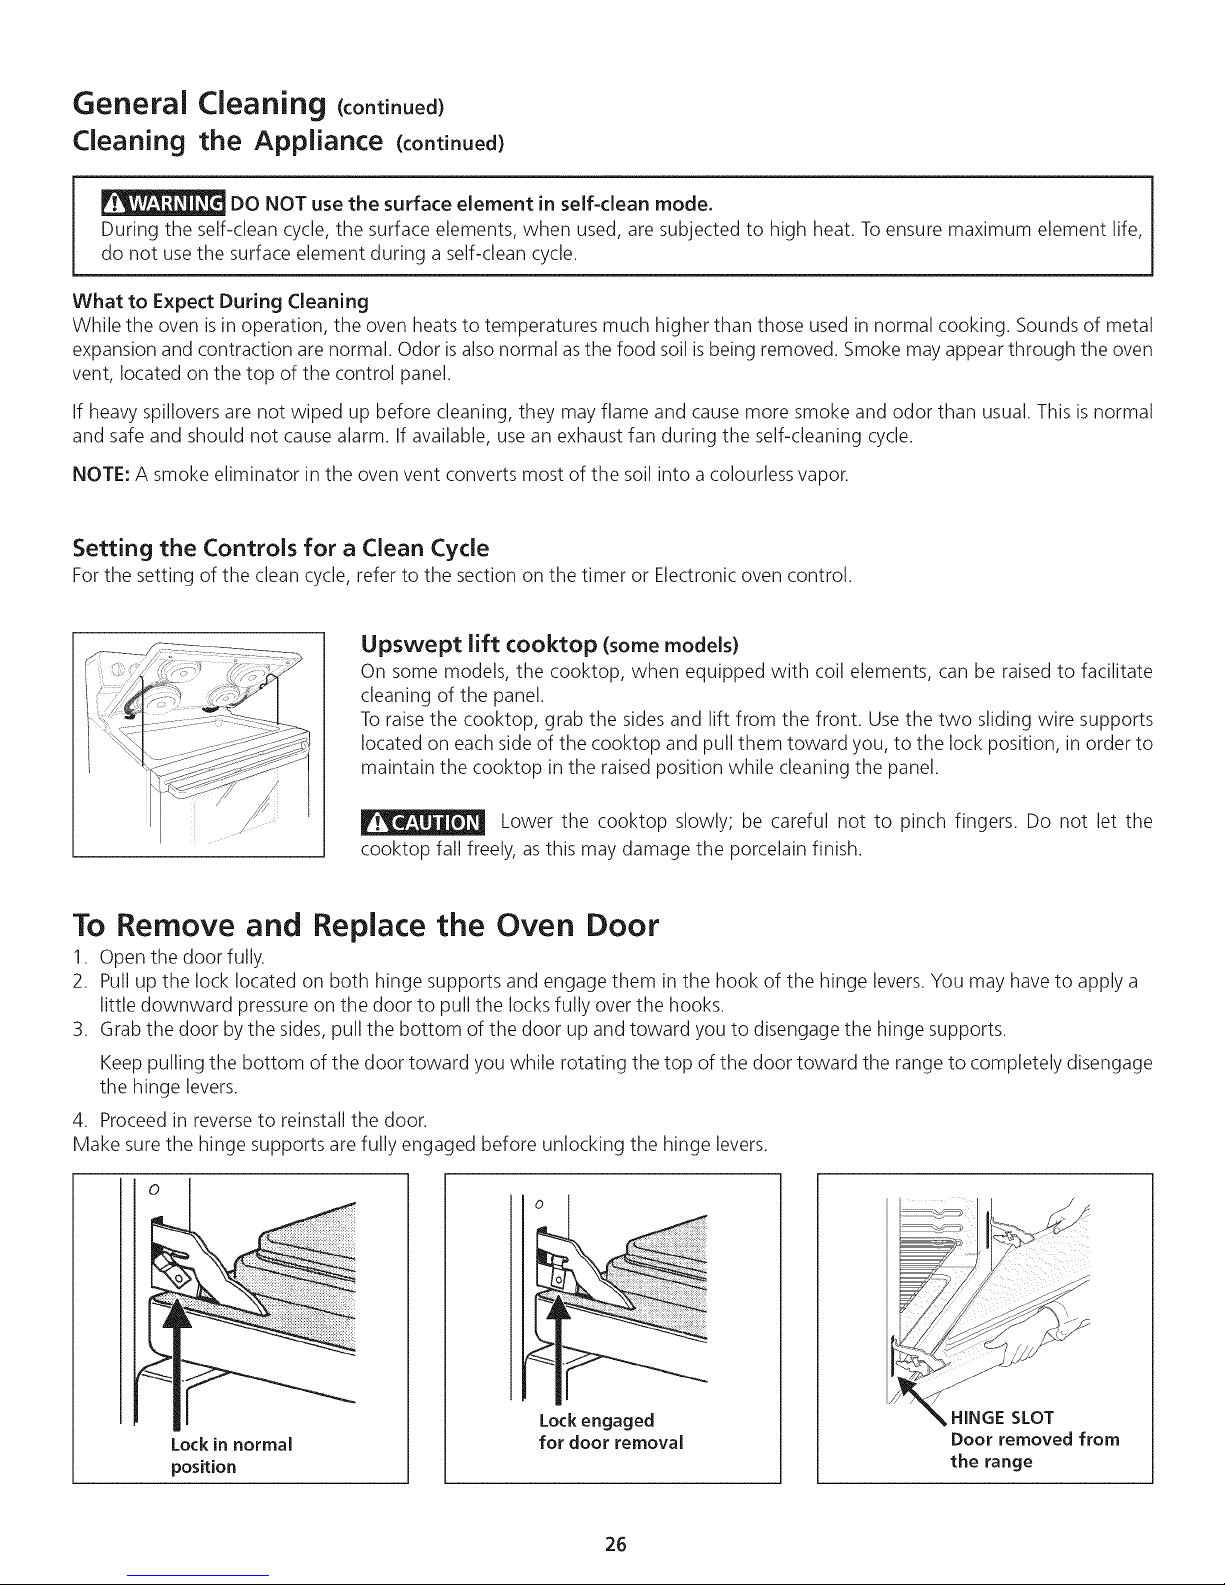
Upswept lift cooktop (some models)
On some models, the cooktop, when equipped with coil elements, can be raised to facilitate
cleaning of the panel.
Toraise the cooktop, grab the sides and lift from the front. Use the two sliding wire supports
located on each side of the cooktop and pull them toward you, to the lock position, in order to
maintain the cooktop in the raised position while cleaning the panel.
Lower the cooktop slowly; be careful not to pinch fingers. Do not let the
cooktop fall freely, asthis may damage the porcelain finish.
To Remove and Replace the Oven Door
1. Open the door fully.
2. Pull up the lock located on both hinge supports and engage them in the hook of the hinge levers. You may have to apply a
little downward pressure on the door to pull the locks fully over the hooks.
3. Grab the door bythe sides, pull the bottom of the door up and toward you to disengage the hinge supports.
Keep pulling the bottom of the door toward you while rotating the top of the door toward the range to completely disengage
the hinge levers.
4. Proceed in reverse to reinstall the door.
Make sure the hinge supports are fully engaged before unlocking the hinge levers.
Lock in normal
position
Lock engaged
for door removal
HINGE SLOT
Door removed from
the range
26
Downloaded from www.ManualsFile.com manuals search engine
Loading ...
Loading ...
Loading ...