Loading ...
Loading ...
Loading ...
18ninj akitchen. com17
1-877-646-5288
4 The clock will display and count down the
remaining clean cycle time, which takes
approximately 60 minutes to complete�
Your unit will deliver a small amount of
cleaning solution to distribute it through
the system� It will then pause, deliver
additional cleaning solution, and continue
for 60 minutes� The extended pauses
allow for maximum cleaning and descaling�
5 Upon completion, the coee maker will
beep, the clock will display End, and the
CLEAN light will turn o�
6 Empty the contents of the carafe and
place it back under the brew basket�
Clean the water reservoir with warm,
soapy water to remove any cleaning
solution that could aect the flavor of
your coee�
7 Fill the reservoir with fresh water up
to, but not exceeding, the Max Fill line�
8 Flush the system by running a Full
Carafe, Classic brew cycle with water
only� After the cycle is complete, discard
the water and thoroughly clean the carafe�
AFTER EACH BREW
1 After the unit has cooled, remove the
filter holder from the brew basket� If using
a paper filter, discard it� If using the
permanent filter, wash it thoroughly
with soap and warm water or place on
top rack of dishwasher�
2 Clean the frother whisk after each use�
Hand-wash thoroughly with soap
and warm water or place on top rack
of dishwasher�
3 Wash the carafe and brew-through lid
with soap and warm water� Use a bottle
brush or a cloth to wash the inside of the
carafe� DO NOT use a wire brush�
4 After the coee maker has cooled, wipe
down the main unit, showerhead, and
water reservoir shelf with a cloth and
warm water� DO NOT immerse the coee
maker in water�
CLEANING THE WATER RESERVOIR
Empty the reservoir and hand-wash or
place in dishwasher� For a better clean, we
recommend placing it on the bottom rack
of the dishwasher standing upright with the
opening facing downward� We recommend
doing this weekly�
CLEANING THE CARAFE
We recommend cleaning your carafe with
warm, soapy water�
If you want to clean the carafe more
thoroughly, we recommend using a soft
foam brush or placing it in the dishwasher
(glass carafe only)� DO NOT use a wire brush�
NOTE: The unit must remain on for
the Delay Brew function to work�
DO NOT power o or unplug after
setting Delay Brew�
IMPORTANT: Make sure the Drip Stop is in
the open position�
NOTE: If you attempt to change your
selections while Delay Brew is set, the unit
will beep and DELAY BREW will flash� To
change your selections, cancel Delay Brew
and repeat the process again�
NOTE: Hard water will cause scale buildup
faster than soft water and the brewer will
indicate it needs cleaning more often�
IMPORTANT: DO NOT remove the carafe
at any time throughout the clean cycle�
The CLEAN button will illuminate when a
cleaning cycle is recommended for your
unit, as calcium scale buildup could be
aecting the flavor of your coee�
To clean and descale your Ninja®
Specialty
Coee Maker:
1 Select the Full Carafe size and set the
empty carafe beneath the brew basket�
2 Use a descaling solution specifically
formulated for coee maker cleaning
and follow the directions on the package�
Fill the water reservoir up to, but not
exceeding, the Max Fill line (50 oz�)�
OR
Fill the water reservoir to the Travel Mug
line (16 oz�) with white vinegar, then fill
the rest of the reservoir with water up to,
but not exceeding, the Max Fill line�
3 Once the water reservoir is filled, press
the CLEAN button�
NOTE: To cancel the clean cycle, press
the Power button or CLEAN button once�
The unit will beep and stop brewing
through the cleaning mixture� Continue to
follow the instructions starting at Step 6�
NOTE: The clean cycle takes approximately
60 minutes� If you cancel the clean cycle,
your machine will not be properly descaled�
IMPORTANT: Use only white vinegar
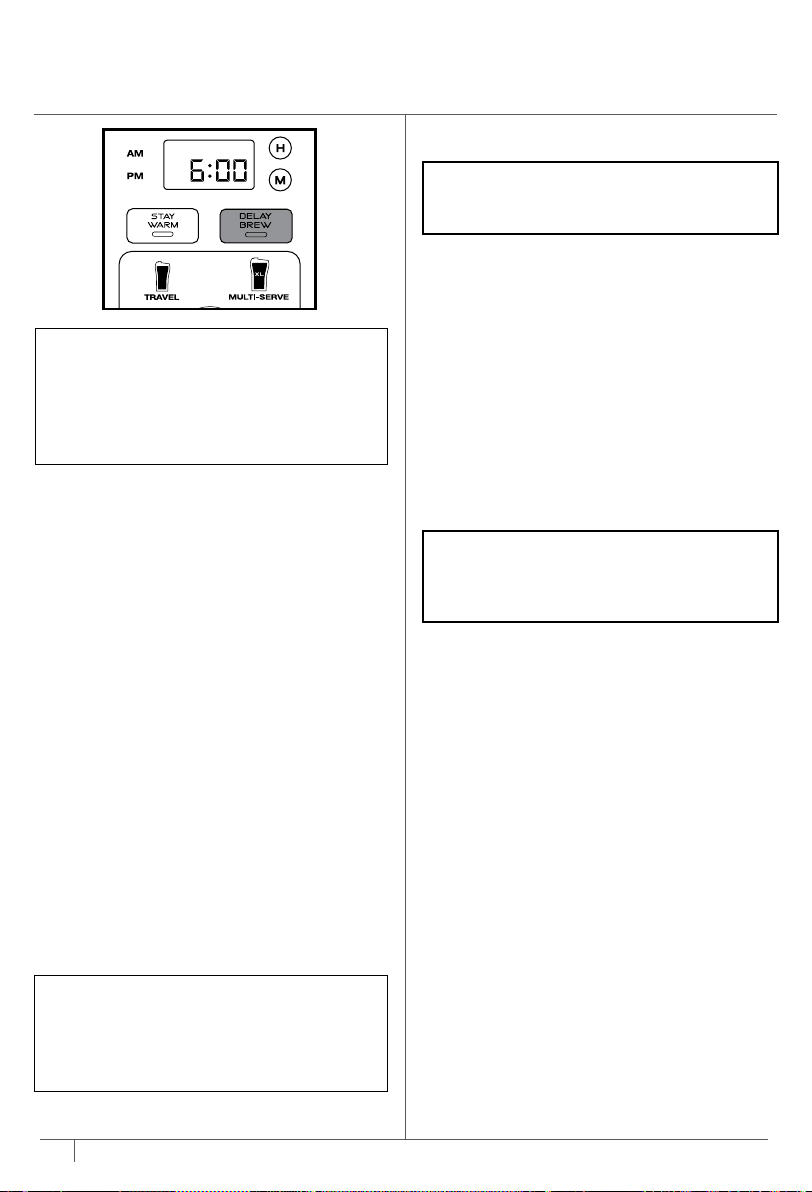
1 Plug the unit in and turn it on by pressing
the power button
2 After filling the water reservoir and
adding ground coee to the filter holder,
be sure the reservoir and brew basket are
securely in place� Place the appropriately
sized vessel under brew basket�
3 Press DELAY BREW� DELAY BREW will
illuminate and the clock will begin to
flash “12:00” or the last Delay Brew
time that was set�
4 Use the H and M buttons to set the time
the brew will begin� Then use the multi-
serve dial to select the size of the vessel
you would like to brew into�
5 Select the brew style that you desire
from the 4 flashing buttons� The selected
brew style will remain illuminated�
6 Once the time, brew size, and brew style
have been set, allow DELAY BREW to
stop flashing, or press DELAY BREW
to activate� When activated, the unit
will beep and DELAY BREW and your
selected options will remain illuminated�
To cancel, press DELAY BREW again�
NOTE: For best results, we recommend
rinsing the reservoir after brewing and
refilling with fresh water for the next brew�
NOTE: The glass carafe, brew-through lid,
permanent filter, removable filter holder,
water reservoir, flip-top lid, frother whisk, and
scoop are dishwasher safe�
NOTE: If the clock ever reads “CLn” it
indicates heavy scale build-up on the
boiler� Run a clean cycle before attempting
to brew again�
NOTE: Running a water-only clean cycle
will not descale the brewer properly�
DELAY BREW,
CARE & MAINTENANCE
CLEANING & DESCALING
Loading ...
Loading ...
Loading ...