Loading ...
Loading ...
Loading ...
OPERATING INSTRUCTIONS
INSTALLING AND REMOVING THE
BATTERY PACK FROM THE TOOL
CAUTION: Make certain the lock-off
button is engaged to prevent switch actuation
before removing or installing battery.
NOTE: This jig saw only accepts 20v MAX*
TO INSTALL BATTERY PACK: Insert
battery pack (6) firmly into tool until an
audible click is heard as shown in Figure A.
latched into position.
TO REMOVE BATTERY PACK: Depress
the battery release button (7) as shown in
Figure B and pull battery pack out of tool.
B
7
A
6
ASSEMBLY
WARNING: Laceration Hazard. Before
attempting any of the following operations,
battery is removed, and that the saw blade
has stopped. Used saw blades can be hot.
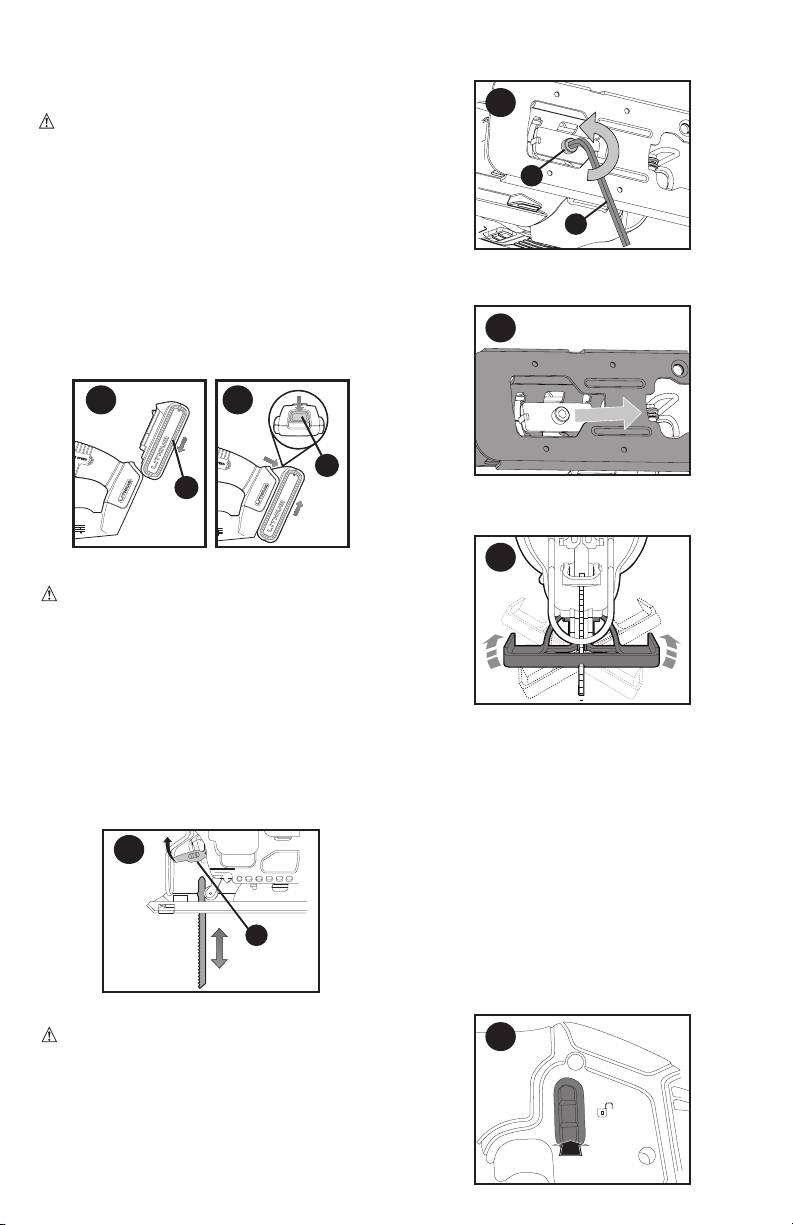
FITTING THE SAW BLADE (FIGURE C)
teeth facing forward.
shoe (4).
C
8
USE
WARNING: To reduce the risk of
injury, never use the tool when the saw
shoe is loose or removed.
ADJUSTING THE SHOE PLATE FOR
BEVEL CUTS (FIGURE D - F)
straight cut or a left or right bevel cut up to
Figure D).
D
9
10
Figure E).
E
angle (Figure F).
F
the left or right detent for a
angle.
To reset the shoe plate for straight cuts:
Pull the shoe forward, rotate to the center
Switching On and Off (Figure G)
(2). The button must be disengaged for the
jig saw to turn on. To disengage the button,
depress the button on the side of the handle
G
Loading ...
Loading ...
Loading ...