Loading ...
Loading ...
To avoid possible SERIOUS INJURY from a falling garage door
opener, fasten it SECURELY to structural supports of the garage.
Concrete anchors MUST be used if installing any brackets into
masonry.
REPLACEMENT PARTS
Part No. Description Qty
41A5250-2 10' Belt Assembly 1
41A3021 Rope 1
4A1008 Master Link Kit 1
Hex Bolt
5/16"-18x7/8"
Nut 5/16"-18
Lock Washer 5/16"
Hanging Bracket (Cross Brace) Not shown actual size
HARDWARE SHOWN ACTUAL SIZE
ADDING AN ADDITIONAL HANGING BRACKET:
Cut the enclosed hanging bracket (cross brace) to fit across the installed
hanging brackets. Fasten the cross brace to the top and bottom hole of the
hanging brackets using 5/16" -18x7/8" hex bolts, 5/16 lock washers and
5/16"-18 nuts.
Lock Washer 5/16"
Nut 5/16"-18
Hex Bolt 5/16"-18x7/8"
Hanging Bracket (Cross Brace)
Lock Washer 5/16"
Nut 5/16"-18
Lock Washer 5/16"
Nut 5/16"-18
Lock Washer 5/16"
Nut 5/16"-18
Hex Bolt 5/16"-18x7/8"
Hanging Bracket (Cross Brace)
Structural Supports
Structural Supports
Finished Ceiling
Unfinished Ceiling
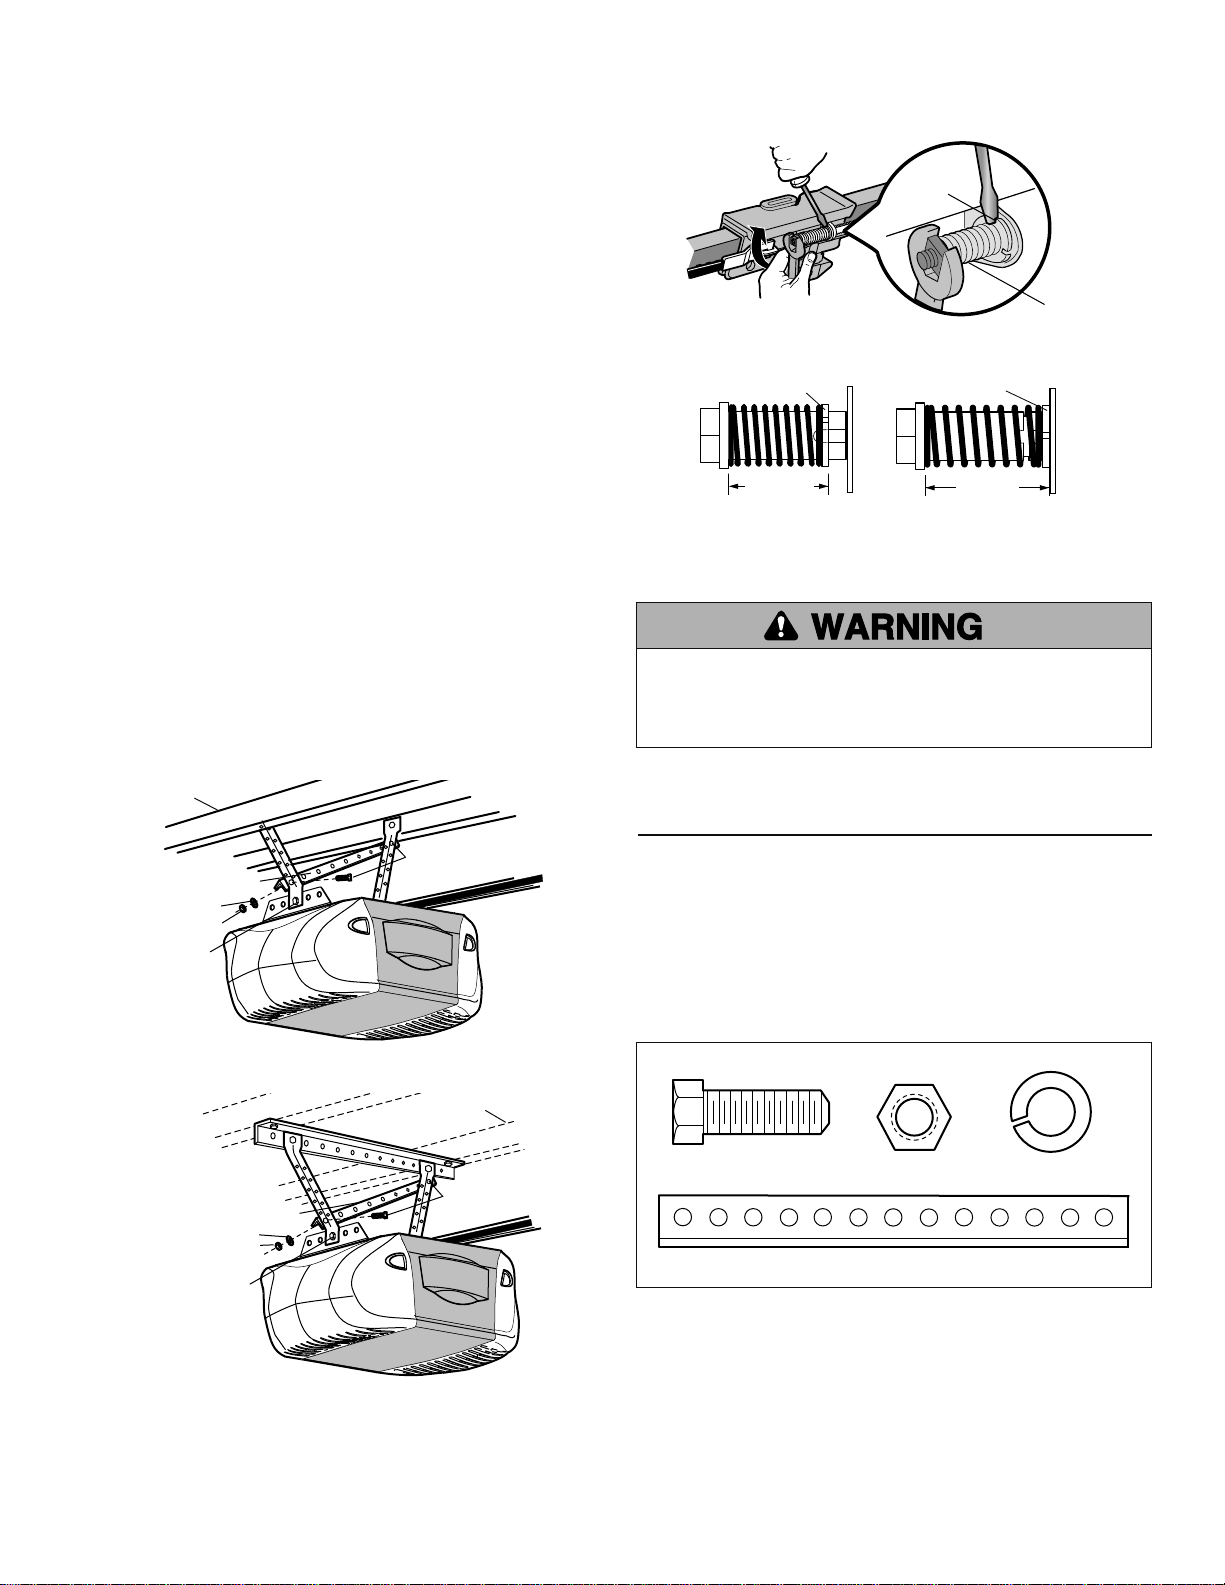
17. Insert the trolley threaded shaft through the hole in the trolley. Be sure
the belt is not twisted, and the ribbed side faces the rail.
18. Hold the belt at the trolley shaft as you thread the spring nut by hand
(Figure 3) onto the shaft until finger tight against the trolley. Do not use
any tools.
19. Remove the screwdriver.
20. Insert a flathead screwdriver tip into one of the nut ring slots and brace
it firmly against the trolley.
21. Tighten the spring trolley nut with an adjustable wrench or a 7/16" open
end wrench about a quarter turn until the spring releases and snaps the
nut ring against the trolley. This sets the spring to optimum belt tension
(Figure 3).
22. Replace the belt cap retainer and complete the re-installation and
adjustment of your opener according to your owner’s manual.
NOTE: Before hanging the opener, an additional hanging bracket is
necessary for stability.
23. Replace the old emergency release rope with the new, longer
replacement rope.
24. Reconnect power.
25. Make adjustments and test the safety reversal system according to the
owner's manual.
Figure 3
Loading ...
Loading ...
Loading ...