Loading ...
Loading ...
Loading ...
11
possible between the junction box and the unit so that the unit can be moved if servicing becomes
necessary in the future.
Do not cut the conduit. Use the length of the conduit provided.
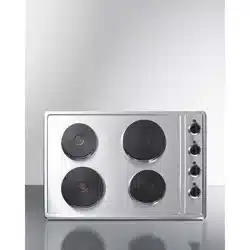
1. 3-Wire Power Cord Installation
IMPORTANT: Use the 3-wire cable from power supply where local codes permit connecting the frame-
ground conductor to the neutral (white) junction box wire.
1. Disconnect power
2. Remove junction box cover, if present.
3. Connect the flexible cable conduit (3) from the
cooktop to the junction box (4) using a UL listed or
CSA approved conduit connector (7).
4. Tighten screws on conduit connector if present.
5. Connect the two black wires (1) together using the
UL listed wire nut (5).
6. Connect the two red wires (2) together using the UL
listed wire nut.
7. Connect the green wire (6) to the white (neutral)
wire (6) in the junction box using the UL listed wire
nut.
8. Install junction box cover.
9. Reconnect power.
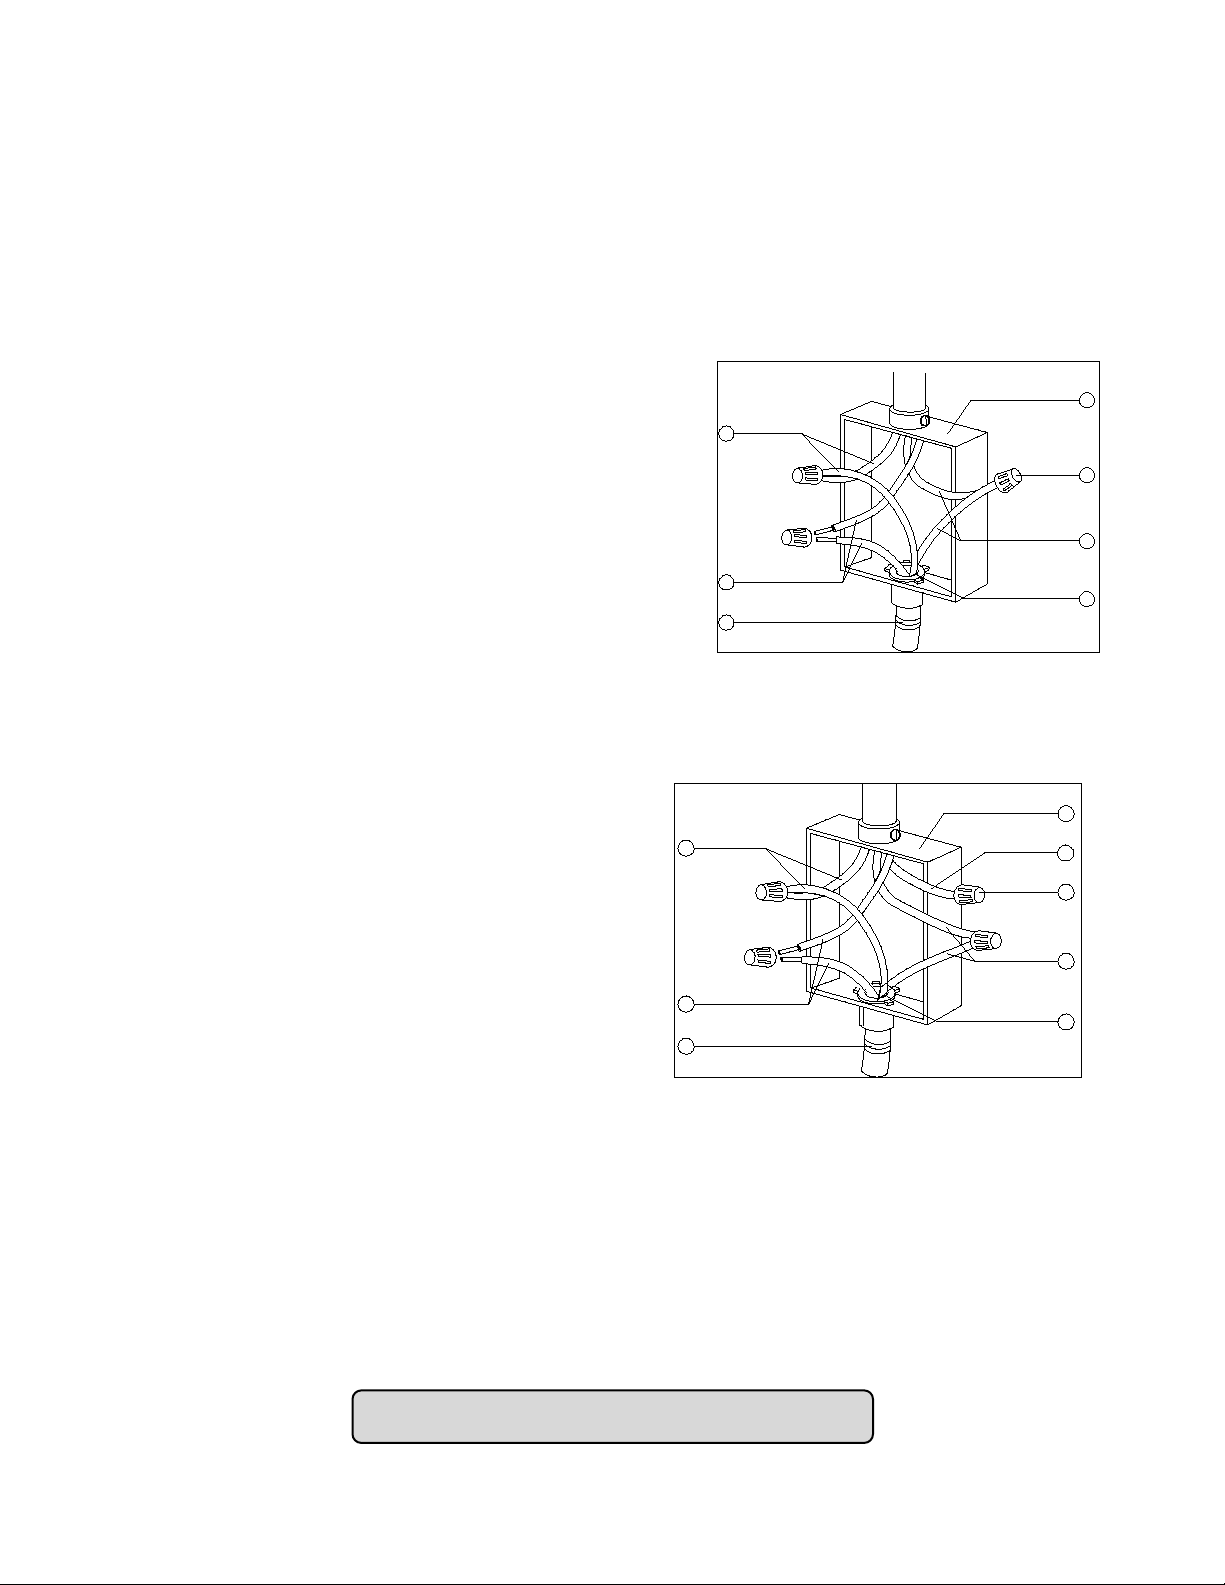
2. 4-Wire Power Cord Installation
IMPORTANT: Use the 4-wire cable from power supply
where local codes do not permit connecting the frame-
ground conductor to the neutral (white) junction box
wire
.
1. Disconnect power
2. Remove junction box cover if present.
3. Connect the flexible cable conduit (3) from the
cooktop to the junction box (4) using a UL listed
or CSA approved conduit connector (7).
4. Tighten screws on conduit connector, if
present.
5. Connect the two black wires (1) together using
the UL listed wire nut (5).
6. Connect the two red wires (2) together using
the UL listed wire nut.
7. Connect the green wire (6) from the cooktop cable to the green wire (6) (in the junction box) using
the UL listed wire nut.
8. Put a UL listed wire nut on the end of the white wire (8).
NOTE: Do not connect the bare ground wire to the neutral (white) wire in the junction box.
9. Install junction box cover.
10. Reconnect power.
OPERATING YOUR APPLIANCE
1
2
3
4
5
6
7
1
2
3
4
5
6
7
8
Loading ...
Loading ...
Loading ...