Loading ...
Loading ...
Loading ...
33OPERATION
ENGLISH
on both sides. If the height is not the same on
both sides, the dishwasher door will not shut
and the upper spray arm will not connect to the
water inlet.
• There is a 2 3/16 inches (56 mm) gain in height
when the upper rack is moved to the lower
position.
• After adjusting the rack levels, check that the
spray arms are free to rotate.
• When the upper rack is in the lower position,
make sure the rack and the spray arm do not hit
the items on the lower rack.
• When the upper rack is in the lower position,
push in the upper rack first, and the lower rack
later.
• Pull out the lower rack first, and the upper rack
later.
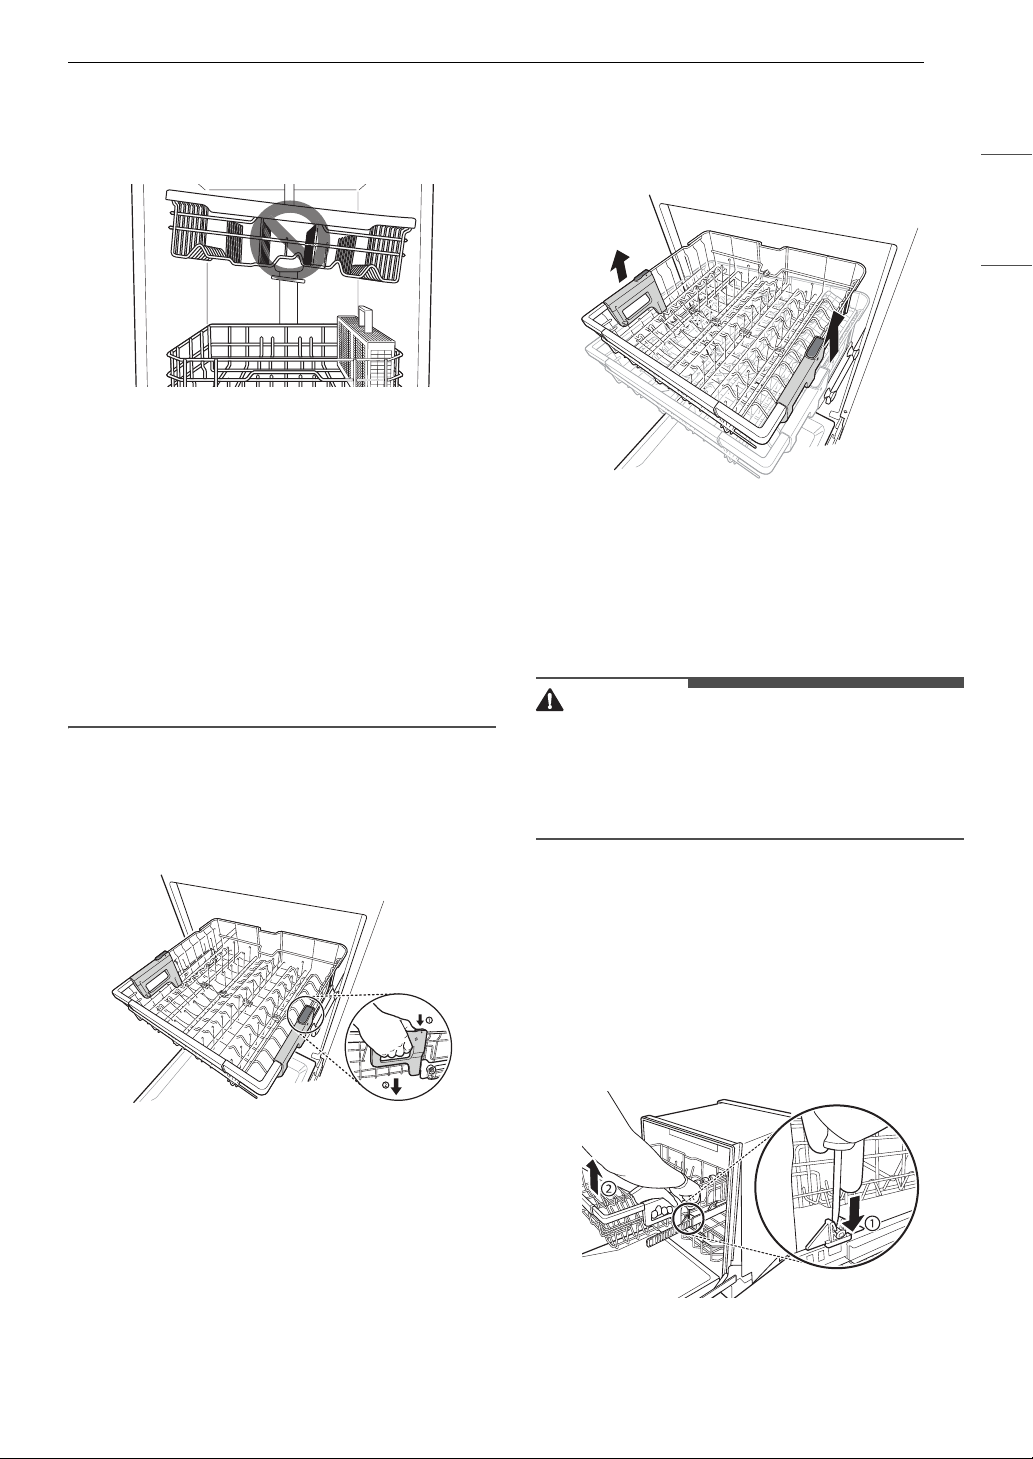
Lowering the Rack
Hold the rack at the center of each side to support
its weight. Then, push the button on each side to
release the rack and lower it into position.
Raising the Rack
Lift the rack at the center of each side until the rack
locks into place in the upper position. It is not
necessary to lift the lock levers to raise the rack.
Removing the Snap-In Gliding
Upper Rack
This feature is only available on some models.
These instructions are for models with snap-in rack
supports rather than wheeled rack supports.
CAUTION
• The snap-in upper rack should only be removed
for servicing. If you need to remove the rack,
wear gloves and handle the screwdriver carefully
to avoid personal injury or damage to the
dishwasher.
1 Pull the upper rack out until it stops. Remove
any contents from the rack.
2 To remove the front rack supports from the
rails, push the front hooks open with a flat-
blade screwdriver while pulling the front of
the rack up to snap the front rack support out
of the hooks. Repeat to snap the front support
out on the opposite side.
3 To remove the back rack supports from the
rails, hold a side rail with one hand, lift the
front of the rack, and firmly push the rack
Loading ...
Loading ...
Loading ...