Loading ...
Loading ...

2-1
F F
G
K K
J J
2-2
D E D
K K
J J
3
2 – Rack Assembly
Warning: Install the rack in a controlled, structurally sound, indoor environment with
a level floor. Use appropriate caution when moving the rack and consider whether you
require assistance. Assemble the rack completely and confirm its stability before
attempting to install equipment in the rack.
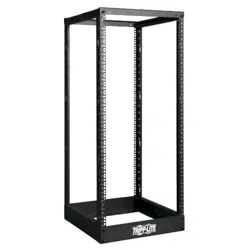
Note: SR4POST is shown, but the assembly process is identical for SR4POST1224, SR4POST13, & SR4POST25.
Rack Depth Index
Mounting Depth Index Numbers
36 in. 8 and 8
35 in. 7 and 8
34 in. 7 and 7
33 in. 6 and 7
32 in. 6 and 6
31 in. 5 and 6
30 in. 5 and 5
29 in. 4 and 5
28 in. 4 and 4
27 in. 3 and 4
26 in. 3 and 3
25 in. 2 and 3
24 in. 2 and 2
23 in. 1 and 2
22 in. 1 and 1
Repeat the process in Step 2-1 to assemble the other top section.
Make sure the depths match by using the same pair of index
numbers. Lay the assembled sections side by side to confirm that
they’re the same length.
2-2
Assemble a bottom section by sliding two bottom corner sections
D
inside the ends of a bottom center
section
E
. The index numbers printed on the corner sections correspond to the rack’s mounting depth. Align
the sections so the index numbers match the numbers you used for the top sections. When the sections are
aligned at the correct depth, use two M8 bolts
J
and M8 washers
K
to fasten each section in place. The
bolts will pass through the center section and into threaded holes in the corner sections. Tighten the bolts
approximately 90% with the included wrench.
Repeat the process in Step 2-2 to assemble the other bottom section. Lay the assembled top and bottom
sections side by side to confirm that all sections are the same length.
2-1
Assemble a top section by sliding two top corner sections
F
over
the ends of a top center section
G
. Align the sections so the index
numbers printed on the center section show through the cutouts
in the corner sections. The index numbers correspond to the rack’s
mounting depth, which is adjustable from 22 inches to 36 inches in
1-inch increments. You can set the rack to the required mounting
depth by cross-referencing the index numbers with the table at
right. When the sections are aligned at the required depth, use an
M8 bolt
J
and M8 washer
K
to fasten each section in place. The
bolt will pass through the corner section and into threaded holes in
the center section. Tighten the bolts approximately 90% with the
included wrench – they should be fixed in place, but not completely
tightened.
Note: You’ll finish tightening all nuts and bolts when the rack is fully assembled.
Loading ...
Loading ...
Loading ...
