Loading ...
54 mm
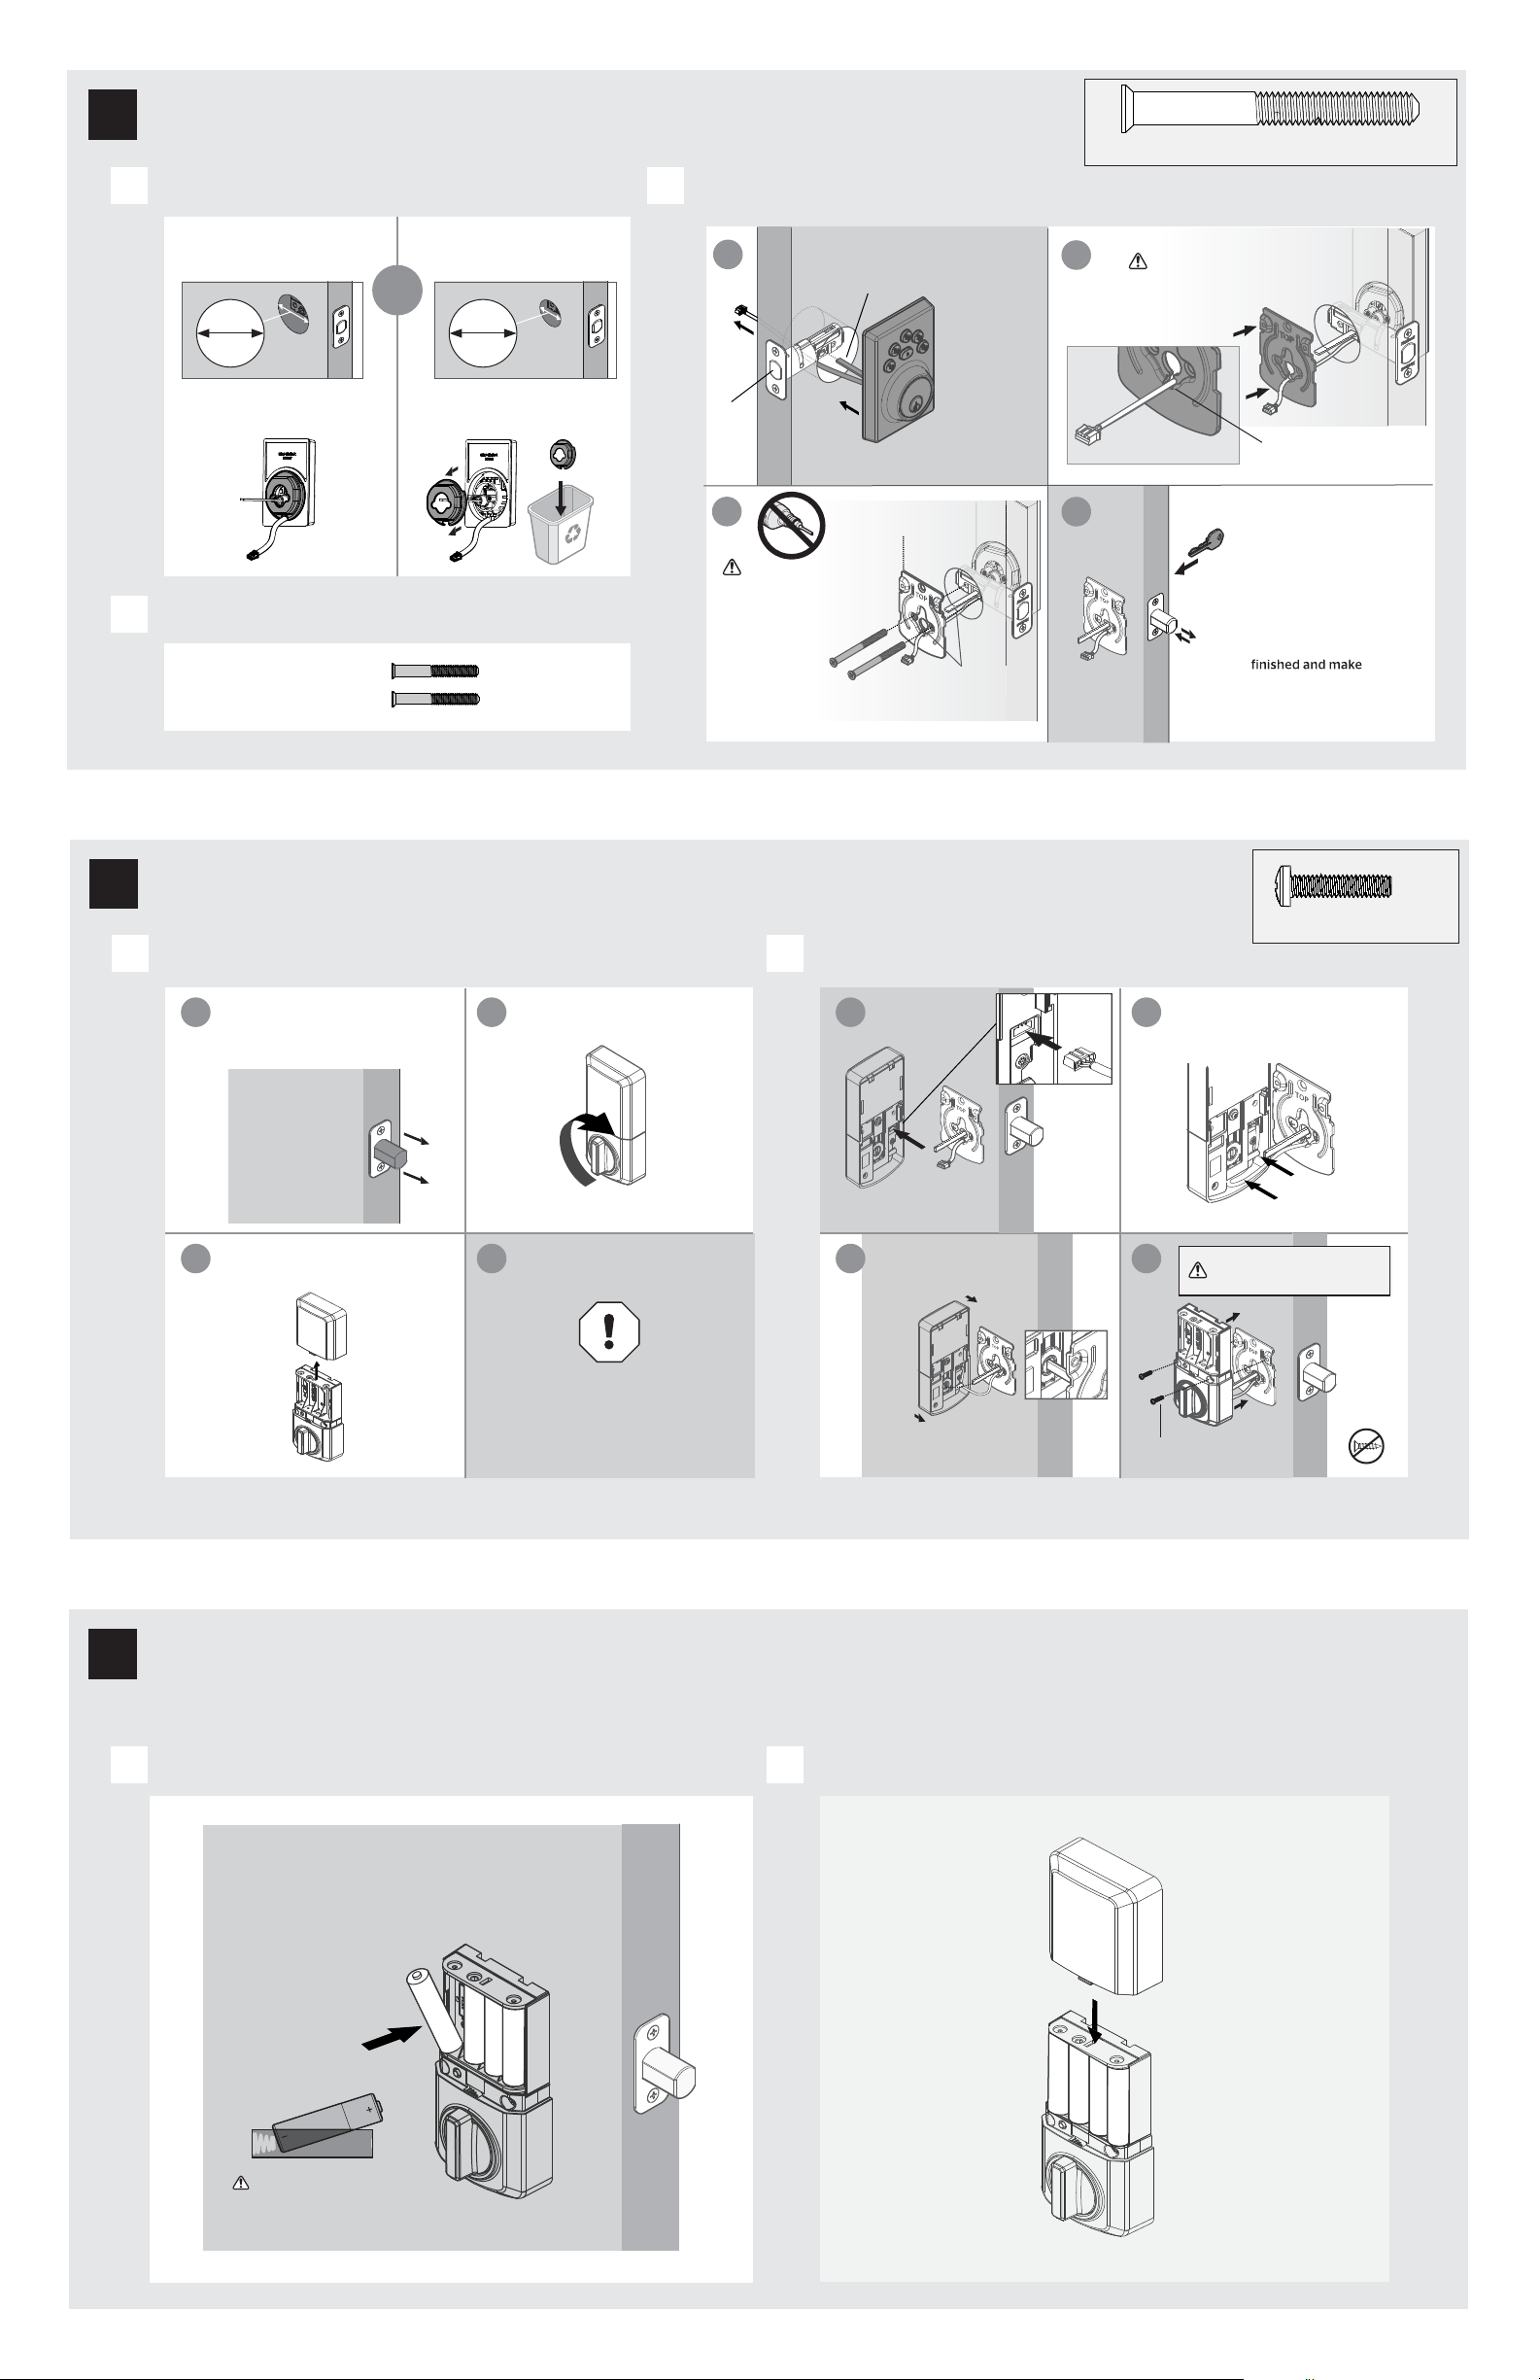
2-1/8 in
38 mm
1-1/2 in
2 / 4
What is the diameter of the hole in the door?
Locate screws for step 3C and keep them within reach.
Install exterior keypad and mounting plate.
A
B
C
Diameter is 2-1/8 in
(54 mm)
Diameter is 1-1/2 in
(38 mm)
or
Adapter ring is not needed
for installation.
Install 4 AA batteries in interior assembly
A
3
Install the exterior keypad
5
Install the batteries in the interior assembly
Adapter ring is required for
installation.
53646
actual size
(2x)
For Lock
Bag
53646
(2x)
(For Lock Bag)
Remove interior cover from interior assembly. Secure the interior assembly onto the mounting plate.
A B
a
c
b
a
b
d
4
Install the interior assembly
52502
actual size
(2x)
For Lock
Bag
Remove the interior cover
from the interior assembly.
Make sure turnpiece shaft
is rotated as shown.
Check to make sure the latch bolt
is in the extended/locked position
to install the interior assembly.
If the turnpiece is not pointing up,
rotate the turnpiece until you hear a click.
Do not install batteries
until step 5.
d
Route cable around the side
notch and bottom of the
interior assembly.
c
Insert the flat blade into
the turnpiece shaft.
Note: Batteries are not included
Ensure your door is open while installing batteries.
Ensure the interior cover is off to install batteries.
Ensure correct polarity.
For best results, use
new, non-rechargeable
alkaline batteries only.
B
Install interior cover for the interior assembly.
Make sure bolt
is RETRACTED
Cable goes
underneath latch.
Route cable through
center hole, then push
cable into bottom hole.
evenly.
c
Insert key and
test latch. If latch
does not extend or
retract smoothly,
adjust screws.
Remove key when
sure the latch bolt
is FULLY EXTENDED.
a
b
d
Support exterior
assembly during
mounting plate
installation.
53646
(2x)
(For Lock Bag)
Tighten screws
DO NOT
over tighten screws.
TOP of the mounting plate
should be visible
Keep parallel to edge of door.
Make sure the flat
blade is centered in the
mounting plate hole.
Rotate the flat blade to a
horizontal position to match
the latch orientation.
Ensure you are using the correct
screws. Using incorrect screws will
damage the product.
52502
(2X)
Connect the cable.
Ensure a tight cable connection.
Loading ...
Loading ...