www.GEAppliances.com
°e,,,q
Safety Information
Anti-Tip Device .............. 2
Oven ....................... 5
Radiant Surface Units ........ 4
Safety Precautions ......... 2, 3
Operating Instructions
Clock and Timer ............ 13
Oven ................... 10-20
Oven Thermostat ........... 15
Sabbath Feature ............. 20
Self-Cleaning ............ 16, 17
Surface Units .............. 6, 7
Timed Baking & Roasting .... 14
Care and Cleaning
Broiler Pan & Grid .......... 23
Control Knobs ............. 21
Control Panel .............. 22
Glass Cooktop ........... 25-26
Lift-Off Oven Door .......... 22
Oven Light ................. 24
Oven Shelves ............... 23
Oven Vent ................. 21
Stainless Steel Surfaces ....... 21
Storage Drawer Removal ..... 23
JI)P46
jsP46
Troubleshooting Tips
Before You (;all
For Service 27-. 0
Consumer Support
Consumer Support.. Back Cover
Product Registration ..... 33, 34
Warranty .................. 35
Write the model and serial
numbers here:
Model #
Serial #
You can find them on a label
behind the open oven door
on the lower left corner of the
range fi'ame.
164D4290P018 49-80052 12-00JR
IMPORTANTSAFETYINFORMATION.
READALLINSTRUCTIONSBEFOREUSING.
WARNING!
For your safety, the information in this manual must be followed to minimize the risk of fire, electric
shock, or to prevent property damage, personal injury, or loss of life.
2
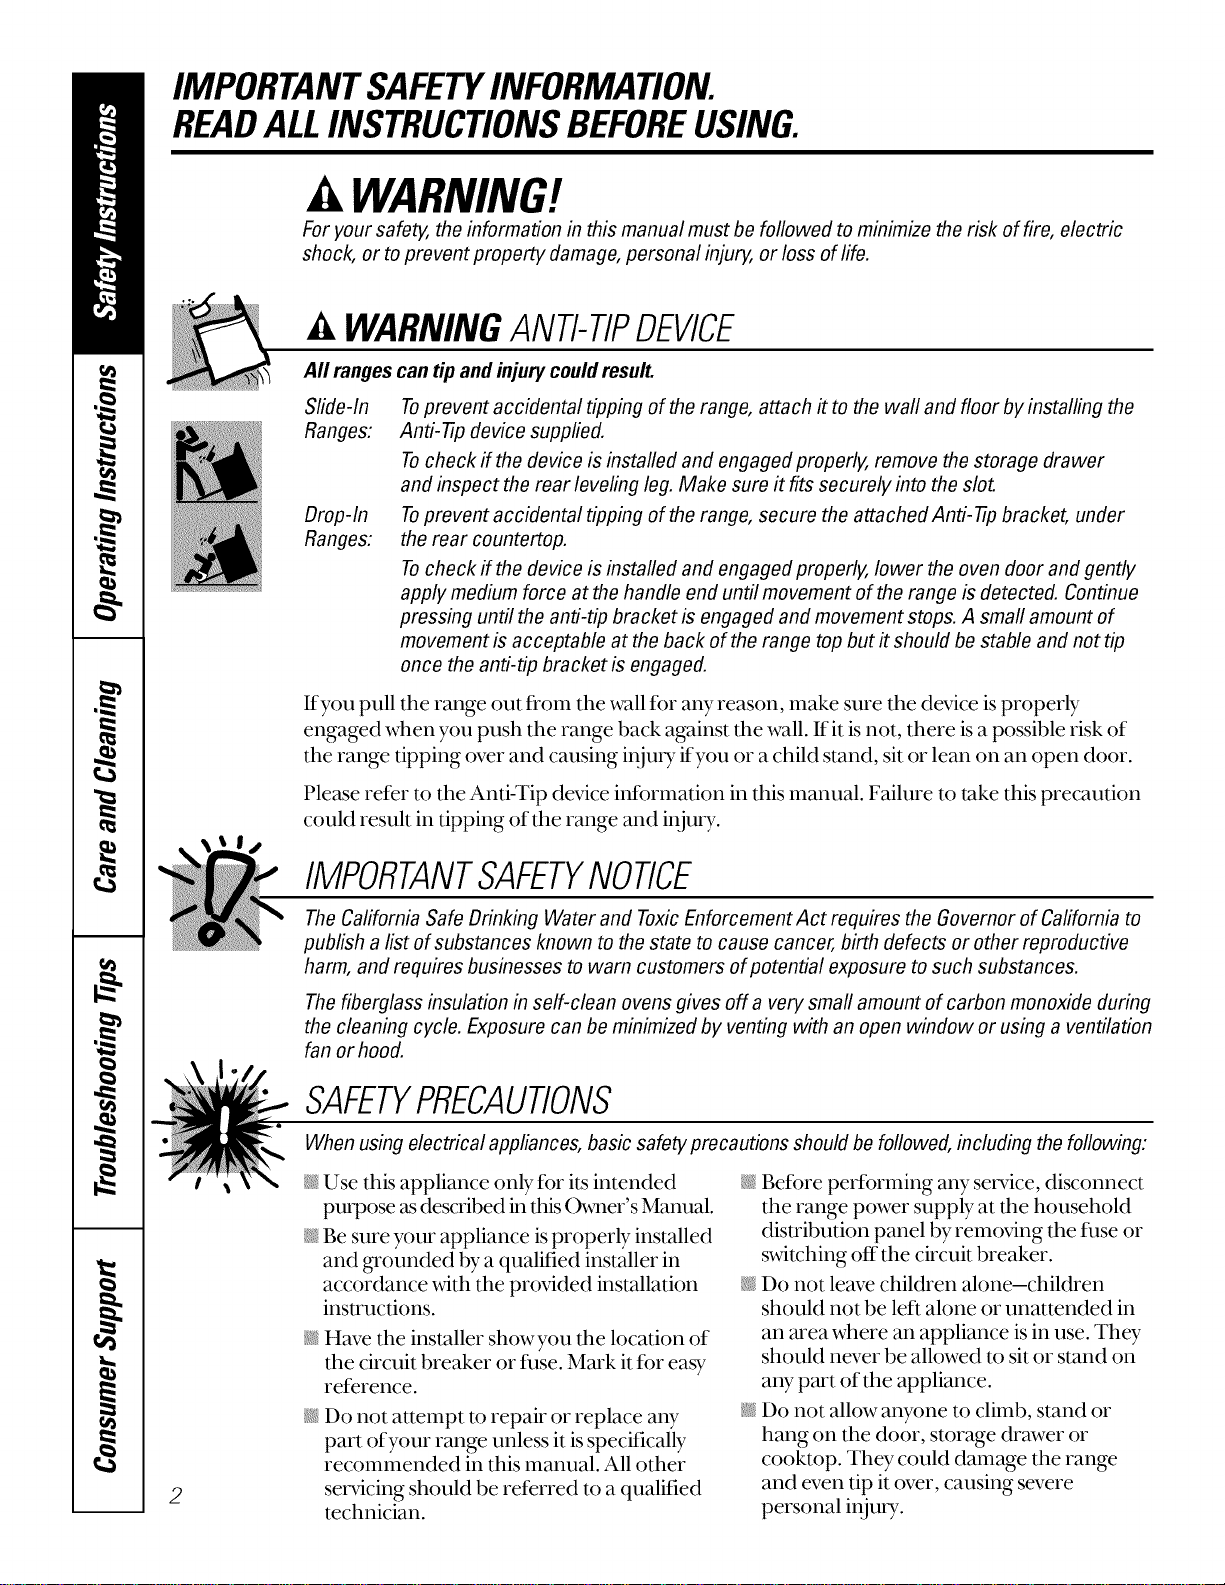
WARNINGANti-TIPDEVICE
Aft ranges
Slide-In
Ranges:
Drop-In
Ranges:
can tip and injury could result.
Toprevent accidental tipping of the range, attach it to the waft and floor by installing the
Anti-tip device supplied.
Tocheck if the device is installed and engaged properly, remove the storage drawer
and inspect the rear leveling leg. Make sure it fits securely into the slot.
Toprevent accidental tipping of the range, secure the attached Anti-tip bracket, under
the rear countertop.
Tocheck if the device is installed and engaged properly, lower the oven door and gently
apply medium force at the handle end until movement of the range is detected. Continue
pressing until the anti-tip bracket is engaged and movement stops. A small amount of
movement is acceptable at the back of the range top but it should be stable and not tip
once the anti-tip bracket is engaged.
If you pull the range out from the wall for any reason, make sure the device is properly
engaged when you push the range back against tl_e wall. Ifit is not, there is a possible risk of
the range tipping over and causing injuU ityou or a child stand, sit or lean on an open door.
Please refer to the Anti-Tip device hfformation in this manual. Failure to take this precaution
could result in tipping of the range and h_jury.
IMPORTANTSAFETYNOtiCE
The California Safe Drinking Water and Toxic Enforcement Act requires the Governor of California to
publish a list of substances known to the state to cause cancer, birth defects or other reproductive
harm, and requires businesses to warn customers of potential exposure to such substances.
The fiberglass insulation in self-clean ovens gives off a very small amount of carbon monoxide during
the cleaning cycle. Exposure can be minimized by venting with an open window or using a ventilation
fan or hood.
SAFETYPRECAUtiONS
When using electrical appliances, basic safety precautions should be followed, including the following:
@
@
Use this appliance only for its intended
pulpose as described in dds O_mer's Manual.
Be sure your appliance isproperly installed
and _ounded by a qualified installer in
accordance with the provided installation
instructions.
Have the installer showyou dm location of
the circuit breaker or fuse. Mark it for easy
reference.
Do not attempt to repair or replace any
part ofyour range unless it is specitically
recommended in this manual. All other
servicing should be referred to a qualified
technician.
Betbre performing any service, disconnect
the range power supply at file household
distribution panel by removing the fllse or
switching off the circuit breaker.
_ Do not leave children alone-children
should not be left alone or unattended in
an area where an appliance is in use. They
should never be allowed to sit or stand on
any part of the appliance.
@Do not allow anyone to climb, stand or
hang on the door, storage drawer or
cooktop. They could damage the range
and even tip it over, causing severe
personal injury.
wvvw.GEAppliances.com
A WARNING'!
SAFETYPRECAUTIONS
Do not operate the oven or cooktop controls if the glass is broken. Foodsplatter or cleaning solution
may penetrate a broken control panel or cooktop and create a risk of electrical shock. Contact a
qualified technician immediately should your glass control panel or cooktop become broken.
_ Do not store flammable materials in an
oven or near the cooktop.
CAUTION:Itemsofinterestto
children should not be stored in cabinets
above a range or on the back of a range-
children climbing on the range to reach
items could be seriously ir_jured.
@Never wear loose-fitting or hanging
garments while using tile appliance. Be
careful when reaching for items stored over
the range. Flammable material could be
ignited if brought in contact with hot
surface units or heating elements and may
cause severe burns.
@ Use only" dry pot holders--moist or damp
pot holders on hot surfaces may result in
burns from steam. Do not let pot holders
touch hot sur[hce units or heating elements.
Do not use a towel or other bulky cloth in
place of pot holders.
N
@
@
Do not use water on _-ease fires. Never
pick up aflaming pan. Turn the controls
ofL Smother a flaming pan on a surface
unit by covering the pan completely with a
well-fitting lid, cookie sheet or flat tray. Use
a nmlti-purpose dry chemical or foam-type _0_
fire extinguisher.
Flaming _-ease outside a pan can be put
out by covering it with baking soda or, if
available, by using a multi-purpose dry
chemical or foam-type fire extinguisher.
Flame in the oven can be smothered
completely by closing the oven door and
turning the oven off or by using a multi-
purpose dry chemical or foam-type fire
extinguisher.
@For your safety, never use your appliance
for warming or heating the room.
@
N
@
Do not let cooking _ease or other
flammable materials accumulate in or
near the range.
Do not touch the sm{hce units, tire heaung
elements or tire interior surfhce of the
oven. These surfhces may be hot enough to
burn even though they are dark in color.
During and after use, do not touch, or let
clothing or other flanlmable materials
contact the sm{hce units, areas nearby the
surfhce units or any interior area of the
oven; allow sufficient time for cooling first.
Potentially hot surfaces include the
cooktop, areas facing the cooktop, oven
vent opening, surfaces near the opening,
crevices around the oven door.
REMEMBER:The inside sur/hce of the oven
may be hot when tile door is opened.
Do not store or use combustible materials,
gasoline or other flammable vapors and
liquids in the vicinity of this or any other
appliance.
Keep the hood and _ease filters clean
to maintain good venting and to avoid
grease fires.
Teach children not to play with the
controls or any other part of the range.
Always keep dish towels, dish cloths, pot
holders and other linens a safe distance
from your range.
Ahvays keep wooden and plastic utensils
and canned food a safe distance from
your range.
Ahvays keep combustible wall coverings,
curtains or drapes a safe distance from
your range.
COOKMEATANDPOULTRYTHOROUGHLY...
Cookmeat andpoultry thoroughly--meat to at leastan INTERNALtemperatureof 160°Eandpoultry
toat least an INTERNALtemperatureof 180°ECookingto thesetemperaturesusuallyprotectsagainst
foodbomeillness.
3
IMPORTANTSAFETYINFORMATION.
READALLINSTRUCTIONSBEFOREUSING.
4
RADIANTSURFACEUNITS
Use proper pan size--select cookware having flat bottoms large enough to cover the surface unit
heating element. Theuse of undersized cookware will expose a portion of the surface unit to direct
contact and may result in ignition of clothing. Proper relationship of cookware to surface unit will
also improve efficiency.
Never leave the surface units unattended at
high heat settings. Boilovers cause smoking
and _easy spillovers that may catch on fire.
_ Only certain types of glass, glass/ceramic,
earthenware or other glazed containers are
suitable for cooktop service; others may
break because of the sudden change in
temperature.
@To minimize the possibility of burns,
ignition of flammable materials and
spillage, the handle of a container should
be turned toward the center of the range
without extending over nearby surface units.
Ahvays turn the surface units off before
removing cookware.
@When preparing flaming foods under the
hood, turn the fan on.
@ Use care when touching the cooktop. The
glass surface of the cookmp _411retain heat
after the controls have been turned off.
@ Keep an eye on foods being flied at high or
medium high heat settings.
N Foods tor fiTing should be as &T as
possible. Frost on fiozen toods or moisture
on fi-esh foods can cause hot fat to bubble
up and over the sides of the pan.
N Use little fat tor effective shallow or deep
fat flying. Filling the pan too fldl of fat can
cause spillovers when food is added.
@ ff a combination of oils or fats will be used
in flying, stir together before heating, or as
fats melt slowly.
@ Ahvays heat fat slowly, and watch as it heats.
@ Use a deep fat thermometer whenever
possible to prevent overheating fat beyond
the smoking point.
N Avoid scratching the glass cooktop. The
cooktop can be scratched with items such
as sharp instruments, rings or other
jewelry, and rivets on clothing.
Do not operate the radiant sur[ace units if
the glass is broken. Spillovers or cleaning
solution may penetrate a broken cooktop
and create a risk of electrical shock.
Contact a qualified technician immediately
should your glass cooktop become broken.
N Never use the glass cooktop surface as a
cutting board.
@ Do not place or store items that can melt or
catch fire on the glass cooktop, even when
it is not being used.
N Be carefld when placing spoons or other
stirring utensils on glass cooktop surface
when it is in use. They may become hot and
could cause burns.
@ Clean the cooktop with caution. Ifa wet
sponge or cloth is used to wipe spills on a
hot sm{hce unit, be carefifl m avoid steam
burns. Some cleaners can produce noxious
fimms if applied m a hot surface.
NOTE: We recommend thatyou avoid
wiping aW surface unit areas until they
have cooled and the indicator light has
gone off. Sugar spills are the exception to
this. Please see the Cleaning the glass
cooktop section.
N When the cooktop is cool, use only the
recommended cleaning cream to clean
the cooktop.
@ To aw)id possible damage to the cooking
surface, do not apply cleaning cream to
the glass surface when it is hot.
@Alter cleaning, use a &Y cloth or paper
towel to remove all cleaning cream residue.
N Read and follow all instructions and
warnings on the cleaning cream labels.
wvvw.GEAppliances.com
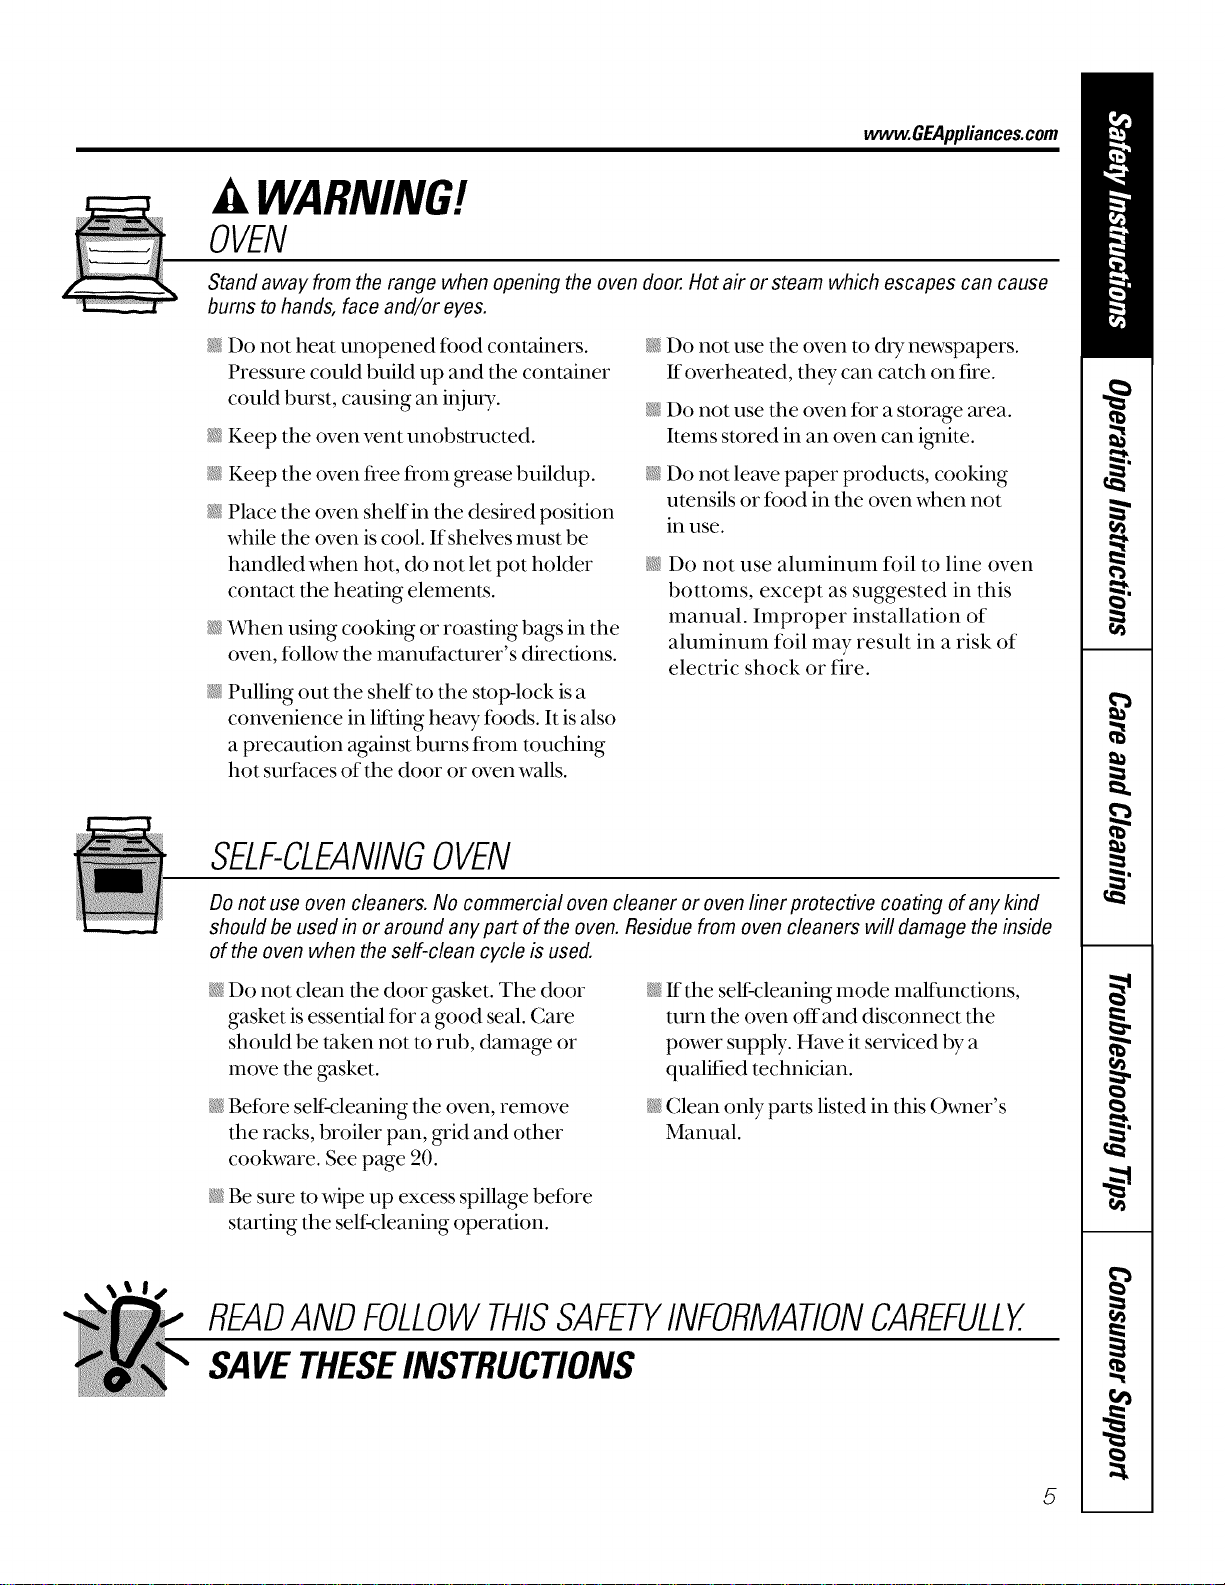
WARNING'!
OVEN
Stand away from the range when opening the oven door. Hot air or steam which escapes can cause
bums to hands, face and/or eyes.
Do not heat unopened food containers.
Pressure could build up and the container
could burst, causing an i,{juU.
N
@
N
N
@
Keep the oven vent unobstructed.
Keep the oven fl_ee fl_om grease buildup.
Place the oven shelf in the deshed position
while the oven is cool. If shelves must be
handled when hot, do not let pot holder
contact the heating elements.
When using cooking or roasting bags in the
oven, follow the manufacturer's directions.
Pulling out the shelf to the stop-lock is a
convenience in lifting heavy foods. It is also
a precaution against burns fl_om touching
hot surfaces of the door or oven walls.
N
@
@
Do not use the (wen to dry newspapers.
If overheated, they can catch on fire.
Do not use the oven for a storage area.
Items stored in an oven can i_dte.
Do not leave paper products, cooking
utensils or food in the (wen when not
in use.
Do not use aluminum fl_il to line oven
bottoms, except as suggested in this
manual. Improper installation of
aluminum foil may result in a risk of
electric shock or fire.
SELF-CLEANINGOVEN
Do not use oven cleaners. No commercial oven cleaner or oven liner protective coating of any kind
should be used in or around any part of the oven. Residue from oven cleaners will damage the inside
of the oven when the self-clean cycle is used.
N Do not clean the door gasket. The door
gasket is essential for a good seal. Care
should be taken not to rub, damage or
move the gasket.
N Before sell:cleaning the oven, remove
the racks, broiler pan, _id and other
cookware. See page 20.
@ Be sure to wipe up excess spillage befbre
starting the self:cleaning operation.
N If the sell:cleaning mode malfunctions,
turn the oven offand disconnect the
power supply. Have it serviced by a
qualified technician.
N Clean only parts listed in this Owner's
Manual.
READANDFOLLOWTHISSAFETYINFORMATIONCAREFULLY.
SAVETHESEINSTRUCTIONS
5
Usingthesurfaceunits.
Throughout this manual, features and appearance may vary from your model
!i!i_i¸i!i!i!i!!ii_iiiiiiii_!i_i_!ili!i!_!i_iii!i!i_g_!iii!;i:i, i! _'_iiiiiiiii!_:_i;i;_iii_i_ii!i!i!!iiii!i!iii¸i_iiii_iii!!i_i_!i¸ii!i_!!i:i!i!!iiii!_ii_!ii_i,li!il;i
i!!1%!!i_i:!i: _iii!!_!i_iii_ili!ii!i_!ii!ii!i!_¸¸;!;!_iiiii!i!i!i!i_i!i!i!IJ_!!!i
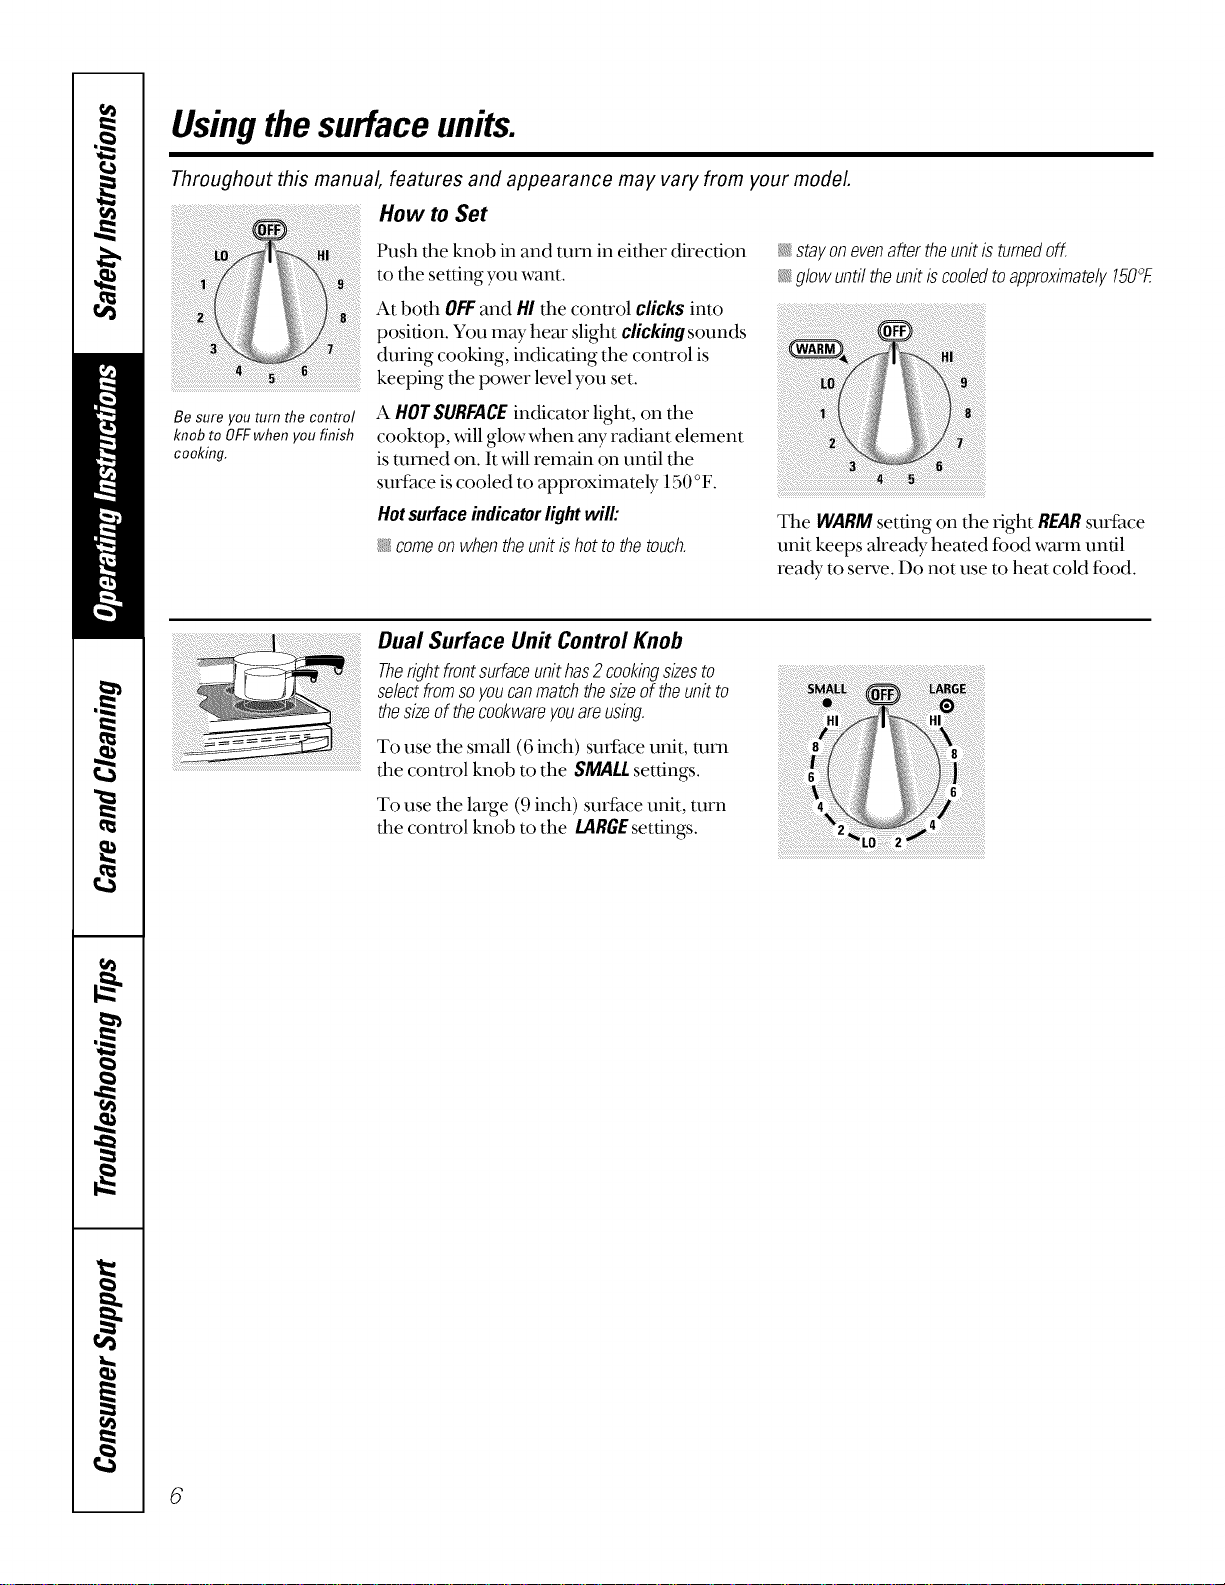
How to Set
Push tile knob in and turn in either direction
to the setting you want.
At both OFFand HI the conu'ol clicks into
position. You may hem" slight clicking sounds
during cooking, indicating the conu'ol is
keeping the power level you set.
stayonevenaftertheunitisturnedoff.
glowuntiltheunitiscooledtoapproximately150°E
Be sure you turn the control
knob to OFFwhen you finish
cooking.
A HOTSURFACEindicator light, on the
cooktop, will glow when any radiant element
is mined on. It will remain on until the
surface is cooled to approximately 150 °F.
Hotsurfaceindicatorlightwill:
_ comeon when the unit is hot to the touch.
The WARMsetting on the fight REARsurface
unit keeps already heated food warm until
ready to set_,e. Do not use m heat cold food.
Dual Surface Unit Control Knob
Therightfrontsurfaceunithas2cookingsizesto
selectfromsoyoucanmatchthesizeof theunitto
thesizeof theco&wareyouareusing
To use the small (6 inch) sudhce unit, mm
the control knob to the SMALL settings.
To use the large (9 inch) surface unit, turn
the control knob to the LARGEsettings.
6
wvvw.GEAppliances.com
The following information will help you choose cookware which will give good performance on glass cooktops.
Never cook directly on the glass,
Always use cookware,
Always place the pan in the center of
the surface unityou are cooking on.
About the radiant surface units...
The radiant cooktop teamres heating
units beneath a smooth glass suri_lce.
NOTE:A slightodorisnormalwhenanew
cooktopisusedforthefirsttime.It iscausedby
theheatingofnewpartsandinsulatingmaterials
andwifl disappearina shorttime.
The surface unit _,_4llcycle on and off'to
maintain your selected control setting.
It is sale to place hot cookware on the
glass smihce even when the cooktop
is cool.
Even atter tlle surface units are turned
oft, the glass cooktop retains enough heat
m continue cooking. To avoid over-
cooking, remove pans fl'om the surt_ace
units when the food is cooked. Avoid
placing awthing on the surface unit
until it has cooled completely.
Do not slide cookware across the
cooktop because it can scratch the
glass--the glass is scratch resistant,
not scratch proof.
_ Waterstains(mineraldeposits)areremovable
usingthecleaningcreamorfurlstrengthwhite
vinegar.
_'_;Useof windowcleanermayleavean
iridescentfilm ontheco&top.Thecleaning
creamwi//removethisdiscoloration.
_ Don'tstoreheavyitemsabovethecooktop.
ff theydropontotheco&top,theycancause
damage.
_ Donotusethesurfaceasacuttingboard.
Temperature Limiter
EvmT t_ldiant suriace unit has a
temperature limiter.
The mmperamre limiter protects the
glass cooktop from getting too hot.
The temperature limiter may cTcle
the units offfor a time if:
_ Thepanboilsdry.
_: Thepanbottomisnotflat.
_ Thepanisoffcenter.
Thereisnopanontheunit.
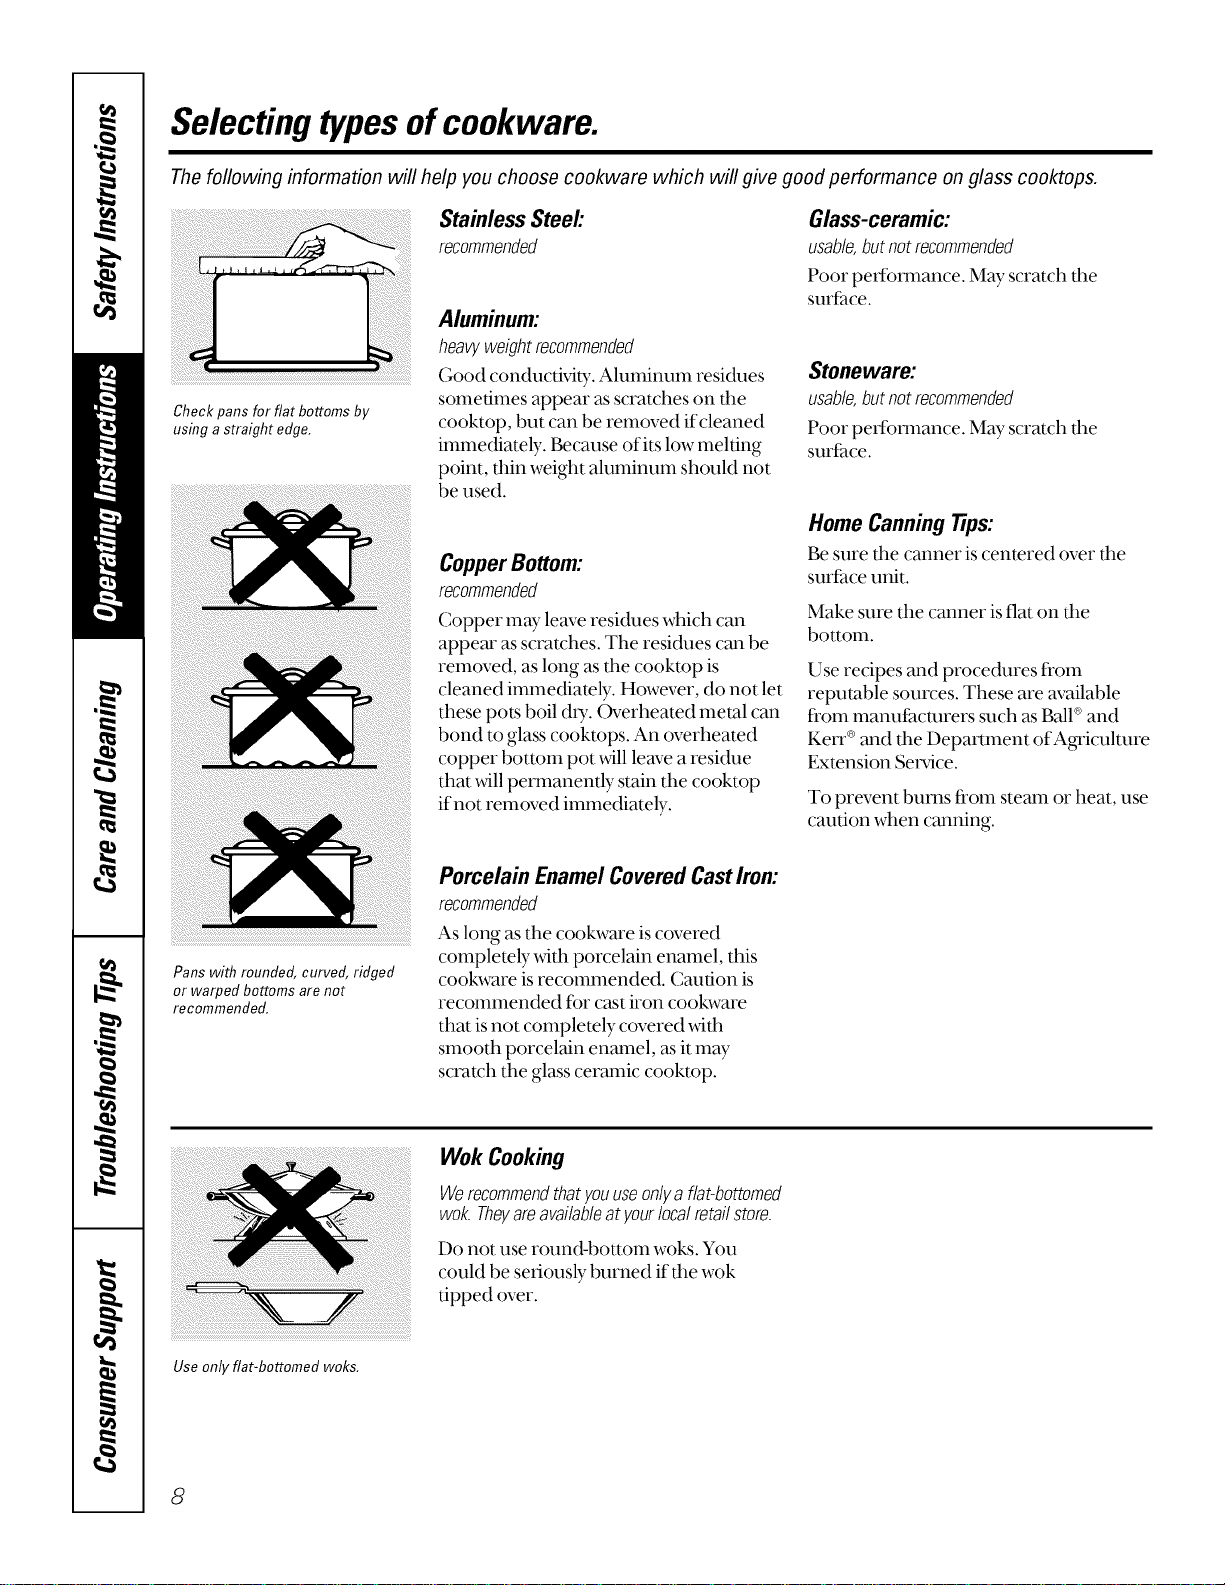
Selectingtypesofcookware.
The following information will help you choose cookware which will give good performance on glass cooktops.
Check pans for flat bottoms by
using astraight edge.
Stainless Steel:
recommended
Aluminum:
heavyweight recommended
Good conductMty. Aluminum residues
sometimes appear as scratches on the
cooktop, but can be removed if cleaned
immediately. Because of its low melting
point, thin weight aluminum should not
be used.
CopperBottom:
recommended
Copper may leave residues which can
appem" as scratches. The residues can be
removed, as long as the cooktop is
cleaned immediamly. However, do not let
these pots boil d U. Overheated metal can
bond to glass cookmps. An overheated
copper bottom pot will leave a residue
that will permanently stain the cooktop
if not removed immediately.
Glass-ceramic:
usable,butnotrecommended
Poor perfbmlance. May scratch the
surfhce.
Stoneware:
usable,butnotrecommended
Poor peffommnce. May scratch dm
surthce.
Home Canning Tips:
Be sure the canner is centered over the
suriace unit.
Make sure the canner is flat on tim
bottom.
Use recipes and procedures ii'om
reputable sources. These are available
ii'om manuiacmrers such as Ball®and
Ken `®and the DeparUnent of Agriculture
Exmnsion Service.
To prevent bums from steam or heat, use
caution when canning.
Pans with rounded, curved, ridged
or warped bottoms are not
recommended.
Porcelain EnamelCoveredCastIron:
recommended
As long as the cookware is covered
completely _4th porcelain enamel, this
cookware is recommended. Caution is
recommended for cast iron cookware
that is not complemly covered _4th
smooth porcelain enamel, asit may
scratch the glass ceramic cookmp.
Use only fiat-bottomed woks.
Wok Cooking
Werecommendthatyouuseonlya flat-bottomed
wok.Theyareavailableatyourlocalretailstore.
Do not use round-bottonl woks. You
could be seriously burned if the wok
tipped over.
8
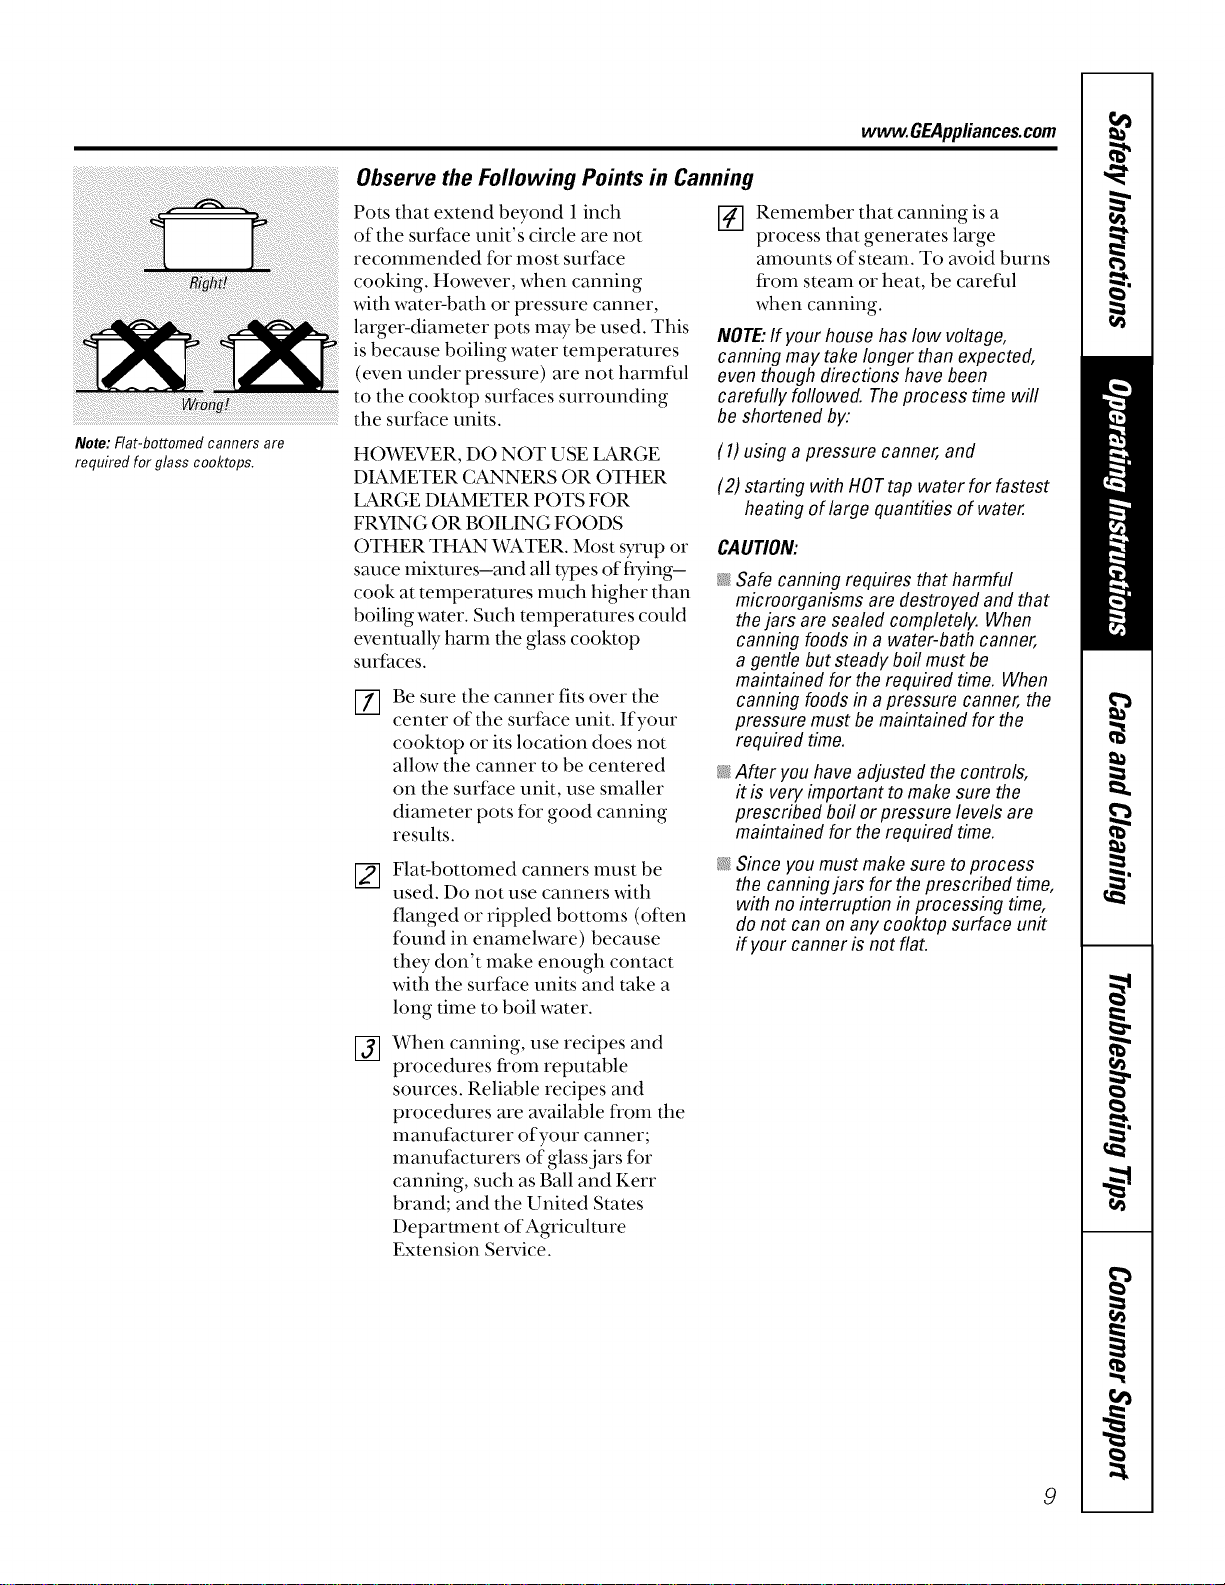
Note: Flat-bottomed canners are
required for glass cooktops.
www.GEAppliances.com
Observe the Following Points in Canning
Pots that extend beyond i inch
of the surface unit's circle are not
recommended for most surface
cooking. However, when canning
with water-bath or pressure canner,
larger-diameter pots may be used. This
is because boiling water temperatures
(even under pressure) are not harmflll
to the cooktop surfhces surrounding
the surface units.
[] Remember that canning is a
process that generates large
amounts of steam. To avoid burns
fi'om steam or heat, be carefld
when canning.
NOTE:If your househas low voltage,
canning may take longer than expected,
even though directions have been
carefully followed. Theprocess time will
be shortened by:
HO_gEVER, DO NOT USE LARGE
DIAMETER CANNERS OR OTHER
LARGE DIAMETER POTS FOR
FRYING OR BOILING FOODS
OTHER THAN WATER. Most syrup or
sauce mixtures-and all t}_oesof flTing-
cook at temperatures much higher than
boiling water. Such temperatures could
eventually harm the glass cooktop
surfaces.
[]
Be sure the canner fits over the
center of the surface unit. If your
cooktop or its location does not
allow the canner to be centered
on the surface unit, use smaller
diameter pots fBr good canning
results.
Flat-bottomed canners nmst be
used. Do not use canners _4th
flanged or rippled bottoms (often
found in enamelware) because
they don't make enough contact
with the surface units and take a
long time to boil water.
(1) using a pressure canner, and
(2) starting with HOTtap water for fastest
heating of large quantities of water.
CAUTION:
@
@
@
Safe canning requires that harmful
microorganisms are destroyed and that
thejars are sealed completely. When
canning foods in a water-bath canner,
a gentle but steady boil must be
maintained for the required time. When
canning foods in apressure canner, the
pressure must be maintained for the
required time.
After youhave adjusted the controls,
it is very important to make sure the
prescribed boil or pressure levels are
maintained for the required time.
Since you must makesure to process
the canningjars for the prescribed time,
with no interruption in processing time,
do not can on any cooktop surface unit
if your canner is not flat.
@
When canning, use recipes and
procedures from reputable
sources. Reliable recipes and
procedures are available from the
manuf_mturer of your canner;
manufacturers of glass jars for
canning, such as Ball and Kerr
brand; and the United States
Department of Agriculture
Extension Set_,ice.
9
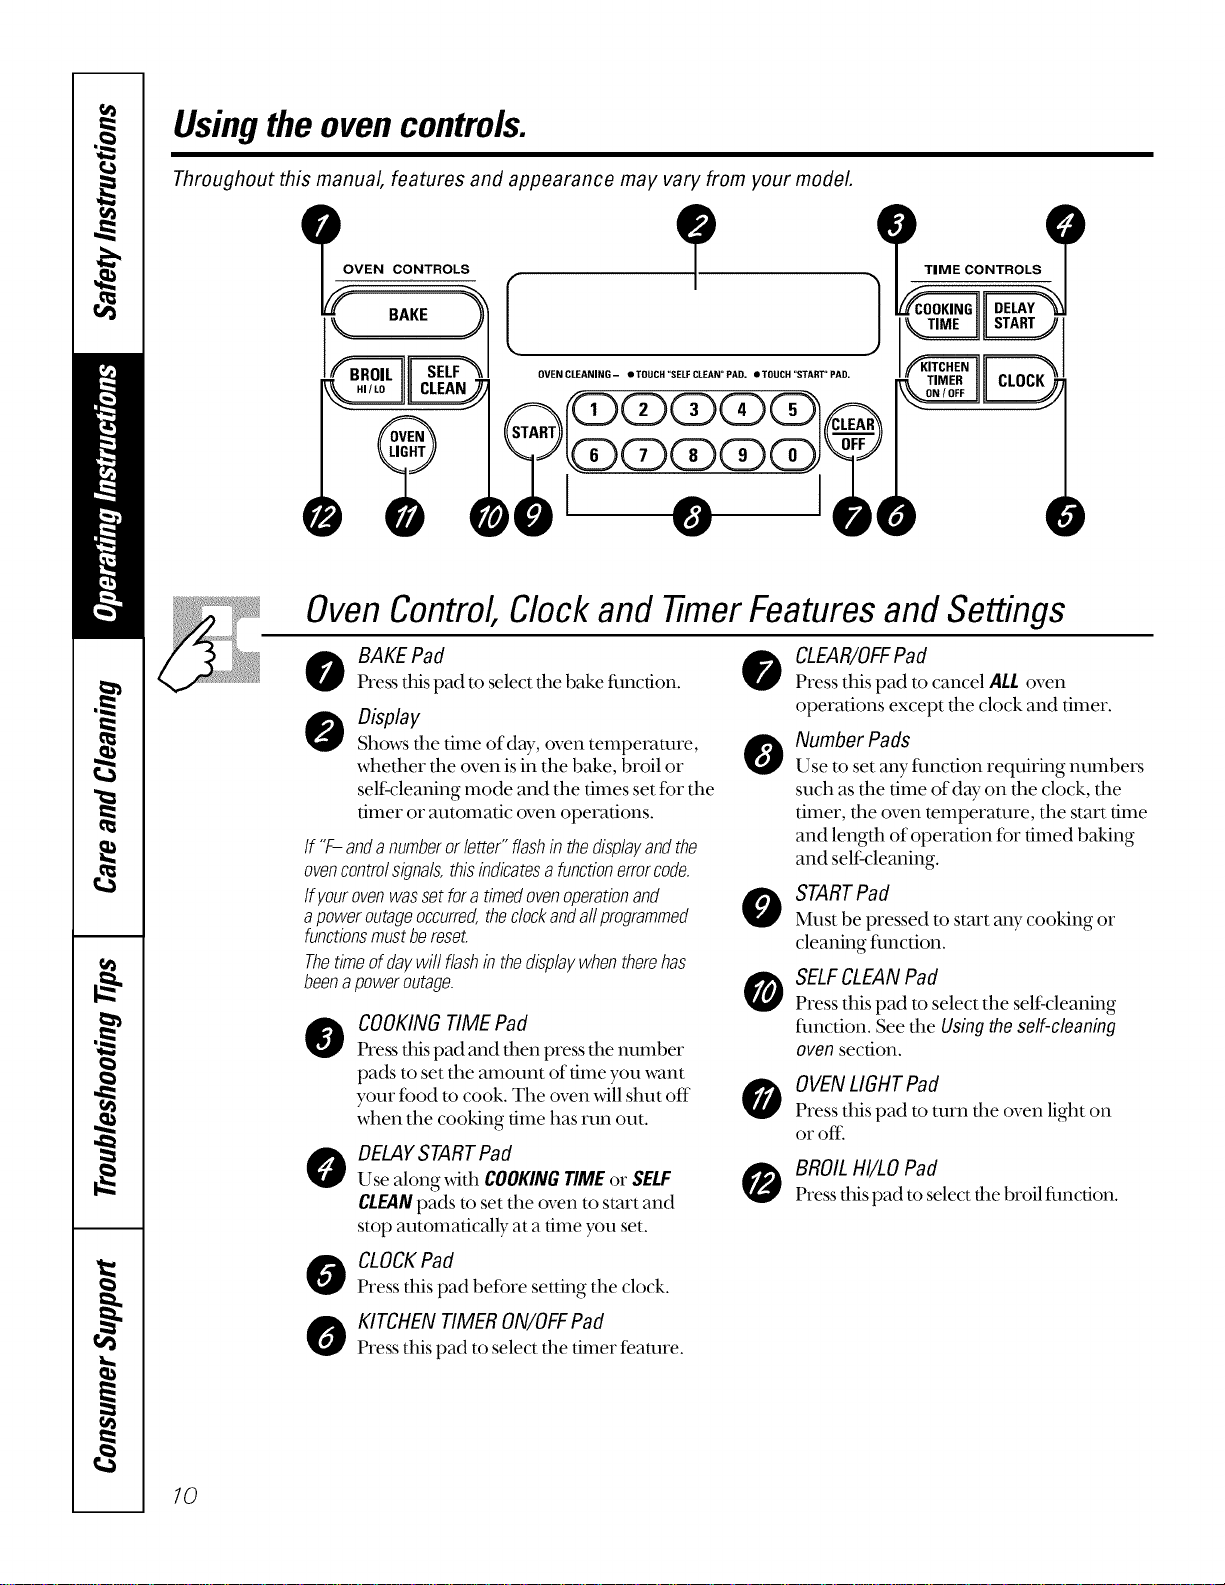
Usingtheovencontrols.
Throughout this manual, features and appearance may vary from your model
__ VEN CONTROLS
TIME CONTROLS
0VENCLEANING- OTOUCH"SELFCLEAN°PAD, eTOUCH"START"PAD,
OvenControl,Clockand timer Featuresand Settings
BAKE Pad 0
Press tlds pad to select tile bake fimcfion.
Display
Shows tile time of day, oven temperature, A
whether the oven isin the bake, broil or
self:cleaning mode and the times set for the
timer or automatic oven operations.
If "F-anda numberorletter"flashin thedisplayandthe
ovencontrolsignals,thisindicatesafunctionerrorcode.
Ifyourovenwassetfora timedovenoperationand
apoweroutageoccurred,theclockandaftprogrammed
functionsmustbereset.
Thetimeofdaywillflashin thedisplaywhentherehas
beenapoweroutage.
@
0
COOKING TIME Pad
Press this pad and then press the number
pads to set the amount of time you want
your fbod m cook. The oven will shut off
when the cooking time has run out.
DELAYSTARTPad
Use along with COOKINGTIMEor SELF
CLEANpads to set the oven to start and
stop automatically at a time you set.
CLOCKPad
Press this pad befbre setting the clock.
KITCHENTIMER ON/OFFPad
Press this pad to select the timer feature.
0
@
0
0
CLEAR/OFFPad
Press this pad to cancel ALLoven
operations except the clock and timer.
Number Pads
Use to set any flmcdon requiring numbers
such as the time old W on the clock, the
timer, the oven temperature, the start time
and length of operation tbr timed baking
and self:cleaning.
STARTPad
Must be pressed to start any cooking or
cleaning flmction.
SELFCLEANPad
Press this pad to select the self:cleaning
flmction. See the Usingtheself-cleaning
ovensection.
OVENLIGHTPad
Press this pad to turn the oven light on
or off:
BROIL HI/LOPad
Press this pad to select the broil fimcdon.
10
Usingtheoven. www.GEAppliances.com
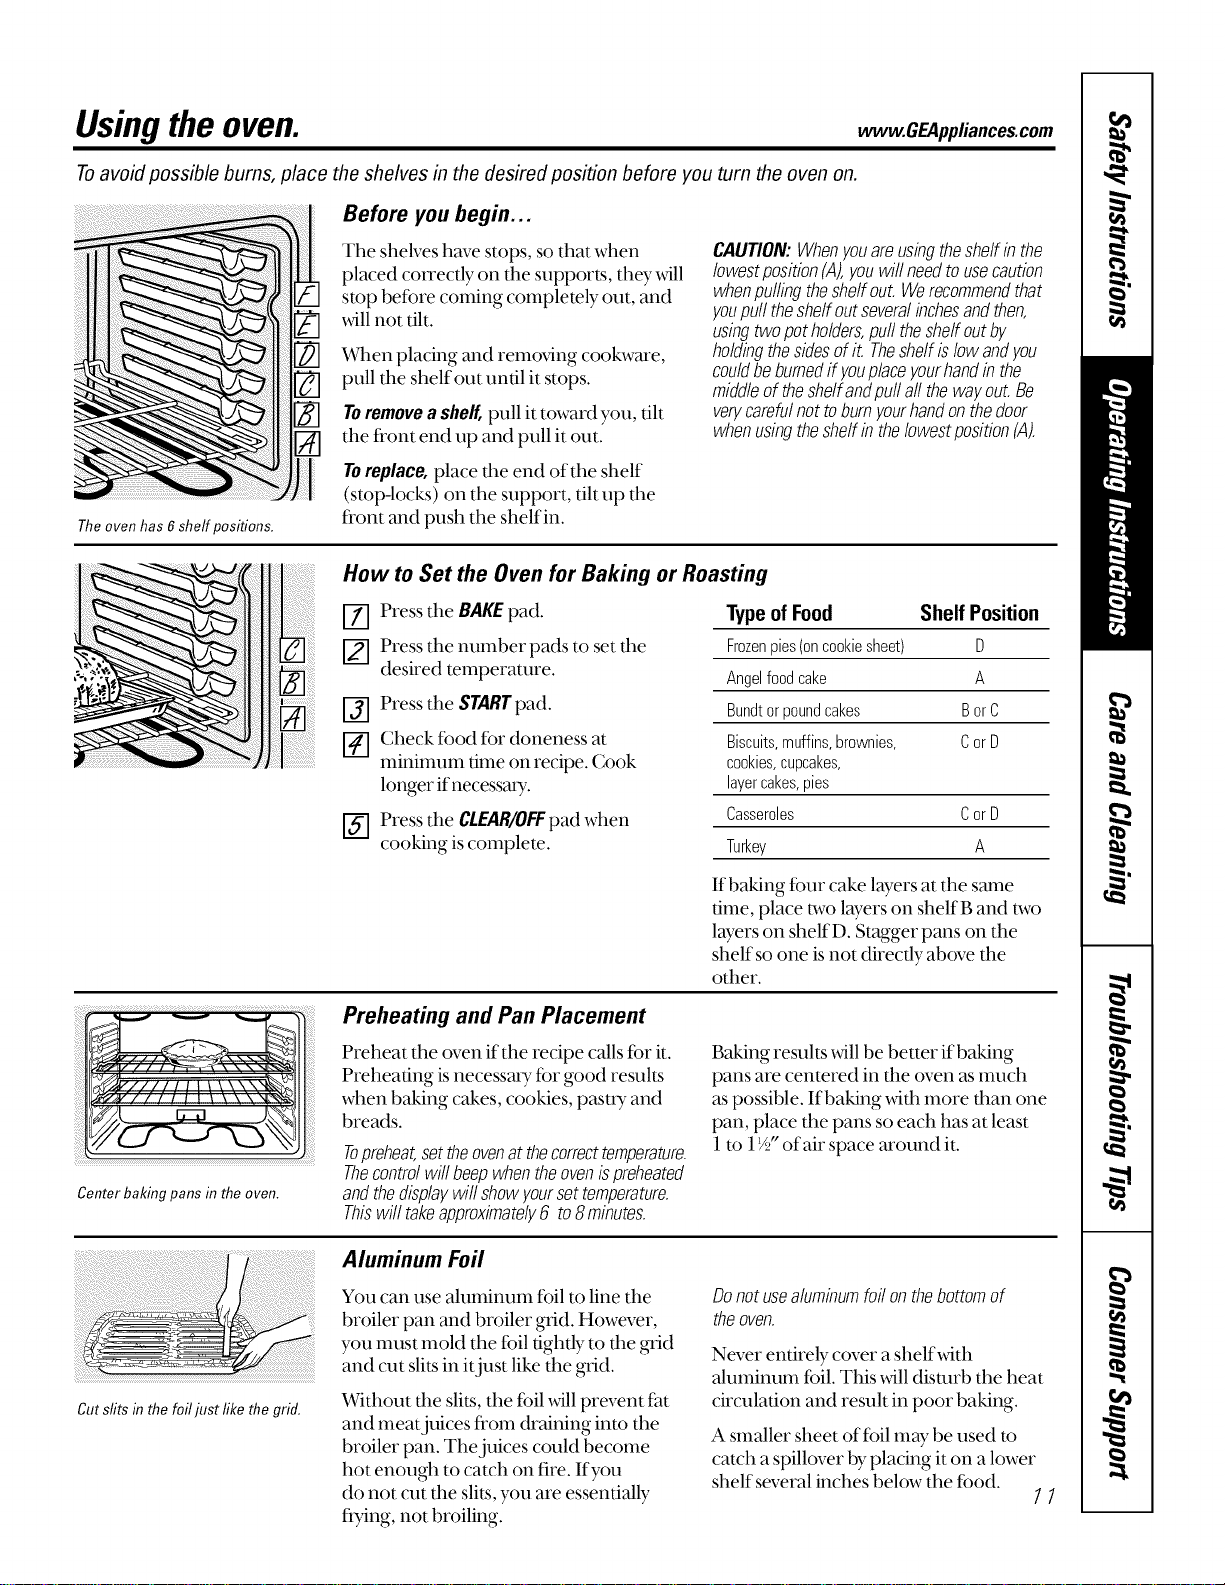
Toavoid possible bums, place the shelves in the desired position before you turn the oven on.
Before you begin...
The shelves have stops, so that when
placed con'ectly on the supports, they _411
stop betbre coming completely out, and
will not tilt.
%lien placing and removing cookware,
pull the shelf out until it stops.
Toremovea shelf,pull it toward you, tilt
the fi'ont end up and pull it out.
CAUTION:Whenyouareusingtheshelfin the
/owestposition(A),youwiflneedtousecaution
whenpuffingtheshelfout.Werecommendthat
youpull theshelfoutseveralinchesandthen,
usingtwopotholders,pulltheshelfoutby
holdingthesidesofit. Theshelfislowandyou
couldbeburnedif youplaceyourhandinthe
middleoftheshe/fandpu//aftthewayout.Be
verycarefulnottoburnyourhandonthedoor
whenusingtheshelfinthelowestposition(A).
Theoven has 6 sheff positions.
Toreplace,place the end of the shelf
(stop-locks) on the support, tilt up the
fi'ont and push the shelf in.
How to Set the Oven for Baking or Roasting
[Z] Press tile BAKEpad.
[] Press the number pads to set the
desired temperature.
f-j] Press the STARTpad.
[] Check food for doneness at
minimum time on recipe. Cook
longer ifnecessary..
[_] Press the CLEAR/OFFpad when
cooking is complete.
Type of Food Shelf Position
Frozenpies(oncookiesheet) D
Angelfoodcake A
Bundtorpoundcakes BorC
Biscuits,muffins,brownies, CorD
cookies,cupcakes,
layercakes,pies
Casseroles CorD
Turkey A
If baking ibur cake layers at the same
time, place two layers on shelfB and two
1wers on shelfD. Stagger pans on the
shelf so one is not directly above the
other.
v//! ! ! ! !
_VIII I I I I \ \\"4L'%'_
Center baking pans in the oven.
Preheating and Pan Placement
Preheat the oven if the recipe calls for it.
Preheating is necessa U ior good results
when baking cakes, cookies, pasuTyand
breads.
Topreheat,settheovenat thecorrecttemperature.
Thecontrolwillbeepwhentheovenispreheated
andthedisplaywifishowyoursettemperature.
Thiswilltakeapproximately6 to8minutes.
Baking results will be better if baking
pans are centered in the oven as much
as possible. If baking _4th more than one
pan, place the pans so each has at least
1to 1'/2"of air space around it.
Cut slits in the foiliust like the grid.
Aluminum Foil
You can use aluminum fbil to line tile
broiler pan and broiler grid. However,
you must mold the foil tightly to the grid
and cut slits in itjust like the grid.
Without the slit.s,the foil will prevent fat
and meat juices fi'om draining into the
broiler pan. The juices could become
hot enough to catch on fire. If you
do not cut the slits, you are essentially
flying, not broiling.
Donotusealuminumfoilonthebottomof
theoven.
Never entirely- cover a shelf_4th
aluminum fail. This _._4lldisturb the heat
circulation and result in poor baking.
A smaller sheet of ff)ilmay be used to
catch a spillover by placing it on a lower
shelf several inches below the tbod.
11
Usingtheoven.
Leave the door open to the broil
stop position. Thedoor stays open
by itself, yet the proper temperature
is maintained in the oven.
How to Set the Ovenfor Broiling
E_] Place tile meat or fish on tile broiler
grid in the broiler pan.
[] Follow suggested shelf positions in
tile Broiling Guide.
If yourrangeisconnectedto208volts,rare
steaksmaybebroiledbypreheatingthebroiler
andpositioningtheovenshelfoneposition
higher.
Use LO Broil to cook foods such as pouluy
or thick cuts of meat thoroughly without
over-brooming them.
[_] Press tile BROILHI/LOpad once
for HIBroil.
To change to LOBroil,press dm
BROILHI/LOpad again.
_] Press tile $TARTpad.
['ff] When broiling is finished, press dm
CLEAR/OFFpad.
The size, weight, thickness,
starting temperature,
and your preference
of doneness will affect
broiling times. This guide
is based on meats at
refrigerator temperature.
+ The {T& D@a_¢m#nt o[
Agwiodture says "Rare beff is
popular, bat you should know that
_)ohi_Tgit toonly 14(P£ means
som_'/bod poLsoning o_ganis m_smay
sunfive. "(Sou'rc_: S@, Food Book.
Four Kitchen Guide. USDA Re*J.
June 1985.)
12
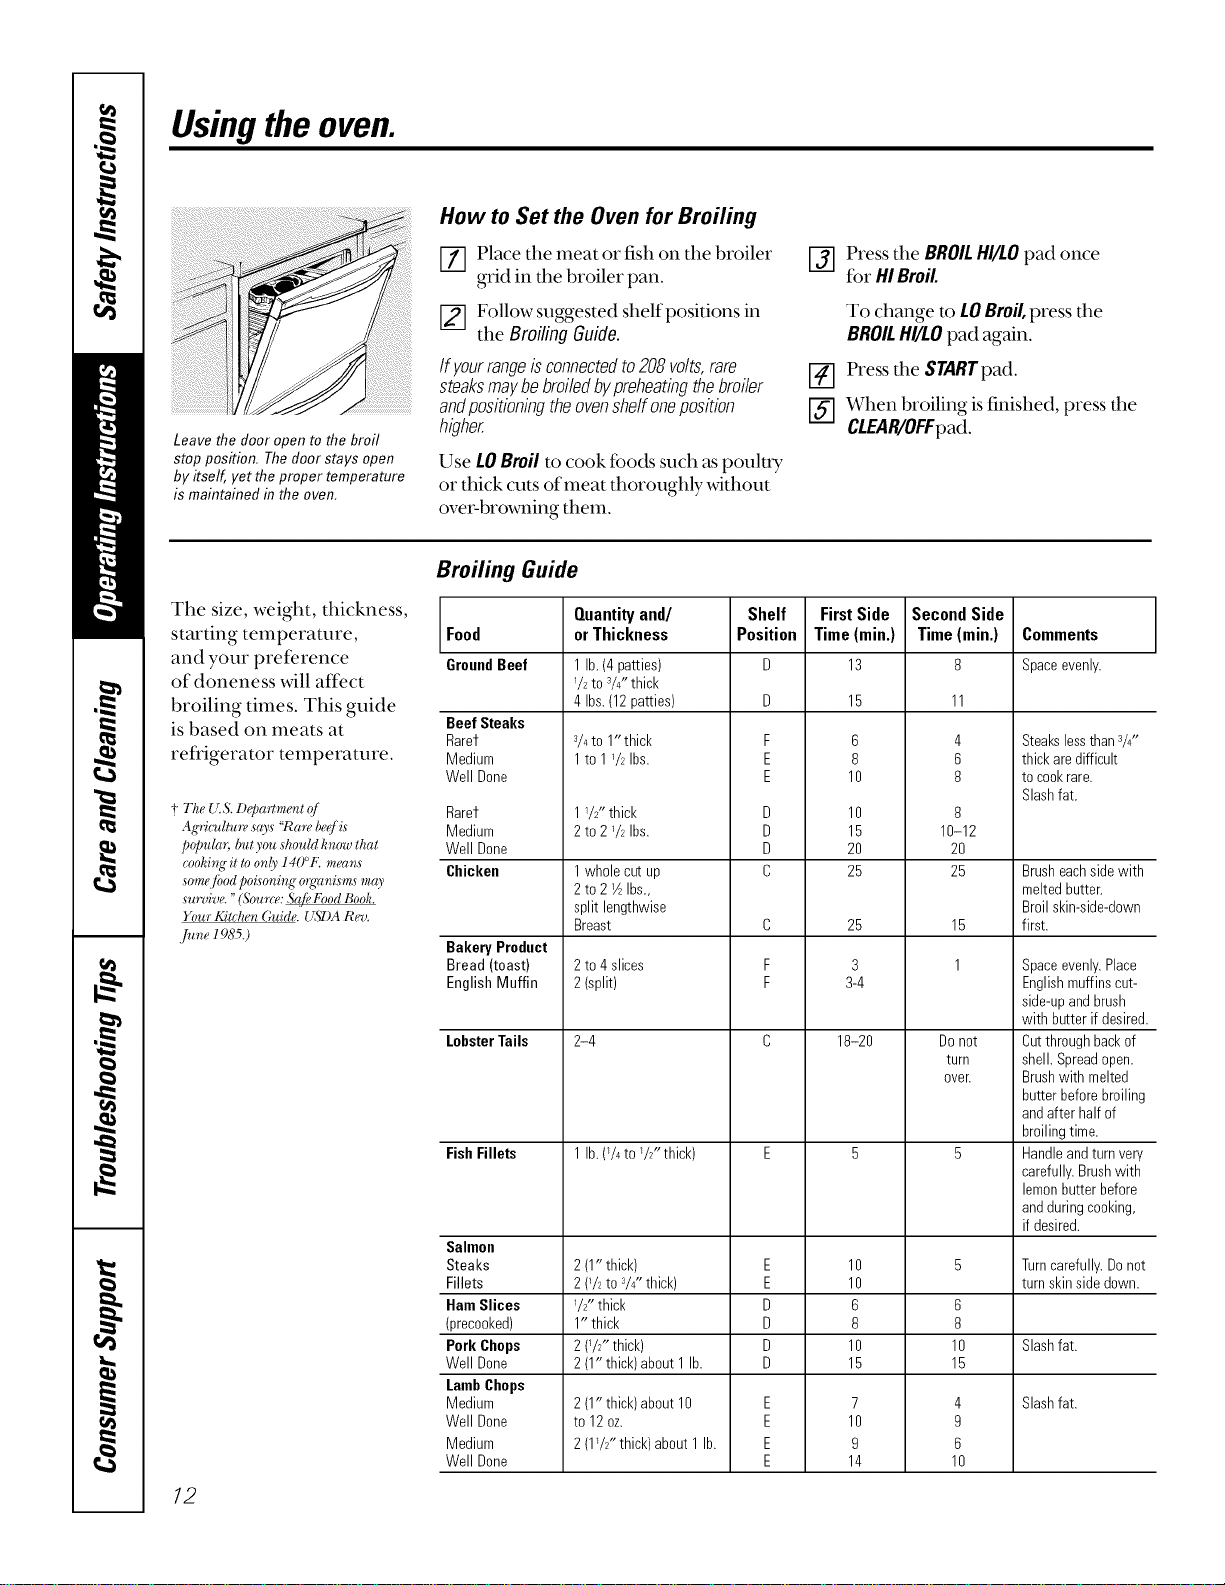
Broilh?g Guide
Food
GroundBeef
Beef Steaks
Rarer
Medium
Well Done
Rarer
Medium
Well Done
Chicken
Bakery Product
Bread (toast)
English Muffin
LobsterTails
FishFillets
Salmon
Steaks
Fillets
HamSlices
(precooked)
Pork Chops
Well Done
LambChops
Medium
Well Done
Medium
Well Done
Quantityand/
orThickness
1lb. (4patties)
72 to 3/Z'thick
4 Ibs.(12patties)
_/4to 1"thick
1to 1_/_Ibs.
17_" thick
2 to 272Ibs.
1whole cutup
2 to 2VzIbs.,
split lengthwise
Breast
2 to 4slices
2 (split)
2-4
1lb. (74to _/2"thick)
2 (1"thick)
2 (*/2to V4"thick)
1/2"thick
1" thick
2 (TZ' thick)
2 (1"thick)about 1lb.
2 (1"thick)about 10
to 12oz.
2 (172"thick)about 1lb.
Shelf
Position
F
E
E
D
D
D
C
C
F
F
E
E
D
D
O
D
E
E
E
E
FirstSide
Time(rain.)
13
15
6
8
10
10
15
20
25
25
3
3-4
18-20
10
10
6
8
10
15
7
10
9
14
SecondSide
Time(min.)
11
4
6
8
8
10-12
2O
25
15
1
Do not
turn
oveE
6
8
10
15
4
9
6
10
Comments
Spaceevenly.
Steakslessthan3/4"
thick aredifficult
to cookrare.
Slashfat.
Brusheachsidewith
meltedbutter.
Broil skin-side-down
first.
Spaceevenly.Place
Englishmuffins cut-
side-upandbrush
with butter if desired.
Cutthroughbackof
shell. Spreadopen.
Brushwith melted
butter beforebroiling
andafter half of
broilingtime.
Handleandturnvery
carefully.Brushwith
lemonbutterbefore
andduringcooking,
if desired.
Turncarefully.Donot
turn skinsidedown.
Slashfat.
Slashfat.
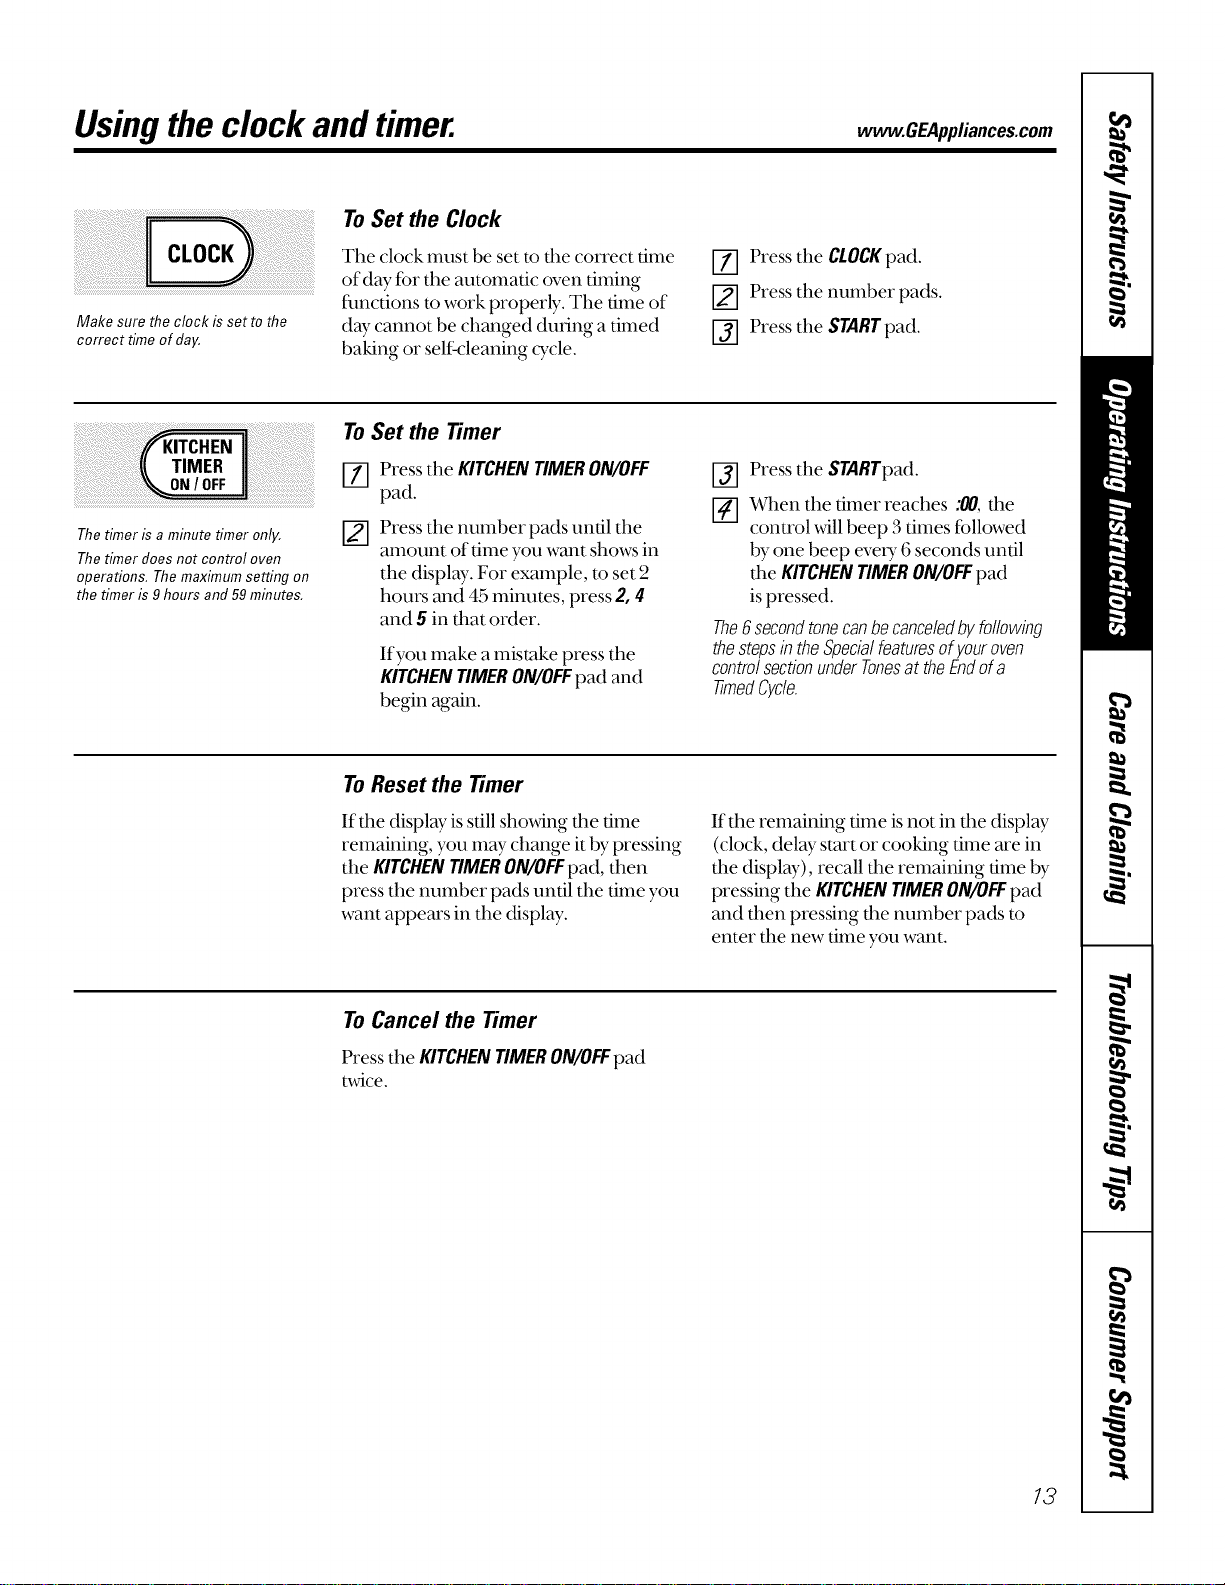
Usingtheclock andtimer, w OEApplia,oes.oom
Make sure the clock is setto the
correct time of day,
To Set the Clock
The clock must be set to the correct time
of day for the automatic oven timing
flmctions m work properly. The time of
day cannot be changed during a timed
baking or self-cleaning cycle.
[Z] Press the CLOCKpad.
[] Press the number pads.
I-j] Press the STARTpad.
The timer is a minute timer only,
The timer does not control oven
operations, Themaximum setting on
the timer is 9hours and59 minutes.
To Set the Timer
[-_ Press the KITCHENTIMERON/OFF
pad.
_-] Press the number pads until the
amount of time you want shows in
the displ W. For example, to set 2
hours and 45 minutes, press 2, 4
and 5 in that order.
If you make a mistake press the
KITCHENTIMERON/OFFpad and
begin again.
_-] Press the STARTpad.
_-] Vvqlenthe timer reaches :_, the
control will beep 3 times followed
by one beep eveU 6 seconds until
the KITCHENTIMERON/OFFpad
is pressed.
The6 secondtonecanbecanceledbyfollowing
thestepsin theSpecialfeaturesof youroven
controlsectionunderTonesat theEndofa
timedC/c/e.
To Reset the Timer
If the display is still showing the time
remaining, you may change it by pressing
the KITCHENTIMERON/OFFpad, then
press the number pads until the time you
want appears in the display.
If the remaining time is not in d_e display
(clock, delay start or cooking time are in
the display), recall the remaining time by
pressing the KITCHENTIMERON/OFFpad
and then pressing the number pads m
enter the new time you want.
To Cancel the Timer
Pressthe KITCHENTIMERON/OFFpad
twice.
13
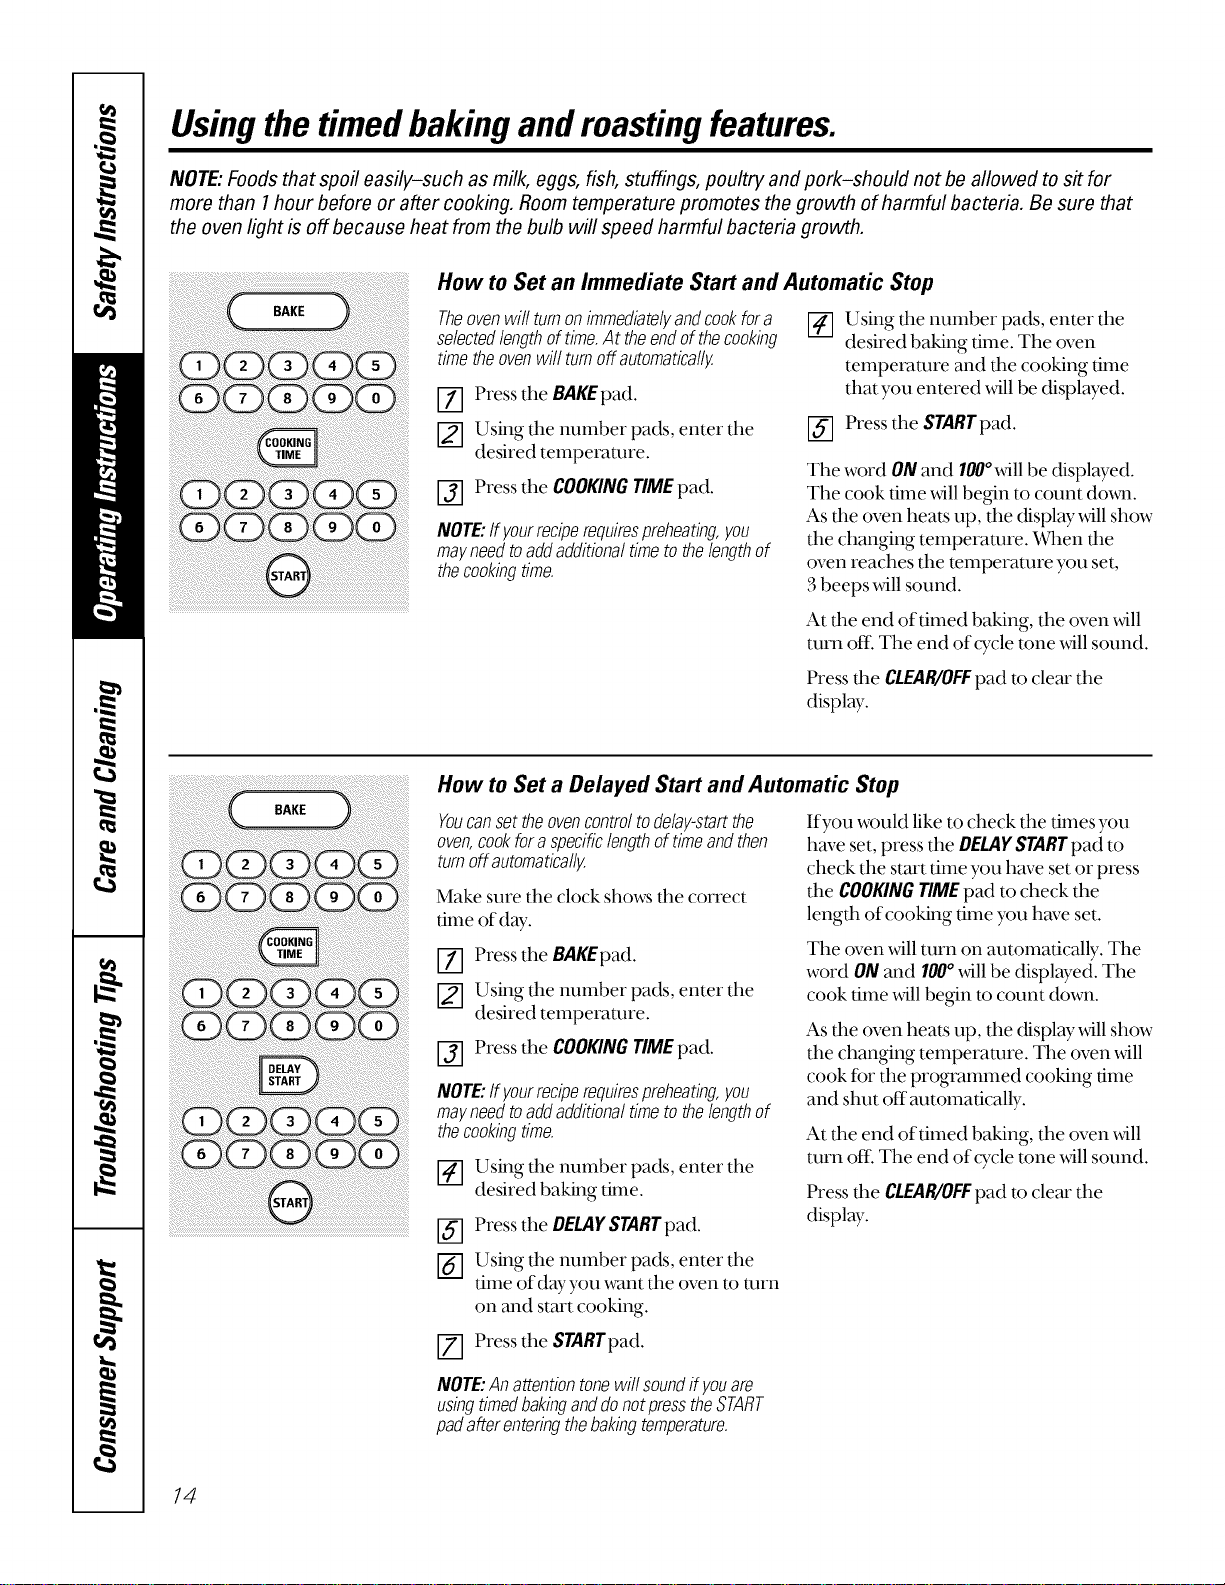
Usingthetimedbakingand mastingfeatures.
NOTE:Foods that spoil easily-such as milk, eggs, fish, stuffings, poultry andpork-should not be allowed to sit for
more than I hour before or after cooking. Room temperature promotes the growth of harmful bacteria. Be sure that
the oven light is off because heat from the bulb will speed harmful bacteria growth.
How to Set an Immediate Start and Automatic Stop
Theovenwillturnonimmediatelyandcookfora
selectedlengthoftime.At theendof thecooking
timetheovenwillturnoffautomatically.
[7] Press the BAKEpad.
[] Using the number pads, enter the
desired temperature.
[_] Press the COOKINGTIMEpad.
NOTE:If yourreciperequirespreheating,you
mayneedtoaddadditionaltimeto thelengthof
thecookingtime.
_] Using the number pads, enter the
desired baking time. The oven
temperature and the cooking time
that you entered will be displayed.
[_] Press the STARTpad.
The word ONand 100°will be displayed.
The cook time will begin to count doxm.
As the oven heats up, the display will show
the changing temperature. _en the
oven reaches the temperature you set,
3beeps will sound.
At fl_eend of timed baking, the oven will
turn off\ The end of cTcle tone will sound.
Press the CLEAR/OFFpad to clear the
display.
How to Set a Delayed Start and Automatic Stop
Youcanset the ovencontrol todelay-start the
oven,cookfor a specificlengthof time andthen
turn off automatically.
Make sure the clock shows the correct
time of day.
[7] Press the BAKEpad.
Using the number pads, enter the
desired temperature.
[_] Press the COOKINGTIMEpad.
NOTE:If yourreciperequirespreheating,you
mayneedtoaddadditionaltimeto thelengthof
thecookingtime.
Using the number pads, enter the
desired baking time.
[_] Press the OELAFSTARTpad.
[_3 Using the number pads, enter the
time ofdwyou want the oven to turn
on and start cooking.
Press the $TARTpad.
If you would like to check the times you
have set, press the DELAYSTARTpad to
check the start time you have set or press
the COOKINGTIMEpad to check the
length of cooking time you have set.
The oven will turn on automatically. The
word ONand 100°will be displayed. The
cook time _411begin to count down.
As the oven heats up, the display will show
the changing temperature. The oven will
cook for the programmed cooking time
and shut off'automatically.
At the end of timed baking, the oven will
turn ore The end of cTcle tone will sound.
Press dm CLEAR/OFFpad to clear the
display.
NOTE:Anattentiontonewillsoundifyouare
usingtimedbakinganddonotpresstheSTART
padafterenteringthebakingtemperature.
14
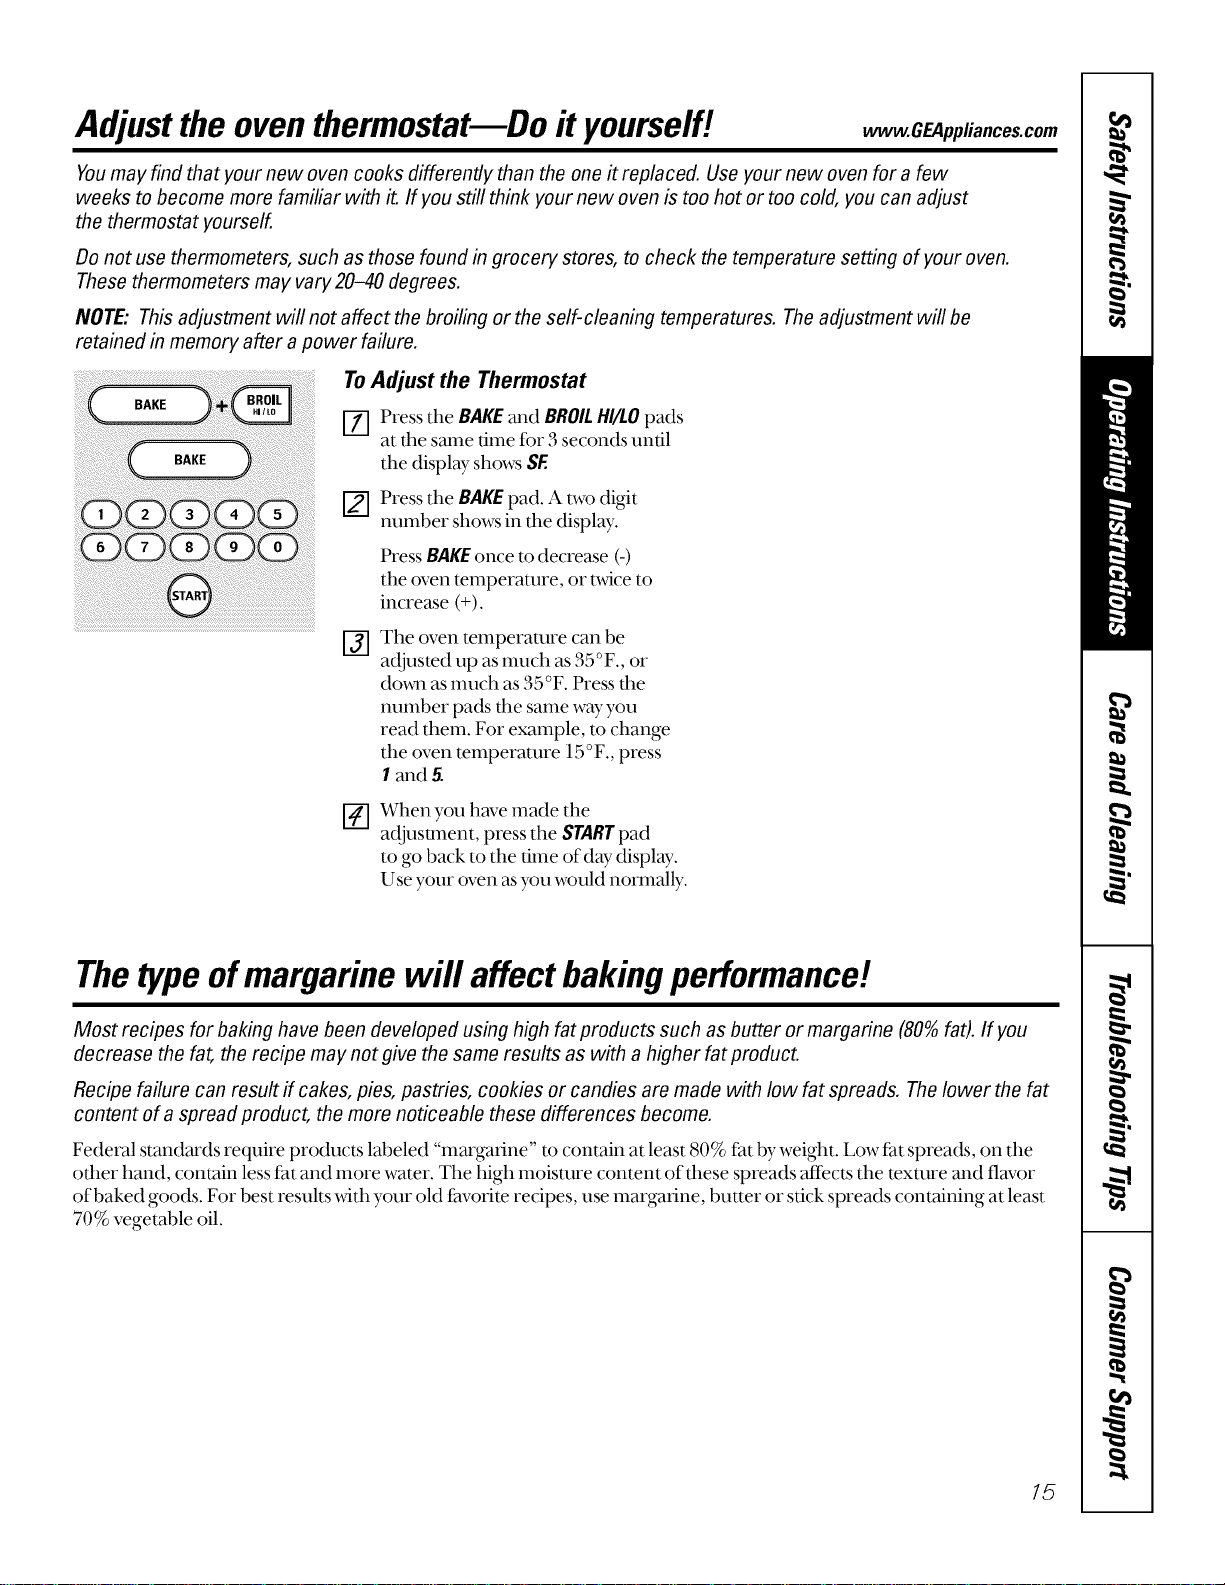
Adjustthe oventhermostat--Do it yourself! www.GEAppliances.com
Youmay find that your new oven cooks differently than the one it replaced. Use your new oven for a few
weeks to become more familiar with it. If you still think your new oven is too hot or too cold, you can adjust
the thermostat yourself.
Do not use thermometers, such as those found in grocery stores, to check the temperature setting of your oven.
These thermometers may vary20-40 degrees.
NOTE: This adjustment will not affect the broiling or the self-cleaning temperatures. The adjustment will be
retained in memory after a power failure.
To Adjust the Thermostat
_] Pressthe BAKEand BROILHI/LOpads
at the same time for 3 seconds until
the display shows SE
[] Press the BAKEpad. A two digit
number shows in the display.
Press BAKEonce m decrease (-)
the oven temperature, or tv_4ceto
increase (+).
I-j] The oven temperature can be
adjusted up as much as 35°F., or
dovm as much as 35°F. Press the
number pads the same wayyou
read them. For example, m change
the oven temperature 15°F., press
I and 5.
@
When you hmTemade the
acljusunent, press the STARTpad
to go back to the time of day display.
Use your oven asyou would normally.
Thetypeofmargarine will affect bakingperformance!
Most recipes for baking have been developed using high fat products such as butter or margarine (80%fat). If you
decrease the fat, the recipe may not give the same results as with a higher fat product.
Recipe failure can result if cakes, pies, pastries, cookies or candies are made with low fat spreads. Thelower the fat
content of a spread product, the more noticeable these differences become.
Federal standards require products labeled "margarine" to contain at least 80% fat by weight. Low fat spreads, on the
other hand, contain less tat and more water. The high moisture content of these spreads affects the texture and flavor
of baked goods. For best results v_4thyour old thvorite recipes, use margarine, butter or stick spreads containing at least
70% vegetable oil.
15
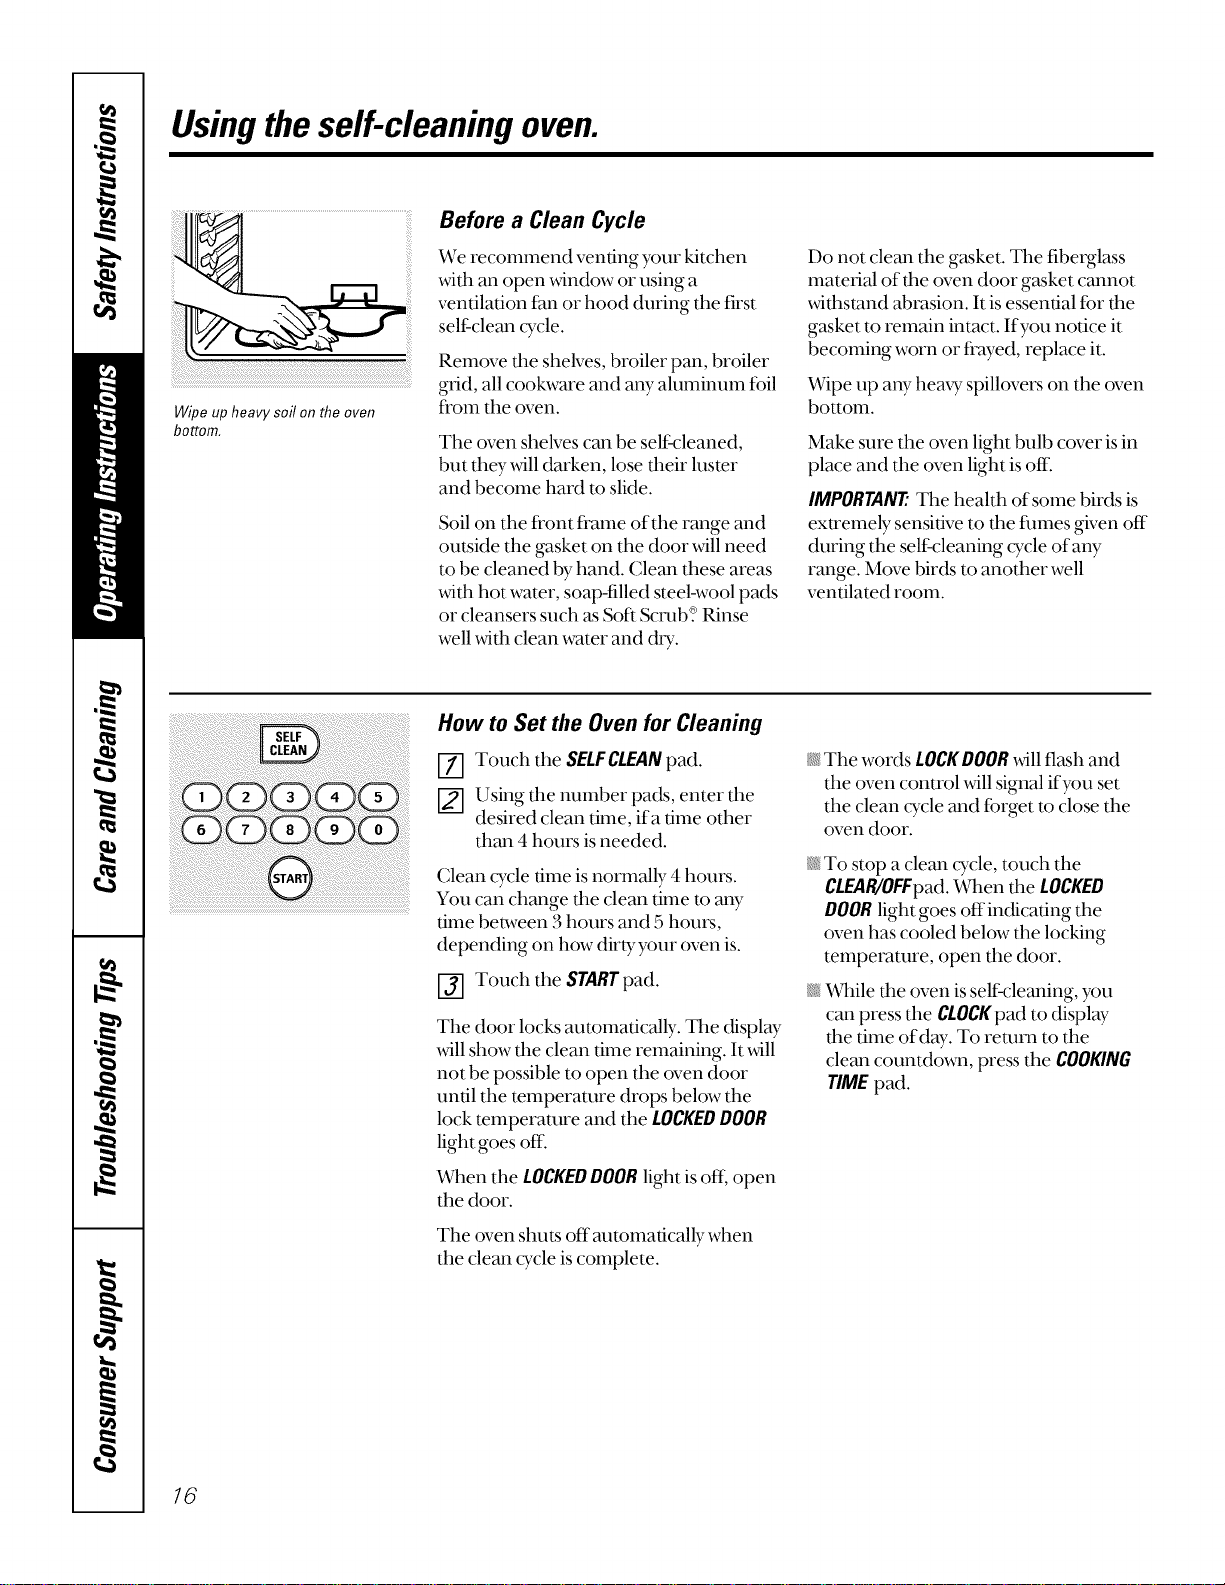
Usingtheself-cleaning oven.
i)ii i ;!ii !i !ii !ii!i i!ii!i i!ii!i i!ii!i i!ii!i i!ii!i i!ii!i i!ii!i i!ii!iii!ii!iii!ii!iii!ii!iii!ii!iii!ii!iii!ii!iii!ii!iii!ii!iii!ii!iii!ii!iii!ii!iii!ii!iii!i !ii
Wipe up heavy soil on the oven
bottom.
Before a Clean Cycle
We recomumnd venting your kitchen
with an ()pen _4ndow or using a
ventilation thn or hood during the first
self-clean cycle.
Remove the shelves, broiler pan, broiler
grid, all cookware and any aluminum fbil
ti'oln the oven.
The oven shelves can be self cleaned,
but they will darken, lose their luster
and become hard to slide.
Soil on the fl'ont ti'ame of the range and
outside the gasket on the door will need
to be cleaned by hand. Clean these areas
with hot water, soap-filled steel-wool pads
or cleansers such as Soft Scrub? Rinse
well with clean water and dU.
Do not clean the gasket. The fiberglass
material of the oven door gasket cannot
withstand abrasion. It is essential Ibr the
gasket to remain intact. If you notice it
becoming worn or ti'ayed, replace it.
Wipe up any heaxT spillovers on the oven
bottom.
Make sure the oven light bulb cover is in
place and the oven light is of[i
IMPORTANTThe health of some birds is
exu'emely sensitive to the thmes given off
during the self cleaning cycle of any
range. Move birds to another well
ventilated room.
How to Set the Oven for Cleaning
Touch the SELFCLEANpad.
_-] Using the number pads, enter the
desired clean time, ifa time other
than 4 hours is needed.
Clean cycle time is normally 4 hours.
You can change tim clean time to any
time between 3 hours and 5 hours,
depending on how dirty your oven is.
Touch the STARE pad.
The door locks automatically. The display
_411show tim clean time remaining. It will
not be possible to open the oven door
until the temperature drops below the
lock temperature and the LOCKEDDOOR
light goes off:
When the LOCKEDDOORlight is off, open
the door.
The oven shu_s off automatically when
the clean cycle is complete.
_ The words LOCKDOOR_411flash and
the oven control will signal if you set
the clean ©'cle and fi)rget to close the
oven door.
N To stop a clean cycle, touch the
CLEAR/OFFpad.When the LOCKED
DOORlight goes offindicating the
oven has cooled below the locking
temperature, open the door.
N _qfile the oven is self cleaning, you
can press the CLOCKpad to display
the time ofd W. To remm to the
clean countdown, press the COOKING
TIMEpad.
16
www.GEAppliances.com
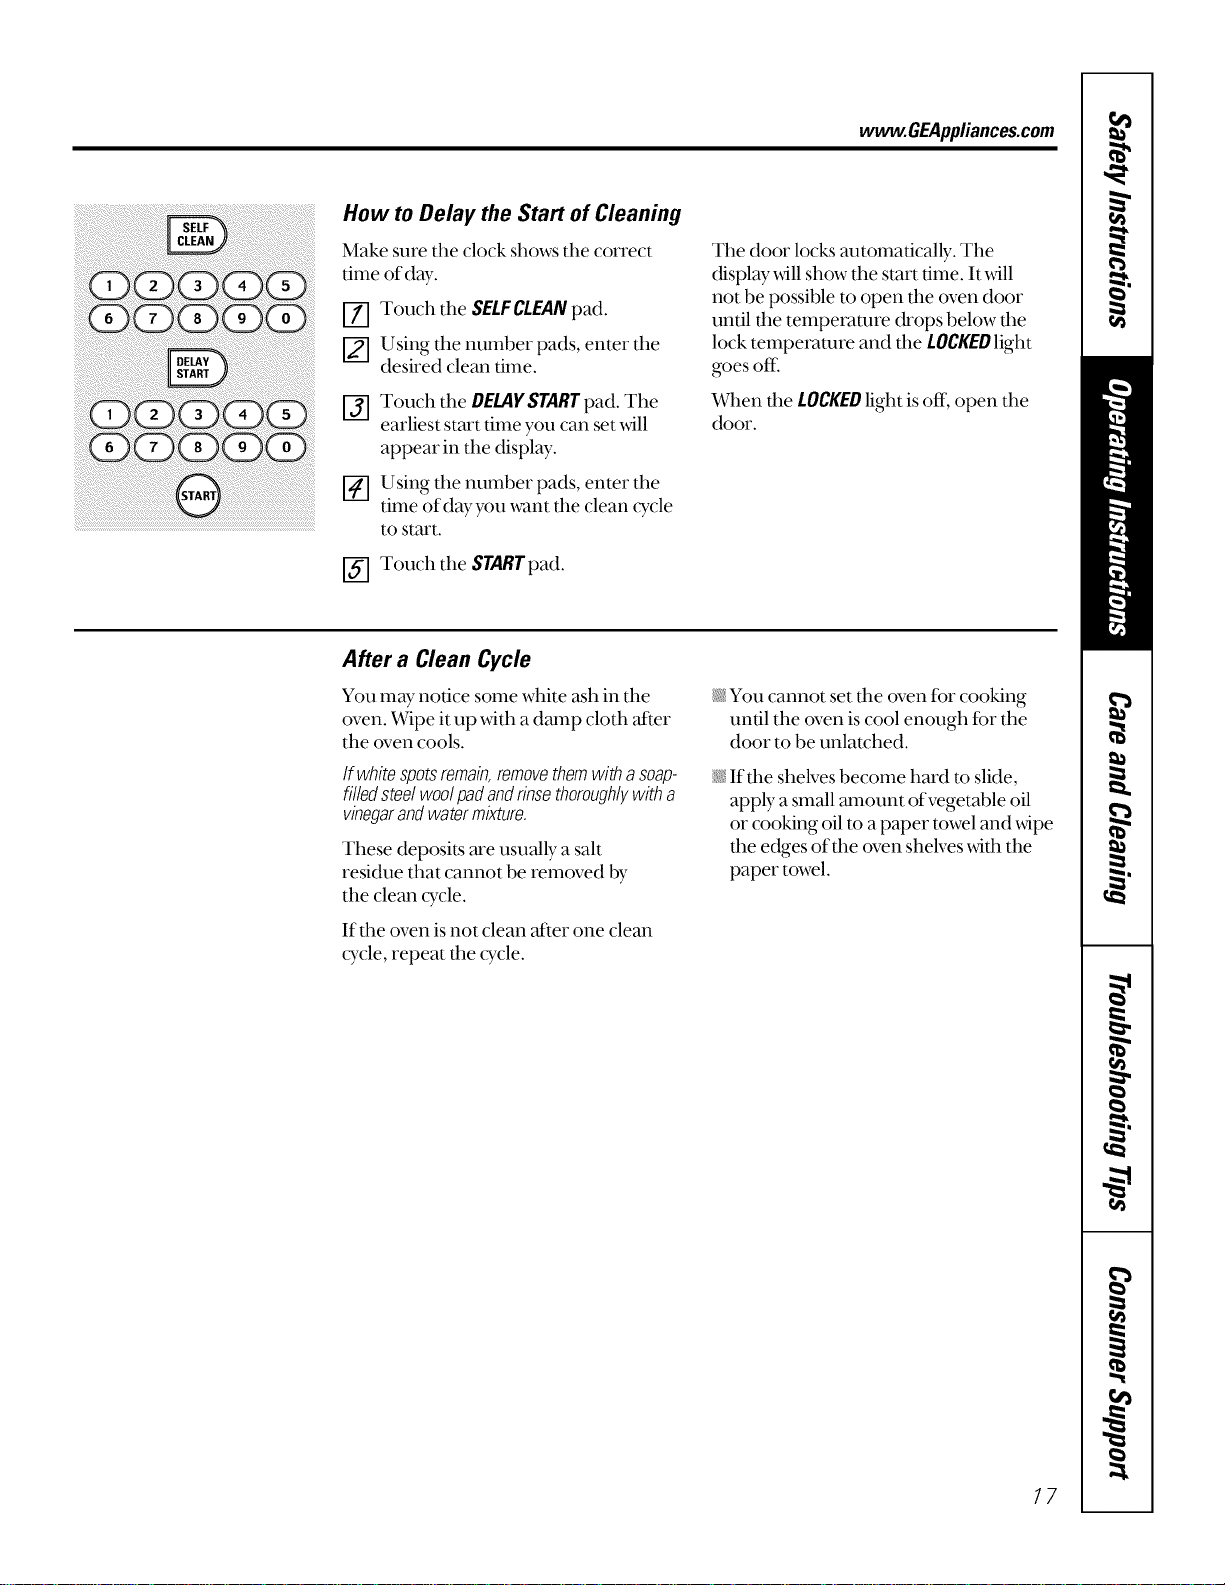
How to Delay the Start of Cleaning
Make sure the clock shows the correct
time of day.
[-_ Touch the SELFCLEANpad.
_-] Using the number pads, enter the
desired clean time.
I-if] Touch the DELAYSTARTpad.The
earliest start time you can set _411
appear in the display.
[] Using the number pads, enter the
time ofdayyou want the clean cycle
to start.
I-if] Touch the STARTpad.
The door locks automatically. The
display _4ll show the start time. It _4ll
not be possible to open the oven door
until the temperature drops below the
lock temperature and the LOCKEDlight
goes oK
Vvqlenfile LOCKEDlight is off, open the
door.
After a Clean Cycle
You may notice some white ash in the
oven. Wipe it up with a damp cloth alter
the oven cools.
If whitespotsremain,removethemwitha soap-
filledsteelwoolpadandrinsethoroughlywitha
vinegarandwatermixture.
These deposits are usually a salt
residue that cannot be removed by
the clean cycle.
If din oven is not clean _er one clean
cycle, repeat the cycle.
_iYou cannot set the oven for cooking
until the oven is cool enough for the
door to be unlatched.
If dm shelves become hard to slide,
apply a small amount of vegetable oil
or cooking oil to a paper towel and wipe
the edges of the oven shelves _4th the
paper towel.
17
Special featuresofyourovencontrol
Yournew touch pad control has additional features that you may choose to use. The following are the features and
how you may activate them.
Thespecial feature modes can only be activated while the display is showing the time of day. Theyremain in the
control's memory until the steps are repeated.
When the display shows your choice, press the STARTpad. Thespecial features will remain in memory after a
power failure.
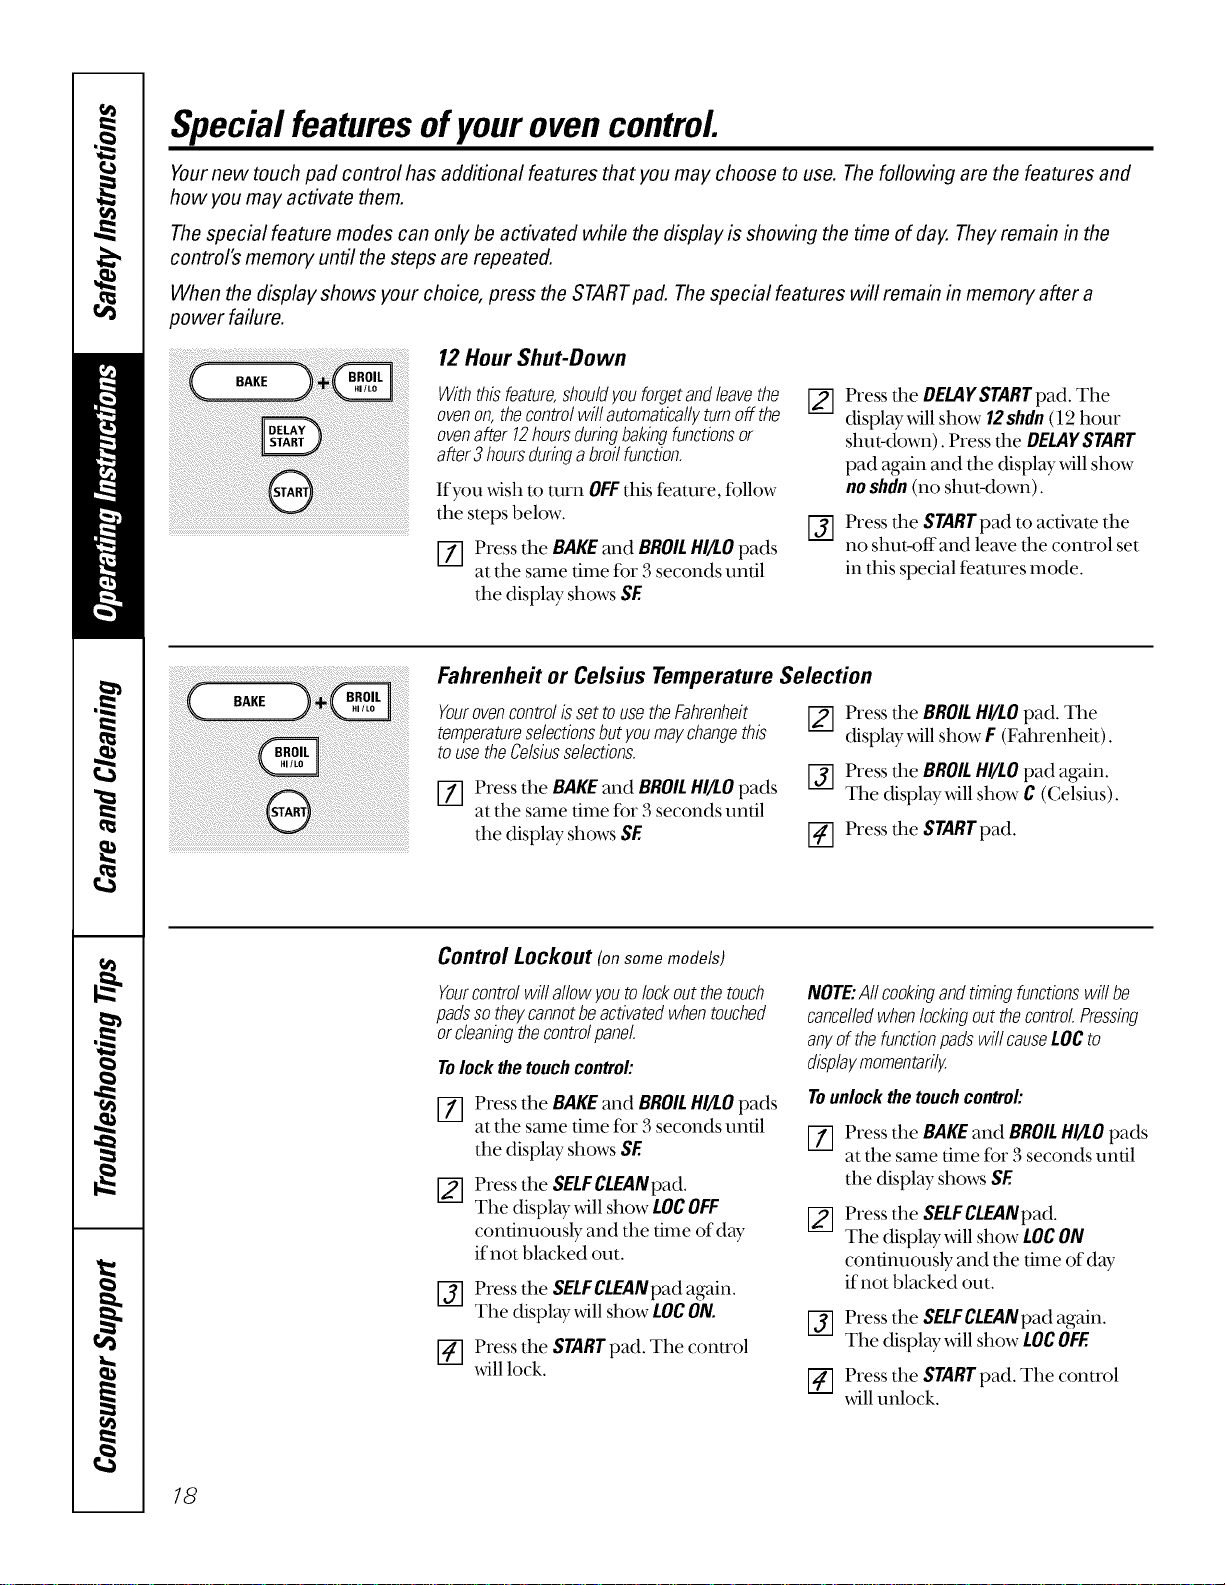
12Hour Shut-Down
Withthisfeature,shouldyouforgetandleavethe
ovenon,thecontrolwillautomaticallyturnoff the
ovenafter !2hoursduringbakingfunctionsor
after3 hoursduringabroilfunction.
If you _ish to turn OFFthis feature, follow
the steps below.
[_] Press the BAKE and BROIL HI/LOpads
at the same time for 3 seconds until
the display shows SE
[]
@
Press the DELAYSTARTpad. The
display will show 12shdn (l 2 hour
shut-down). Press the DELAYSTART
pad again and the display will show
no shdn (no shut-down).
Press the STARTpad to activate the
no shut-offand leave the conu'ol set
in this special features mode.
Fahrenheit or Celsius Temperature Selection
Youroven control is set touse the Fahrenheit
temperatureselectionsbut youmay changethis
to use the Celsiusselections.
[_] Press the BAKEand BROILHI/LOpads
at the same time fi_r3 seconds until
the display shows SE
Press the BROILHI/LO pad. The
display will show F (Fahrenheit).
Press the BROIL HI/LO pad again.
The display will show C (Celsius).
_-] Press the STARTpad.
Control Lockout (onsomemodels)
Yourcontrolwillallowyoutolockoutthetouch
padssotheycannotbeactivatedwhentouched
orcleaningthecontro!panel.
Tolockthetouchcontrol:
NOTE:Aftcookingandtimingfunctionswill be
cancelledwhenlockingoutthecontrolPressing
anyof thefunctionpadswill causeLOCto
displaymomentarily.
Press the BAKEand BROILHIll.0pads
at the same time for 3 seconds until
r--73
the display shows SE I/I
Press the SELFCLEANpad.
The display will show LOCOFF
continuously and the time of day
ifnot blacked out.
[_] Press the SELFCLEANpad again.
The display will show LOCON.
_-] Press the STARTpad. The conu'ol
will lock.
Tounlockthetouchcontrol:
Press the BAKEand BROILHI/I.O pads
at the same time for 3 seconds until
the display shows SE
Press the SELFCLEANpad.
The display will show LOCON
continuously and the time of day
if not blacked out.
[_] Press the SELFCLEANpad again.
The display will show LOCOFF.
Press the STARTpad. The control
will unlock.
18
www.GEAppliances.com
®
e
Tonesat the End of a TimedCycle
At theendofa timedcycle,3 shortbeepswill
soundfollowedbyonebeepevery6secondsuntil
theCLEAR/OFFpadispressed.Thiscontinual
6 secondbeepmaybecanceled.
To cancel tile 6 second beep:
[-_ Press tile BAKEand BROILHI/I.Opads
at tile same time for 3 seconds until
tile display- shows SE
[]
Press the KITCHENTIMERON/OFF
pad. The display shows CONBEEP
(continual beep). Press the KITCHEN
TIMERON/OFFpad again. The display
shows BEEP.(This cancels the one
beep every 6 seconds.)
[] Press the STARTpad.
¸i¸¸¸= ?; : < 7 <k <<<< +=
12Hour,24 Hour or Clock Black-Out
Yourcontrolissettousea 12hourclock.
If you would pret(r to have a 24 hour
militar T time clock or black-out the clock
display, follow the steps below.
_] Press the BAKEand BROILHI/I.O pads
at the same dine for 3 seconds until
the display shows SE
Press the CLOCKpad once. The
display will show 12hr.If this is
the choice you want, press the
STARTpad.
Press die CLOCKpad again to change to
the 24 hour militmy time clock. Tile
display _4ll show 24 hr. If this is tire choice
you want, press the STARTpad.
Press dm CLOCKpad again to black-out
the clock display. Tile display will show
OFF.If this is the choice you want, press
the STARTpad.
NOTE:If theclockisintheblack-outmodeyou
will notbeabletousetheDelayStartfunction.
Cookand Hold
BAKE Yourcontrolhasacookandholdfeaturethat
_ keepscookedfoodswarmforupto3hoursafter
thecookingfunctionisfinished.
i_ To activate this feanu'e, follow the stepsbelow
Press the BAKEand BROILHI/I.Opads
at the same time for 3 seconds until
the displ W shows SE
Press tire COOKINGTIMEpad.
The display _411show HidOFF.
%
Press the COOKINGTIMEpad again
to activate tile feature. The display
will show Hid ON.
Press tire STARTpad to activate
tire cook and hold feature and
leave the control set in this special
features mode.
19
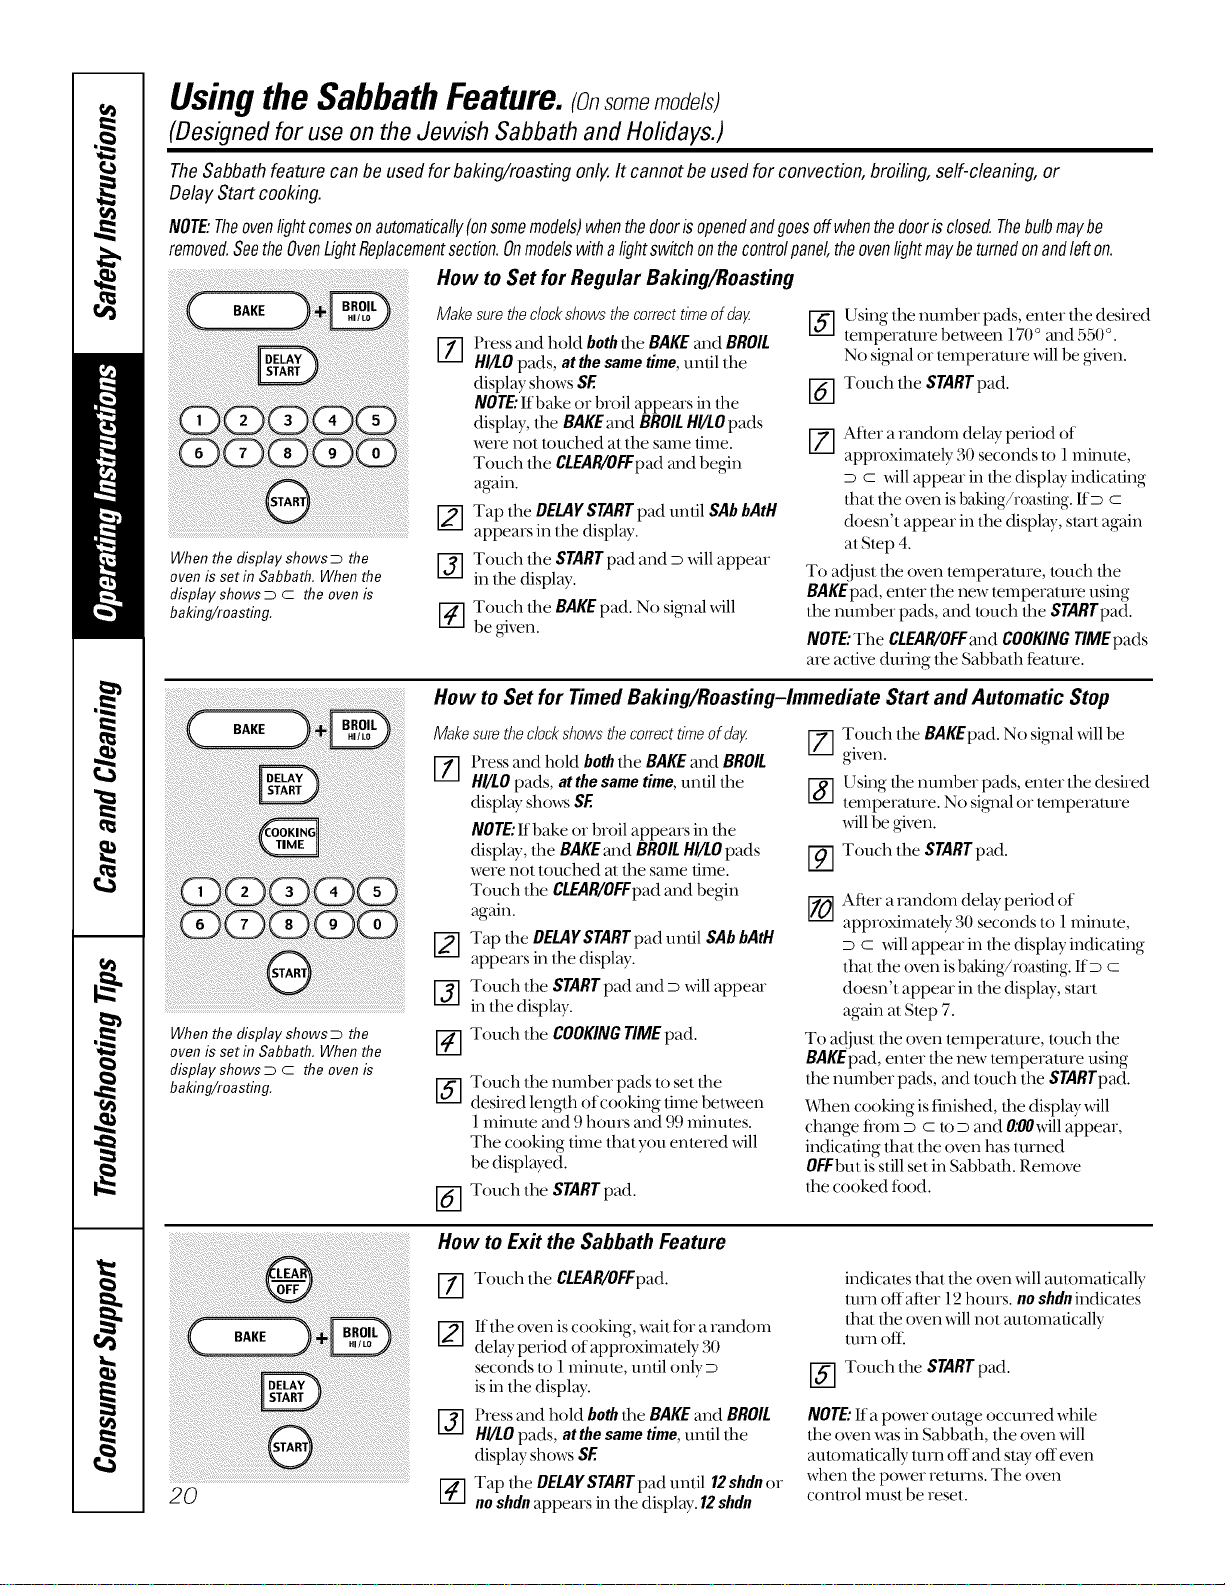
UsingtheSabbathFeature. somemode/s
(Designed for use on the Jewish Sabbath and Holidays.)
The Sabbath feature can be used for baking/roasting only. It cannot be used for convection, broiling, self-cleaning, or
Delay Start cooking.
NOTE:Theovenlightcomesonautomatically(onsomemodels)whenthedoorisopenedandgoesoffwhenthedooris closed.Thebulbmaybe
removed,SeetheOvenLightReplacementsection.Onmodelswithalightswitchonthecontrolpanel,theovenlightmaybeturnedonandlefton.
When the display shows D the
oven is set in Sabbath. When the
display shows D C the oven is
baking/roasting,
How to Set for Regular Baking/Roasting
Makesurethedockshowsthecorrecttimeofday [_]
[-_ Pressand hold boththe BAKEand BROIL
HI/tO pads, at thesametime,unlil lhe
display shows SE
NOTE."Ifbake or broil appems in lhe
display, the BAKEand BROILHI/LOpads
were not touched at tile same lime.
Touch lhe CLEAR/OFFpadand begin
again.
Tap the DELAYSTARTpad until SAbbAtH
appears in lhe display.
Touch lhe STARTpad and D will appear
in lhe display.
[4-] Touch the BAKE pad. No sig_lal xdll
be given.
@
Using lhe number pads, enter the desired
temperalure belween 170° and 550°.
No sigmal or temperature will be given.
Touch tile STARTpad.
_,-] Afier arandom delay period of
approximalely 30 seconds lo 1minute,
D c will appear in lhe display indicaling
thai lhe oven is baking/roasting. ItD c
doesn't appear in the displ W, slart again
al Step 4.
To a{!jusl tile oven lemperalure, k)uch the
BAKEpad, enler lhe new temperalure using
the number pads, and touch the STARTpad.
NOTE,"Tile CLEAR/OFFand COOKINGTIMEpads
are active dining the Sabbath teatme.
When the display shows D the
oven is set in Sabbath. When the
display shows D C the oven is
baking/roasting.
20
How to Set for Timed Baking/Roasting-Immediate Start and Automatic Stop
Make surethe dock shows thecorrect time of dag
[Z] Press and hold boththe BAKEand BROIL
HI/LOpads, at thesametime,until the
display shows SE
NOTE."If bake or broil appears in the
display, the BAKEmid BROILHI/tOpads
were not touched al tile same ume.
Touch lhe CLEAR/OFFpadand begin
again.
Tap lhe DELAYSTARTpad until SAbbAtH
appears in lhe display.
[_] Touch lhe STARTpad and D x_ll appear
in tile display.
Touch the COOKINGTIMEpad.
@
@
Touch lhe number pads to set lhe
desired length of cooking time between
1 minum mid 9 hours and 99 minutes.
The cooking time that you entered will
be displayed.
Touch the STARTpad.
[7] Touch the BAKEpad. No signal xdll be
given.
[_] Using the number pads, enter the desired
lemperamre. No si_lal or temperature
xdll be given.
Touch the SrARTpad.
/LZ.J
_-_ Afier a random delay period of
approximately 30 seconds to 1minute,
D c will appear in the displ W indicating
that the oxen is baking/roasting. IfD C
doesn'l appear in lhe displ W, slart
again al Slop 7.
To adjust the oven lemperature, touch the
BAKEpad,enler tile new temperature using
tile number pads, ml(t touch the STARTpad.
When cooking is finished, lhe displ W _dll
change flom D C lo D and O:OOxdllappear,
indicating thai lhe oven has lumed
OFFbut is still set in Sabbath. Remox_
lhe cooked food.
How to Ex# the Sabbath Feature
%
@
Touch the CLEAR/OFFpad.
If tile oven is cooking, wait ff)r a random
delay period of approximalely 30
seconds to l minule, until only D
is in the display.
Press and hold boththe BAKEand BROIL
HI/tO pads, atthesametime,unlil lhe
display shows SE
Tap lhe DELAYSTARTpad until 12shdn or
no shdn appears in lhe display. 12shdn
indicales thai the oven will autolnafically
mm offafier 12 hours, no shdn indicates
thai the oven _ill not automatically
turn oftl
_-] Touch the STARTpad.
NOTE"Ira power outage occuned while
tile o'_n was in Sabbalh, tile oven will
aulomalically mm off and stW offeven
when tile power returns. Tile oxen
(;onlrol InUS[be reset.
Careand cleaning ofthe range, w OEA pli .oesoom
Be sure all controls are off and all surfaces are cool before cleaning any part of the range.
If your range is removed for cleaning, servicing or any reason, be sure the anti-tip
device is re-engaged properly when the range is replaced. Failure to take this
precaution could result in tipping of the range and cause injun/
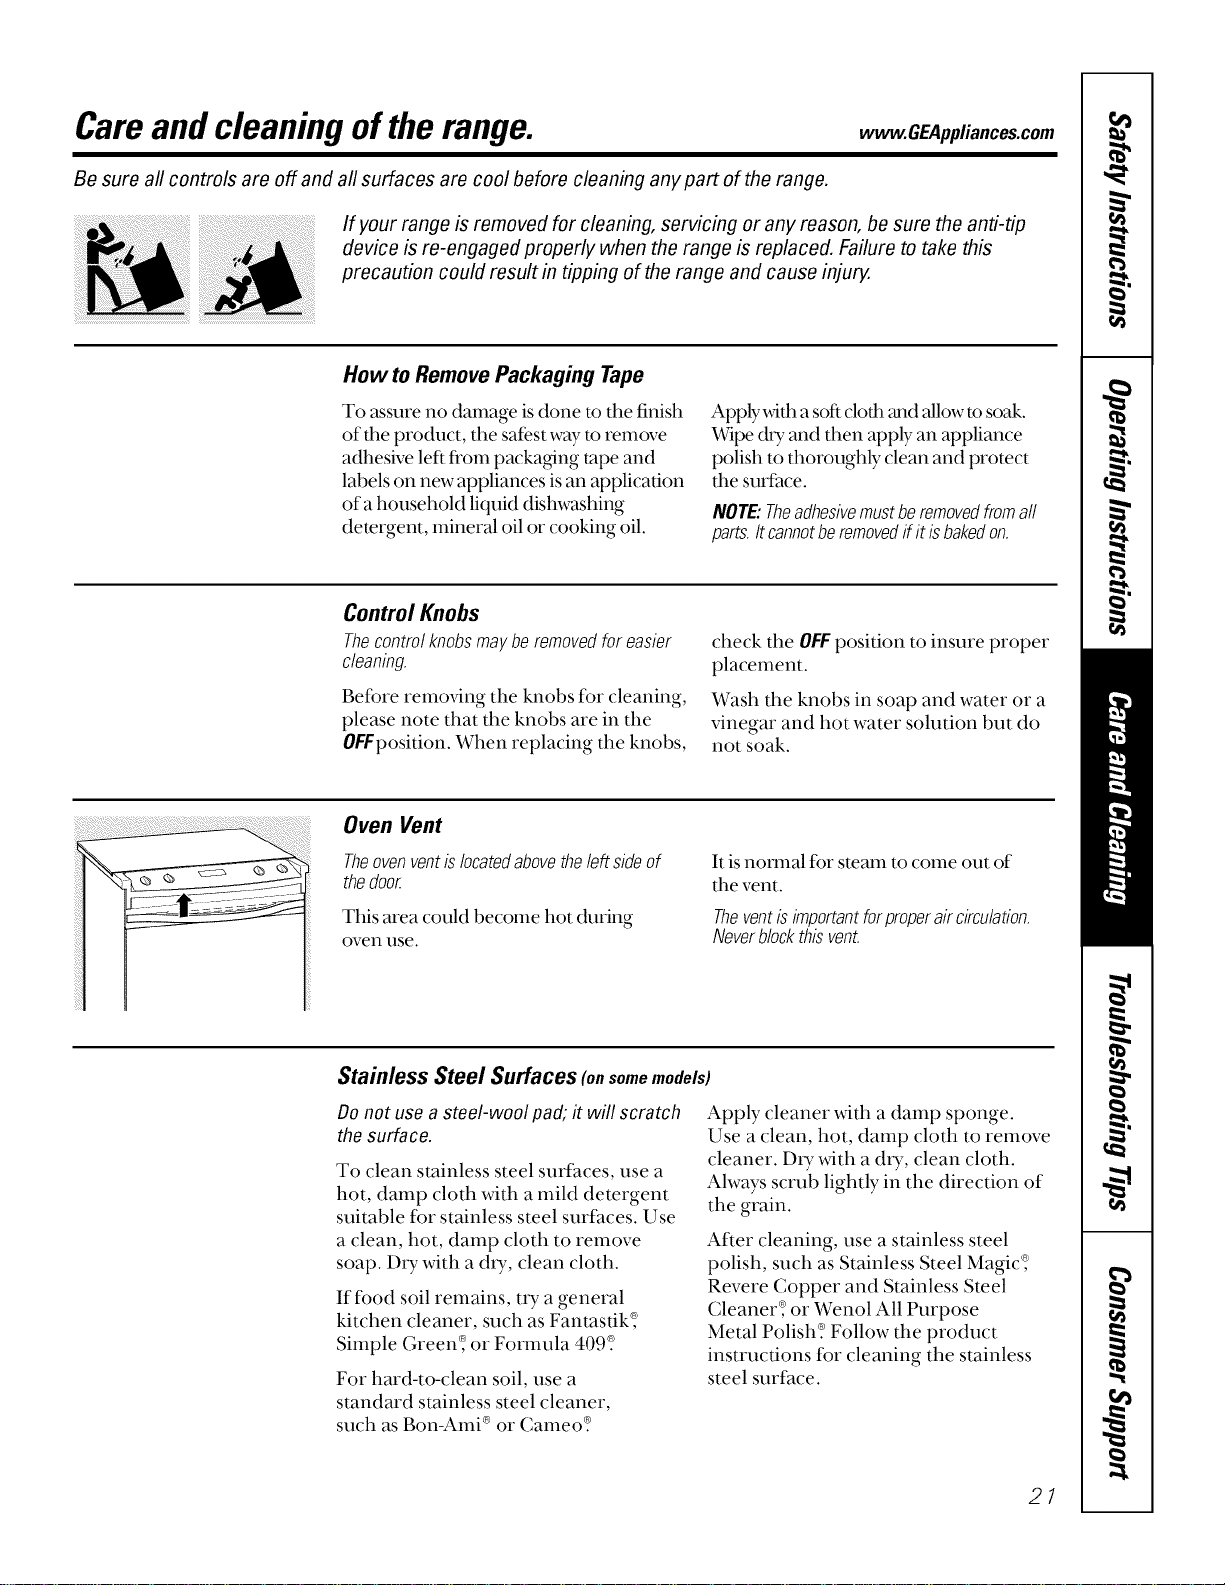
How to Remove Packaging Tape
To assure no damage is done to the finish
of the product, the safest way to remove
adhesive left fl'om packa_ng tape and
labels on new appliances is an application
of a household liquid dishwashing
demrgent, mineral oil or cooking oil.
Apply _dth a softclofl__mdallow to soak.
Wipe dU and then apply an appliance
polish to thoroughly clean and protect
the surfhce.
NOTE:Theadhesivemustberemovedfromaft
parts.Itcannotberemovedif it isbakedon.
Control Knobs
Thecontrolknobsmayberemovedforeasier
cleaning.
Before remming the knobs fBr cleaning,
please note that the knobs are in the
OFFposition. When replacing the knobs,
check the OFFposition to insure proper
placement.
Wash the knobs in soap and water or a
vinegar and hot water solution but do
not soak.
Oven Vent
Theovenventislocatedabovetheleftsideof
thedoor.
This area could beconm hot during
oven use.
It is natural for steam to come out of
the vent.
Theventisimportantforproperaircirculation.
Neverblockthisvent.
Stainless Steel Surfaces (o. somemodels)
Donot use a steel-wool pad; it will scratch
the surface.
To clean stainless steel surfaces, use a
hot, damp cloth with a mild detergent
suitable for stainless steel surfaces. Use
a clean, hot, damp cloth to remove
soap. D_y with a dU, clean cloth.
If food soil remains, uT a general
kitchen cleaner, such as Fantastik_
Simple Green_ or Fornmla 409_
For hard-to-clean soil, use a
standard stainless steel cleaner,
such as Bon-Ami ®or Cameo_
Apply cleaner with a damp sponge.
Use a clean, hot, damp cloth to remove
cleaner. DU with a dtT, clean cloth.
Always scrub lightly in the direction of
the grain.
After cleaning, use a stainless steel
polish, such as Stainless Steel Magic_
Revere Copper and Stainless Steel
Cleaner_ or Wenol All Purpose
Metal Polish? Follow the product
instructions tbr cleaning the stainless
steel surihce.
21
Careand cleaning ofthe range.
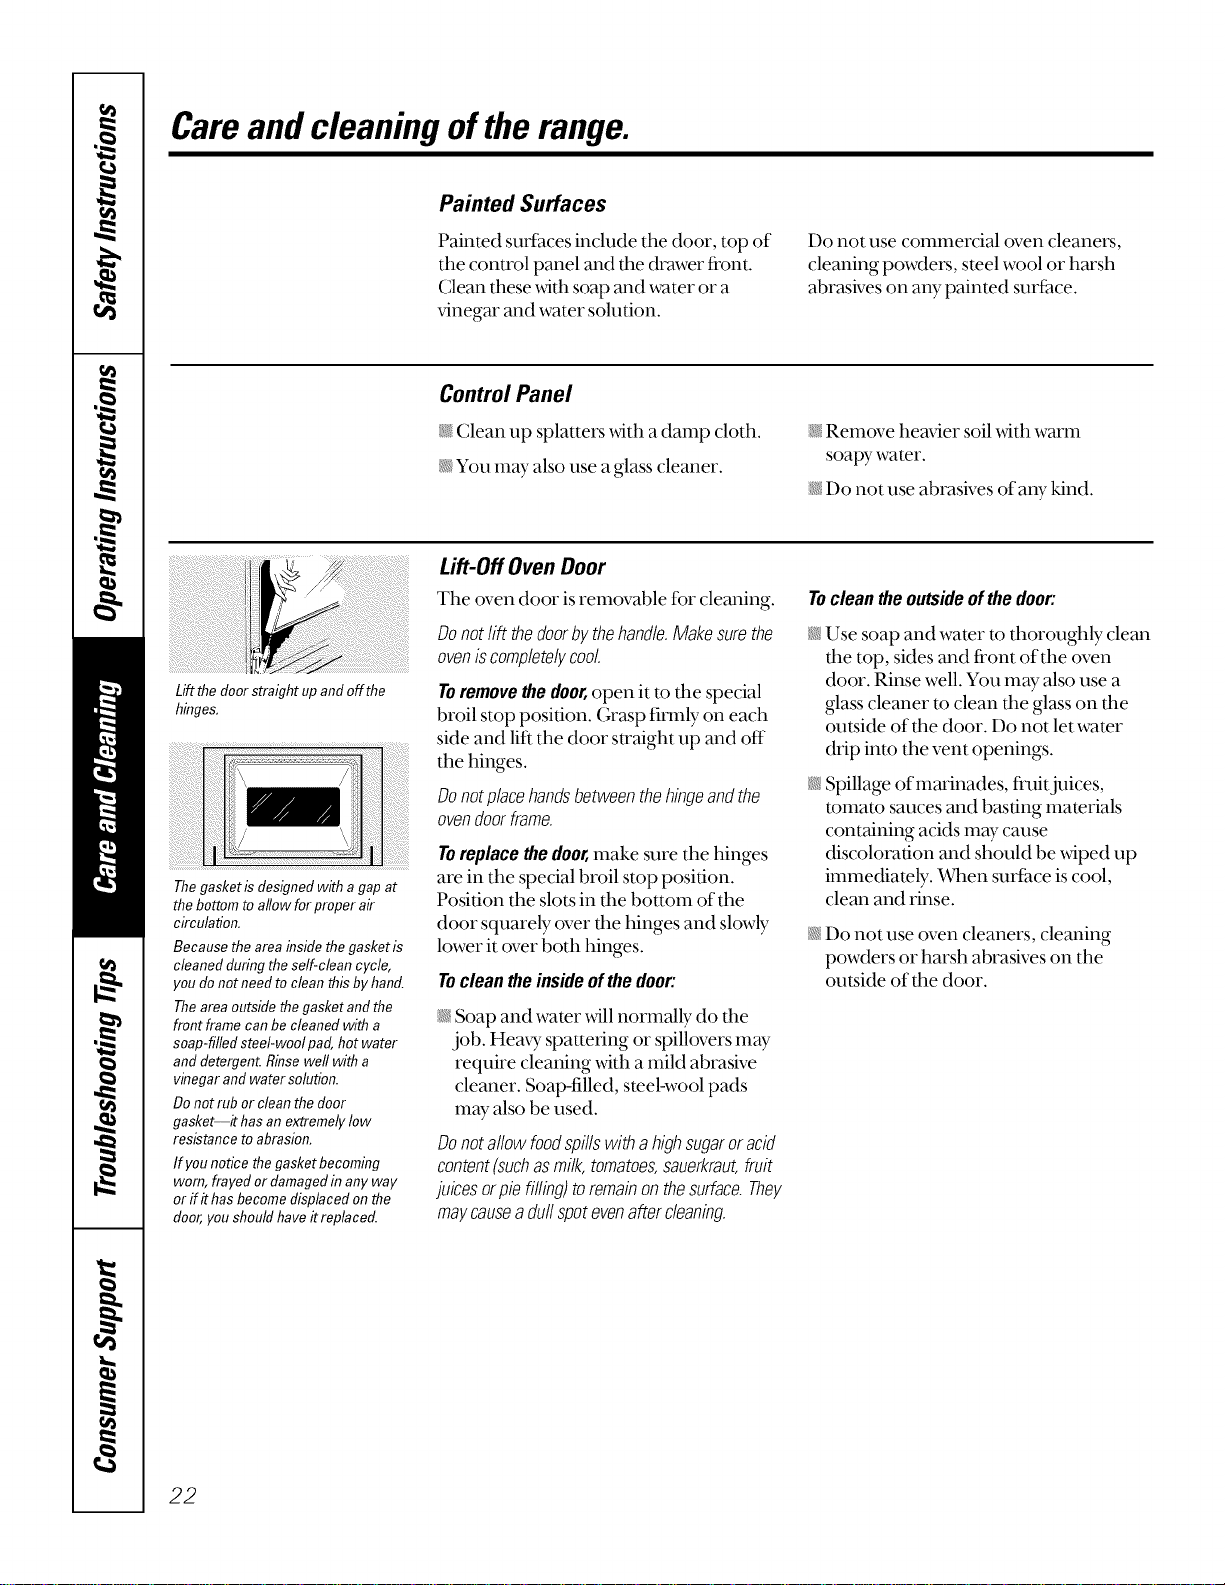
Lift the doorstraight up andoffthe
hinges,
Painted Surfaces
Painted surfhces include the door, top of
the control panel and the drawer fi'ont.
(;lean these with soap and water or a
vinegar and water solution.
Do not use conmlercial oven cleaners,
cleaning powders, steel wool or harsh
abrasives on aW painted surface.
Control Panel
Clean up splatters _._4tha damp cloth.
_¢You m W also use a glass cleaner.
Remove heavier soil _,_4thwarm
soapy-water.
Do not use abrasives of an},"kind.
Thegasket isdesigned with agap at
the bottom toallow forproper air
circulation.
Because the area insidethe gasket is
cleaned during theself-clean cycle,
you donot need to cleanthis by hand.
Theareaoutsidethegasket andthe
front frame can be cleaned with a
soap-filled steel-wool pad, hot water
and detergent.Rinsewell with a
vinegar andwater solution.
Donot rub or clean thedoor
gasket--it hasan extremely low
resistance to abrasion.
If you notice thegasket becoming
worn, frayed or damagedin any way
or flit has becomedisplaced onthe
door,you should have itreplaced.
Lift-Off Oven Door
Tile oven door is removable for cleaning.
Donotlift thedoorbythehandle.Makesurethe
oveniscompletelycool
Toremovethedoor,open it to the special
broil stop position. Grasp firmly on each
side and lift the door su'aight up and off
the hinges.
Donotplacehandsbetweenthehingeandthe
ovendoorframe.
To replace the door,make sure the hinges
are in tile special broil stop position.
Position the slots in tim bottom of the
door squarely over tim hinges and slowly
lower it over both hinges.
Tocleantheinsideofthedoor:
Soap and water will normally do file
job. Hem T spattering or spillovers may
require cleaning with a mild abrasive
cleaner. Soap-filled, steel-wool pads
may also be used.
Donotal!owfoodspillswithahighsugaroracid
content(suchasmilk,tomatoes,sauerkraut,fruit
juicesorpiefilling)toremainonthesurface.They
maycauseaduffspotevenaftercleaning.
Tocleantheoutsideofthedoor:
Use soap and water to thoroughly clean
tim top, sides and fi'ont of the oven
door. Rinse well. You may also use a
glass cleaner m clean the glass on the
outside of the door. Do not let water
&'ip into the vent openings.
Spillage of marinades, fl'uitjuices,
tomato sauces and basting materials
containing acids may cause
discoloration and should be wiped up
immediately. Wq_ensurface is cool,
clean and rinse.
N Do not use oven cleaners, cleaning
powders or harsh abrasives on the
outside of the door.
22
www.GEAppliances.com
Oven Shelves
Clean the oven shelves with an abrasive
cleanser or steel wool. After cleaning,
rinse the shelves with clean water and d U
with a clean cloth.
NOTE:Theovenshelvesmaybecleanedinthe
self-cleaningoven.However,theshelveswill
darkenincolor,losetheirlusterandbecomehard
toslideif cleanedduringtheself-cleaningcycle.
To make the shelves slide more easily
apply a small amount of vegetable oil
or cooking oil to a paper towel and wipe
the edges of the oven shelves with the
paper towel.
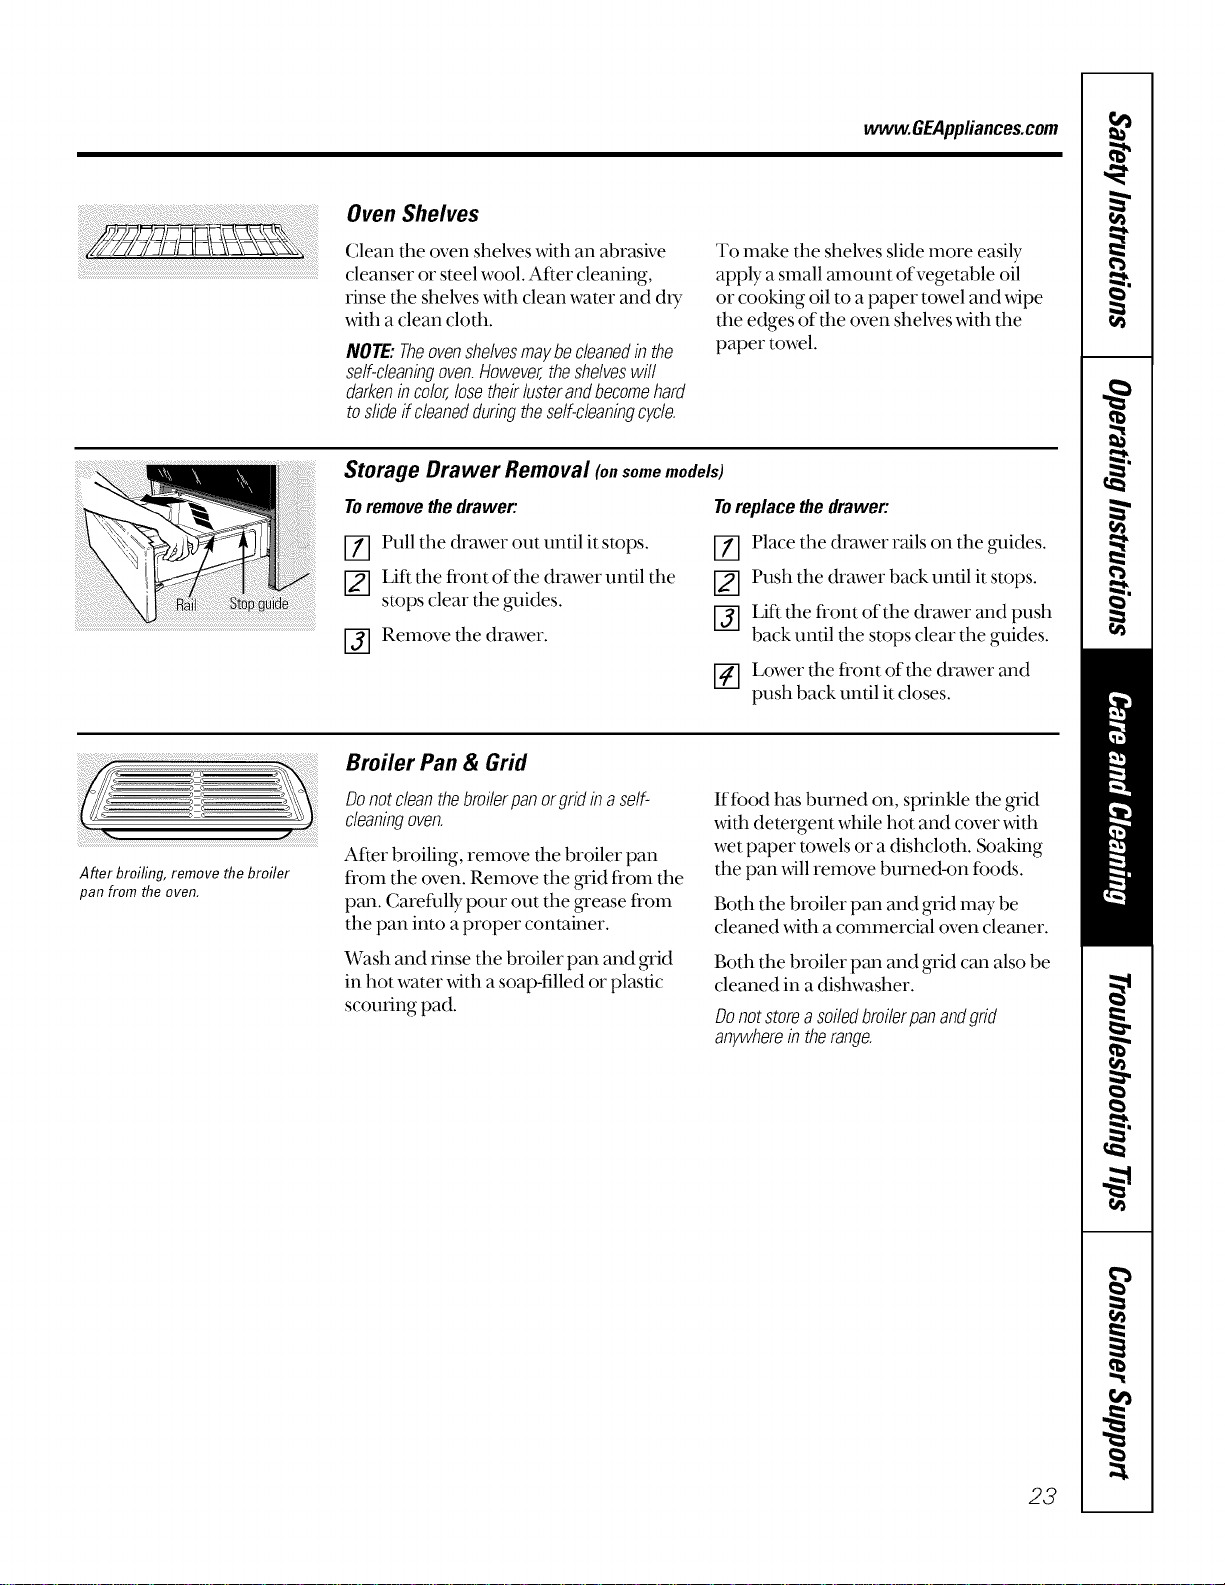
Storage Drawer Removal (onsomemodels)
Toremovethedrawer:
Toreplacethedrawer:
_] Pull the drawer out until it stops.
LiI_ the ti'ont of the &v_wer until the
stops clear the gxddes.
I-j] Remove the drawer.
[-]-] Place the drawer rails on the gxddes.
_-] Push the drawer back until it stops.
_] Lif* the fi'ont of the drawer and push
back until the stops clear the guides.
Lower the fi'ont of the drawer and
push back until it closes.
After broiling, remove the broiler
pan from the oven.
Broiler Pan & Grid
Do notclean the broiler panor gridin aself-
cleaningoven.
After broiling, remove the broiler pan
from the oven. Remove the _'id from the
pan. Carefidly pour out the ,grease fi'om
the pan into a proper container.
Wash and rinse the broiler pan and grid
in hot water x_th a soap-filled or plastic
scouring pad.
If food has burned on, sprinkle the grid
with detergent while hot and cover _4th
wet paper towels or a dishcloth. Soaking
the pan will remove burned-on ibods.
Both the broiler pan and grid may be
cleaned with a commercial oven cleaner.
Both the broiler pan and grid can also be
cleaned in a dishwasher.
Donotstorea soiledbroilerpanandgrid
anywherein therange.
23
Careand cleaning ofthe range.
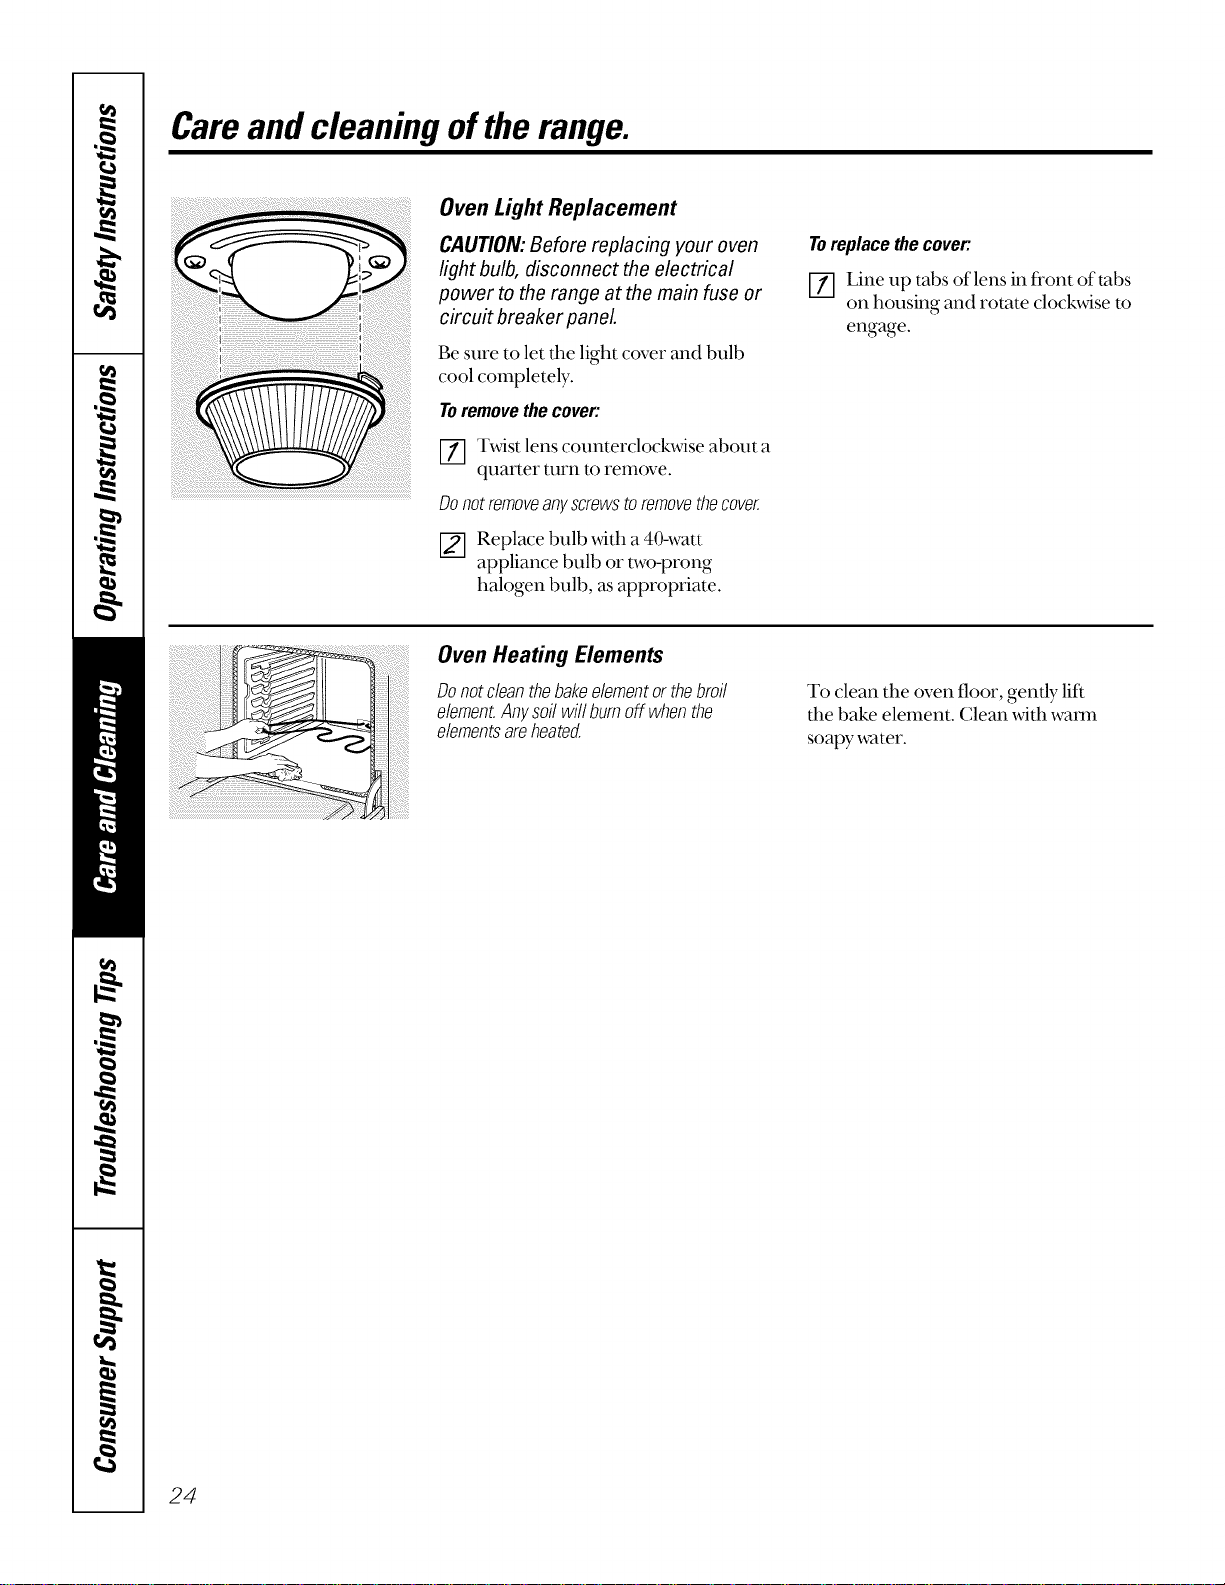
Oven Light Replacement
CAUTION:Before replacing your oven
light bulb, disconnect the electrical
power to the range at the main fuse or
circuit breaker panel.
Be sure to let d_e light cover and bulb
cool completely.
Toremove the cover:
[_] Twist lens counterclockwise about a
quarter turn to remove.
Donotremoveanyscrewstoremovethecover.
[] Replace bulb _.dth a 40-watt
appliance bulb or two-prong
halogen bulb, as appropriate.
Toreplacethecover:
[] Line up tabs of lens in front of tabs
on housing and rotate clockwise to
engage.
Oven Heating Elements
Donotcleanthebakeelementor thebroil
element.Anysoi!willbumoff whenthe
elementsareheated.
To clean the oven floor, gently-lift
tim bake element. Clean wifl_waml
soapy water.
24
Cleaningtheglass cooktop, w .OEAppli..oes.oom
Control Lockout (onsomemodels)
Begin by locking the cooktop;
see the Control Lockoutsection.
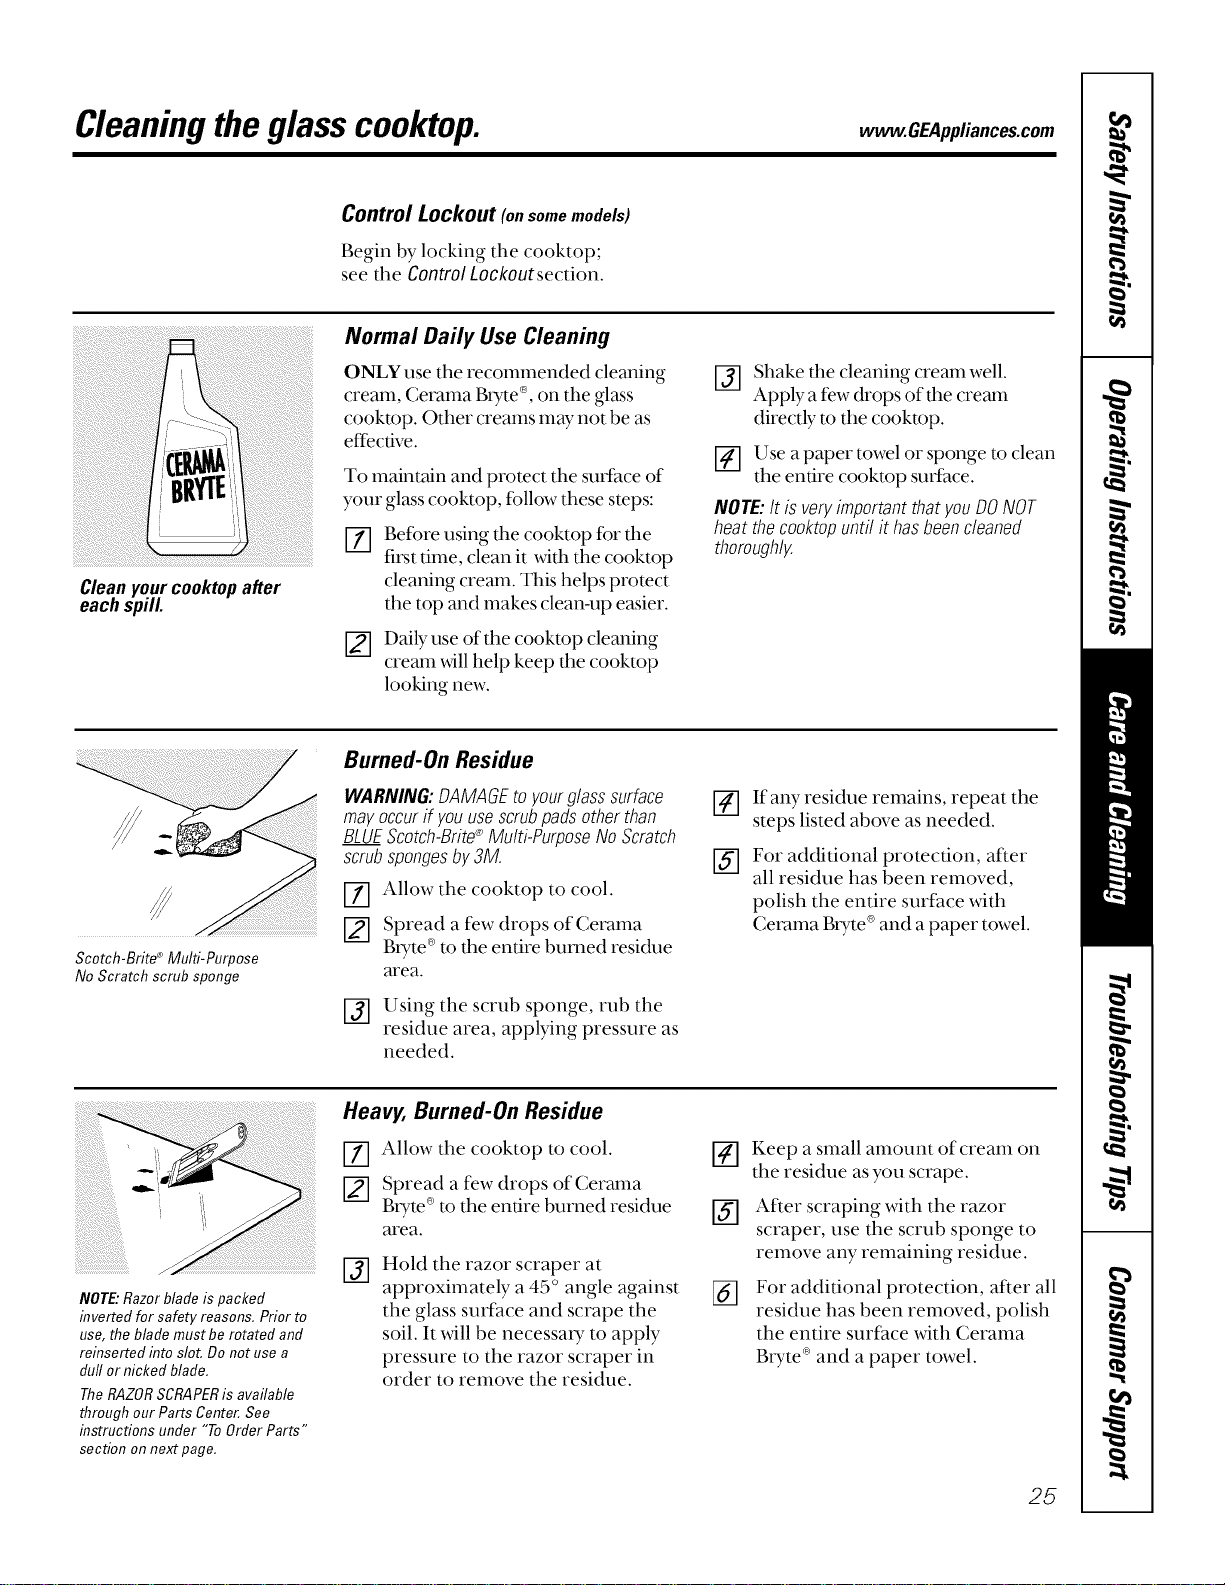
Cleanyourcooktopafter
eachspill
Normal Daily Use Cleaning
ONLY use the recommended cleaning
cream, Cerama Btyte ®,on the glass
cooktop. Other creams may not be as
effective.
To maintain and protect the surface of
your glass cooktop, fbllow these steps:
%
[]
Before using the cooktop for fl_e
first time, clean it with the cooktop
cleaning cream. This helps protect
the top and makes clean-up easier.
Daily use of the cooktop cleaning
cream _dll help keep the cooktop
looking new.
Shake the cleaning cream well.
Apply a few drops of the cream
directly to the cooktop.
_-] Use a paper towel or sponge to clean
the entire cooktop sudace.
NOTE:It isveryimportantthat youDONOT
heat thecooktopuntil it hasbeencleaned
thoroughly.
®
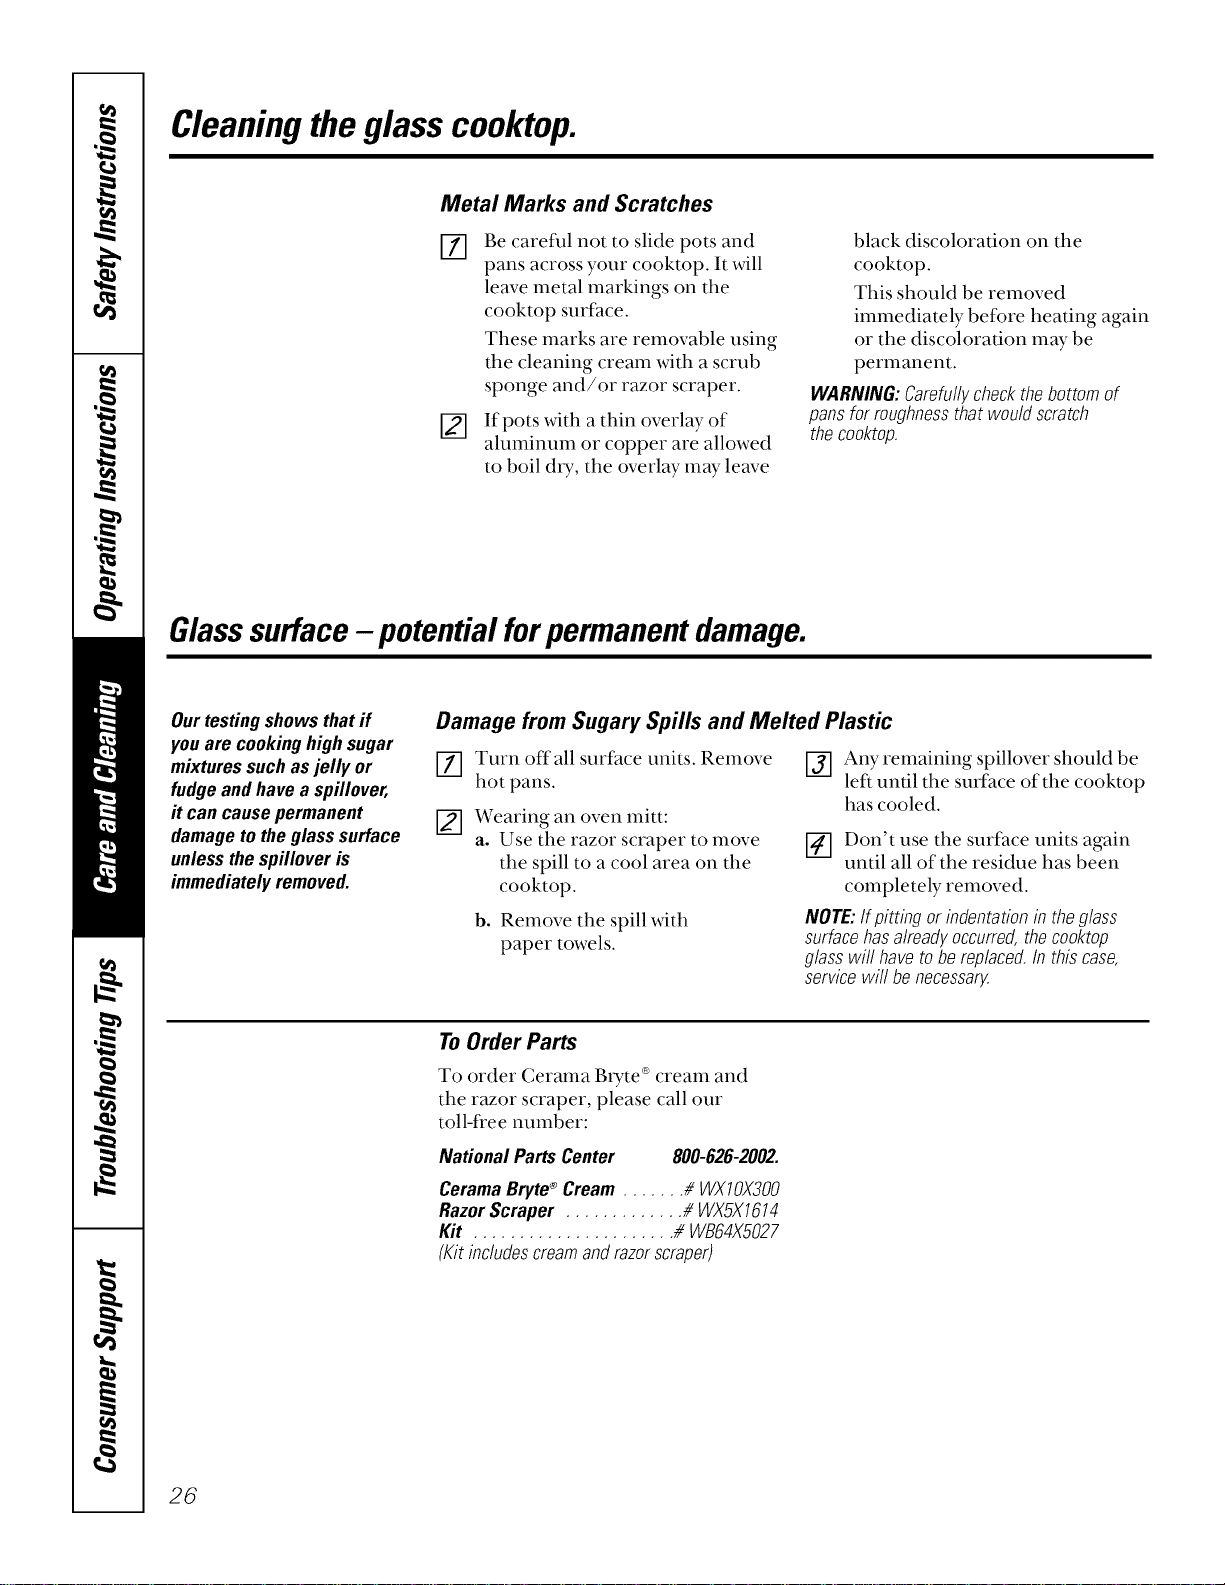
Scotch-Brite Multi-Purpose
No Scratch scrub sponge
Burned-On Residue
WARNIN& DAMAGEtoyourglasssurface
mayoccurif youusescrubpadsotherthan
BLUEScotch-Brite®Multi-PurposeNoScratch
scrubspongesby3M.
Allow the cooktop to cool.
Spread a few drops of Cerama
Bryte ®to the entire burned residue
area.
Using the scrub sponge, rub the
residue area, applying pressure as
needed.
If any residue remains, repeat the
steps listed above as needed.
_-] For additional protection, af_er
all residue has been removed,
polish the entire surface with
Cerama Btyte ®and a paper towel.
NOTE:Razor blade is packed
inverted for safety reasons. Prior to
use, the blade must be rotated and
reinsertefl into slot. Do not use a
duff or nicked blade.
TheRAZORSCRAPERis available
through our Parts Center.See
instructions under "ToOrderParts"
section on next page.
Heavy, Burned-On Residue
[Z] Allow the cooktop to cool.
Spread a few drops of Cerama
Btyte®to the entire burned residue
area.
@
Hold the razor scraper at
approximately a 45 ° angle against
the glass surface and scrape the
soil. It will be necessa U to apply
pressure to the razor scraper in
order to remove the residue.
@
@
%
Keep a small amount of cream on
the residue as you scrape.
After scraping with the razor
scraper, use the scrub sponge to
remove any remaining residue.
For additional protection, after all
residue has been removed, polish
the entire surface with Cerama
BtTte ®and a paper towel.
25
Cleaningtheglass cooktop.
Metal Marks and Scratches
i21
Be careful not to slide pots and
pans across your cooktop. It will
leave metal markings on the
cooktop surface.
These marks are removable using
the cleaning cream with a scrub
sponge and/or razor scraper.
If pots with a thin overlay of
aluminum or copper are allowed
to boil d_T, the overlay may leave
black discoloration on the
cooktop.
This should be removed
immediately before heating again
or the discoloration may be
permanent.
WARNING'.Carefullycheckthebottomof
pansforroughnessthat wouldscratch
thecooktop.
Glasssurface- potentialforpermanentdamage.
Ourtestingshowsthatif
you are cookinghighsugar
mixturessuchasjelly or
fudgeandhavea spillover,
it cancausepermanent
damagetotheglasssurface
unlessthespilloveris
immediatelyremoved.
Damage from Sugary Spills and Melted Plastic
[] Turn off all surface units. Remove
hot pans.
[] Wearing an oven mitt:
a. Use the razor scraper to move
the spill to a cool area on the
cooktop.
b. Remove the spill with
paper towels.
[_] Any remaining spillover should be
left until the surface of the cooktop
has cooled.
_-] Don't use tile suri:ace units again
until all of the residue has been
completely removed.
NOTE:Ifpitting or indentationin theglass
surfacehasalreadyoccurred,thecooktop
glasswill havetobe replaced.Inthiscase,
servicewill benecessary.
ToOrder Parts
To order Cerama Btyte ®cream and
the razor scraper, please call our
toll-free number:
NationalPartsCenter 800-626-2002.
CeramaBryte ®Cream ....... # WXIOX300
RazorScraper ............. //WX5X1614
Kit ...................... //WB64X5027
(Kitinc/udescreamandrazorscraper)
26
Before YouCarlForService... w GEApplia.oes.oom
Troubleshooting tips
Save time and money! Review the charts on the following
pages first and you may not need to call for service.
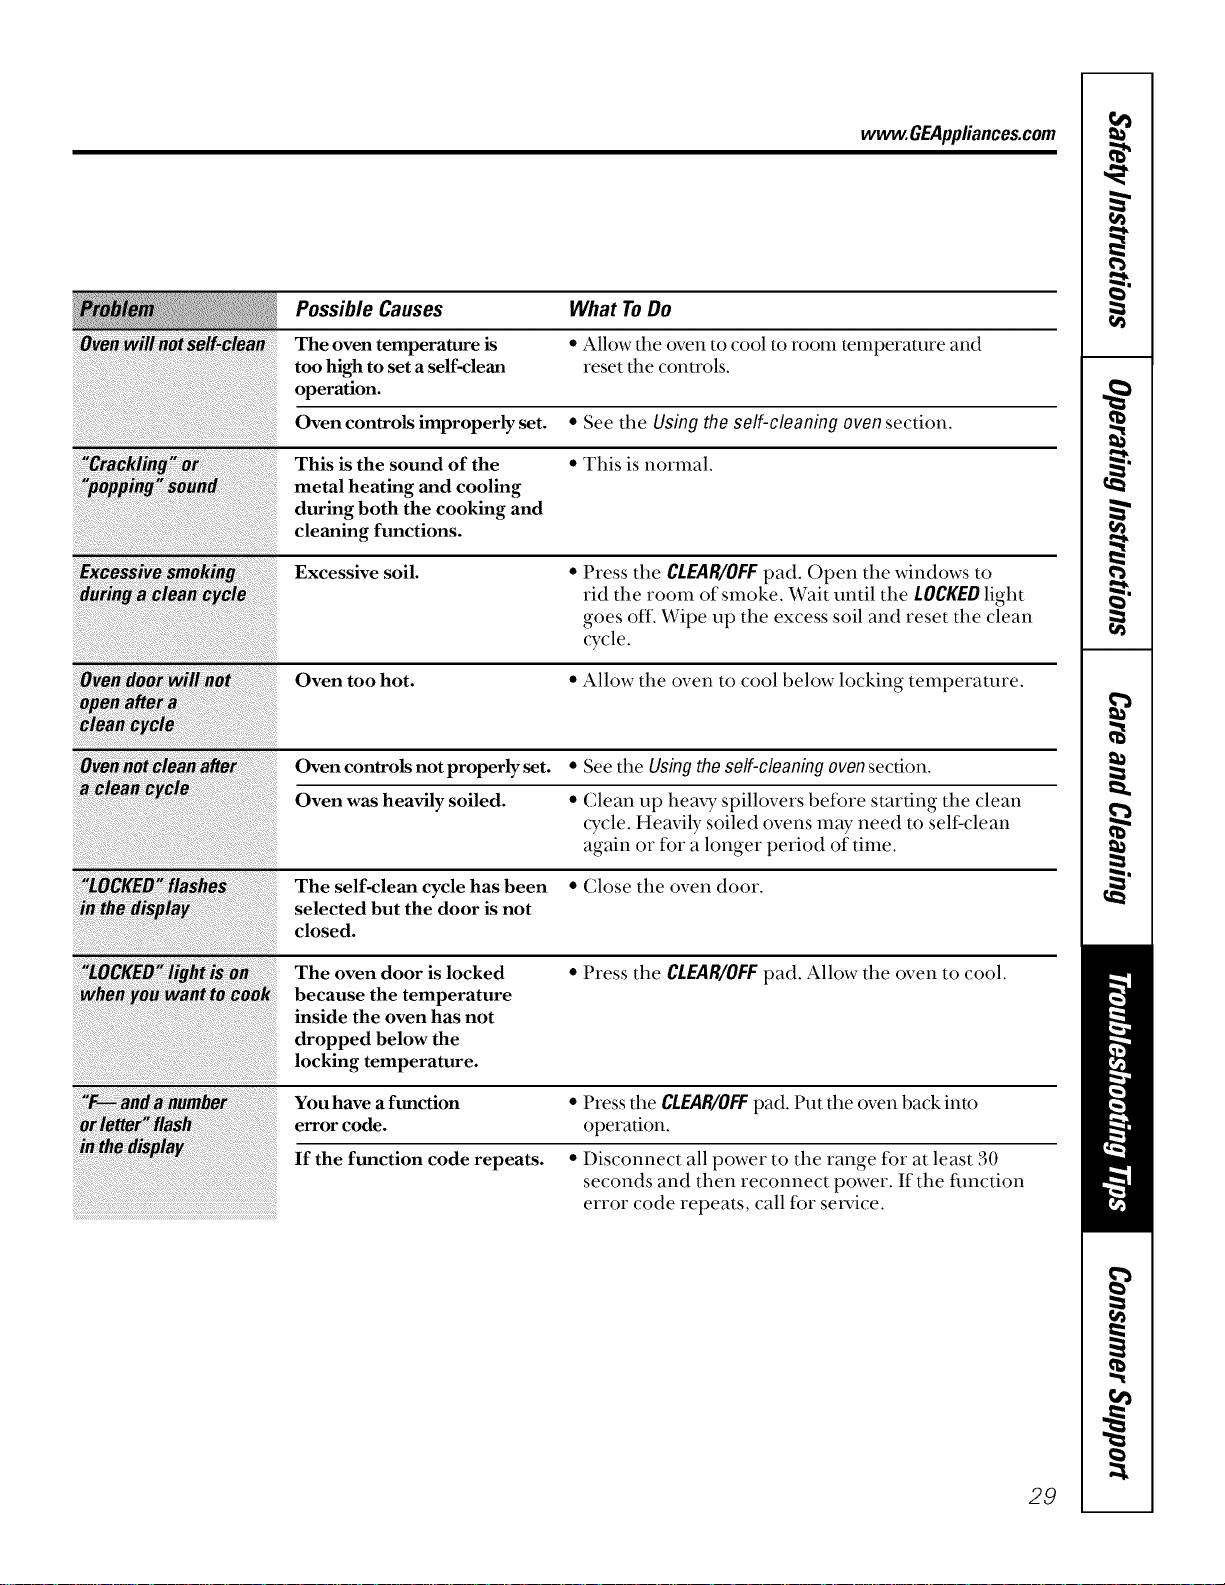
Possible Causes
Improper cookware
being used.
What ToDo
• Use pans which are flat and match the diameter
of the surface unit selected.
A fuse in your home may be • Replace the fuse or reset the circuit breaker.
blown or the circuit breaker
tripped.
Cooktop controls • Check to see the correct control is set for the surface
improperly set. unit you are using.
Incorrect cleaning
methods being used.
Cookware with rough bottoms
being used or coarse particles
(salt or sand) were between
the cookware and the surface
of the cooktop.
Cookware has been slid
across the cooktop surface.
• Scratches are not removable. Tiny scratches will become
less visible in time as a result of cleaning.
• To avoid scratches, use the recommended cleaning
procedures. Make sure bottoms ofcookware are clean
before use, and use cookware _4th smooth bottoms.
Food spillovers not cleaned • See the Cleaningthe glass cooktop section.
before next use.
Hot surface on a model • This is normal. The surfhce may appear discolored
with a white glass cooktop, when it is hot. This is temporary and will disappear
as the glass cools.
Hot cooktop came into • See the Glasssurface--potential for permanent damage
contact with plastic placed section in the Cleaning the glass cooktop section.
on the hot cooktop.
Hot sugar mixture spilled • Call a qualified technician for replacement.
on the cooktop.
Improper cookware • Use only- flat cookware to minimize cycling.
being used.
You forgot to enter a • Press the BAKE pad and desired temperamre or the
bake temperature or SELFCLEANpad and desired clean time.
cleaning time.
Oven controls improperly set. • See the Using the oven section.
Shelf position is incorrect • See the Usingthe oven section.
or the shelf is not level.
• See the Using the oven section.
• See the Adjust the oven thermostat--Do it yourself!
section.
Incorrect cookware or
cookware of improper
size being used.
Oven thermostat needs
adjustment. 27
Before YouCall ForService...
Troubleshooting tips
Possible Causes What To Do
Plug on range is not completely * Make sure electrical plug is plugged into a live, properly
inserted in the electrical outlet. _'ounded outlet.
A fuse inyour home may * Replace the fuse or reset the circuit breaker.
be blown or the circuit
breaker tripped.
Oven controls improperly set. • See the Using the clock and timer section.
Light bulb is loose or defective. * Tighten or replace the bulb.
Switch operating light • Call for setMce.
is broken.
Door not open to the broil stop * See the Using the oven section.
position as recommended.
Oven controls improperly set. * Make sure you press the BROIL HI/£O pad.
Improper sheffposition * See the Broiling Guide.
being used.
Cookware not suited • Use the broiling pan and grid that came with your range.
for broiling.
Aluminum foil used on the • See the Using the oven section.
the broiling pan and grid has
not been fitted properly and
slit as recommended.
In some areas the power * Preheat the broil element for 10 minutes.
(voltage) may be low.
• Broil for the longest period of time reconunended in
the Broiling Guide.
:_ve_temp_ratt • See the Adjust the oven thermostat--Do it yourself/.
section.
• Replace the fuse or reset the circuit breaker.
• See the Using the oven section.
<F ¸ />( _ /_17;;5;
Storage _awe
woh't_lo
Oven thermostat
needs adjustment.
A fuse in your home may be
blown or the circuit
breaker tripped.
Oven controls improperly set.
Rear drawer support is
on top of the guide rail.
Power cord may be
obstructing drawer
in the lower back
of the range.
Rear drawer support is
on top of the guide rail.
• Reposition the drawer. See the Storage Drawer
Removal insu'uctions in the Care and cleaning of your
range section.
• Reposition the drawer and power cord. See the
StorageDrawer Removalinstmctions in the Careand
cleaningofyourrangesection.
• Reposition the drawer. See the Storage Drawer
Removalinstrucdons in the Careand cleaning of your
range section.
28
www.GEAppliances.com
Possible Causes What ToDo
The oven temperature is
too high to set a self-clean
operation.
Oven controls improperly set.
• Allow the oven to cool to room temperature and
reset the conu'ols.
• See the Using the self-cleaning ovensection.
This is the sound of the
metal heating and cooling
during both the cooking and
cleaning functions.
• This is normal.
Excessive soil.
• Press tile CLEAR/OFFpad. Open tile windows to
rid the room of smoke. Wait until the LOCKEDlight
goes off. Wipe up the excess soil and reset the clean
cycle.
Oven too hot.
• Allow tile oven to cool below locking temperature.
Oven controls not properly set. • See the Usingtheself-cleaningovensection.
Oven was heavily soiled. • Clean up hea W spillovers before starting the clean
cycle. Heavily soiled ovens may need to self:clean
again or for a longer period of time.
The self-clean cycle has been • Close the oven door.
selected but the door is not
closed.
The oven door is locked • Press the CLEAR/OFFpad. Allow tile oven to cool.
because the temperature
inside the oven has not
dropped below the
locking temperature.
Youhave a function • Press tile CLEAR/OFFpad. Put the oven back into
error code. operation.
If the function code repeats. • Disconnect all power to tile range fbr at least 30
seconds and then reconnect power. If the fimction
error code repeats, call fbr set-vice.
29
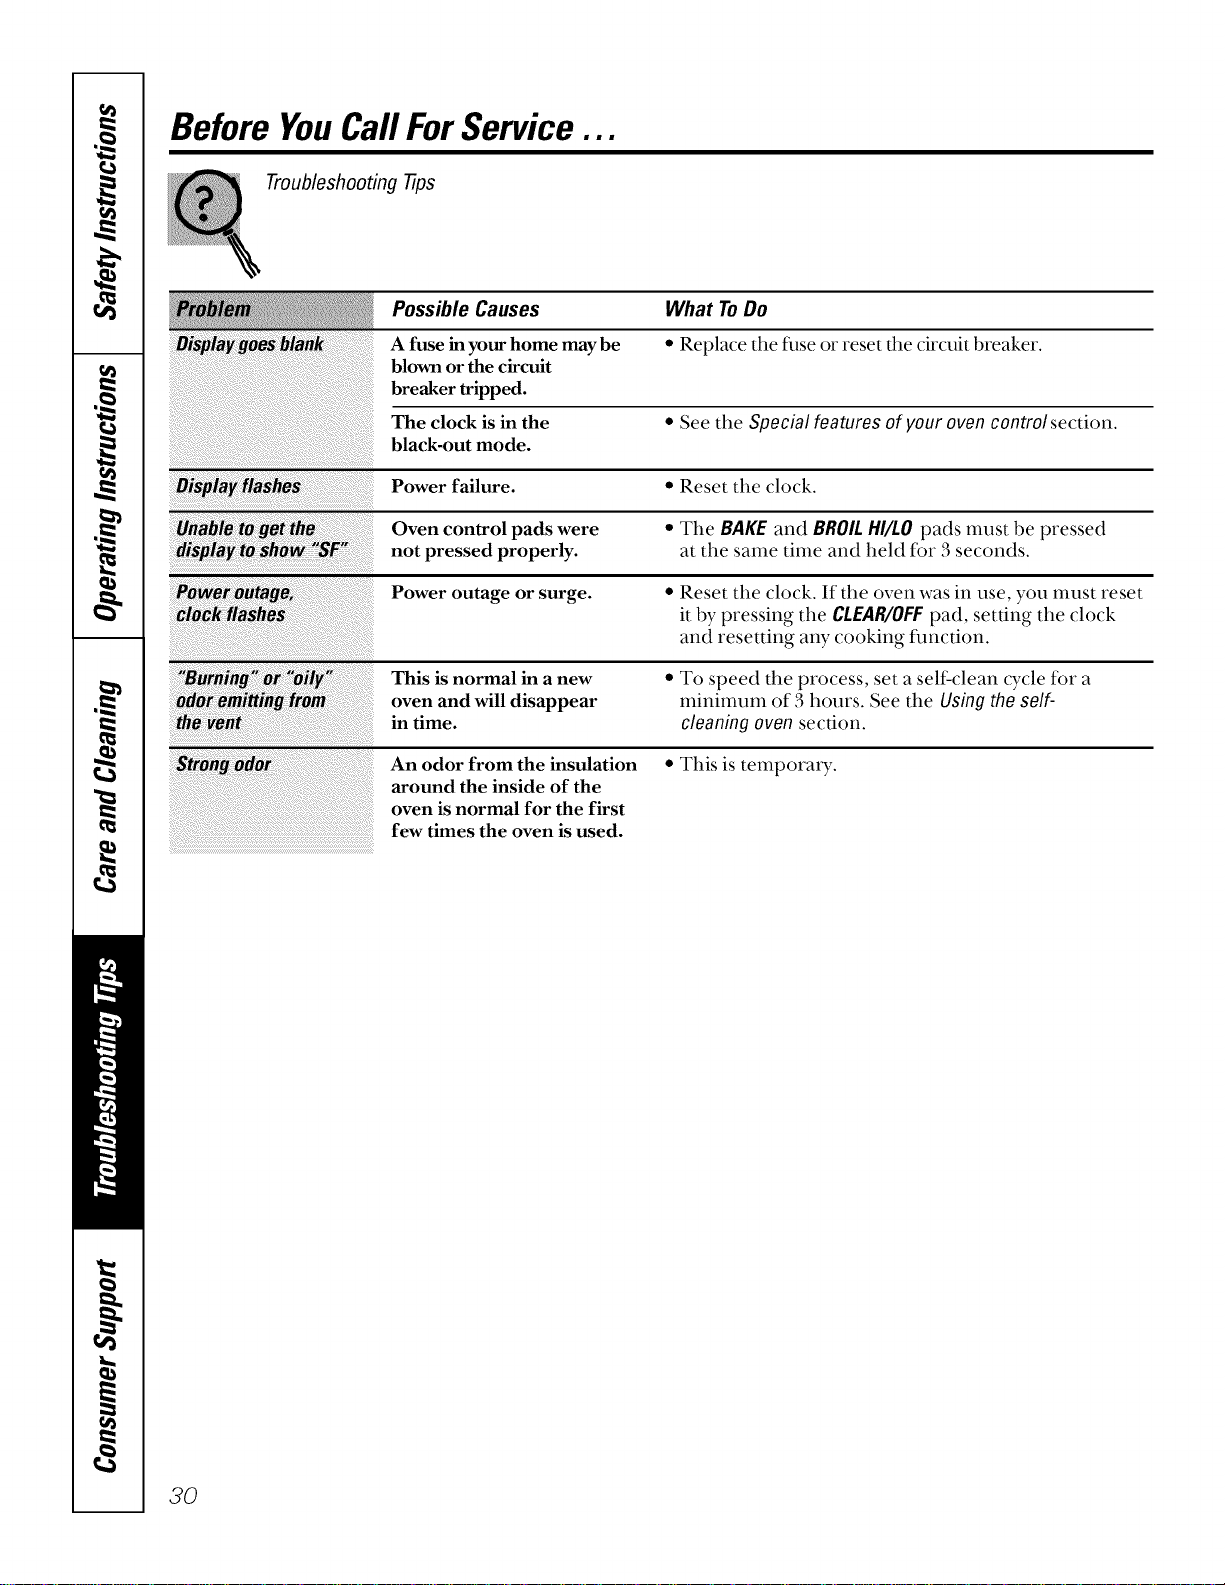
Before YouCall ForService...
Troubleshooting tips
Possible Causes What ToDo
A fuse in your home may be * Replace the filse o1"reset the circuit breaker.
blown or the circuit
breaker tripped.
The clock is in the * See the Special features of your oven controlsection.
black-out mode.
Power failure. * Reset the clock.
il;_¸¸¸¸¸¸¸¸;_J; ___;_i_;;;; _ _;_!_ff _!_; ii;i;;
: Burn!ng Oi Oi
Odo _ittin fro
th_ve_
ng_do_
Oven control pads were
not pressed properly.
Power outage or surge.
This is normal in a new
oven and will disappear
in time.
An odor from the insulation
around the inside of the
oven is normal for the first
few times the oven is used.
• The BAKE and BROILHI/LOpads must be pressed
at the same time and held for 3 seconds.
• Reset the clock. If the oven was in use, you nmst reset
it by pressing the CLEAR/OFFpad, setting the clock
and resetting any cooking function.
• To speed the process, set a self clean cycle for a
minimum of 3 hours. See the Using the self-
cleaning oven section.
• This is temporaD_.
3O

Notes
fo
w
r_
€=
€=
m
m
€0
w
!
€=
m
L
i
€=
€=
m
Notes
GE Service Protection Plus TM
GE, a name recognized worldwide for quality and dependability, offers you
Service Protection Plus TM--comprehensive protection on all your appliances--
No Matter What Brand!
Benefits Include:
• Backed by GE
• All brands covered
• Unlimited service calls
• All parts and labor costs included
• No out-of-pocket expenses
• No hidden deductibles
• One 800 number to call
We'll CoverAny Appliance.
Anywhere. Anytime.*
You will be completely satisfied with our setMce protection or you may request your money back
on the remaining value of your contract. No questions asked. It's that simple.
Protect your refrigerator, dishwasher, washer and dxyer, range, TV, VCR and much more-any brand!
Plus there's no extra charge for emergency sexvice and low monthly financing is available. Even icemaker
coverage and fbod spoilage protection is offered. You can rest easy, knowing that all your valuable
household products are protected against expensive repairs.
Place your confidence in GE and call us in the U.S. toll-free at 800-626-2224
for more intbrmation.
*All brands coxered, up to 20 )ears old, in the continental I .S.
._._ Cut here
Please place in envelope and mail to:
General Electric Company
Warranty Registration Department
P.O. Box 32150
Lotfisfille, KY 40232-2150
33
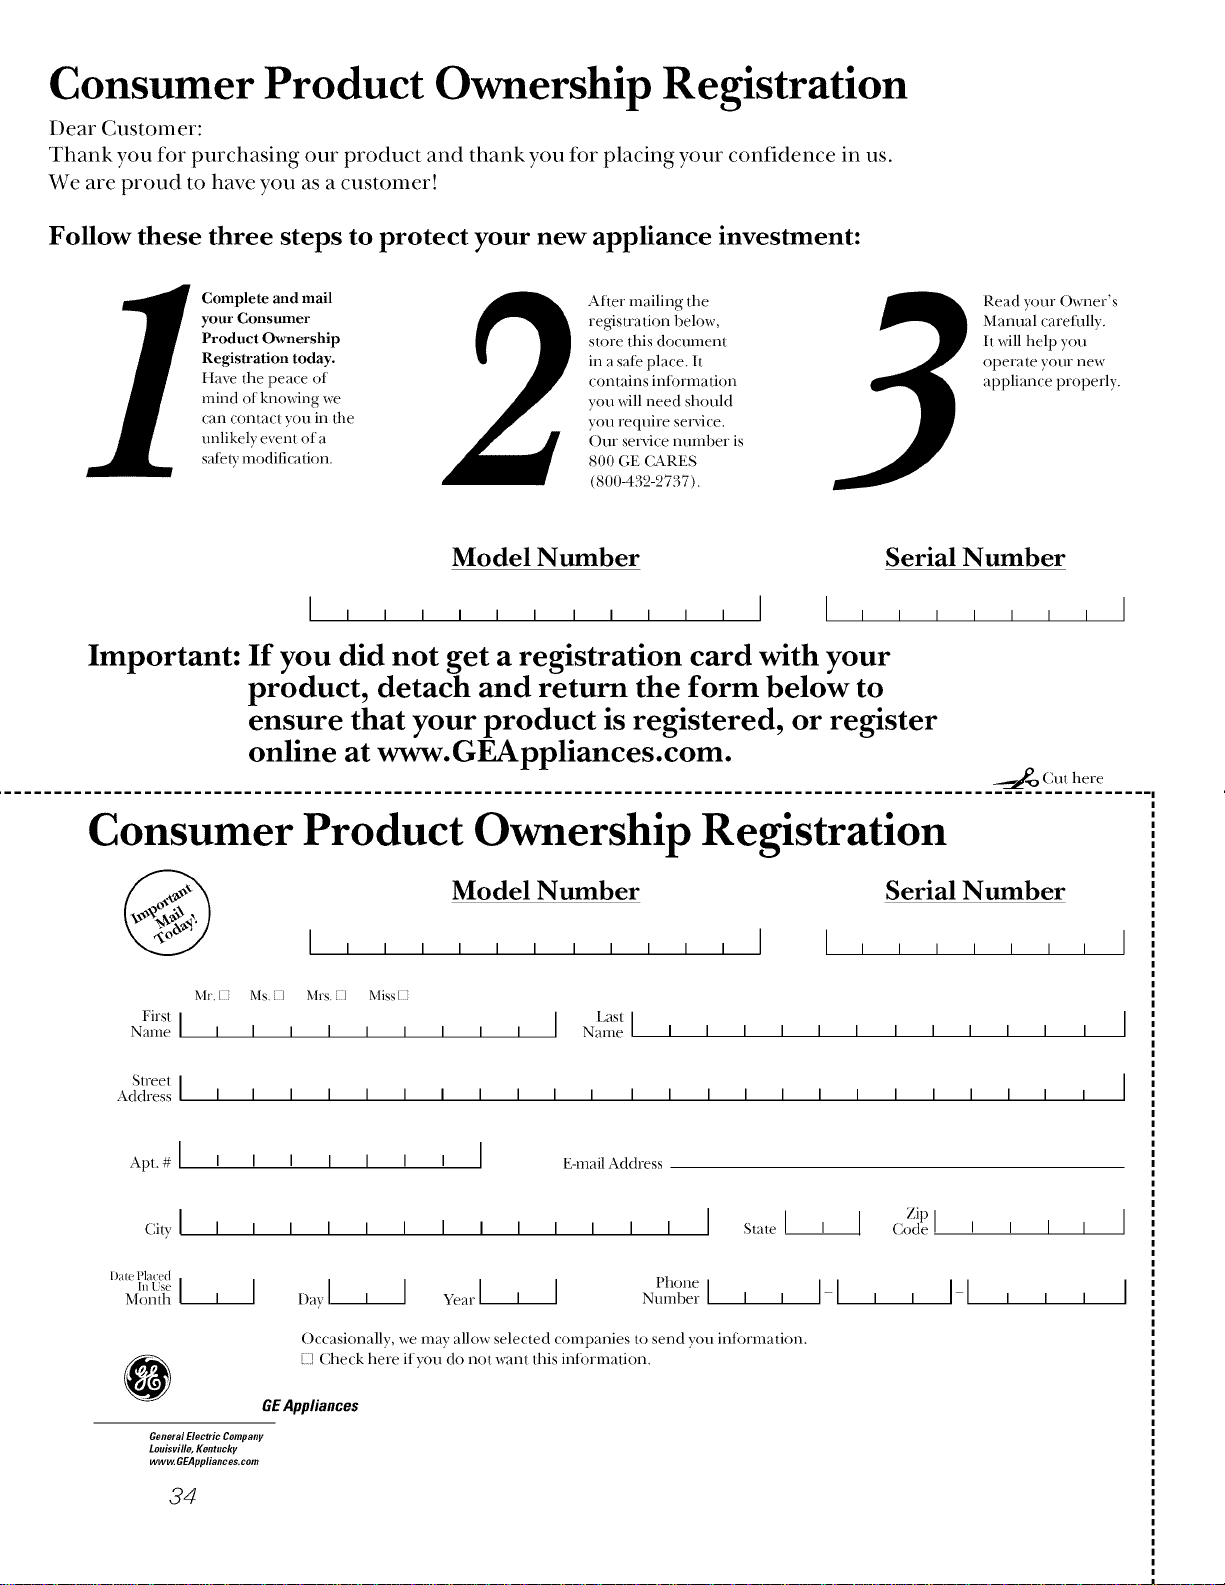
Consumer Product Ownership Registration
Dear Customer:
Thank you for purchasing our product and thank you for placing your confidence in us.
We are proud to have you as a customer!
Follow these three steps to protect your new appliance investment:
Complete and mail
your Consumer
Product Ownership
Registration today.
Have the peace ()f"
mind of knowing we
can contact you in the
unlikely event of a
salary modification.
Alter" mailing the
registration below,
store this document
in a sal_ place. It
contains inli)rmati<)n
you will need should
you require sere'ice.
Our self'ice number is
800 GE CARES
(800-432-2737).
Read y(mr Owner's
Manual careflrlly.
It will help you
operate your new
appliance properly.
Model Number Serial Number
Important: If you did not get a registration card with your
product, detach and return the form below to
ensure that your product is registered, or register
online at www.GEAppliances.com.
_..._P_ Cut here
Consumer Product Ownership Registration
@
Model Number Serial Number
Mr. [2 his. K] bh-s. K] Miss [2
First [
Name I I I I I I
Last I
I I I Name I I I I I I I I I I I
Street I
Address ] I I I I I I I I I I I I I I I I I I I I
Apt. # [ I I I ] [ I I [ E-mail Address
Zip
City[ I I I I I I I I I I I I I [ State[' ] Codel'' I I
[)a[e Placed
u,Us__,] I I I I I I IMonth I Davl I ve_,rl' I t'l,one
• _umberI ' I-I I-I
Occasionally we may allow selected companies t() send you information.
127Check here if you do not want this intormation.
GEAppliances
General Electric Company
Louisville, Kentucky
ww_GEAppliances.com
34
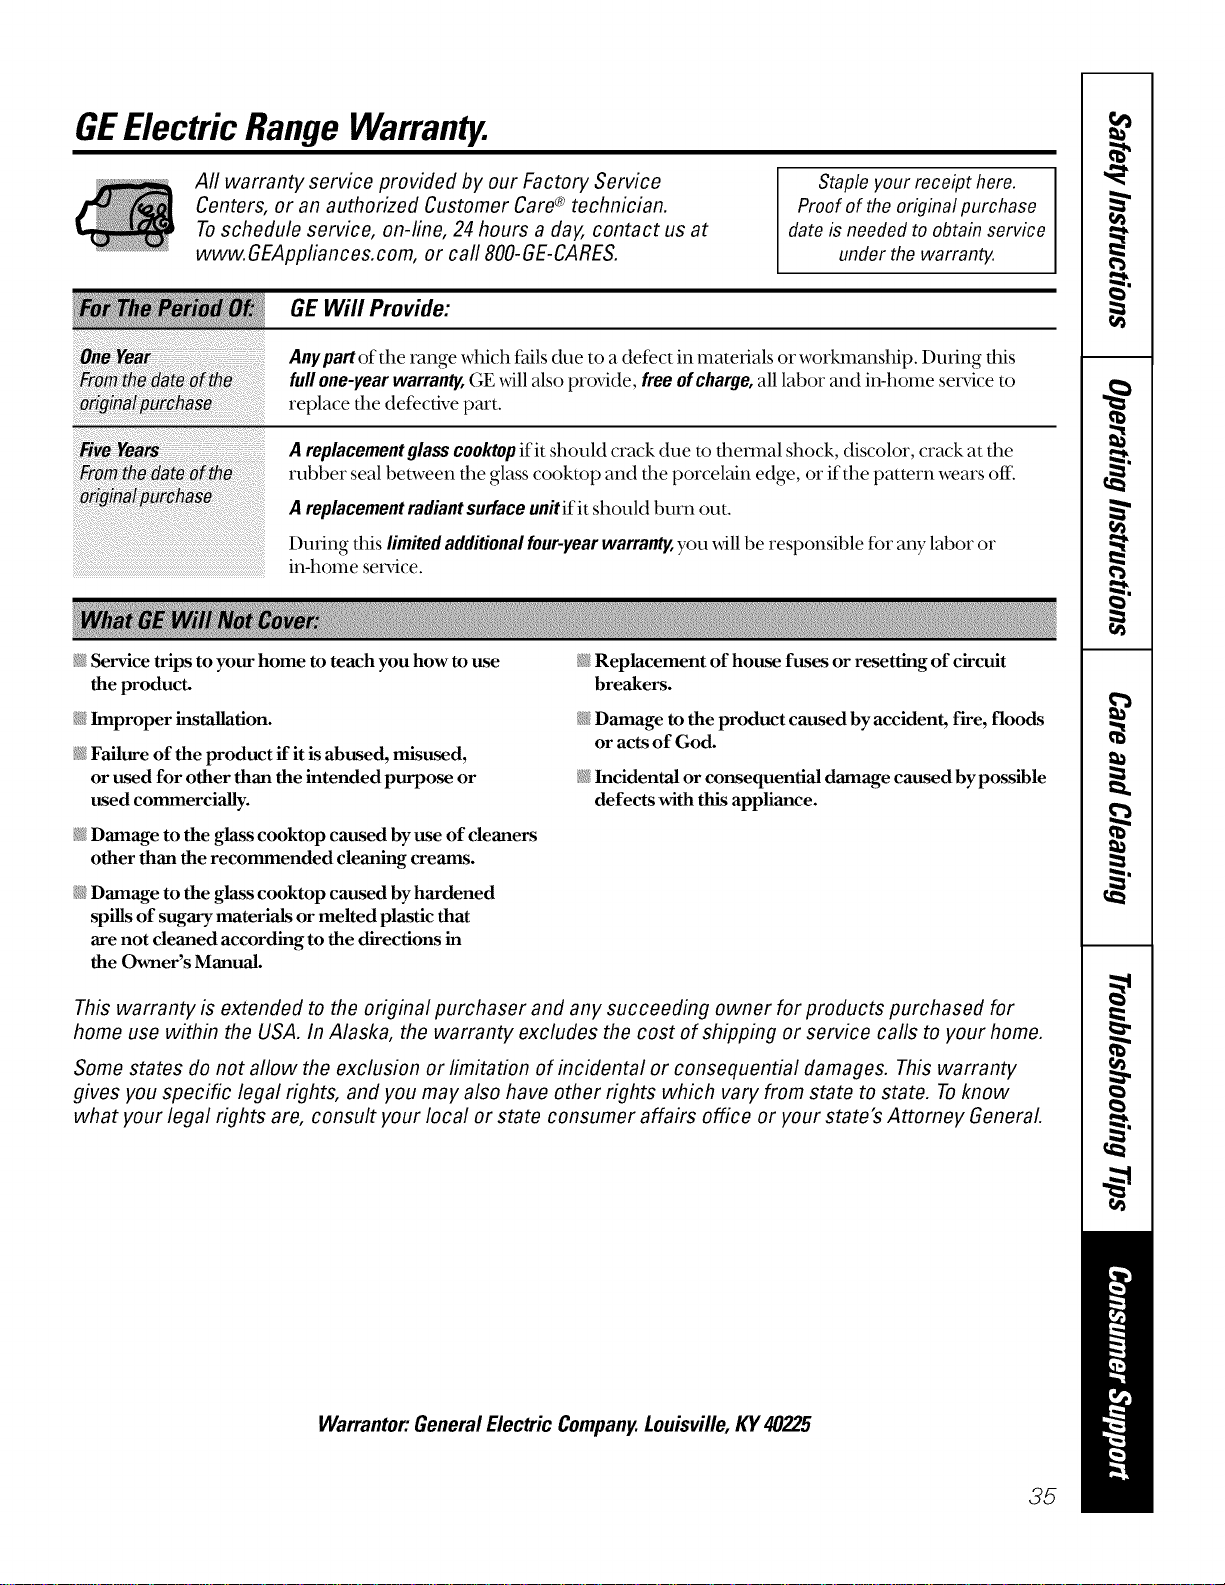
GEElectric Range Warranty.
All warranty service provided by our Factory Service
Centers, or an authorized Customer Care® technician.
Toschedule service, on-line, 24 hours a day, contact us at
www.GEAppliances.com, or carl 800-GE-CARES.
Staple your receipt here.
Proof of the original purchase
date is needed to obtain service
under the warranty.
GE Will Provide:
Anypart of the range which i:ailsdue to a defect in materials or worlmmnship. During this
fullone-yearwarranty,GE _,villalso pro_4de, freeofcharge,all labor and in-home se_ice to
replace the defective part.
Areplacementglasscooktopif it should crack due to thermal shock, discolor, crack at the
rubber seal t,etween the glass cooktop and the porcelain edge, or ifthe pattern wears off.
Areplacementradiantsurfaceunitifitshouldburnout.
During this limitedadditionalfour-yearwarranty,you _ll be responsit)le for any lat)or or
in-home service.
Service trilxs to your home to teach you how to use
the producL
_ Improper installation.
Failure of the product if it is abused, misused,
or used for other than the intended purpose or
used commercially.
Damage to the glass cooktop caused byuse of cleaners
other than the recommended cleaning creams.
_ Damage to the glass cooktop caused by hardened
spills of sugary materials or melted plastic that
are not cleaned according to the directions in
the Owner's Manual.
Replacement of house fuses or resetting of circuit
breakers.
_{Damage to the product caused by accident, fire, floods
or acts of God.
Incidental or consequential damage caused by possible
defects with this appliance.
This warranty is extended to the original purchaser and any succeeding owner for products purchased for
home use within the USA. In Alaska, the warranty excludes the cost of shipping or service calls to your home.
Some states do not allow the exclusion or limitation of incidental or consequential damages. This warranty
gives you specific legal rights, and you may also have other rights which vary from state to state. Toknow
what your legal rights are, consult your local or state consumer affairs office or your state's Attorney General
Warrantor: GeneralElectric Company.Louisville, KY40225
35

ConsumerSupport.
GEAppliancesWebsite wvvw.GEAppliances.com
Have a question or need assistance with your appliance? Try the (;E Appliances Website 24 hours a day,
any day of the year! For greater convenience and faster setsdce, you can now do,reload O_mer's Manuals,
order parts, catalogs, or even schedule set_dce on-line. You can also "Ask Our Team of Experts ......
your questions, and so much more...
ScheduleService
vvvvvv.GEAppliances.com
Expert GE repair service is only one step mvay from your door. Get on-line and schedule your sex_dceat
your convenience 24 hours any day of the year! Or call 800-GE-(L&RES (800-432-2737) during normal
business hours.
RealLifeDesignStudio
wvvw.GEAppliances.com
GE supports the Universal Design concept--producLs, setxdces and emdronments that can be used by
people of all ages, sizes and capabilities. We recognize the need to design tor a wide range of physical and
mental abilities and impairments. For details of GE's Universal Desi_l applications, including kitchen
desi_l ideas tor people _4th disabilities, check out our Website today. For the hearing impaired, please call
800-TDD-GEAC (800-833-4322).
ExtendedWarranties
vvvvvv.GEAppliances.com
Purchase a GE extended wan'anty and learn about special discounts that are available while your wan'anty
is still in effect. You can purchase it on-line anytime, or call 800-626-2224 during normal business hours.
GE Consumer Home Setsdces _ill still be there after your warranty expires.
PartsandAccessories
vvvvvv.GEAppliances.com
IndMduals qualified to setsdce their o;m appliances can have parts or accessories sent directly to their homes
(VISA, MasterCard and Discover cards are accepted). Order on-line today, 24 hours eve U day or by phone at
800-626-2002 during normal business hours.
Instructionscontainedin thismanualcoverprocedurestobeperformedbyanyuser.Otherservicinggenerally
shouldbereferredtoqualifiedservicepersonnelCautionmustbeexercised,sinceimproperservicingmaycause
unsafeoperation.
ContactUs
vvww.GEAppliances.com
If you are not satisfied xvith the service you receive fi'om GE, contact us on our Website _4th all the details
including your phone number, or write to: General Manager, Customer Relations
GE Appliances, Appliance Park
Louisxdlle, KY 40225
RegbterYourApplbnce vvvvvv.GEAppliances.com
Register your new appliance on-line--at your convenience! Timely product registration will allow for
enhanced communication and prompt service under the terms of your warranty, should the need arise.
You may also mail in the pre-printed registration card included in the packing material, or detach and
use the fore1 in this Owner's Manual.
Printed inthe United States

