15*12" Heat Press User Manual
Model:P8001

NEED HELP WITH YOUR NEW HEAT PRESS?
For Sales & Support:
Submit a Service Ticket at: https://www.vevor.com/pages/contact-us
This documentation is copyright 2016 USCutter. No duplication,
republishing or reposting of this material in whole or in part is authorized
without express written consent. Product design, logos, brand names
for various media, and product photos are owned by the manufacturers.
855-385-1880
24H Email Contact: support@vevor.com
Working Time:Mon-Fri 8:00 am to 5: 00 pm

Thank you for purchasing this heat press from VEVOR. The following are important
things you need to know before you begin:
• Intended usage of this Heat Press: This heat press is designed to press heat transfer
vinyl (HTV), sublimation and transfer papers onto soft garments.
Also avoid use of this heat press for other activities such as food preparation or extraction
of oils from plant materials and other alternative uses.
Use of this heat press in a manner other than intended will void the warranty, will damage
the machine, and may constitute a fire hazard.
• Preserve the shipping carton: Please do not discard or disassemble the carton this heat
press came in. It was designed to hold the weight of this machine during shipping.
Should you need to return the equipment due to warranty or repair, you will need it. Do
not attempt to ship this equipment in a different container.
• Follow manufacturer instructions on materials you press: Always use recommended
settings from the manufacturer for any material used in this press. Those instructions are
usually always available on-line from the material maker.
Instructions on the most common and recommended materials are enclosed within this
documentation.
• Test before you press: We encourage you to always do a test of your fabric and HTV
or transfer paper together using a small sample of the materials before you do volume
production.
If possible your test should include actually washing and drying a pressed garment to
assure that the media has properly adhered to the garment using the heat and pressure
setting you have selected.
• Use extreme care during operation: Please also be careful as you operate the heat press.
During operation the platens will get hot enough to do serious injury to you should you
touch them, and surrounding metal parts will also reach high temperatures.
Please educate children and others around this equipment that it is not a toy and can
cause severe burns and/or injury if the unit is closed onto fingers or other body parts.
• Electrical Source: This heat press is designed to plug into a standard household 3
prong outlet. (110-120V/60Hz.) Do not attempt to use this press with a two prong
electrical cord or otherwise use it without proper grounding.
1
2
3
4
5
6
7
8
9
10
11
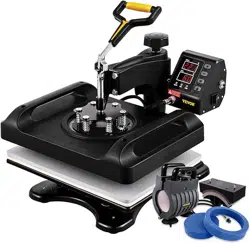
The Pressure Adjustment Knob controls the amount of force that will be used to push the
transferred image into the fibers of the garment. Clockwise increases pressure. Counter
clockwise decreases it.
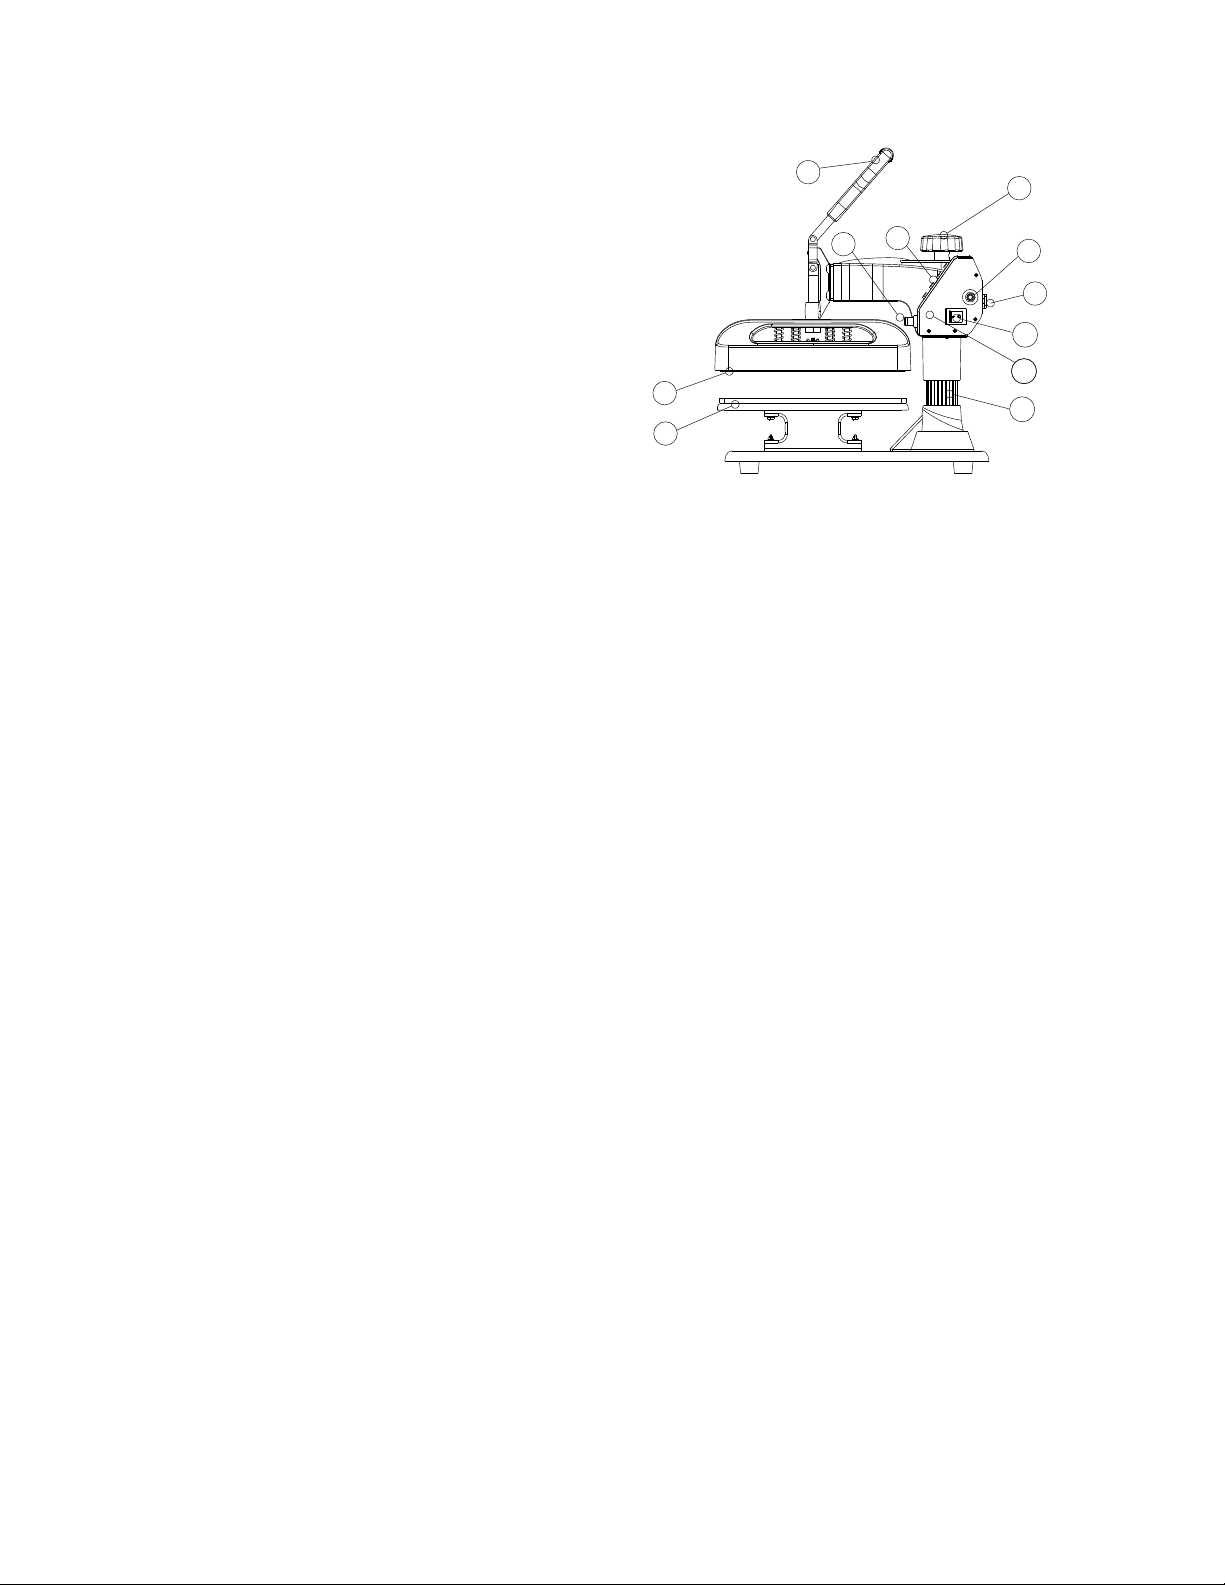
1.Placement
2.Heating plate
3.Handle
4.Aviation connector
5.Button
6.Pressure Adjustment Knob
7.Overload protector
8.Power socket
9.Power switch
10.Control panel
11.Column
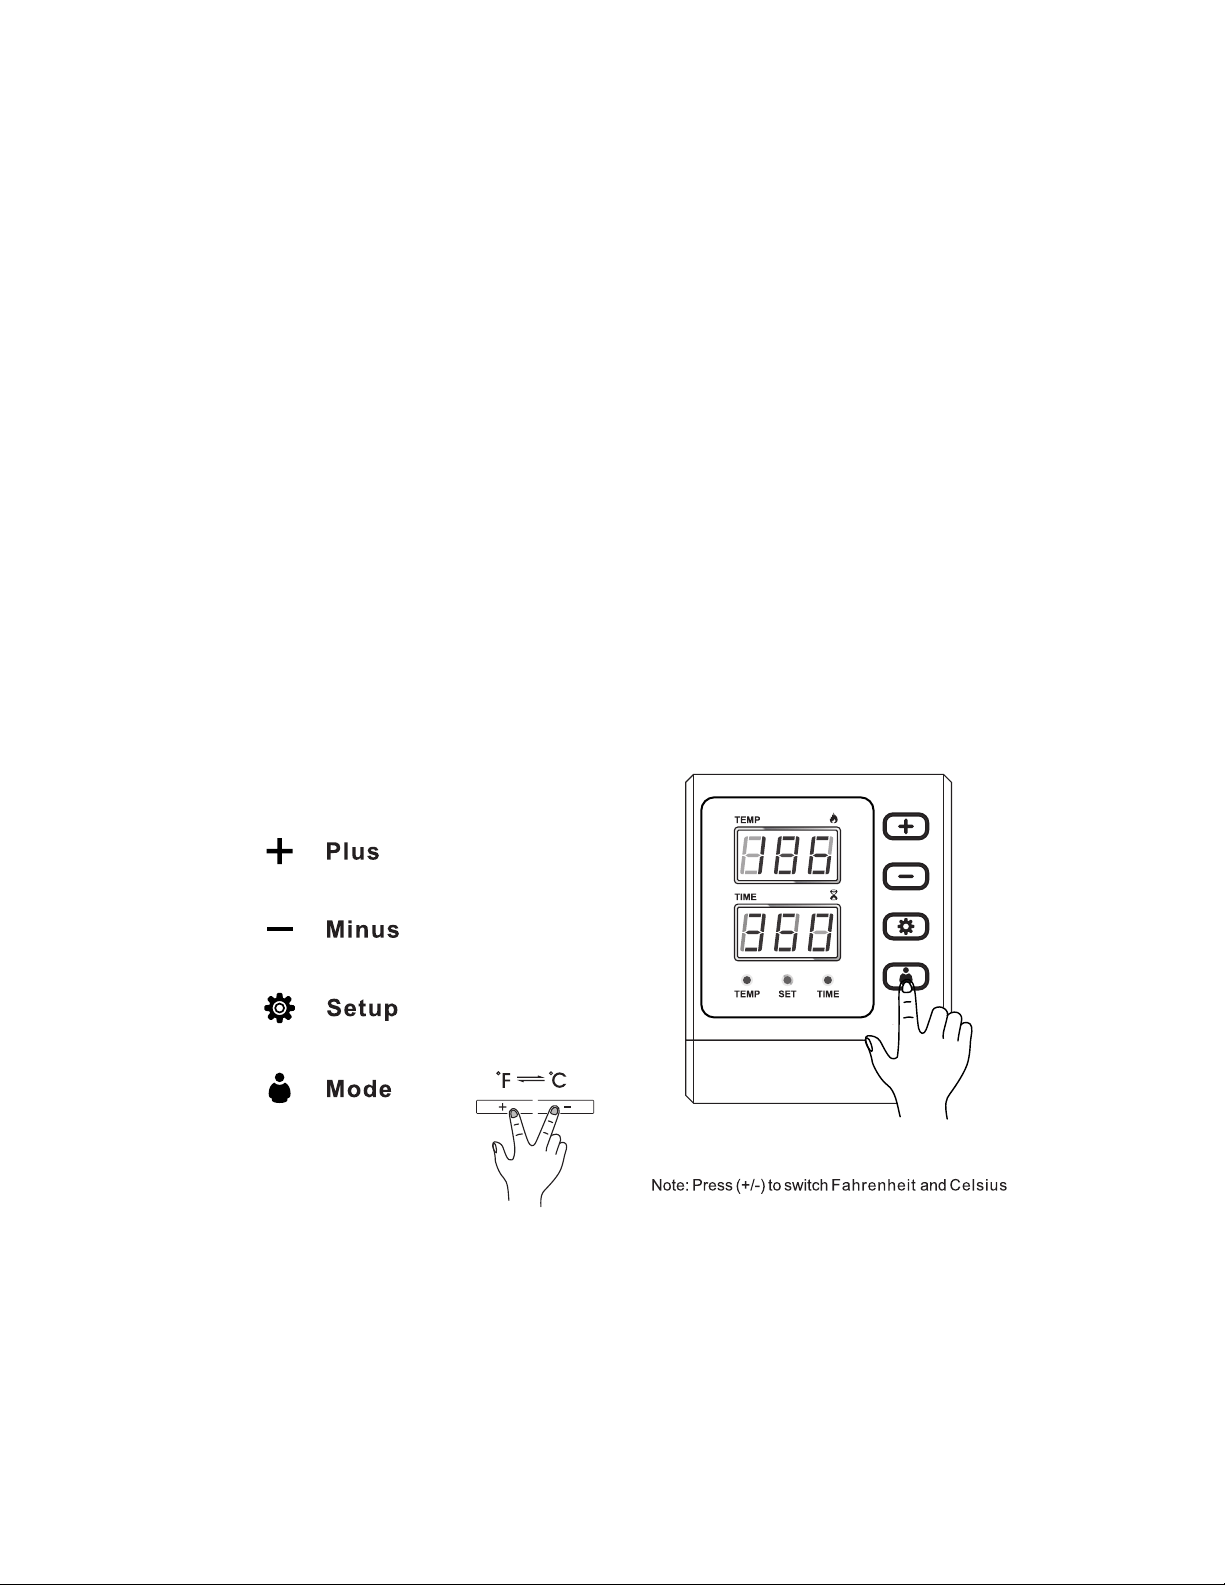
The Control Panel on the right upper face of the casing is where you will et heat and times
requirements of your project. These will vary depending on the vinyl or transfer paper
used .
The handle opens & closes the top & bottom Heated Platens of the revolve press.
The overload protector is a breaker. It will pop out when there is an overload of electricity.
Press it in to reset.
The Power switch must be set to the on position and the Cord must be plugged in before
pressing
Overview of Your Heat Press
From the “Medium” setting, High pressure will be clockwise one to two turns. Low pressure
will be counterclockwise one to two turns. (The number of turns will depend the thickness
of the garment.
Setting the Time and Temperature on your new Heat Press:
How to calibrate your new Heat Press:
Instructions from manufacturers of heat transfer vinyls and transfer papers will instruct
you to use Low, Medium or High Pressure during the application process. Here’s how to
calibrate your machine and identify those settings. (Do this while the platens are cold.)
Turn the pressure knob counterclockwise a few times to lower pressure on the platens.
2. Place a piece of paper onto bottom of the platen
3. Close the revolve press using the handle.
4. Pull on the paper.
5. If the paper moves at all, turn the knob clockwise and try again.
6. Try again and repeat until the paper doesn’t move at all. This is your “Medium” pressure.
1.
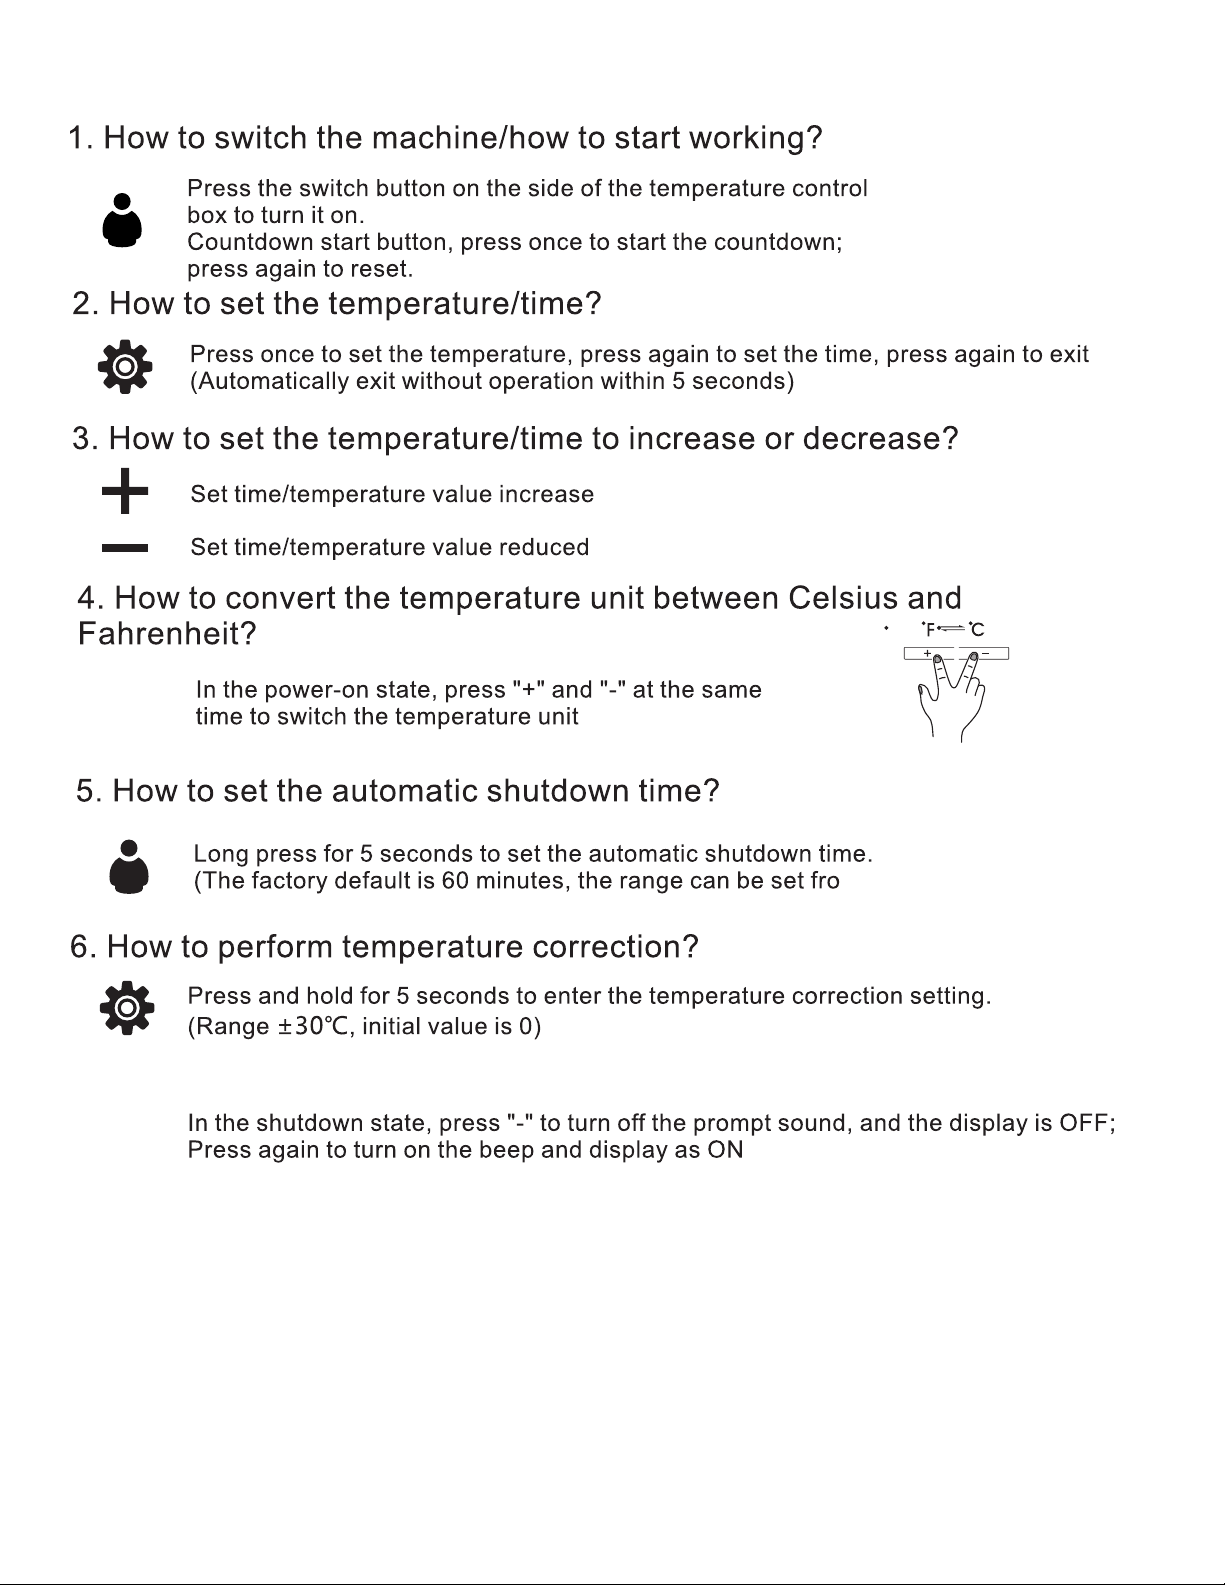
m 10 minutes to 120
minutes.
7.How to turn on/o ffthe alarm buzzer?
8.Warm reminder, the highest sertting temperature of this machine is
210℃ (410℉), and the longest time is 999s.

When I transfer, my colors look faded.
You need to increase the amount of time you’re pressing and/or increase the heat by
20 degrees.
My Heat Press won’t heat up.
Heat presses use a lot of energy while they are heating up. It’s possible that the
energy drain has tripped the internal breaker in the press. Use the reset button on the
side of heat press to reset it. If that doesn’t work, take a moment to plug something else
into the wall outlet you’re using for the press. It might be that you’ve tripped a circuit
breaker.
Troubleshooting:
When I pressed my HTV, the material would not stick to the garment and/or
fell o ffduring washing. How do I fix this?
First double check manufacturer instructions – especially on heat and pressure
settings. If you are following them to the letter, increase your pressure. Remember:
Pressing isn’t just about heating the vinyl – it’s about pushing the vinyl into the materials
so that the adhesive finds a grip. Increasing the pressure is often the solution.
You might also need to increase your temperature a bit, but try this after you’ve
increased the pressure, and don’t up the temperature by more than about 5% over
manufacturer instructions.
When I peeled the carrier sheet from my HTV, the color vinyl came up o ffthe
garment but the adhesive below it stayed in place. What happened?
You are most likely peeling the material too hot. HTV’s like metallic,printed/fashion,
and many others are usually recommended for cold peel.
If that’s not it, double check the garment you are pressing and make sure it’s
appropriate for the HTV you are using. If the material has a coating of any kind, you might
need to use a special HTV specifically designed for sticking to coated materials. A
common example of this is someone trying to heat press HTV onto a water resistant fabric..
My Transfer paper is sticking to the heated platen. How do I fix this?
We really recommend the use of Teflon paper for most transfer pressings.
The above temperature is for reference only, the temperature of different materials will be different.
Using your Heat Press to press Transfer Paper:
As with all media you’ll use on your heat press, we encourage you to look for the pressing
recommendations from the manufacturer of the transfer material on-line if possible. If you
can’t find specific instructions, the following are general guidelines for your consideration.
TRANSFERS PRINTER TEMP. TIME
PRESSURE
Sublimation
Paper
Epson
Polyester 390°F
55-60sec.
Laser Transfer
Paper
Laser Printer
Light Color 365°F 15sec. Medium
Dark Color
330°F 25sec. Medium
Transfer Vinyls
Cutting
170°F
/
25sec. Medium
Plastisol Transfer 390°F
/
/
15sec. High
MATERIAL
Plotter
Medium
Medium
Medium
Medium
Medium
Medium
Aluminum
sheet
330°F
100sec.
Crystal
380°F
720sec.
Rock photo
380°F
400sec.
Glass frame
360°F
300sec.
Pillow
390°F
60sec.
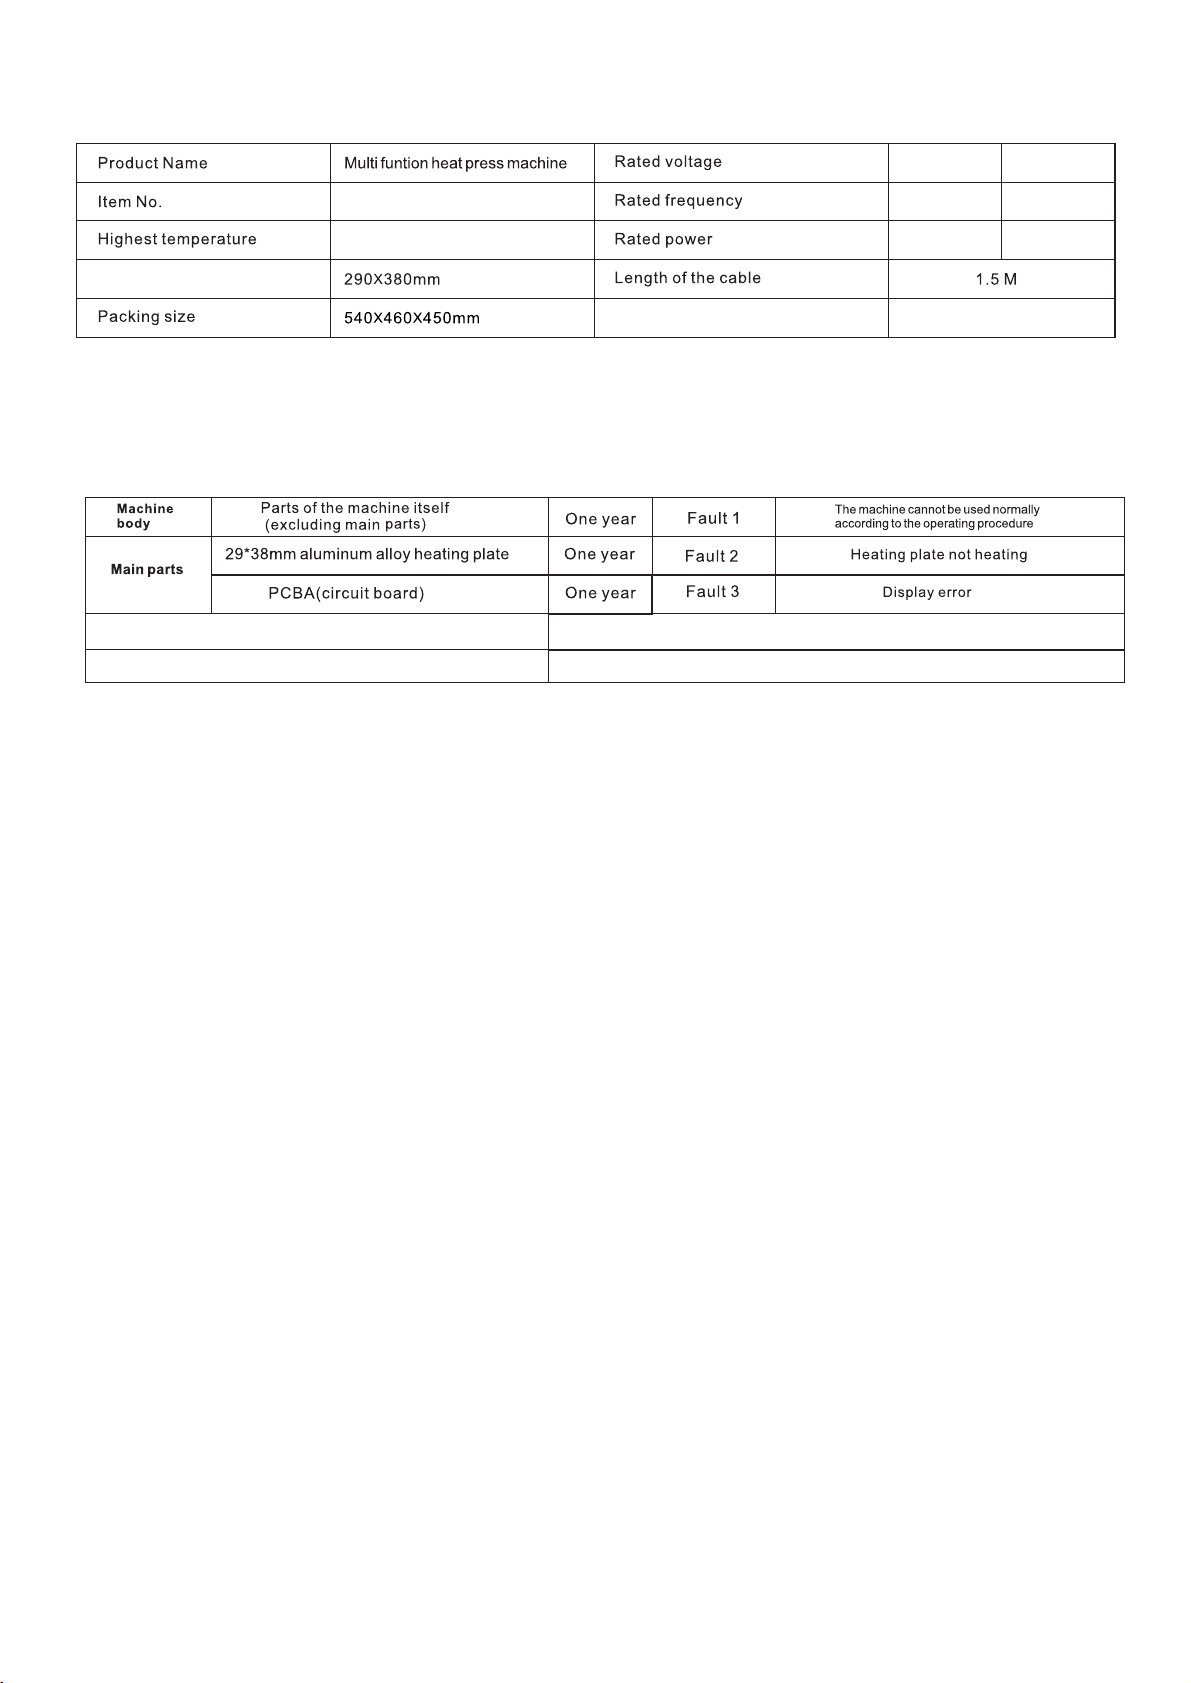
P8001
220V~ 110V~
50Hz 50-60Hz
1000W
800W
210℃ 410℉
Platen size
Timer Range
1~999S
WARRANTY INFORMATION
Terms & Policy
VEVOR warrants all products to be of the highest quality in material, craftsmanship, and service, effective from the date of purchase
to the end of the warranty period.
VOVER will replace any product found to be defective due to manufacturer flaws based on eligibility. Refunds are available within
the first 30 days of purchase. Refunds are only available to the original purchaser of the product. This warranty extends only to
personal use and does not extend to any product that has been used for commercial, rental, or any other use for which the product
is not intended. There are no warranties other than the warranties expressly set forth with each product.
This warranty is non-transferrable. VOVER Corporation is not responsible in any way for any damages, losses, or inconveniences
caused by equipment failure or by user negligence, abuse, or use noncompliant with the user manual or any additional safety or use
warnings included in the product packaging and manual.
Date of Purchase
Order ID
This warranty does not apply to the following:
• Damage due to abuse, accident, alteration, misuse, tampering, or vandalism.
• Improper or inadequate maintenance.
• Damage in return transit.
• Unsupervised use by children under 18 years of age.
ALL EXPRESSED AND IMPLIED WARRANTIES,
INCLUDING THE WARRANTY OF
MERCHANTABILITY, ARE LIMITED TO THE
PERIOD OF THE LIMITED WARRANTY.
Main parameters
Defective Products & Returns
If you discover your product is defective within the
specified warranty period, please contact
Support via
with a copy of
your invoice and order ID.
DO NOT
dispose of your
product before contacting us. Once our Customer
your request, please
return the product with a copy of the invoice and
order ID.
Customer
support@vevor.com
Support Team
has approved