Loading ...
Loading ...
Loading ...
3
2
2
8 9
4. Once the coffee begins to brew into the ceramic mug,
interrupt the brewing process by turning the control knob
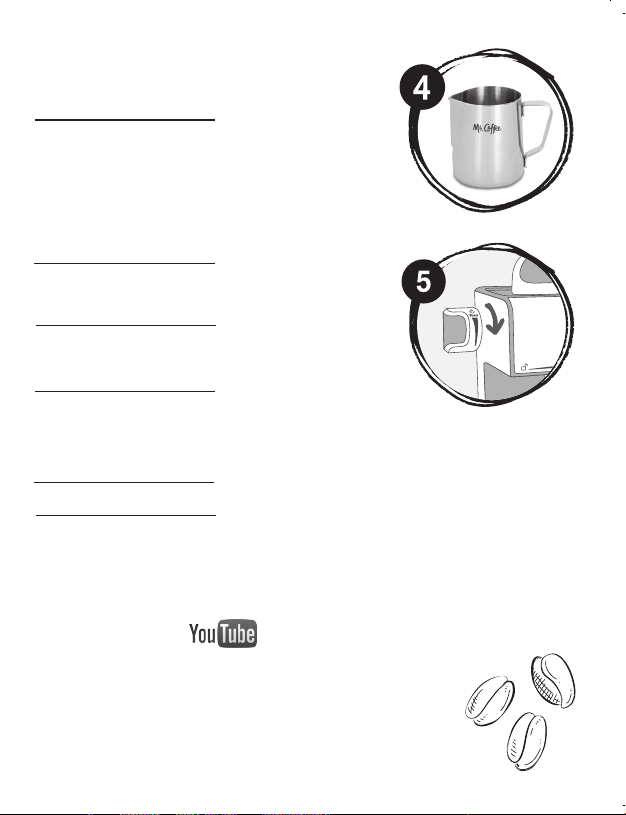
to “Off,” place your frothing pitcher so that the frothing
wand is submerged about 1/2 -1” into the milk.
5. Turn the knob to “Steam.” This will take a few seconds to
heat up before bubbling. You should hear the steam coming
out. If it is silent, it may mean you are out of water and no
steam is coming out. If this happens, remove the frothing
pitcher from the frothing wand.
When you hear steam coming out, move the ceramic mug in
a circular motion until desired amount of froth is reached.
*It takes about 2 minutes to froth 4 oz. of milk to 165˚F heat.
6. Before removing the frothing pitcher from underneath the
frothing wand, turn the control knob back into the “Brew”
position to complete the brewing process.
7. When the espresso finishes brewing, turn the control knob
to the “Off” position and unplug the machine. If brewing 4
cups and frothing, you may need to add additional water.
8. Follow “how to release pressure before removing water
reservoir lid” on page 7.
BUILD YOUR CAPPUCCINO OR LATTE:
1. Grab your favorite drinking mug.
2. Then pour the espresso into your drinking mug.
3. Finally, pour froth into your mug, then stir and enjoy.
*A latte has less foam and more steamed milk than a cappuccino. A cappuccino has 1/3
of espresso, 1/3 of steamed milk and 1/3 milk foam whereas a latte has 1/3 espresso, 2/3
steamed milk topped with milk foam.
*Visit The Mr. Coffee channel for instructional videos and tips.
ESPRESSO PREP:
1. Scoop your finely ground espresso into the portafilter.
• For 2 servings of espresso, fill filter to the 2 cup line located
inside the portafilter.
• For 4 servings of espresso, fill filter to the 4 cup line located
inside the portafilter.
2. Lightly tamp/press down the espresso in the portafilter by
pushing down with the back of the measuring scoop/tamper.
(If tamped too much, the water will not go through the espresso.)
3. Insert the portafilter into machine. The handle should be aligned
with the lock symbol and pointing directly at you when
standing in front of the machine.
TIME TO BREW AND FROTH:
Note: If making a cappuccino or a latte, follow steps 1-8.
If you are making an espresso, follow steps 1, 2, 7, 8!
1. Place the ceramic mug onto the drip tray and under the portafilter.
2. Plug in the machine and turn control knob on the left side of the machine to “Brew.”
3. Pour in your desired amount of cold milk into a the frothing pitcher, but allow enough room
for expansion of the foam (typically 1/3 or 1/2 of the top).
*Frothing texture is highly dependent upon the milk type used. 2% is recommended; whole
milk creates finer bubbles while skim milk creates larger bubbles.
WATER PREP:
1. Remove the water reservoir cap.
• For 2 or 4 servings of espresso, fill the water measuring cup with water to the
appropriate mark and pour into water reservoir.
• If making a cappuccino or latte, fill water measuring cup with water up to the steam
mark
and pour it into the reservoir.
2. Screw cap back onto water reservoir.
HOW TO MAKE ESPRESSO, CAPPUCCINO
OR LATTE
CAUTION: Do not remove water reservoir cap or
portafilter until you release the pressure in the unit.
Loading ...
Loading ...
Loading ...