Loading ...
Loading ...
Loading ...
Rinnai 12 DEPH_OIM
INSTALLATION
GENERAL
This heater is suitable for Do It Yourself installation. It can be either wall mounted (fixed installation) or freestanding
by mounting castors in accordance with these instructions. A phillips head screwdriver is included for freestanding
installation. For wall installation other tools and hardware may be required, depending on the wall material.
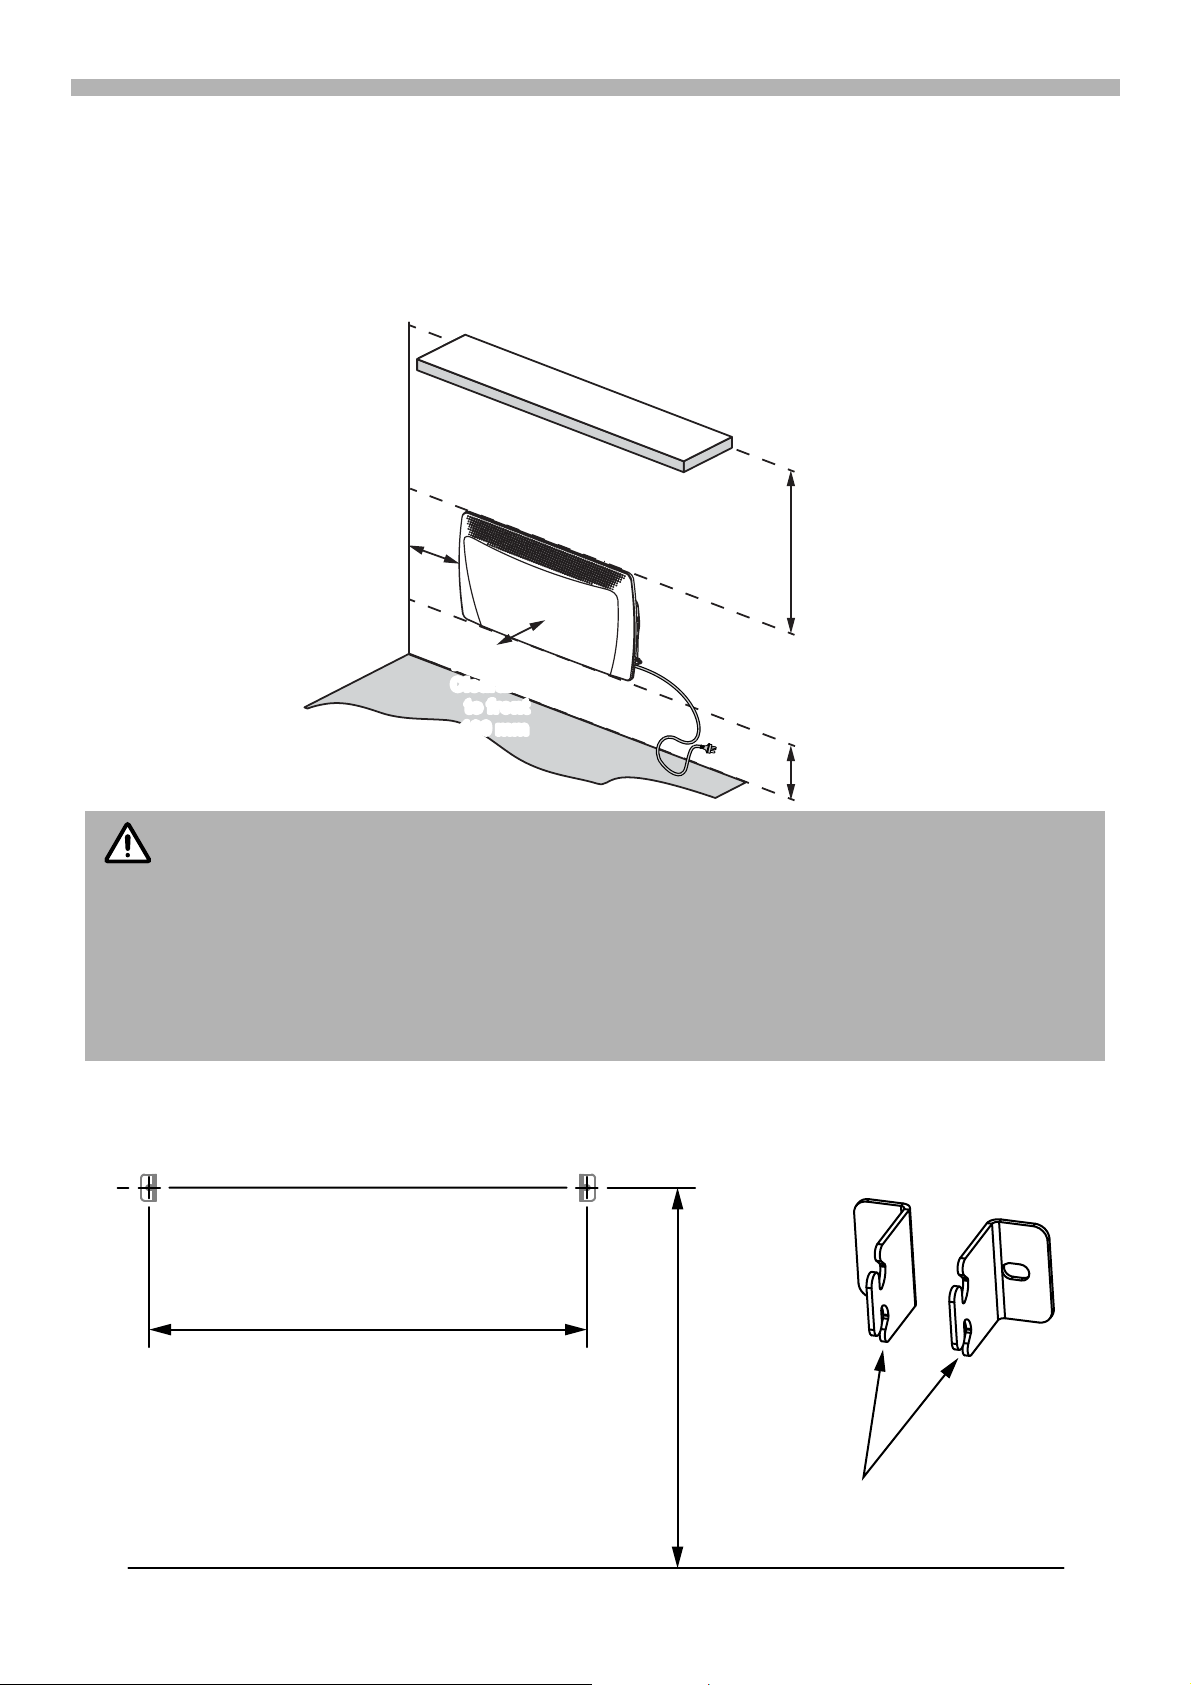
WALL INSTALLATION
The clearance from the sides and front of the heater MUST BE at least 100mm and the clearance abover the heater
MUST BE 300mm as shown in the diagram below.
1. Ensure the heater is unplugged from the power socket outlet before commencing wall mounting.
2. Mount the supplied wall mounting hooks using the following dimensions to the wall using appropriate fixings,
ensuring that the brackets are level and the minimum clearances as described above are observed.
• This heater MUST NOT be located immediately below a socket-outlet.
• This heater MUST be positioned within one metre of a socket-outlet to ensure the flexible cord
and plug can reach it.
• This heater is NOT designed to be built in.
• DO NOT attach the castors to the heater base for wall installations.
• The heater is suitable for installation in non-communal baths and shower areas or bathrooms.
It is to be installed such that switches and other controls cannot be touched by a person in the
bath or shower. Consult your licensed electrical trades person for installation in communal
baths and shower areas or bathrooms.
Minimum
Clearance
to front
100 mm
Minimum
Clearance
to front
100 mm
Minimum
Clearance
Above
300 mm
Minimum
Clearance
Below
100 mm
Minimum
Clearance
to sides
100 mm
IMPORTANT
Minimum
Height above
floor 435mm
W
W = 340mm for 1000W
W = 500mm for 1500W
W = 920mm for 2200W
Wall
mounting
hooks
Loading ...
Loading ...
Loading ...