Loading ...
Loading ...
Loading ...
ADJUSTMENTS
Skid Shoes
Itis not recommendedthatyou operatethissnowthrowerongravel
as it can easily pick up and throw loosegravel,causingpersonal
injuryor damageto the snowthrowerand surroundingproperty.
The snowthrowerskidshoesareadjustedupwardat thefactory
for shippingpurposes.Adjustthemdownwardpriorto operatingthe
machine.
Forclose snow removalon a smoothsurface,adjustthe skidshoesso
thatthe shaveplateon the bottomof the augerhousingis just offthe
ground.
Adjustthe skidshoesto a lowerpositionto raisethe shaveplateoff the
groundwhenclearingunevenareas, suchas a ribbontypedrivewayor
agraveldriveway
NOTE:If youchooseto operatethe snowthroweron a gravelsurface,
keepthe skidshoesin positionfor maximumclearancebetweenthe
groundandthe shaveplate.
To adjust the skid shoes:
1. Adjustskid shoesby looseningthe six (threeon eachside)hex
nutsandcarriagebolts securingthe skid shoesto the auger
housing. Referto Figure12.
f
ShavePlate
Lower
Shave
Plate
Raise
Shave
Plate
Figure12
J
2. Whileobservingthe distancebetweenthe shaveplateand the
ground,adjustthe skids shoesupor downto achievethe desired
shaveplateheight.See Figure12.
3. Makecertainthe entirebottomsurfaceof skidshoesareagainst
theground to avoidunevenwearon the skidshoes;thentighten
nutsandboltssecurely.
AUGER AND DRIVE CONTROL CABLES
Priorto operatingyour snowthrower,carefullyreadandfollowall
instructionsbelow.Performalladjustmentsto verifyyour snow
throweris operatingsafelyand properly.
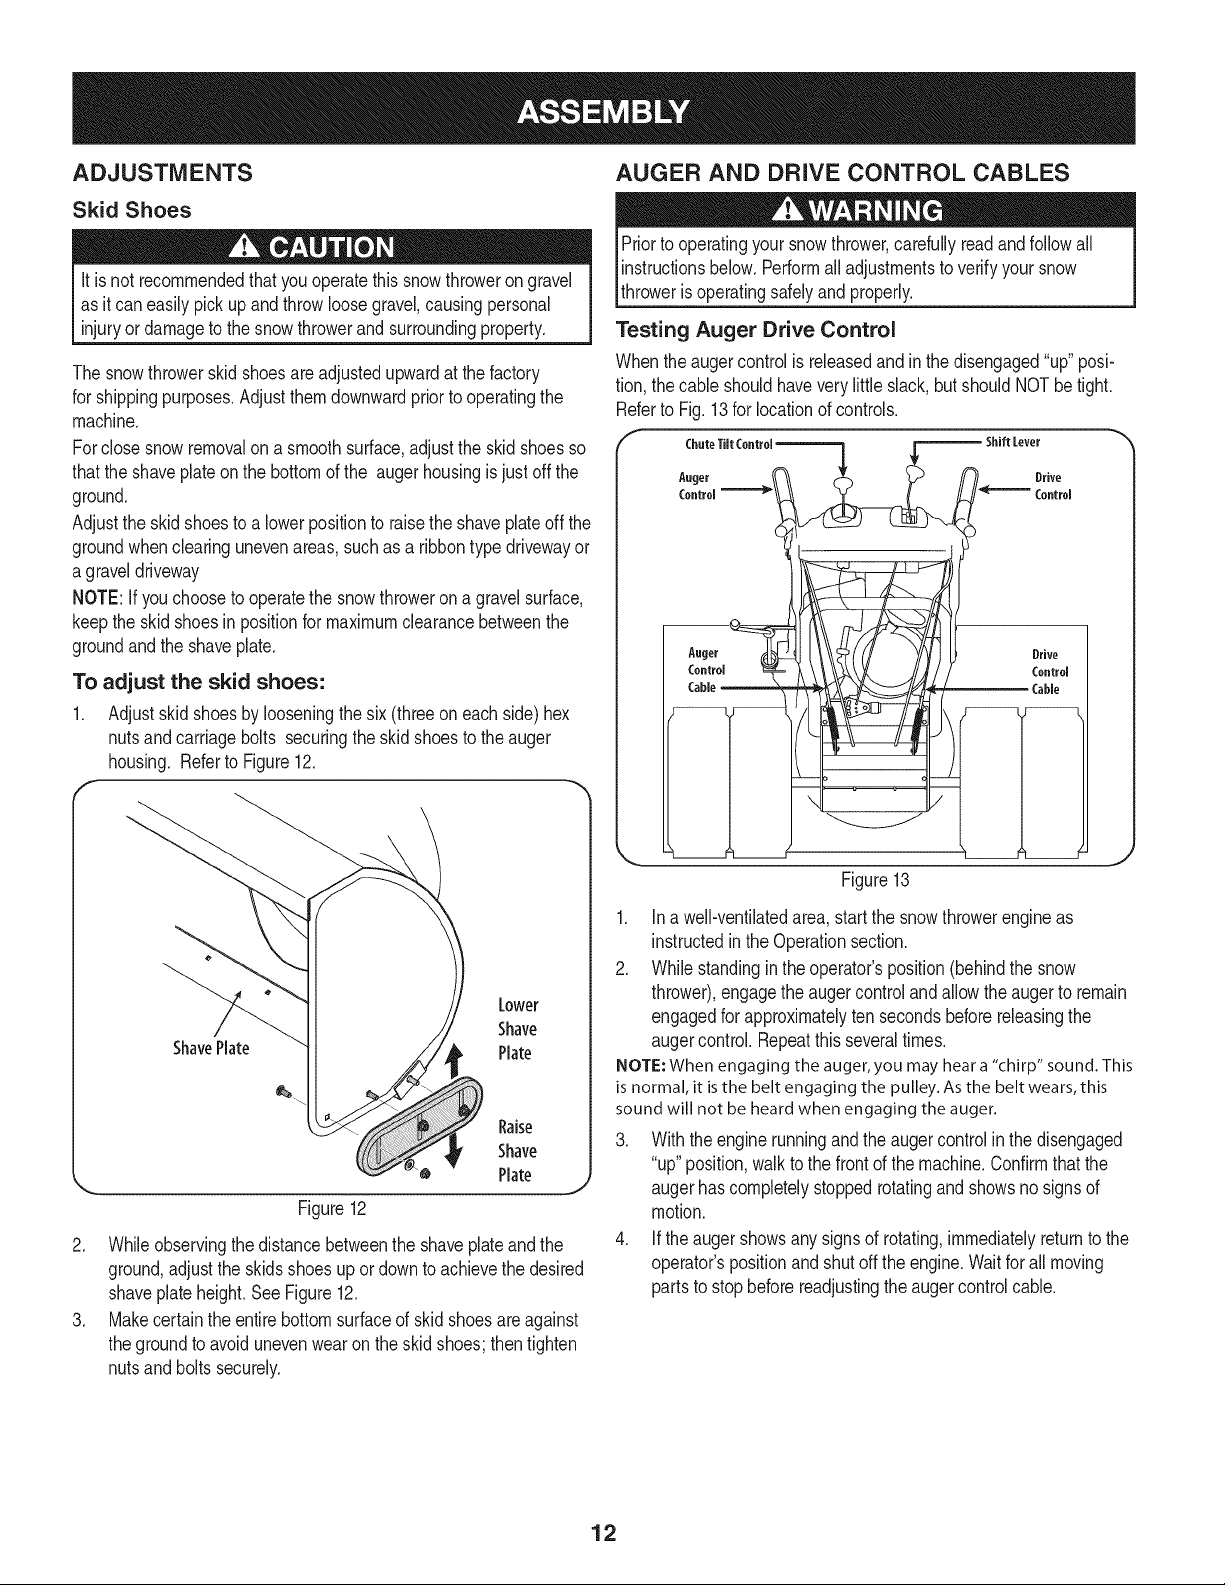
Testing Auger Drive Control
Whenthe augercontrolis releasedandinthe disengaged"up" posi-
tion,the cableshouldhavevery little slack, butshouldNOTbetight.
Referto Fig.13for locationof controls.
r c,.,o,,,co.,°,-.--.-] :[------,,,.Levo,
,.ge, & n. D,,vo
H '°°"°'
Auter (_}J__ Drive
Figure13
1. Ina well-ventilatedarea,startthe snowthrowerengineas
instructedinthe Operationsection.
2. Whilestandingin the operator'sposition(behindthe snow
thrower),engagethe augercontrolandallowthe augerto remain
engagedfor approximatelyten secondsbeforereleasingthe
augercontrol.Repeatthis severaltimes.
NOTE: When engaging the auger, you may hear a "chirp" sound. This
is normal, it is the belt engaging the pulley. As the belt wears, this
sound will not be heard when engaging the auger.
3. With the enginerunningand the augercontrolin the disengaged
"up"position,walkto the frontof the machine.Confirmthat the
augerhascompletelystoppedrotatingand showsno signsof
motion.
4. Ifthe augershowsanysignsof rotating,immediatelyreturnto the
operator'spositionandshut off the engine.Waitfor all moving
partsto stopbeforereadjustingthe augercontrolcable.
12
Loading ...
Loading ...
Loading ...