Loading ...
Loading ...
Loading ...
11INSTALLATION
INSTALLATION
7. Electrical connection
Check that the installation complies with the standards
of local building, gas and electrical authorities. Before
connecting to the mains supply ensure that the mains
voltage corresponds to the voltage on the rating plate
inside the rangehood.
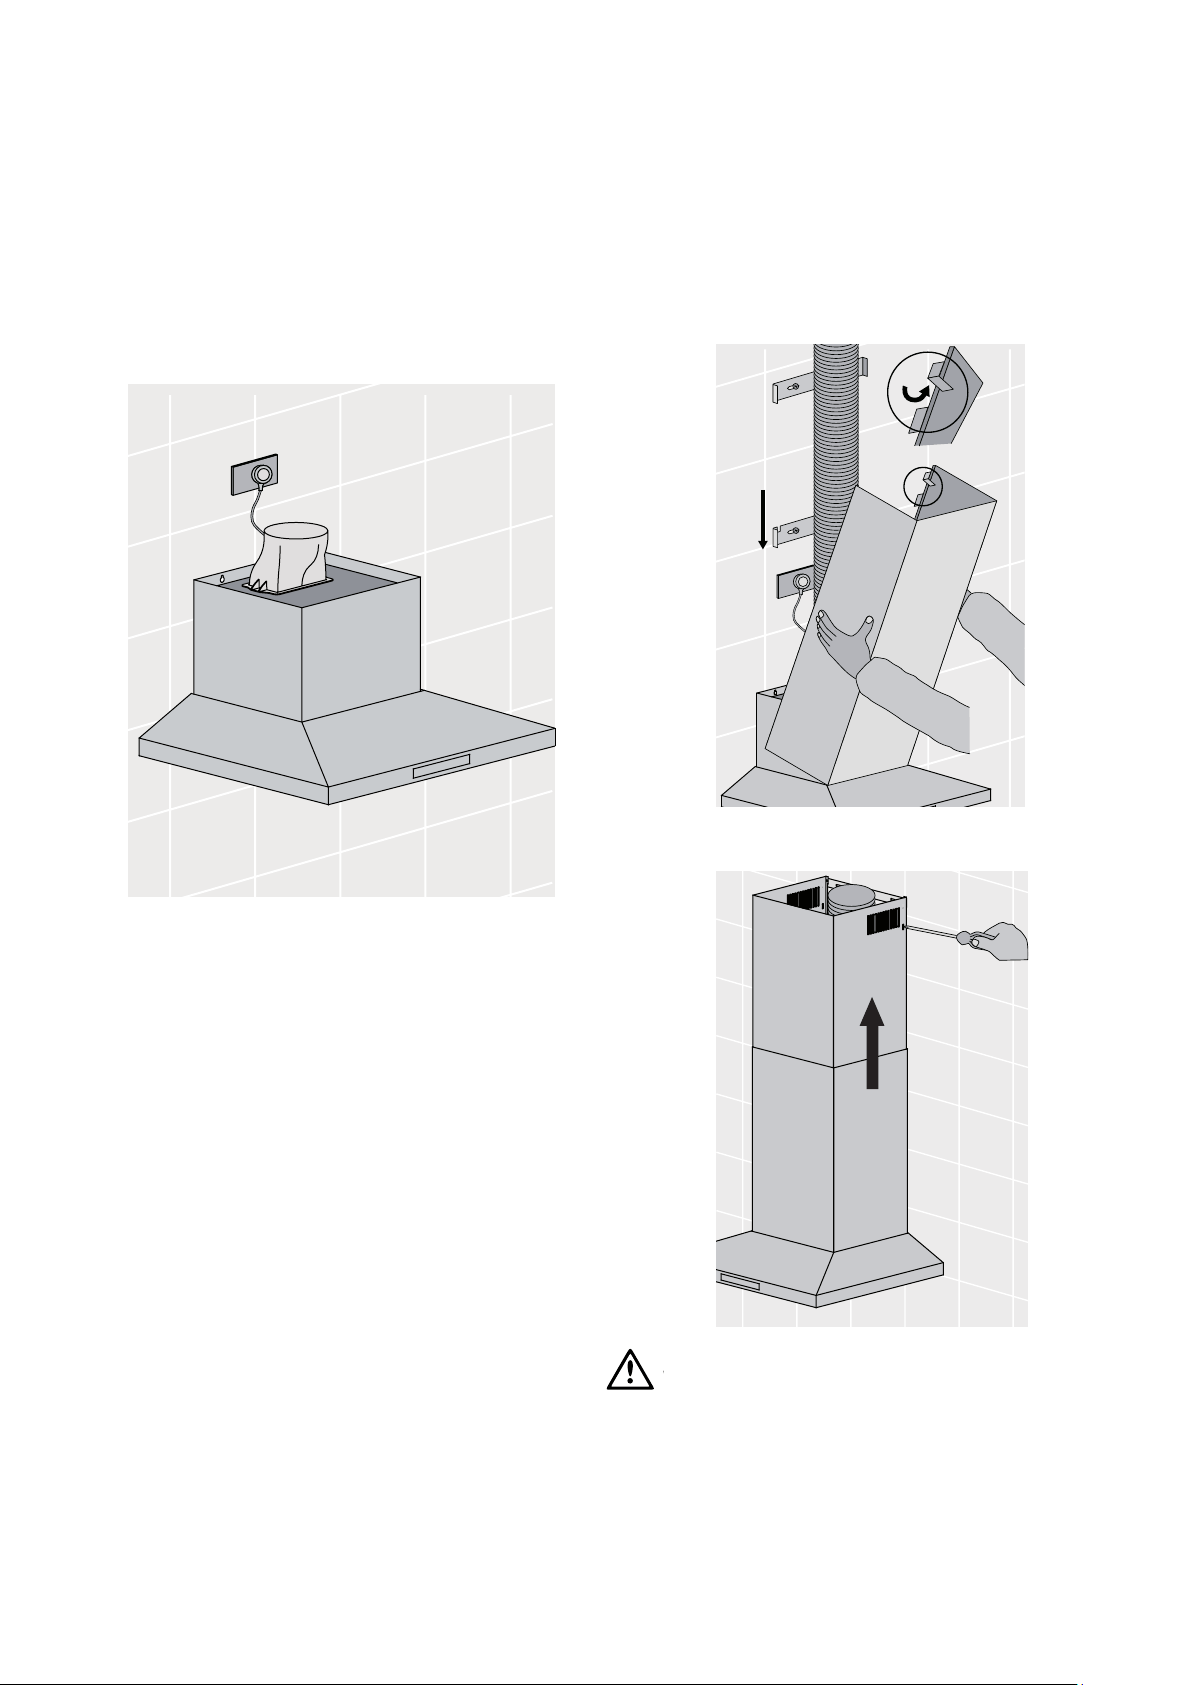
8. Installation of telescopic flue covers
Separate the inner and outer flue covers, and carefully
remove the protective coating from both. Carefully
reassemble the upper and lower flue covers sections by
sliding the inner into the outer flue cover. Carefully lower
the assembled upper and lower flue covers onto the top
of the rangehood body, and insert the flue cover into the
rangehood body approximately 5mm.
Fig. 13
9. Fix upper flue cover
Fix upper flue cover to the wall mounting bracket
with screws supplied. Ensure that the upper section is
extended.
WARNING
WARNING
Care must be taken to ensure the screws (supplied in
accessories bag) are not cross threaded when attaching the
upper flue cover. If installed in recirculating mode, insert the
optional carbon filter (included in recirculation kit AR610RK).
To complete the cooker hood installation, insert the three
filters to the underside of the hood body. Place back edge
of filter into position and push up front edge so that the filter
clips into place.
Your Electrolux cooker hood is now ready to use.
Fig. 15
Fig. 14
Loading ...
Loading ...
Loading ...