Loading ...
Loading ...
Loading ...
Installation Instructions
INSTALLING THE WATER LINE (CONT.)
[] PLUG IN THE REFRIGERATOR
Arrange the coil of tubing so that it does not _ibrate
against the back of the refrioerator_ or against, the
wall, Push the refrigerator back to the wall,
START THE ICEMAKER
Power switch models - Set the icemaker power
switch to the I (on) position, The icelnaker will
not begin to operate until it reaches its operating
temperatm'e of 15°F (-9°C) or below, It will then
begin operation automatically if the icemaker
power switch is in the I (on) position, and the
green light will come on.
Power
Switch icemaker
Light
Power switch model
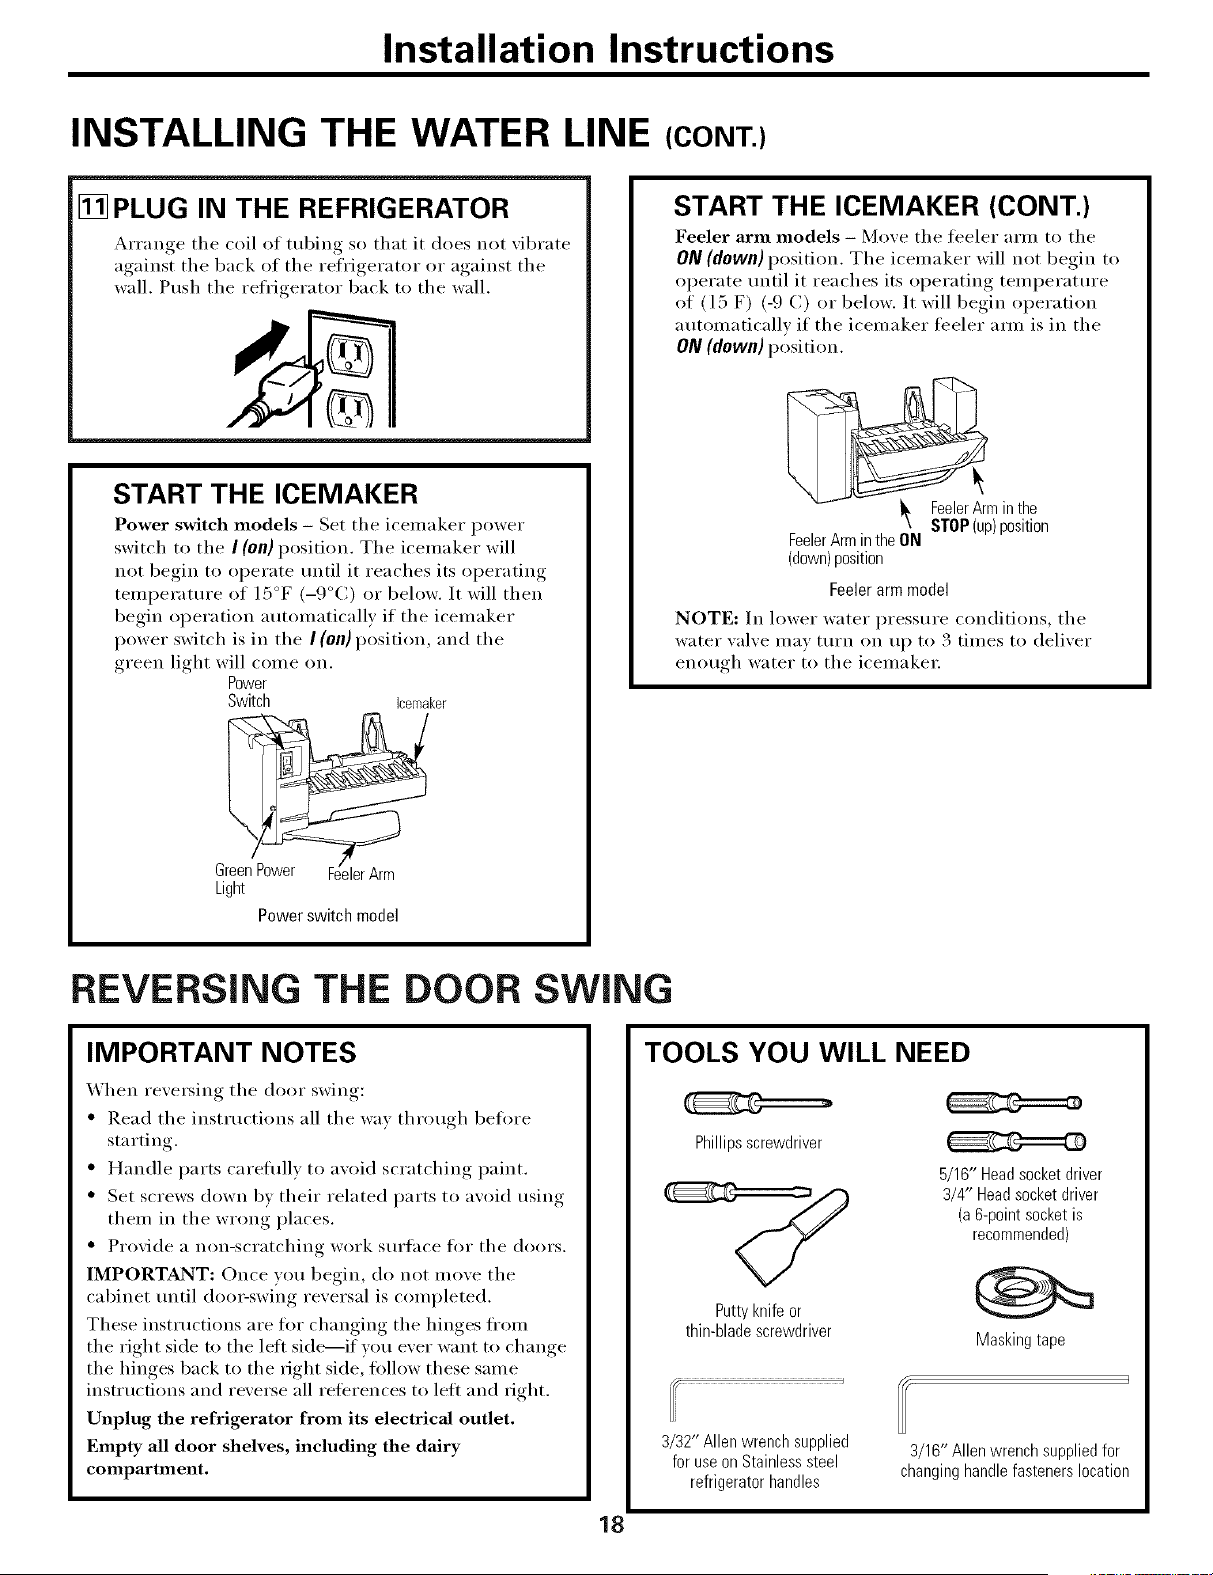
START THE ICEMAKER (CONT.)
Feeler arm models - Move the libeler arm to the
ON (down) position. The icemaker will not begin to
operate until it reaches its operating temperatm'e
of (l 5 F) (-9 C) or below. It will begin operation
automatically if the icemaker feeler am_ is in the
ON (down) position.
_min the
STOP(up)position
FeelerArminthe ON
(down)position
Feelerarm model
NOTE: In lower water pressure conditions, the
water ",al',e may turn on up to 3 times to delixer
enotloh water to the icelllakei:
REVERSING THE DOOR SWING
IMPORTANT NOTES
When re\'e_Mng the door swing:
• Read the instructions all the way through belore
starting.
• Handle parts careflfllv to avoid scratching paint.
• Set screws down bv their related parts to avoid using
them in the wrong places.
• Provide a non-scratching work surtace fro" the doors.
IMPORTANT: Once you begin, do not move the
cabinet tmtil doo>swi_g reversal is completed.
These instructions are for changing the hinges fl'om
the right side m the lett side---if wm ever want to change
the hinges back to the right side, tollow these same
instructions and reverse all reterences to lett and right.
Unplug the refrigerator from its electrical outlet.
Empty all door shelves, including the dairy
compartment.
TOOLS YOU WILL NEED
Phillipsscrewdriver
Puttyknife or
thin-bladescrewdriver
5/16" Headsocketdriver
3/4" Headsocketdriver
(a&point socketis
recommended)
Maskingtape
3/32" Allen wrench supplied
for useon Stainlesssteel
refrigeratorhandles
3/16" Allen wrench suppliedfor
changinghandlefastenerslocation
18
Loading ...
Loading ...
Loading ...