Loading ...
Loading ...
Loading ...
Dryer Operating instructions
Drying Cycle Selection, continued
Timed Dry Cycles
FiRE HAZARD
To avoid fire hazard, do not use heat to dry items
containing feathers or down, foam rubber, plastics
similarly textured, rubber-like materials. Use a timed dry
cycle and the Air Dry setting.
Express Dry
Select this timed cycle to quickly dry a small load made
up of just a few items. It provides approximately 20 min-
utes of tumbling followed by a cool down period.
Refresh (on select models)
Select Refresh to help remove wrinldes from dean and
dry items that were not taken from the dryer at the end
of the cycle, have been stored in crowded closets or
drawers, or unpacked from luggage following a trip. It
provides approximately 10 minutes of tumbling followed
by a 5-minute cool down period.
Time Dry
To manually select the drying time for any load, turn the
knob to a numbered setting: 15 (on select models), 30,
60, or 90 minutes. Moisture sensing bars (if equipped)
are not active and dryer will continue to heat throughout
the cycle until the final cool down period.
Drying Cycle Settings
Drying Temperature
Select the temperature setting most suitable for each load.
To protect your fabrics, not all temperatures are available
with every cycle. If an unavailable temperature setting is
selected by the user, the nearest available temperature will
be substituted.
The Air Dry setting can be used only in a timed cycle. Air
Dry setting tumbles the load without heat. Use Air Dry to
freshen clothing, pillows or blankets, or to dust draperies.
Chime
A signal will sound at the end of the cycle if selected.
Other Features
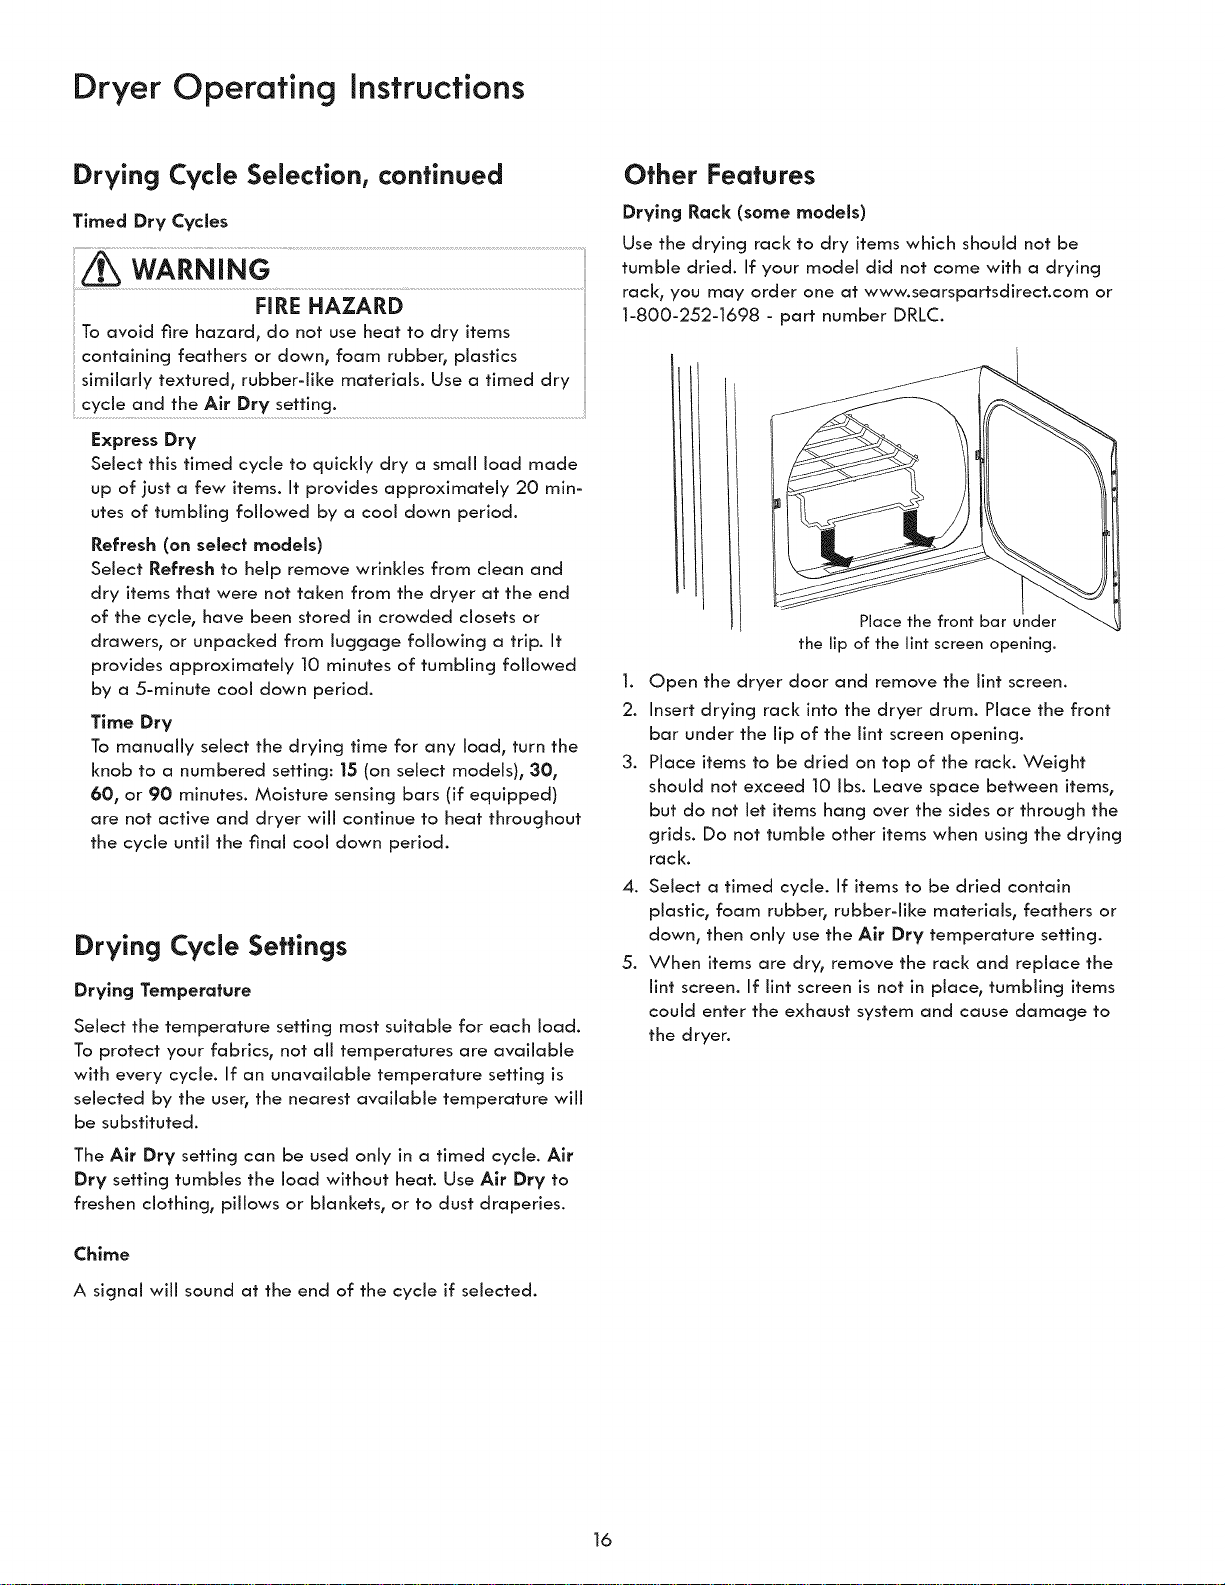
Drying Rack (some models)
Use the drying rack to dry items which should not be
tumble dried. If your model did not come with a drying
rack, you may order one at www.searspartsdirect.com or
1-800-252-1698 - part number DRLC.
Hace the front bar
the lip of the lint screen opening.
1. Open the dryer door and remove the lint screen.
2. Insert drying rack into the dryer drum. Place the front
bar under the lip of the lint screen opening.
3. Place items to be dried on top of the rack. Weight
should not exceed 10 Ibs. Leave space between items,
but do not let items hang over the sides or through the
grids. Do not tumble other items when using the drying
rack.
4. Select a timed cycle. If items to be dried contain
plastic, foam rubber, rubber-like materials, feathers or
down, then only use the Air Dry temperature setting.
5. When items are dry, remove the rack and replace the
lint screen. If lint screen is not in place, tumbling items
could enter the exhaust system and cause damage to
the dryer.
16
Loading ...
Loading ...
Loading ...