Loading ...
Loading ...
Loading ...
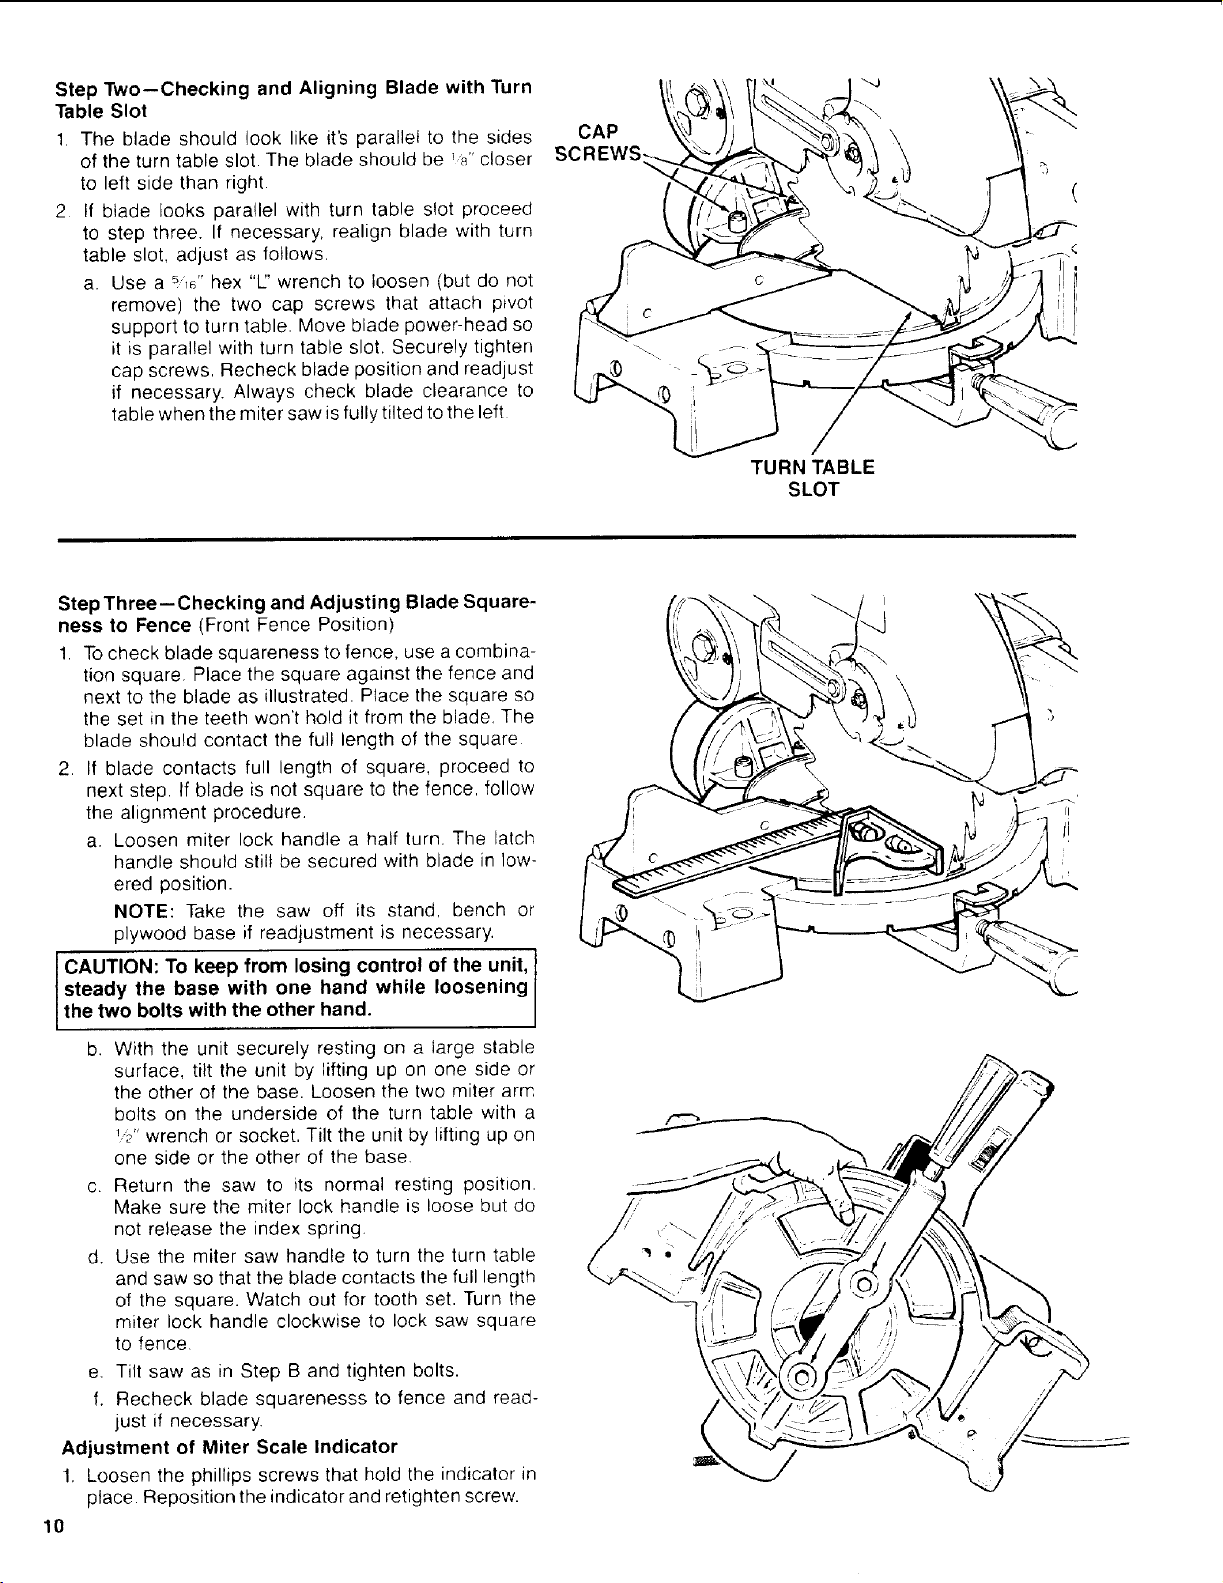
Step Two--Checking and Aligning Blade with Turn
Table Slot
1. The blade should look like it's parallel to the sides
of the turn table slot. The blade should be 'W' closer
to left side than right.
2 If blade looks parallel with turn table slot proceed
to step three. If necessary, realign blade with turn
table slot, adjust as follows.
a. Use a 516_'hex "lj' wrench to loosen (but do not
remove) the two cap screws that attach pivot
support to turn table. Move blade power-head so
it is parallel with turn table slot. Securely tighten
cap screws, Recheck blade position and readjust
if necessary. Always check blade clearance to
table when the miter saw is fully tilted to the left
CAP
s(
TURN TABLE
SLOT
StepThree--Checking and Adjusting Blade Square-
ness to Fence (Front Fence Position)
1. To check blade squareness to fence, use a combina-
tion square Place the square against the fence and
next to the blade as illustrated. Place the square so
the set in the teeth won't hold it from the blade. The
blade should contact the full length of the square
2. If blade contacts full length of square, proceed to
next step If blade is not square to the fence, follow
the alignment procedure.
a. Loosen miter lock handle a half turn. The latch
handle should still be secured with blade in low-
ered position.
NOTE: Take the saw off its stand, bench or
plywood base if readjustment is necessary.
CAUTION: To keep from losing control of the unit,
steady the base with one hand while loosening
the two bolts with the other hand.
b. With the unit securely resting on a large stable
surface, tilt the unit by lifting up on one side or
the other of the base. Loosen the two miter arm
bolts on the underside of the turn table with a
b{' wrench or socket. Tilt the unit by lifting up on
one side or the other of the base.
c. Return the saw to its normal resting position.
Make sure the miter lock handle is loose but do
not release the index spring.
d. Use the miter saw handle to turn the turn table
and saw so that the blade contacts the full length
of the square. Watch out for tooth set. Turn the
miter lock handle clockwise to lock saw square
to fence
e. Tilt saw as in Step B and tighten bolts.
f. Recheck blade squarenesss to fence and read-
just if necessary.
Adjustment of Miter Scale Indicator
1. Loosen the phillips screws that hold the indicator in
place. Reposition the indicator and retighten screw.
10
[I
Ii
Loading ...
Loading ...
Loading ...