Loading ...
Loading ...
Loading ...
ENGLISH
6
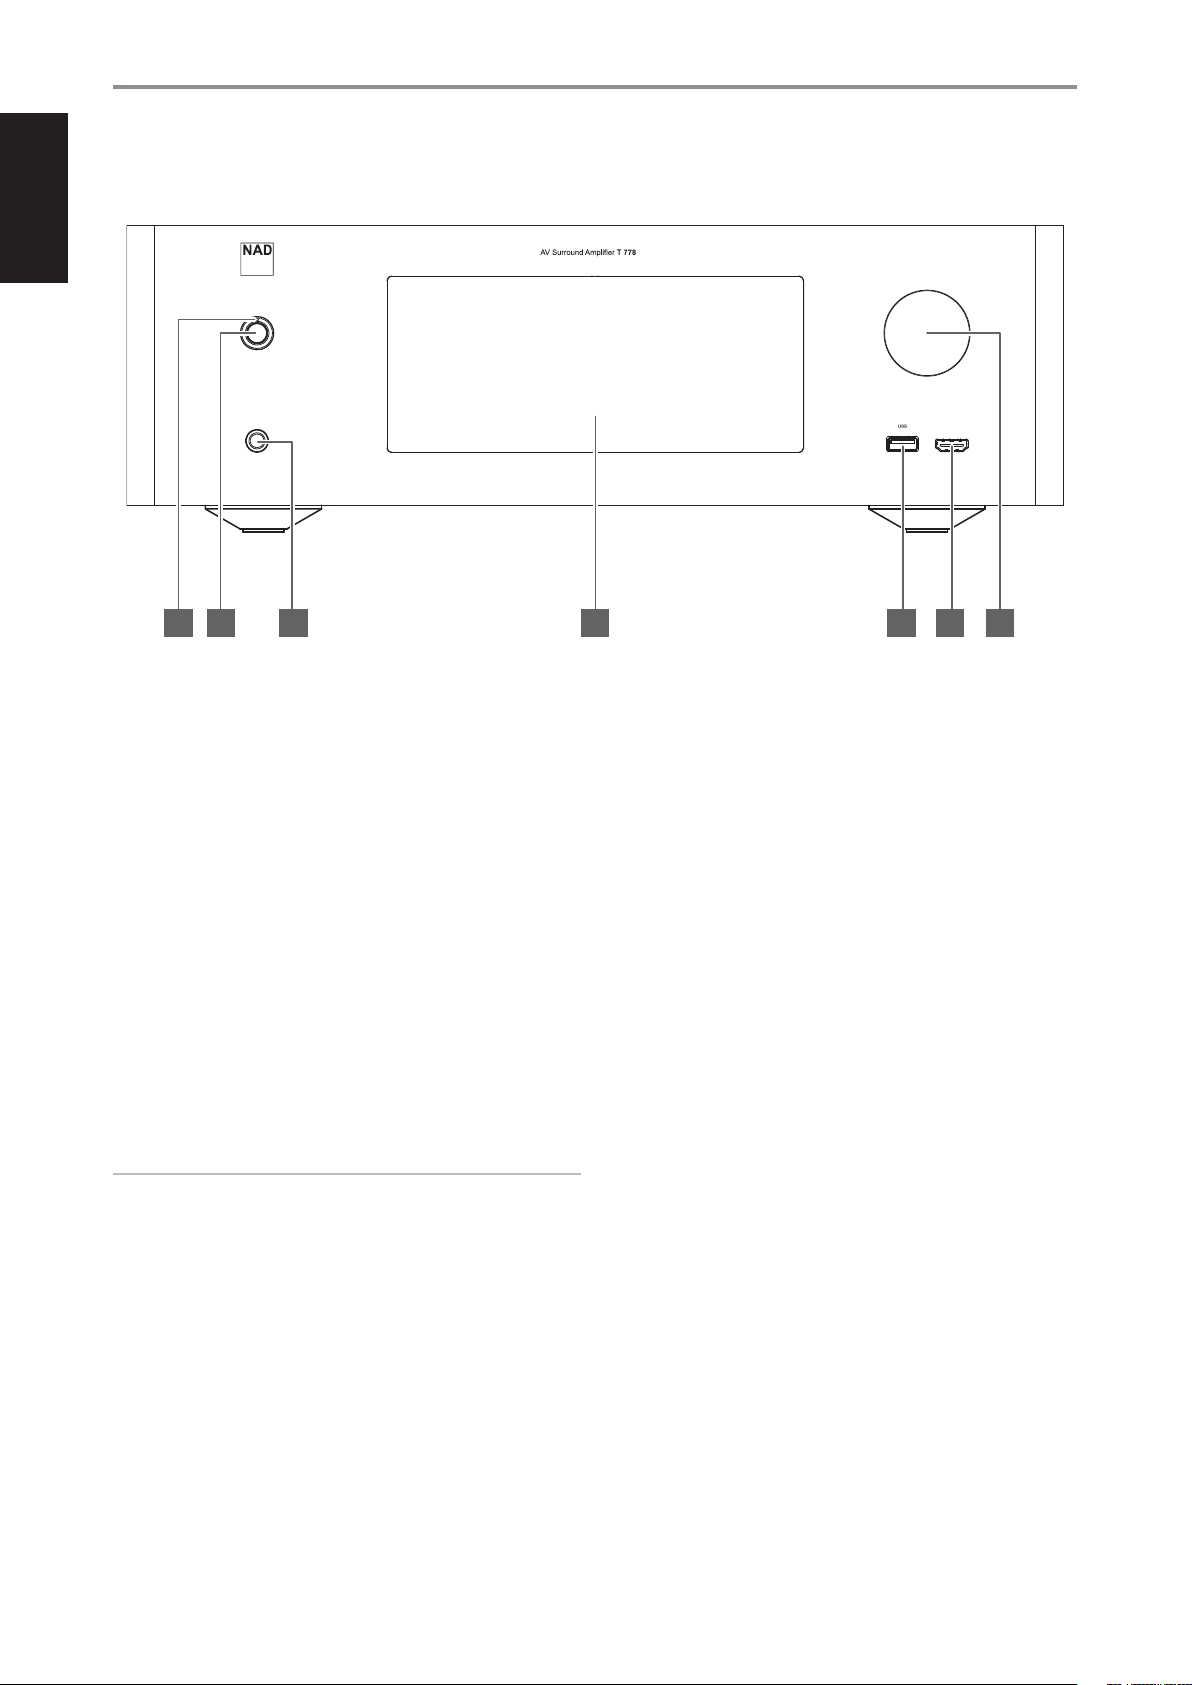
1 STANDBY LED
• This indicator will light up amber when the T 778 is at standby
mode.
• When T 778 is powered up from standby mode, this indicator will
illuminate blue.
• If Zone 2 is ON and STANDBY button is pressed to switch the T 778
to standby mode, the front panel display will be extinguished but
the STANDBY LED remains illuminated blue. This indicates Zone 2 is
still active.
• In order to completely shut down the T 778 with Zone 2 still ON,
press and hold STANDBY button until the STANDBY LED turns
amber.
• When infrared command from the HTR 8 is received, this indicator
will also ash momentarily.
2 STANDBY BUTTON
• Press this button to switch ON the T 778 from standby mode. The
Standby LED indicator will turn from amber to blue and illuminate
the front panel display. Pressing the STANDBY button again turns
the unit back to standby mode.
NOTE
In order to turn ON the T 778 from standby mode or back to standby
mode, the rear panel POWER switch must be in the ON position.
3 PHONES
• Accepts stereo headphone using a standard 1/4-inch stereo phone
plug (use a suitable adaptor for headphones equipped with a
smaller plug).
• For headphone listening, the Front speakers must be set to
“Large” at the “Speaker Conguration” of the Speaker Setup item
at the Setup Menu; otherwise, headphone bass response will be
restricted.
4 DISPLAY (TOUCH PANEL DISPLAY)
• Display visual information about current music or media source,
settings or menu options.
• Touch control functions are also displayed depending upon menu
option selected.
• Send out remote control commands by directing or pointing HTR 8
towards the display panel.
5 FRONT USB INPUT
• Connect to this Front Input port USB mass storage devices
formatted as FAT32, NTFS or Linux ext4. The connected USB device
appears as a Local Source (USB) in the BluOS App.
• Access and playback music stored in the connected USB device by
selecting “USB” from the BluOS App.
6 FRONT HDMI INPUT
• Use the Front HDMI Input to connect directly a HDMI output
source.
7 VOLUME
• The VOLUME control adjusts the overall loudness of the signal
driving the loudspeakers or headphones.
• Turn clockwise to increase the volume level; counter clockwise to
lower it.
IDENTIFICATION OF CONTROLS
FRONT PANEL
5 6 742 31
Loading ...
Loading ...
Loading ...