Loading ...
Loading ...
Loading ...
ASSEMBLY
SNOW CHUTE ASSEMBLY HEADLIGHT ASSEMBLY
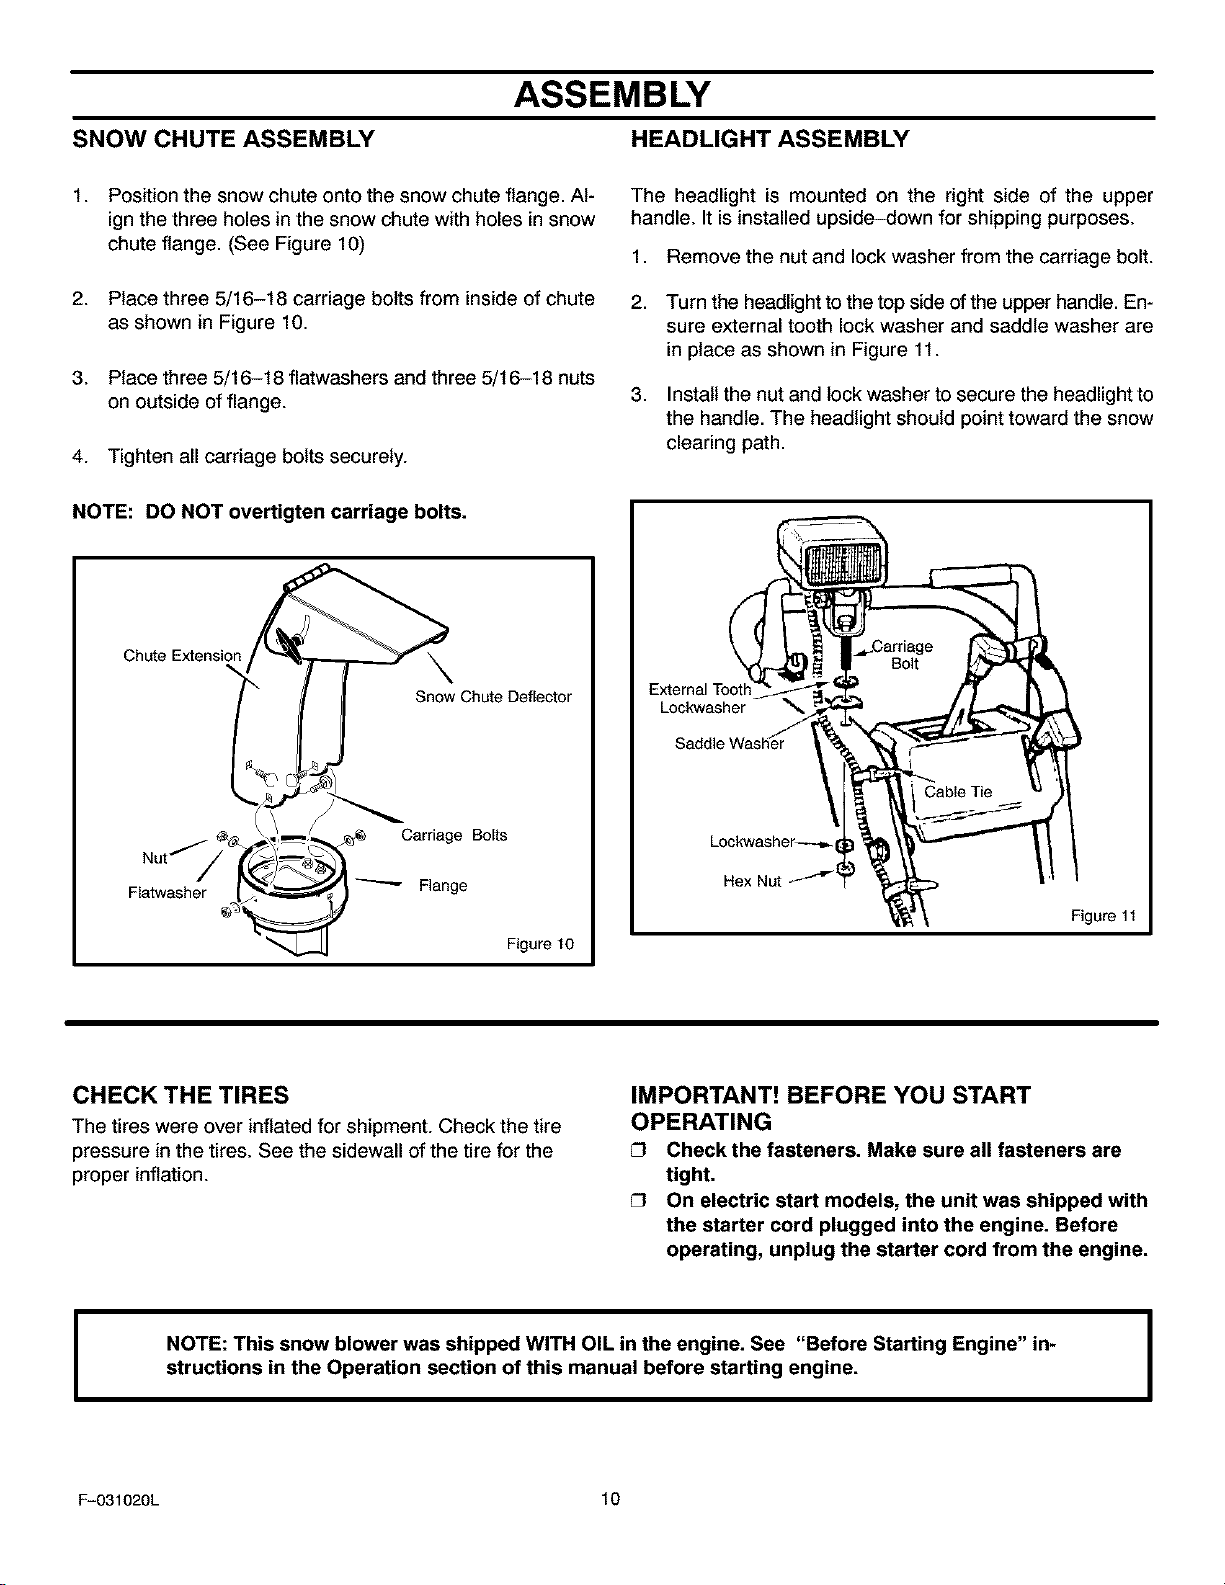
1. Position the snow chute onto the snow chute flange. Al-
ign the three holes in the snow chute with holes in snow
chute flange. (See Figure 10)
2. Place three 5/16-18 carriage bolts from inside of chute
as shown in Figure 10.
3. Place three 5/16-18 flatwashers and three 5/16-18 nuts
on outside of flange.
4. Tighten all carriage bolts securely.
The headlight is mounted on the right side of the upper
handle. It is installed upside_lown for shipping purposes.
1. Remove the nut and lock washer from the carriage bolt.
2. Turn the headlight to the top side of the upper handle. En-
sure external tooth lock washer and saddle washer are
in place as shown in Figure 11.
3. Install the nut and lock washer to secure the headlight to
the handle. The headlight should point toward the snow
clearing path.
NOTE: DO NOT overtigten carriage bolts.
Chute Extension
\
Snow Chute Deflector
Nut/ _ Carriage Bolts
Flatwasher Flange
Figure 10
External Toot
Lockwasher
Hex Nut
Figure 11
CHECK THE TIRES
The tires were over inflated for shipment. Check the tire
pressure in the tires. See the sidewall of the tire for the
proper inflation.
IMPORTANT! BEFORE YOU START
OPERATING
Check the fasteners. Make sure all fasteners are
tight.
On electric start models, the unit was shipped with
the starter cord plugged into the engine. Before
operating, unplug the starter cord from the engine.
I
NOTE: This snow blower was shipped WITH OIL in the engine. See "Before Starting Engine" in-
structions in the Operation section of this manual before starting engine.
F-031020L 10
Loading ...
Loading ...
Loading ...