Loading ...
Loading ...
Loading ...
7
Warranty Safety CleaningOperation Installation Service Parts
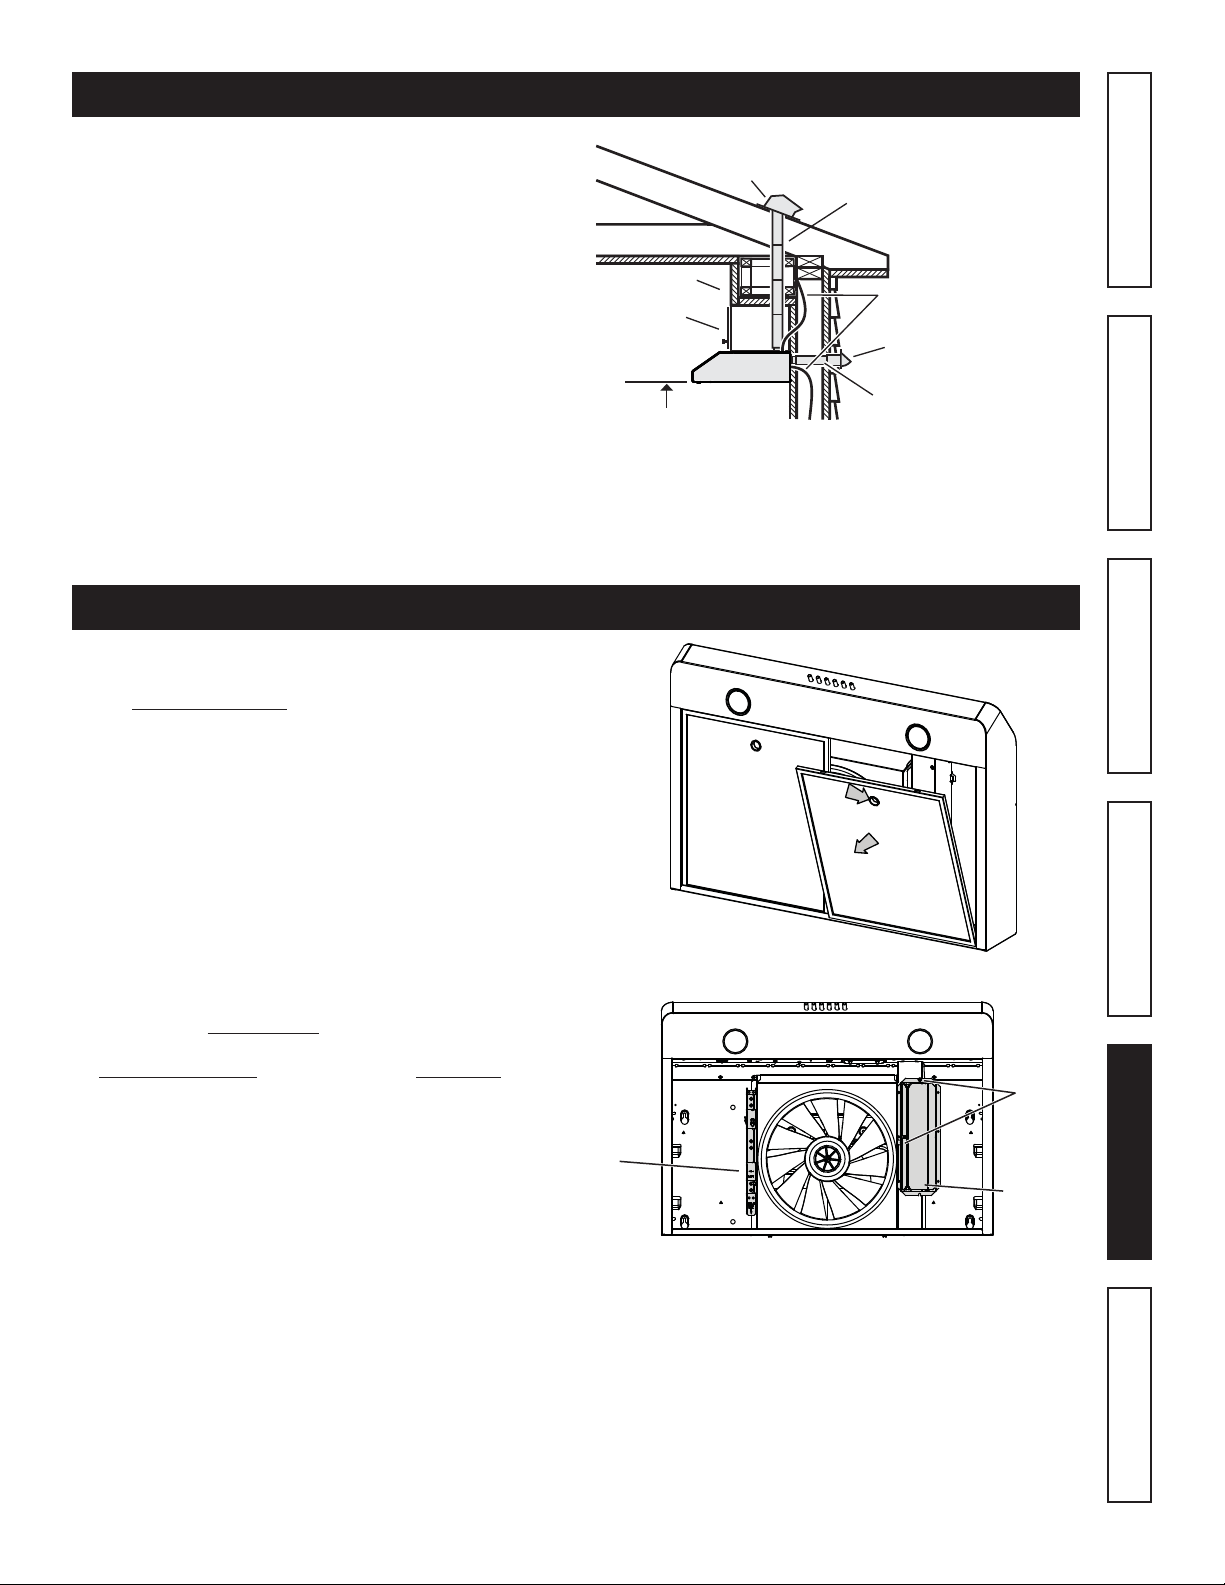
SOFFIT
18" MIN - 24" MAX
ABOVE
COOKING SURFACE
CABINET
3¼" X 10" DUCT
(FOR HORIZONTAL DISCHARGE)
WALL CAP
ROOF CAP
3¼" X 10" OR
7" ROUND DUCT
(FOR VERTICAL
DISCHARGE
)
HOUSE WIRING
(TOP OR BACK OF HOOD)
HOOD
1. Determine whether hood will discharge vertically
(3¼” x 10” or 7” Round) or horizontally (3¼” x 10”
only).
2. Run ductwork between the hood location and a roof
cap or wall cap.
3. Choose a straight, short duct run to allow the hood to
perform most effi ciently. Long duct runs, elbows and
transitions will reduce the performance of the hood.
Use as few of them as possible. When possible, use
at least 2 foot straight runs before any turns. Larger
ductwork may be required for best performance with
longer duct runs.
4. Install wall cap or roof cap (sold separately); ensure
there is no leak in hoiouse insulation. Connect metal
ductwork to cap and work back towards the hood
location. Use 2” metal foil duct tape to seal the joints
between ductwork sections.
INSTALL DUCTWORK (DUCTED INSTALLATION ONLY)
NOTE: Distances over 24” are at the installer and user
discretion.
1. If present, remove all protective polyfi lm from the
hood and/or parts. Using the fi nger cup, remove
the Micromesh Filters from the hood by pushing
down and tilting fi lters out.
PREPARE THE HOOD
B
C
DAMPER
ASSEMBLY
SCREWS
EZ1
BRACKETS
2. Remove the EZ1 brackets from inside the hood by
cutting off the tie wrap. Remove both screws holding
damper assembly to hood. Remove parts bag
(captured behind the damper assembly). Remove
damper assembly from inside the hood and keep
the screws for further use.
Loading ...
Loading ...
Loading ...