Loading ...
Loading ...
Loading ...
www.usaprocom.com
200159-01B
10
This appliance is factory
preset for propane gas. No
changes are required for
connecting to propane. Only a
qualied installer or service techni-
cian can perform gas selection and
connecting to gas supply.
CAUTION: Two gas line
installations at the same time
are prohibited.
CAUTION: To avoid gas
leakage for the gas not being used
at the inlet of regulator, a qualied
installer or service technician
must use supplied cap.
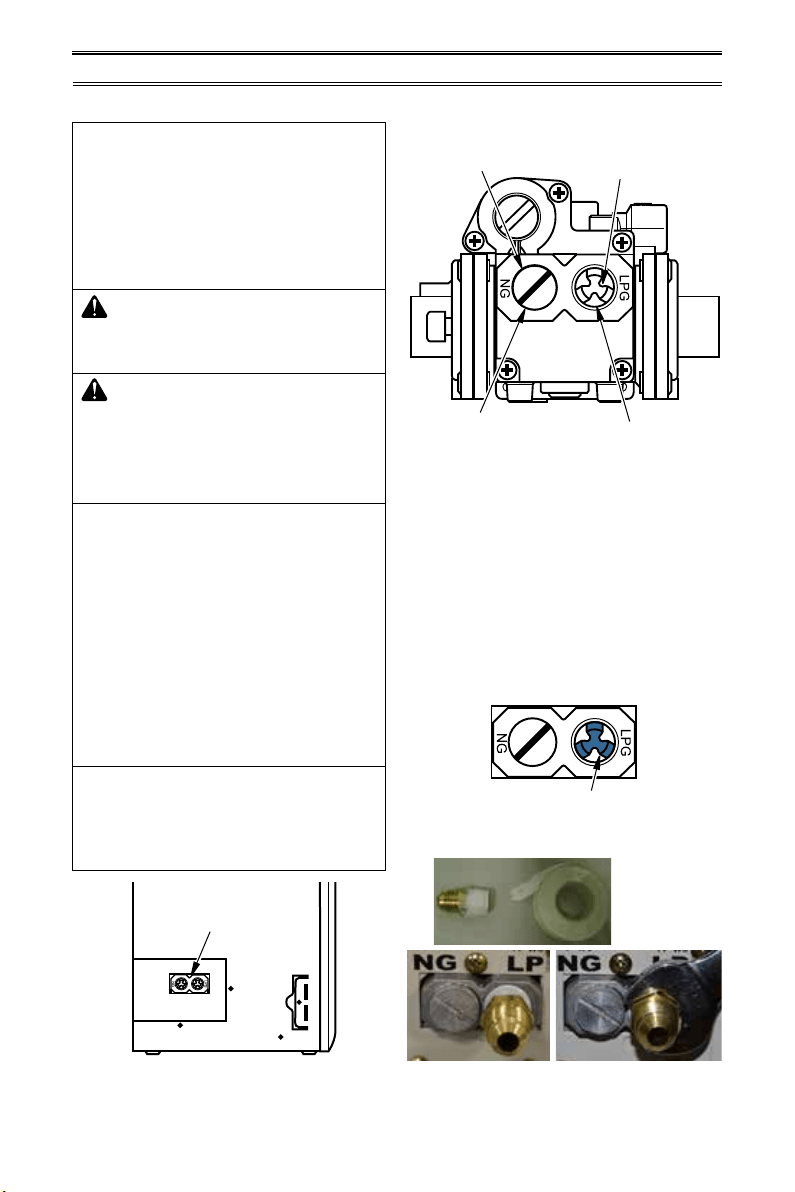
You will notice a color coded
plunger on the inside of the
regulator. This is normal. When
the inlet connection tting is in-
serted and tightened, this plunger
will be pushed back by the tting
making all of the adjustments for
the gas being supplied. DO NOT
REMOVE THE PLUNGER. The
regulator will not work and the
warranty will be voided.
The inlet regulator is color coded
for identication of the correct
gas type. Blue is for propane (LP
gas) and yellow is for natural gas.
INSTALLATION
Figure 5 - Side of Heater
Gas Connection
Figure 6 - Gas Regulator
GAS SELECTION
FOR PROPANE GAS
INSTALLATION: BLUE
Apply thread sealant to the threads on a 3/8"
NPT brass connection tting. While pushing
in, rotate the tting clockwise until the threads
engage the regulator. After the tting has been
hand tightened into the regulator use a wrench
to complete tightening of the tting. Install ad-
ditional tting to connect to the house supply.
Yellow Natural Gas
Plunger Underneath
Metal Cap
Blue Propane Gas
Plunger DO NOT
REMOVE!
Insert Gas Fitting
for Natural Gas
Insert Gas Fitting
for Propane Gas
DO NOT REMOVE
Blue Propane Plunger
Install Gas Fitting Here
Fitting
supplied
by installer,
may vary.
Loading ...
Loading ...
Loading ...