1
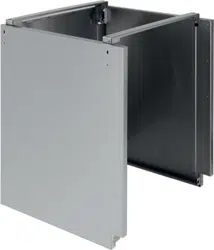
WRAPPER FOR FREE STANDING OUTDOOR BEER
DISPENSER, REFRIGERATOR & REFRIGERATED DRAWERS
INSTALLATION INSTRUCTIONS
Before you begin, read these instructions completely and carefully.
Getting Started
Remove packaging and retain until installation is complete.
CAUTION:
The surface on which the grill cart and refrigerated unit is located must be at and level.
Note: Wrapper must be installed on the refrigerated unit and attached to the grill cart before the grill
head is installed on the cart.
WARNING!
Some parts have sharp edges; care must be taken when handling the various components to
avoid injury. Please read safety information provided in these instructions before beginning
assembly. Wear gloves when handling.
Tools Required
Phillips Screwdriver
5/16 Socket and 5/16 Wrench
Safety Glasses
Work Gloves
Contents
Part Description Qty
Back Panel 1
Side Panels (right and left)
2
Top Riser
2
Male Strike Catch Clips (pre-attached)
4
Female Strike Catch Clips (pre-attached)
4
Hardware Kit Includes:
1
Protective Grommet
1
MS 10-24 X 1-1/8 PH PAN HD SS
8
SM 10-24 X 1/2 PH PAN TY F SS
2
Hex Blt 1/4-20 X 1/2 Full TH SS
2
Nut Hex 1/4-20 KEPS SS
2
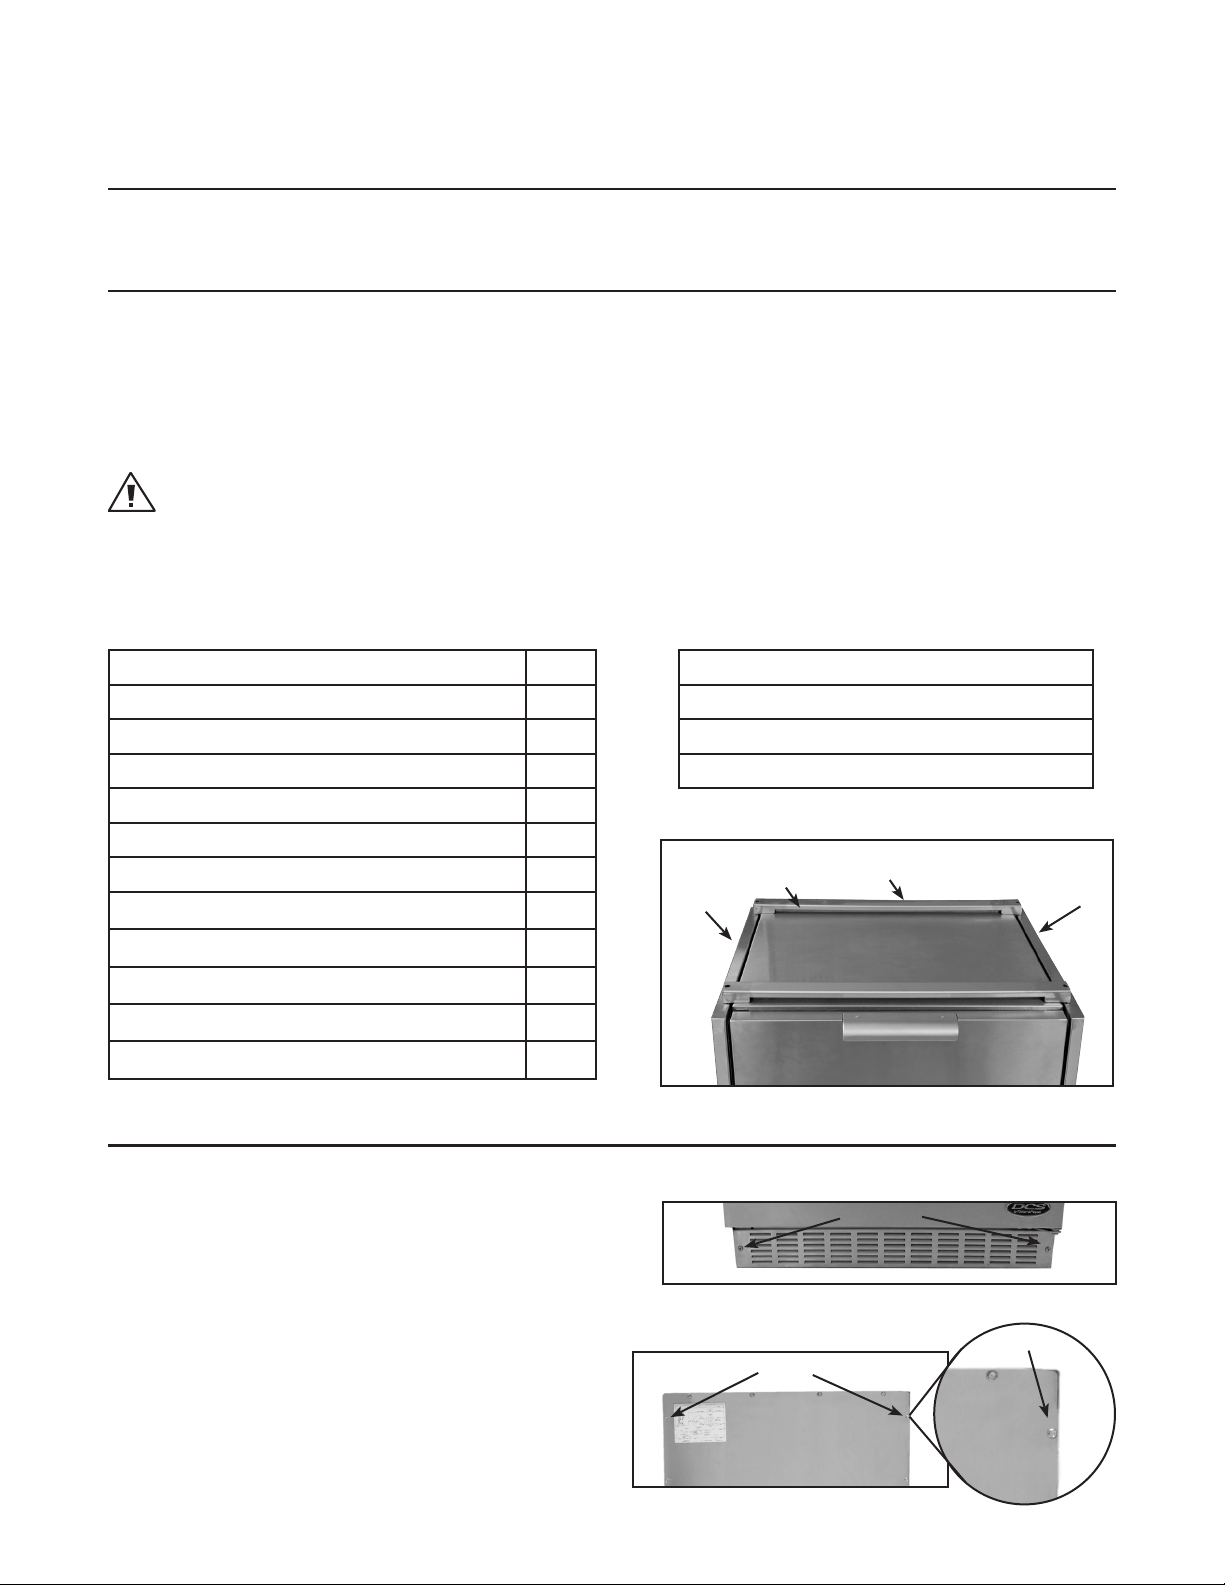
Installation Instructions
Assembly instructions for Freestanding application:
Loosen (2) front bottom grill screws (Fig. 01) approx. 1.
1/8”. (No need to remove screws.)
Remove (2) top outer corner screws on back panel of 2.
refrigerated unit (Fig. 02). (Retain screw for re-use.)
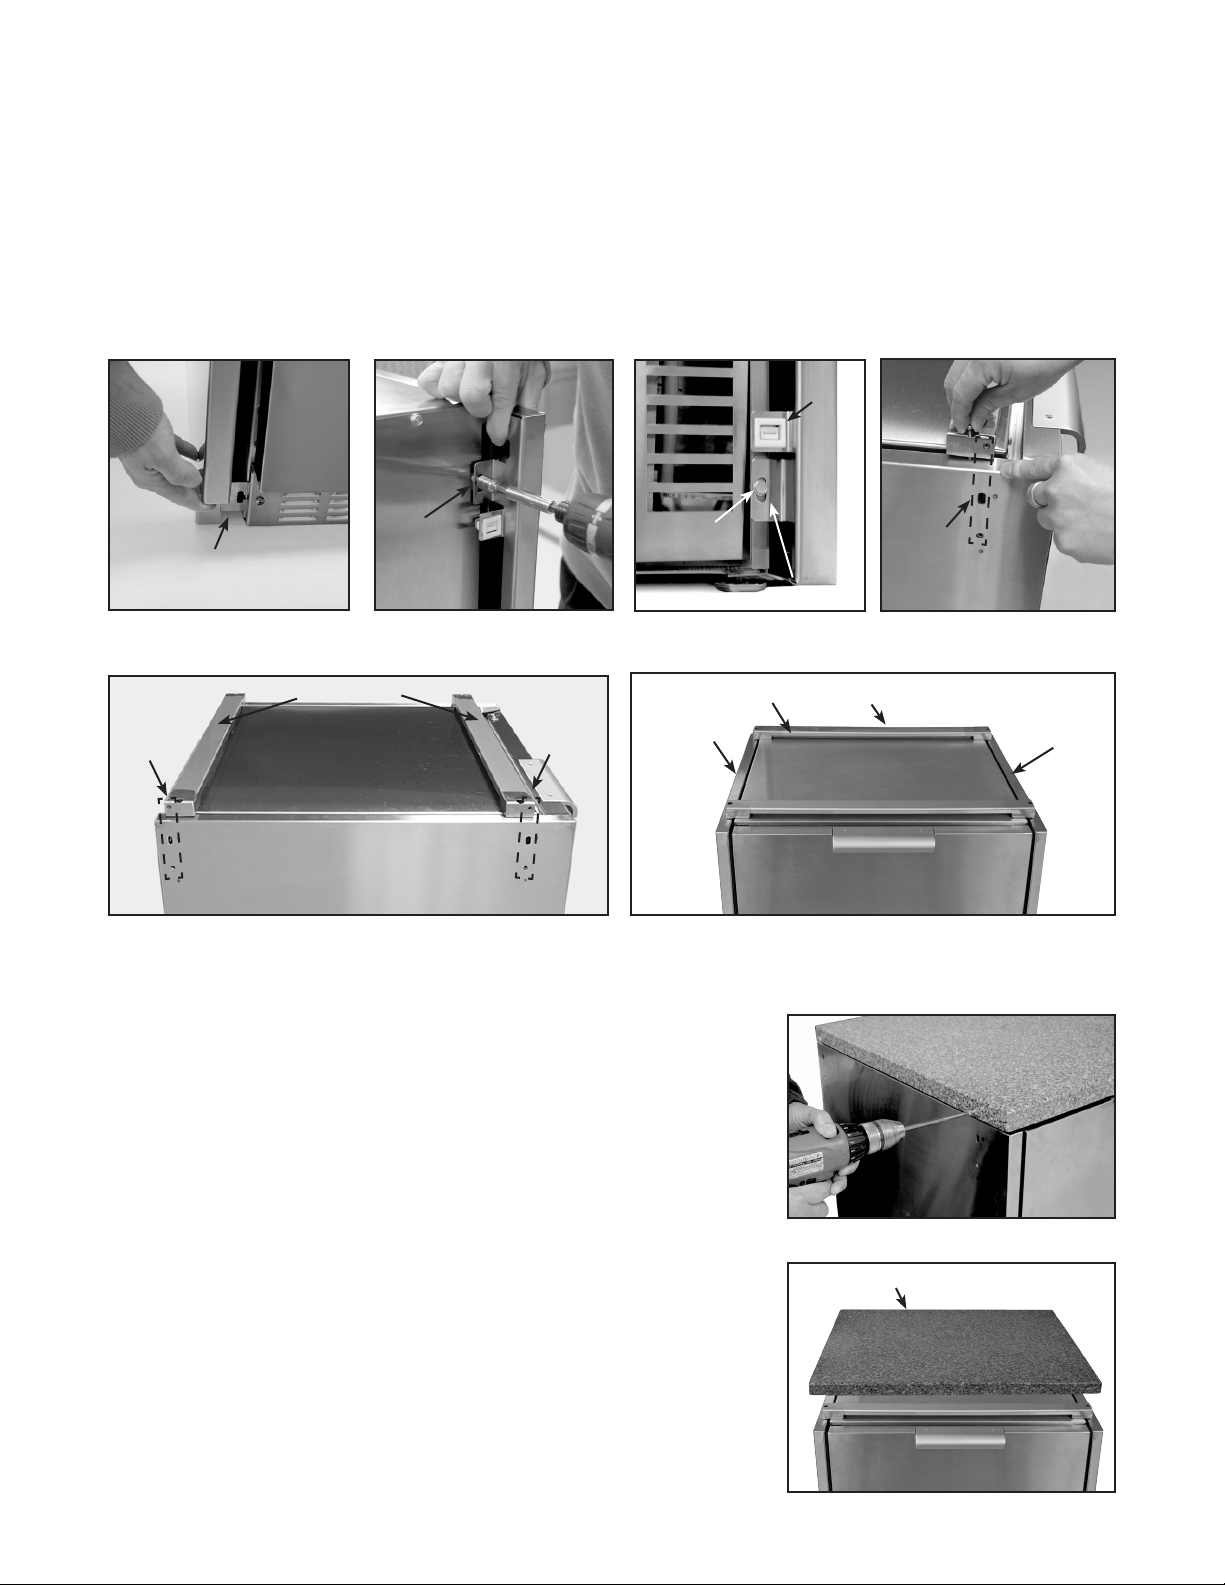
Place the left side panel on the unit by sliding the 3.
front ange behind the bottom grill plate (Fig.03).
Then lift the rear of the panel so the screw holes
are visible in the slotted holes of panel, re-install
top screw and lower screw (Fig. 04 and 05)
(10-24 X 1/2 Hex Head SS - lower screws are
provided with hardware kit). Do not tighten at this
point.
Fig. 02
Screws
Screw
Right panel
Back panel
Top riser
Left panel
Fig. 01
Screws
2
Repeat Steps 2 and 3 for the other side panel. 4.
Place both top risers on top of unit as shown in (Fig. 07). 5.
Using screws provided (10-24 X 1-1/8 Pan Head SS), attach riser to the side panels. Take note of the 6.
alignment of the holes on the riser and side panel (Fig. 06).
Adjust the side panels to be level with the top of the refrigerated unit, then tighten all ange screws. 7.
The 4 male catch clips are preinstalled in the back panel. Feed the power cord thru the back panel and 8.
install protective grommet supplied with the hardware kit (Fig. 14).
Align the bottom male clips to the preinstalled female clips of the side panels, push at the outer corners to 9.
engage clips. See Fig. 08 for nal assembly.
Solid Surface Installation – Required Accessory (sold separately):
Solid Surface for Refrigerator and Refrigerated Drawer (WRT24RD) ■
Solid Surface for Beer Dispenser (WRT24T) ■
Locate holes on the solid surface and place onto the refrigerated 1.
unit so the holes align on the sides. Check for proper t and
alignment. Insert screws (10-24 X 1-1/8 PH SS) to anchor solid
surface to risers (Fig. 09). See Fig. 10 for nal assembly.
Final check to see that all spacing and gaps are even and level. The 2.
Refrigerated Drawer Unit (RF24D) must have the anti-tip device
installed. (Refer to the Installation Instructions that came with the
unit.)
Assembly Instructions for Modular application (linked to a
CAD cart):
Remove the screws and the front bottom grill cover from the refrig-1.
erated unit and set them aside (Fig. 01).
Fig. 03 Fig. 04
Fig. 07
Fig. 06
Fig. 05
top risers
Screw
Lower rear ange
Fig. 09
Female
cup
Fig. 10
Solid surface
Side View
Ensure
holes
are
aligned
Bottom front
ange
Upper
ange
Fig. 08 Wrapper Kit Assembly shown with Refrigerated Drawers
Right panel
Back panel
Top riser
Left panel
Ensure
holes
are
aligned
Ensure
holes
are
aligned

3
Remove top and bottom outer corner screws on back panel of refrigerated unit 2.
(Fig. 11). (Retain screw for re-use.)
With the grill head out of the cart, place the corresponding wrapper side panel 3.
against cart side. Align the holes at the top front and rear side corners and
install hex bolts (1/4-20 X 1/2 HEX BLT SS) and locking nuts (1/4-20 KEPS NUT SS)
provided with hardware kit, using the second hole from the top on the cart panel
and top hole on the wrapper panel (Fig. 12). Do not tighten at this point.
Before connecting the two units, make sure that all of the height requirements 4.
are matched:
a. The refrigerated unit leveling legs can be adjusted to match the cart assembly
or your counter top. Check the level on both units. The bottom front corners
will match and the front faces will be ush (Fig. 13).
b. When installing multiple units as a permanent installation (such
as an island), it is recommended to remove the grill cart casters
and install leveling legs (sold separately - model # CAD-LVL).
Align the front lower ange of the wrapper to the refrigerated unit 5.
(Fig. 13) and slide units together so the rear holes and anges match
with rear holes of unit (Fig. 05). Take care not to damage anges on
the female clips.
Level the legs on the refrigerated unit as described in 4a. Reinstall 6.
front grill cover and screws. Leave screws loose about 1/8 of an inch.
Note: If connecting refrigerator unit between carts, repeat steps
(2-6) for opposite side of refrigerated unit, then proceed to
step 8.
Place the other side panel on the unit by sliding front ange behind 7.
bottom grill plate (Fig. 03). Then lift the side panel until ange holes
align and attach screws, (Fig. 04 and 05) do not tighten screws. (Lower
screws 10-24 X 1/2 Hex Head are provided.)
Place both top risers on top of unit as shown in (Fig. 07). 8.
Using screws provided (10-24 X 1-1/8 Pan Head SS) attach risers to 9.
side panels. Take note of alignment of the holes on the riser and side
panels (Fig. 06).
Make a nal adjustment to the refrigerator unit leveling legs so the 10.
side panels are level with the top unit, and then tighten all screws,
front and rear.
The 4 male catch clips are preinstalled in the back panel. Feed the 11.
power cord thru the back panel and install protective grommet
supplied with the hardware kit (Fig. 14).
Align the bottom male clips to the preinstalled female clips of the side 12.
panels, push at the outer corners to engage clips. See Fig. 08 for nal
assembly.
See Solid Surface Installation (page 2).13.
The grill head(s) can now be installed in the grill cart, refer to 14.
instructions in Grill Manual.
Fig. 12
Fig. 14
Fig. 13
SIDE PANEL
CAD CART
Front Lower
Flange
Front Faces
Flush
Bottom front
corners
CAD CART
REFRIGERATOR
UNIT
REAR VIEW
Top and
bottom
screws
Fig. 11
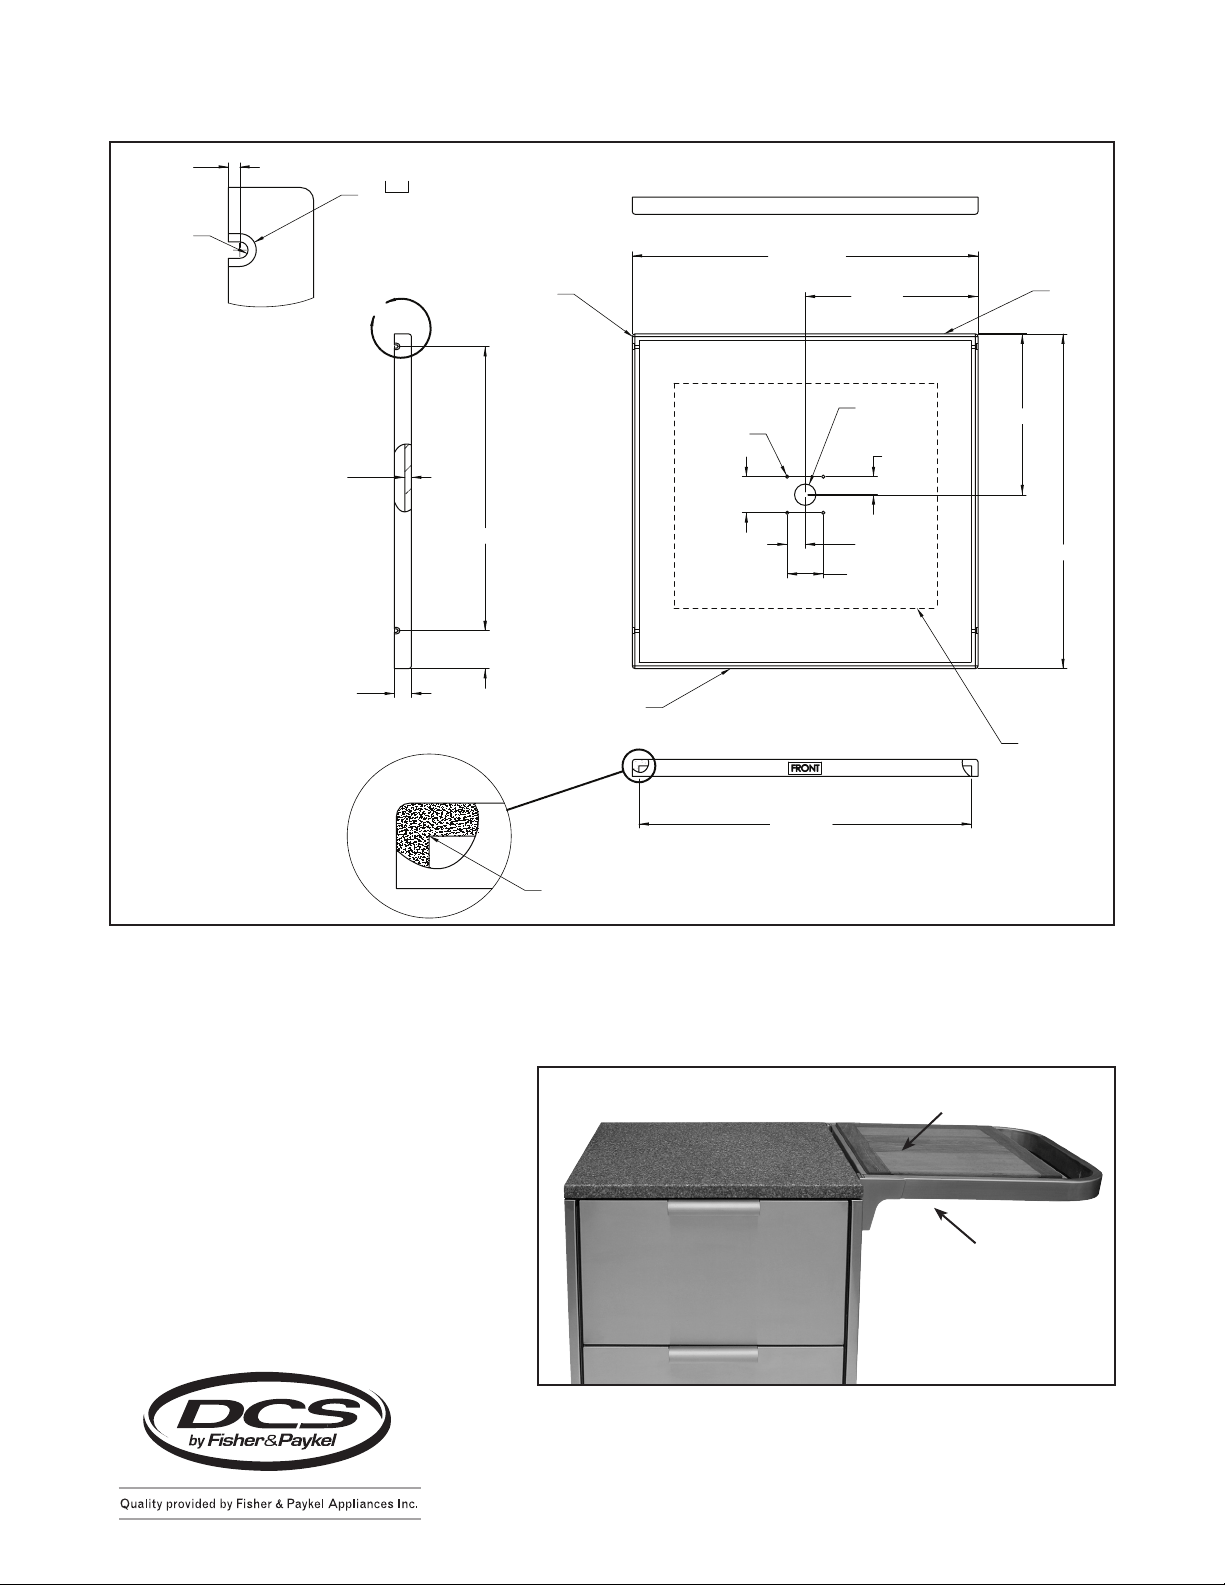
For optional type and colors of the Solid Surface, contact your local manufacturer and provide drawing in
Fig. 15.
Attaching side shelf - Optional Accessories (sold separately)
Side Shelf (CAD-SK) ■
Once the Wrapper has been installed
and Solid Surface top is anchored to
the risers, the side shelf (or shelves) can
be installed. Follow the steps provided
in the Side Shelf Installation Instruction
sheet in the Side Shelf Kit (Fig.16).
Cutting Board (CAD-WCB) ■
26-11/32"
*
25-1/2"
4x
Ø
1/4"
Ø
1-5/8"
*
2-3/4"
*
2-3/4"
1-3/8"
1-3/8"
12-1/4"
13-11/64"
R 1/4"
ALL TOP AND
4 CORNERS
REAR OF UNIT
FRONT OF UNIT
FOR BEER
DISPENSER
ADD HOLE
PATTERN
1/2"
ALL WALLS
*
1.300”
*
2.894”
*21.652”
C
*
25.340”
2X .18
BOTH SIDES
BOTH SIDES
2X Ø .250
BOTH SIDES
2X
Ø
.50 X .150 DEEP
DETAIL C
SCALE 1 : 2
NO EPOXY BUILD UP
ALL INSIDE CORNERS
*
DIMENSIONS SHOWN ARE CRITICAL.
,
Fig. 15
Fig. 16
Cutting Board
Side Shelf
Fisher & Paykel Appliances, Inc.
5900 Skylab Road, Huntington Beach, CA 92647
Customer Care: 888.281.5698 • Fax: 714.372.7003
www.dcsappliances.com
P/N 241681 RA 05/08
