Loading ...
Loading ...
Loading ...
Care & Cleaning (continued)
Care and Cleaning Tips
Interior & ® Soap and water
Door Liners • Baking soda and
water
® Use two tablespoons of baking soda in one quart of warm water.
• Be sure to wring excess water out of sponge or cloth before cleaning around
controls, light bulb or any electrical part.
Drawers & ® Soap and water
Bins
• Use a soft cloth to clean drawer runners and tracks.
o Do not wash any removable items (bins, drawers, etc.) in dishwasher.
Toe Grille
• Soap and water
• Mild liquid sprays
• Vacuum
• Remove toe grille (see Installation Instructions).
® Vacuum both sides and wipe with sudsy cloth or sponge. Rinse and dry.
Exterior & o Soap and water
Handles
(Stainless
Steel Models
Only) o Stainless steel
cleaners
o Never use CHLORIDE or cleaners with bleach to clean stainless steel.
e Clean stainless steel front and handles with non-abrasive soapy water and a
dishcloth. Rinse with clean water and a soft cloth.
e Use a non-abrasive stainless steel cleanen These cleaners can be purchased
at most home improvement or major department stores. Always follow
manufacturer's instruction. Do not use household cleaners containing ammonia
or bleach.
o NOTE: Always clean, wipe and dry with grain to prevent scratching.
o Wash the rest of the cabinet with warm water and mild liquid detergent. Rinse
weii and wipe dry with a clean soft cloth.
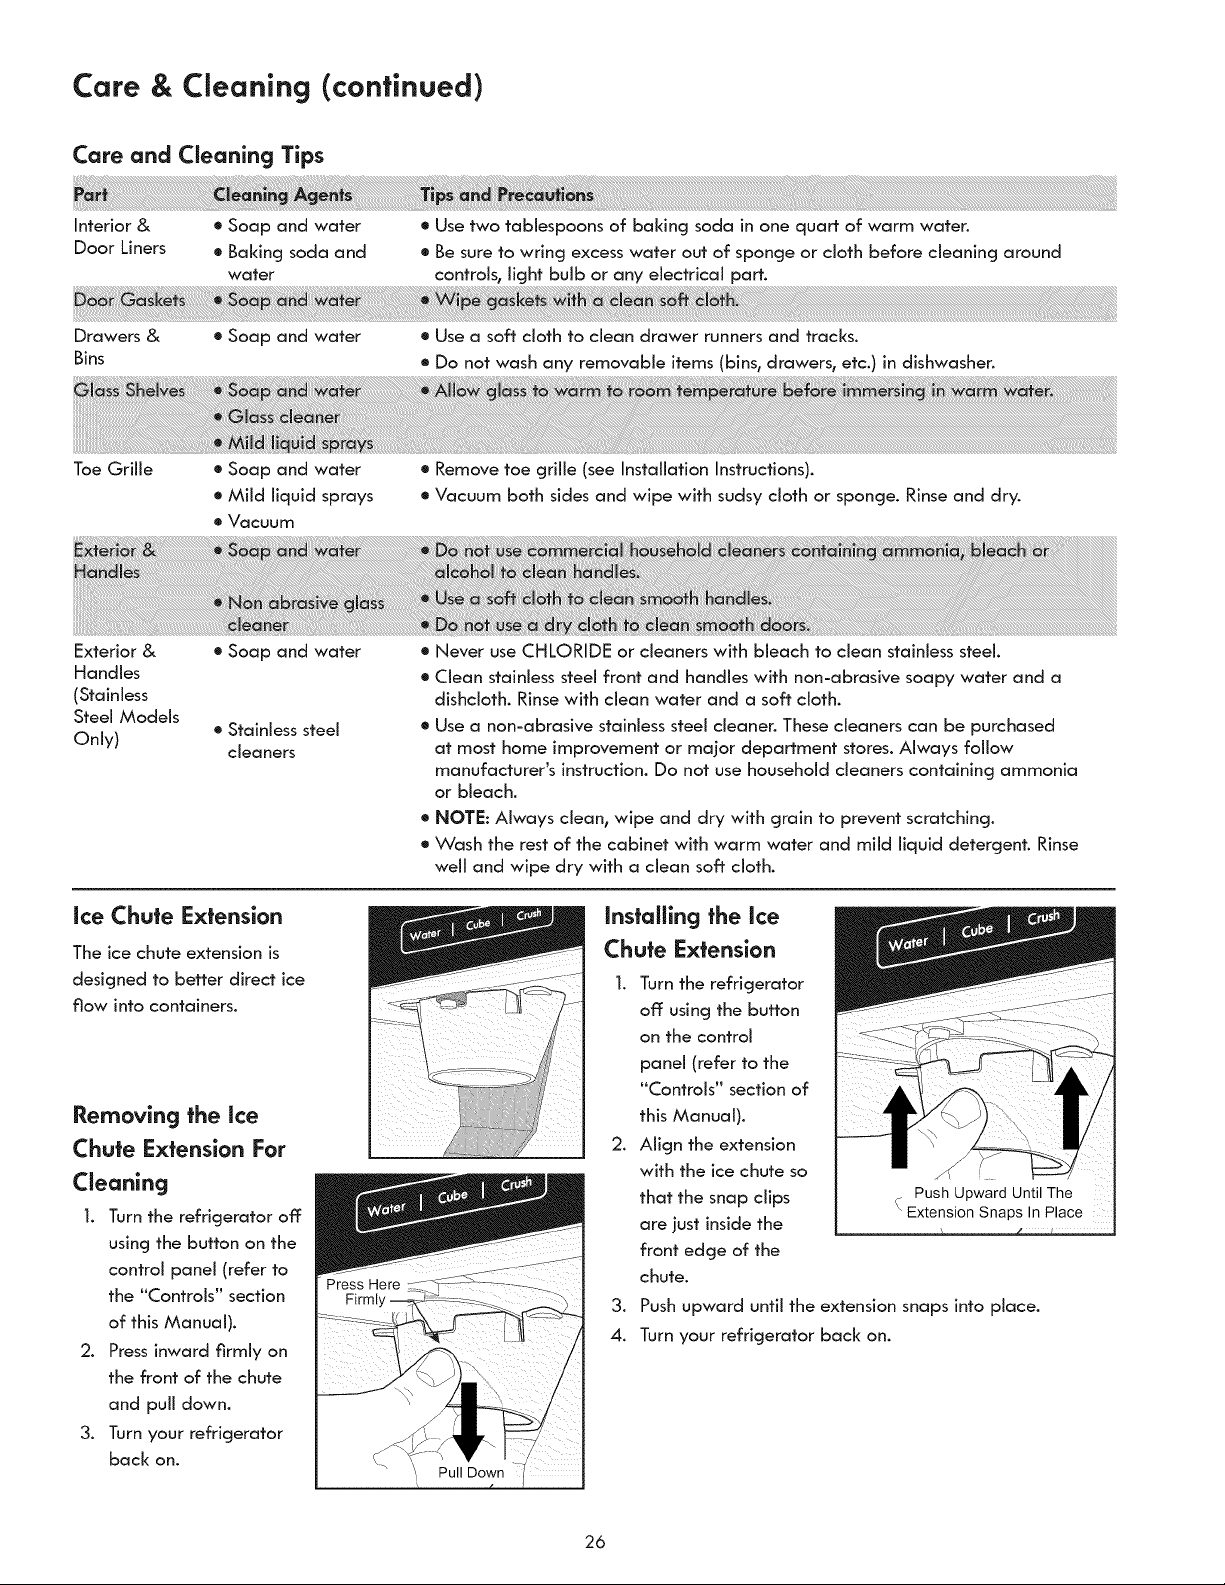
Ice Chute Extension
The ice chute extension is
designed to better direct ice
flow into containers.
Removing the Ice
Chute Extension For
Cleaning
1. Turn the refrigerator of]:
using the button on the
control panel (refer to
the "Controls" section
of this Manual).
2. Press inward firmly on
the front of the chute
and puil down.
3. Turn your refrigerator
back on.
Pull Down
Installing the Ice
Chute Extension
1. Turn the refrigerator
off using the button
on the control
panel (refer to the
"Controls" section of
this Manual).
2. Align the extension
with the ice chute so
that the snap clips
are just inside the
front edge of the
chute.
3. Push upward until the extension snaps into place.
4. Turn your refrigerator back on.
26
Loading ...
Loading ...
Loading ...