
Loading ...
Loading ...
Loading ...
INSTALLING GRINDING DISC - cont'd
5 --
7
Fig. 26
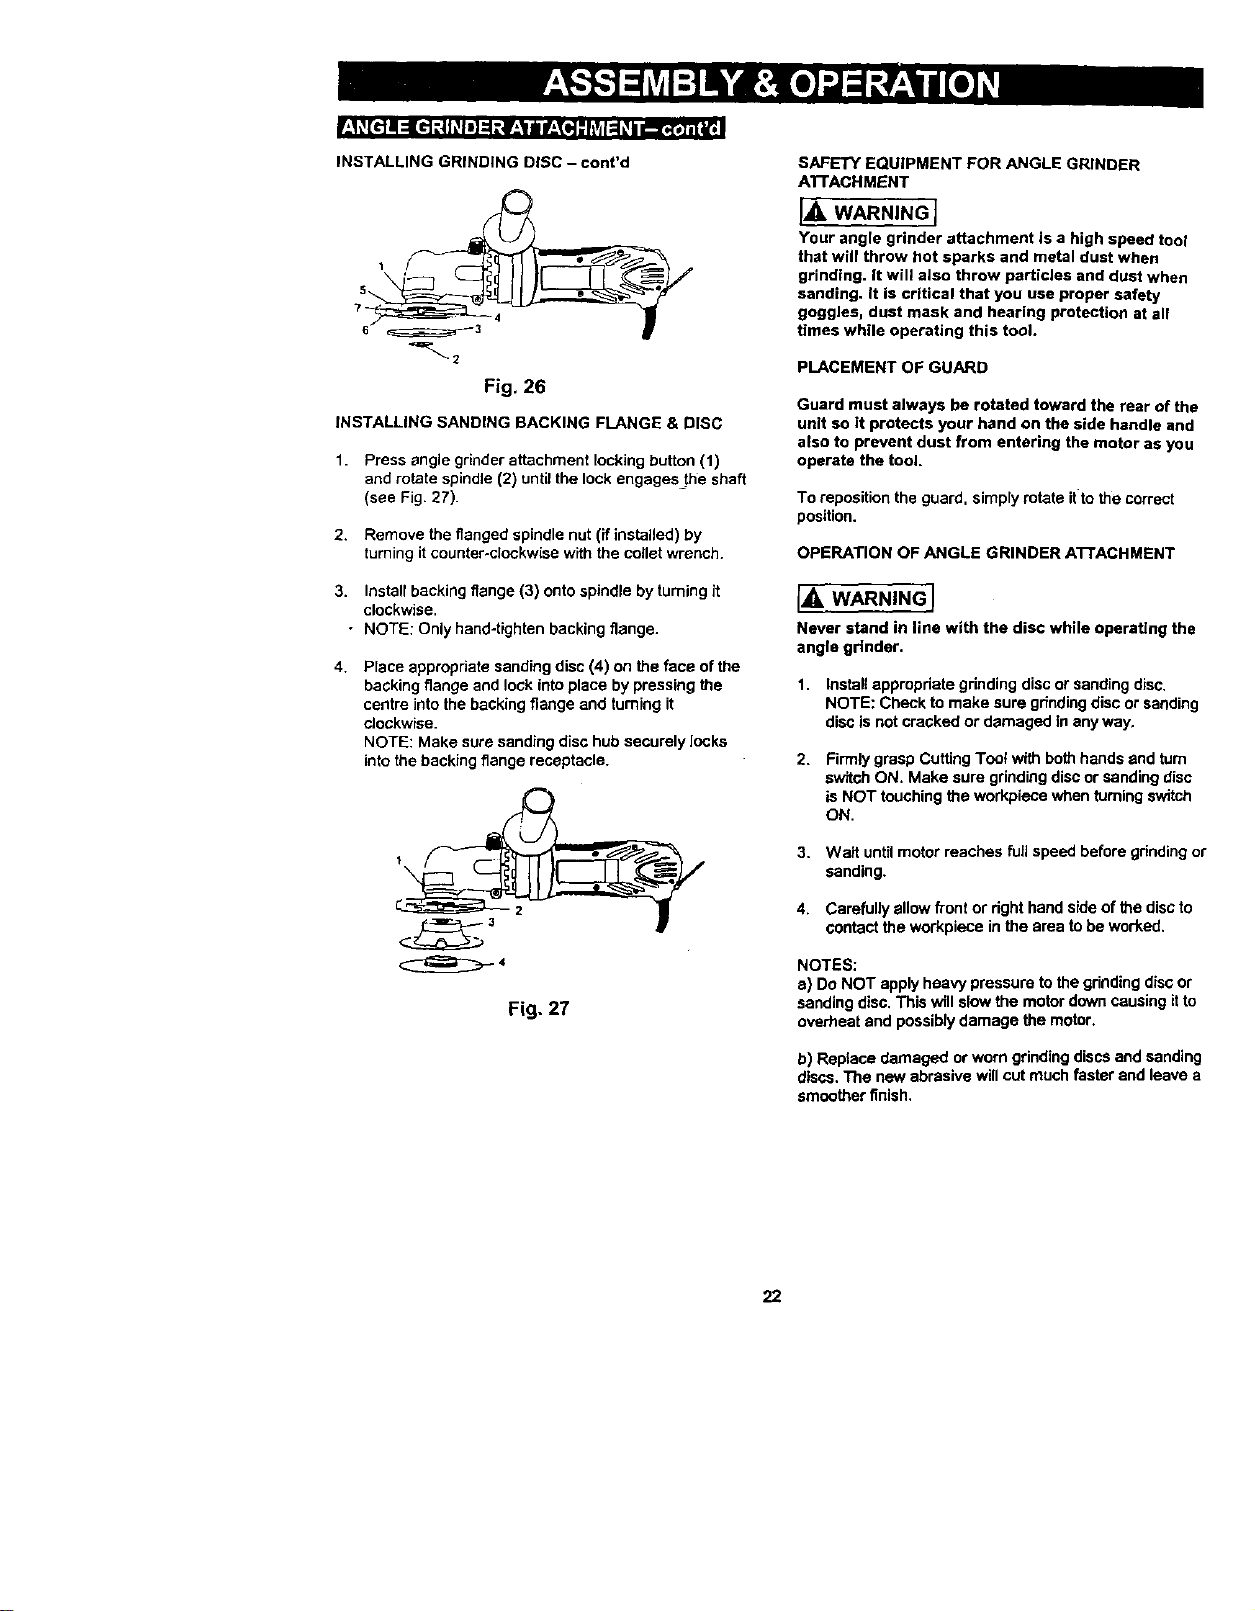
INSTALLING SANDING BACKING FLANGE & DISC
1. Press angle grinder attachment locking button (1)
and rotate spindle (2) until the lock engages=the shaft
(see Fig. 27).
2. Remove the flanged spindle nut (if installed) by
turning it counter-clockwise with the collet wrench.
3. Install backing flange (3) onto spindle by turning It
clockwise.
• NOTE: Only hand-tighten backing flange.
4, Place appropriate sanding disc (4) on the fece of the
backing flange and lock into place by pressing the
centre into the backing flange and turning it
eJockwise.
NOTE: Make sure sanding disc hub securely locks
into the backing flange receptacle.
Fig. 27
SAFETY EQUIPMENT FOR ANGLE GRINDER
ATrACHMENT
I_ WARNING I
Your angle grinder attachment is a high speed tool
that will throw hot sparks and metal dust when
grinding. It will also throw particles and dust when
sanding, it is critical that you use proper safety
goggles, dust mask and hearing protection at all
times while operating this tool.
PLACEMENT OF GUARD
Guard must always be rotated toward the rear of the
unit so It protects your hand on the side handle and
also to prevent dust from entering the motor as you
operate the tool.
To repesition the guard, simply rotate it to the correct
position.
OPERATION OF ANGLE GRINDER A'I-rACHMENT
[A WARNINGI
Never stand in line with the disc while operating the
angle grinder.
1. Install appropriate gdnding disc or sanding disc,
NOTE: Check to make sure gdnding disc or sanding
disc is not cracked or damaged In any way,
2.
Firmly grasp Cuffing Toot with both hands and tam
switch ON, Make sure grinding disc or sanding disc
is NOT touching the workpiece when turning switch
ON.
3.
4.
Wait until motor reaches full speed before grinding or
sanding.
Carefully allow front or right hand side of the disc to
contact the workpieca in the area to be worked.
NOTES:
e) Do NOT apply heavy pressure to the gdnding disc or
sanding disc. This will slow the motor down causing it to
overheat and possibly damage the motor.
b) Replace damaged or worn grinding discs and sanding
discs, The new abrasive will cut much faster and leave a
smoother finish,
22
Loading ...
Loading ...
Loading ...