Loading ...
Loading ...
Loading ...
11
Using the oven.
Before you begin...
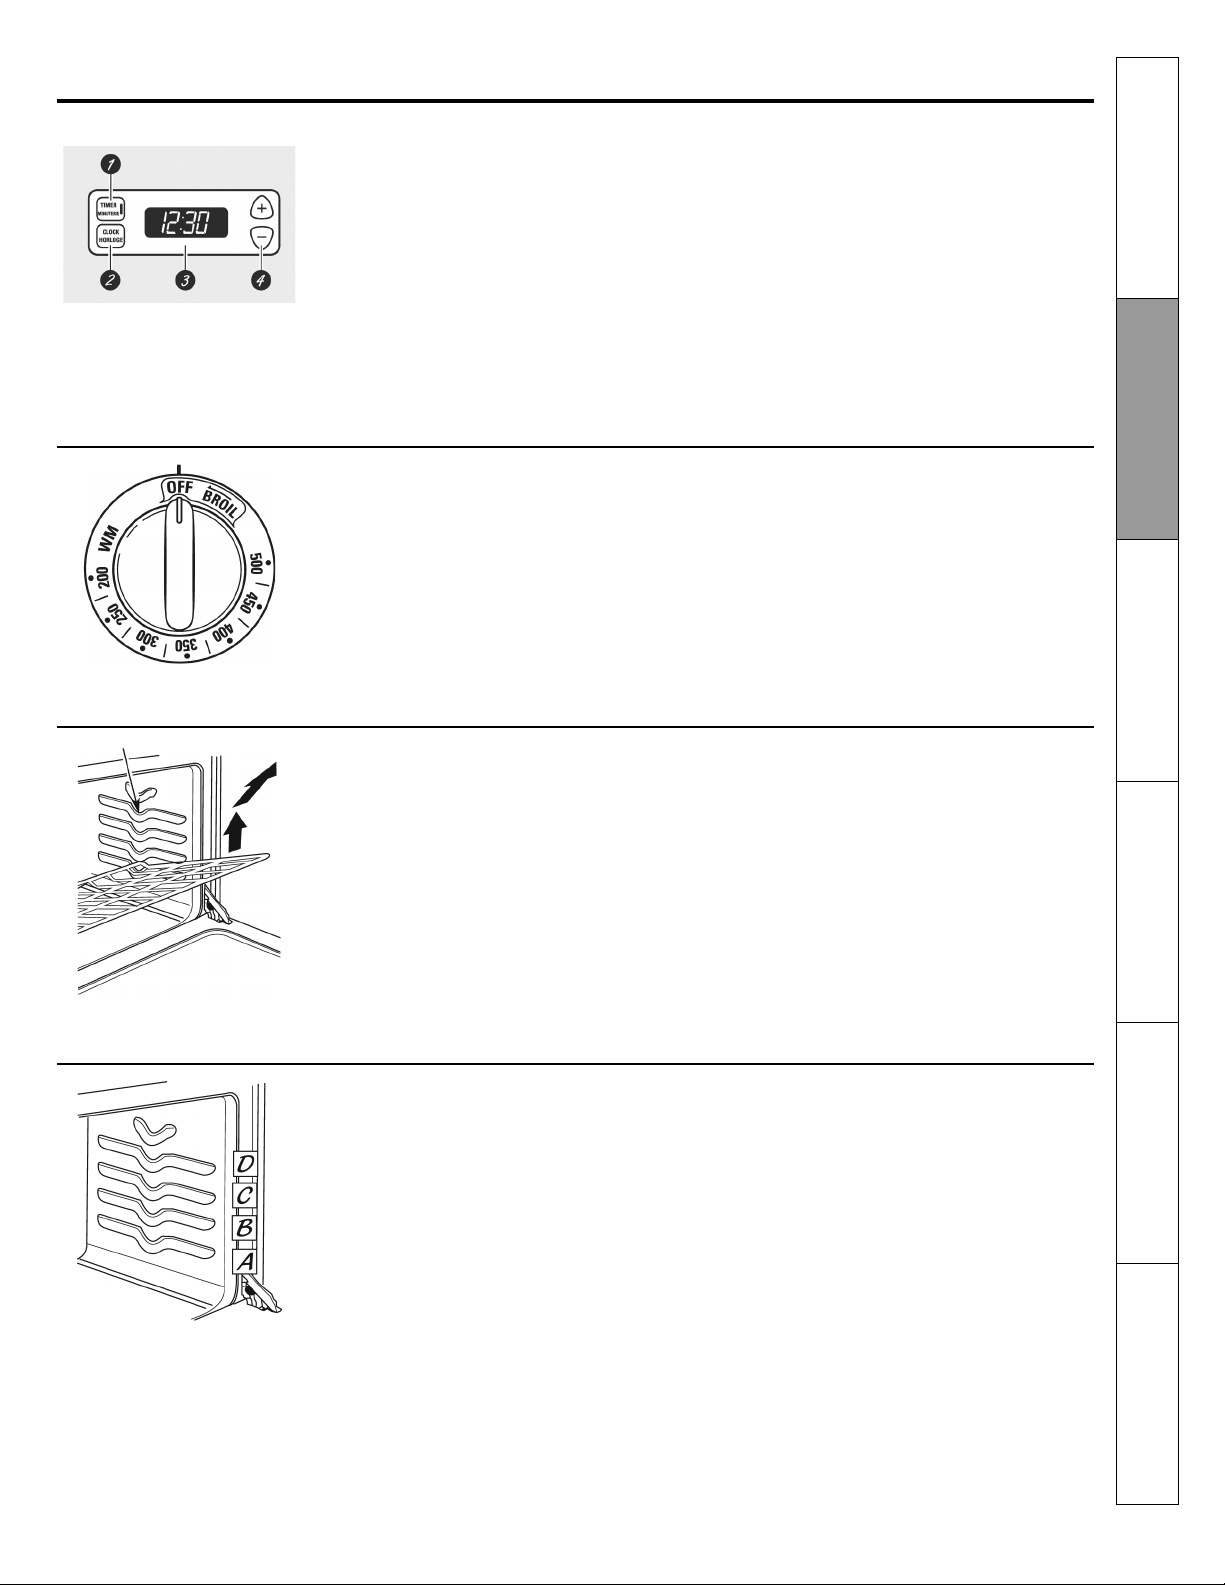
To avoid possible burns, place the shelves
in the desired position before you turn the
oven on.
The shelves have stop-locks, so that when
placed correctly on the shelf supports (A
through D), they will stop before coming
completely out, and will not tilt.
When placing and removing cookware,
pull the shelf out to the bump on the shelf
support.
To remove a shelf, pull it toward you, tilt
the front end up and pull it out.
To replace, place the end of the shelf
(stop-locks) on the support, tilt up the front
and push the shelf in.
NOTE: The shelf is not designed to slide out
at the special low shelf (R) position.
Oven Temperature Knob (on some models)
Appearance may vary.
Oven shelf positions
The oven has four shelf supports—A (bot-
tom), B, C and D (top).
The oven has 4 shelf posi-
tions.
Clock and Timer (on some models)
1. TIMER Pad
Touch this pad to select the timer fea-
ture.
2. CLOCK Pad
Touch this pad before setting the clock.
3. Display
Shows the time of day and the time set
for the timer, cook time or start time.
4. SET +/- Pads
These pads allow you to set the clock
and timer.
Turn this knob to the setting you want.
The oven cycling light glows until the oven
reaches your selected temperature, then
goes off and on with the oven element(s)
during cooking.
Safety Instructions
Operating
Instructions
Care and Cleaning
Troubleshooting Tips
Consumer Support
Installation
Instructions
Loading ...
Loading ...
Loading ...