Loading ...
Loading ...
Loading ...
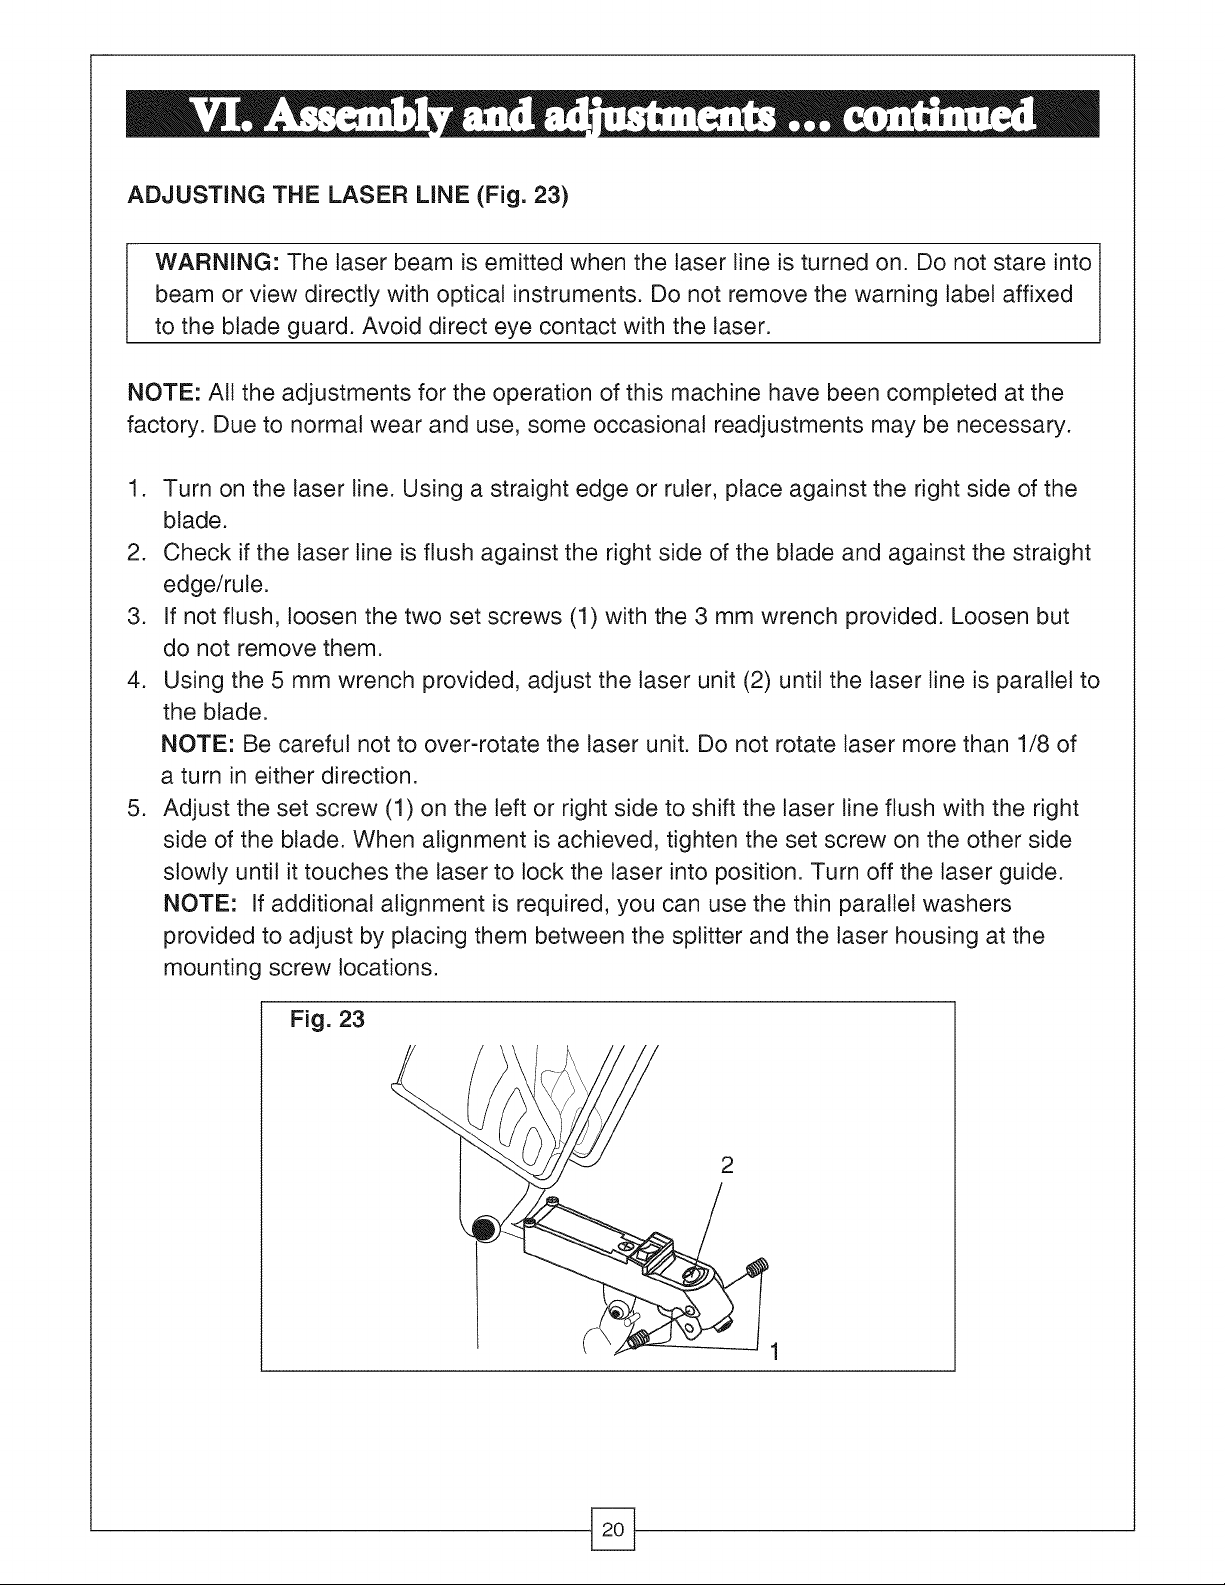
ADJUSTING THE LASER LINE (Fig. 23)
I ARNING: The laser beam is emitted when the laser line is turned on. Do not stare into
beam or view directly with optical instruments. Do not remove the warning label affixed
to the blade guard. Avoid direct eye contact with the laser.
NOTE: All the adjustments for the operation of this machine have been completed at the
factory. Due to normal wear and use, some occasional readjustments may be necessary.
1. Turn on the laser line. Using a straight edge or ruler, place against the right side of the
blade.
2. Check if the laser line is flush against the right side of the blade and against the straight
edge/rule.
3. If not flush, loosen the two set screws (1) with the 3 mm wrench provided. Loosen but
do not remove them.
4. Using the 5 mm wrench provided, adjust the laser unit (2) until the laser line is parallel to
the blade.
NOTE: Be careful not to over-rotate the laser unit. Do not rotate laser more than 1/8 of
a turn in either direction.
5. Adjust the set screw (1) on the teft or right side to shift the laser line flush with the right
side of the blade. When alignment is achieved, tighten the set screw on the other side
slowly until it touches the laser to lock the laser into position. Turn off the laser guide.
NOTE: If additional alignment is required, you can use the thin parallel washers
provided to adjust by placing them between the splitter and the laser housing at the
mounting screw locations.
Fig. 23
2
Loading ...
Loading ...
Loading ...