Loading ...
Loading ...
Loading ...
4
Refer to the chart to install correct ori ces.
Outdoor Grills
• Remove cooking grates and briquette trays.
• Remove the main burners, lift up and then back, up and out.
• Remove the sear burner and lift up and then back, up and out.
• Maintenance: check burner throat for spider webs, run a bottle brush around the inside diameter, wire brush over burner to insure ports are
clear.
• Using the ½” deep socket remove the ori ces from the burner valves. Be sure to support the socket straight and true.
• Using the deep socket install the proper ori ces completely onto the valve. Hold the socket straight and true.
• Remove the rear rotisserie access panel cover plate w/ phillips screwdriver. (one screw on rear hood)
• Remove the rotisserie burner ori ce using the ½” open end wrench. Install the speci ed ori ces.
• On cabinet models, remove the back regulator access panel (four screws) with the phillips screw driver.
• Built in models, under the enclosure, the regulator is located at the rear of the grill.
• Remove the regulator and connector (brass elbow – LP, black pipe 90 degree elbow - NG) from the manifold. Use
fresh pipe dope or tape to install the regulator and elbow supplied in kit.
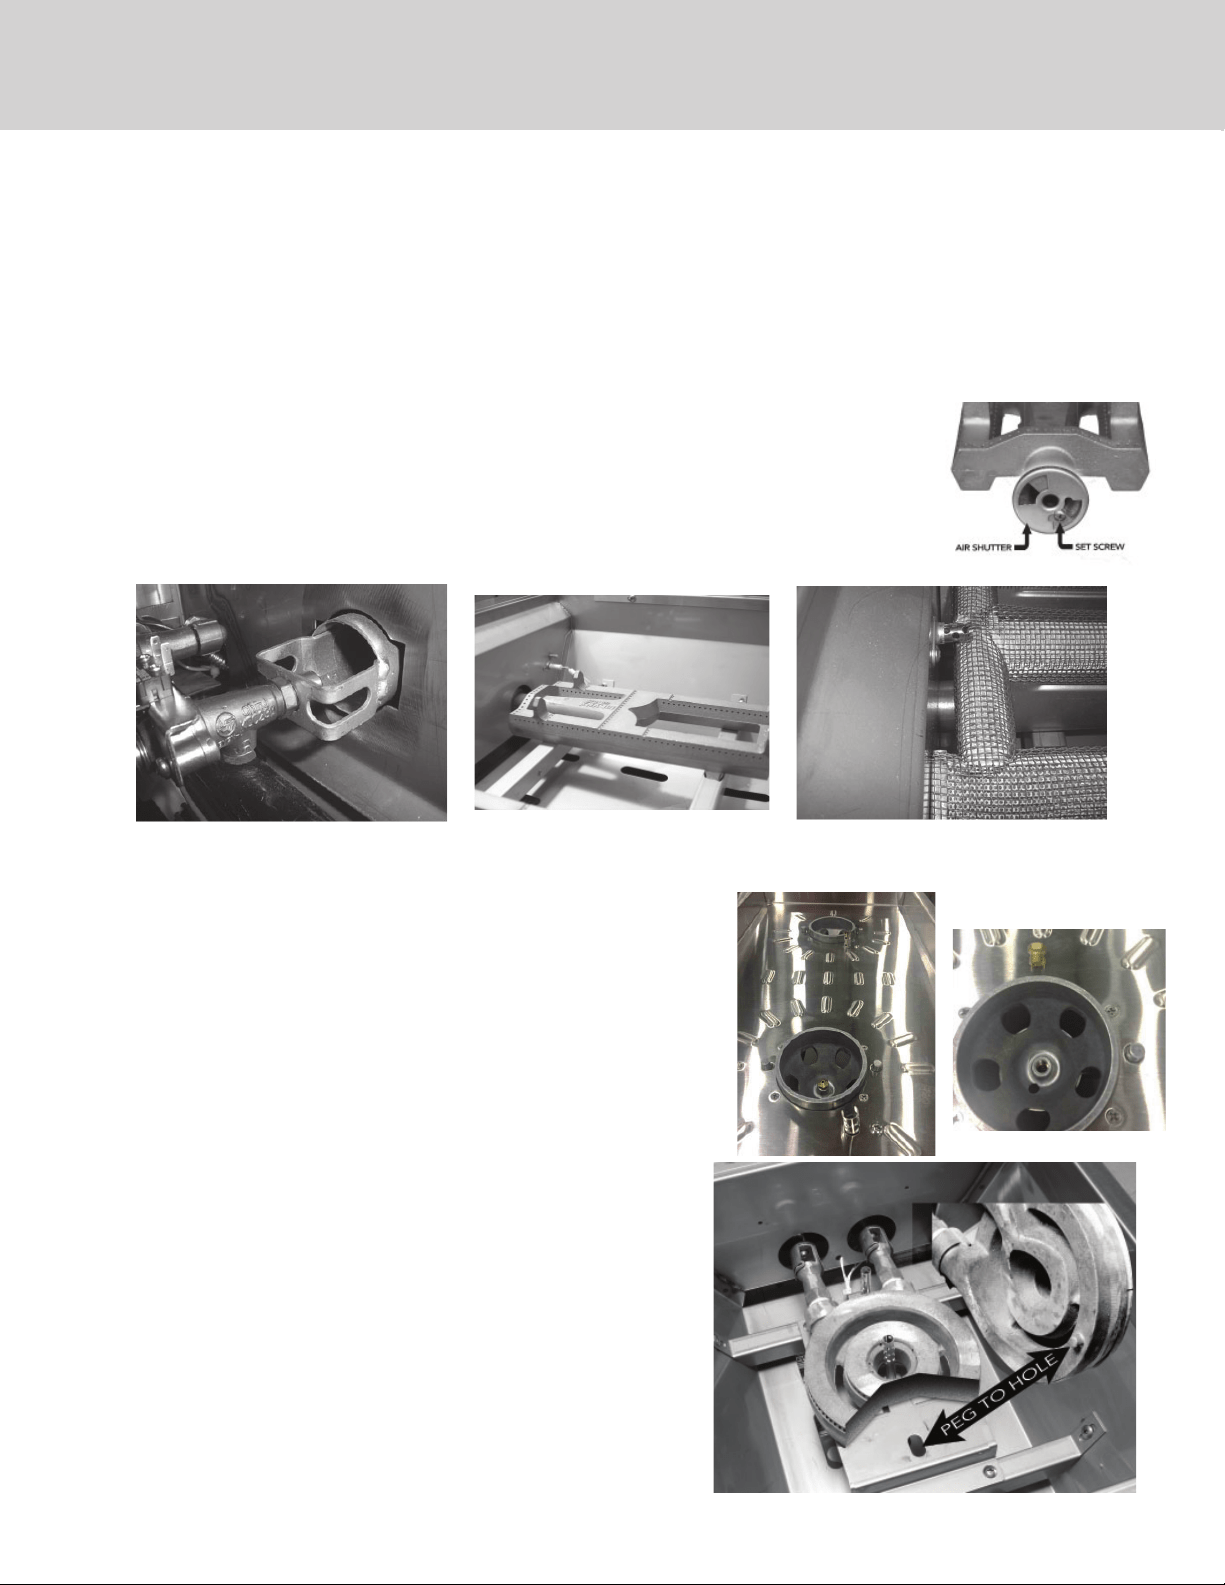
• Adjust air shutters to minimize yellow ames. (Only applies to brass burners)
• Replace all burners, briquette trays, and grates.
Converting the Grill Burners
Ori ce / Venturi Proper Position
ProSear / Trident Burner pushed all
the way onto the ori ce
Main Burner pushed all the way
onto the ori ce
Side Burner Accessory
• Remove cooking grates.
• Remove the brass burner cap.
• Using the ½” deep socket remove the ori ces from the burner valves. Be sure to
support the socket straight and true. Install the proper ori ces completely onto valve.
Hold the socket straight and true.
• Remove the regulator and connector (brass elbow – LP, black pipe 90 degree elbow -
NG) from the manifold. Use fresh pipe dope or tape to install the regulator and elbow
supplied in kit.
• Open “LP” air shutters three-quarters.
• Open “NG” air shutters one half.
• Replace all burners cap and grates.
Power Burner Accessory
• Remove cooking grates.
• Remove the brass burners, lift up and then back, up and out.
• Using the ½” deep socket remove the ori ces from the burner valves.
Be sure to support the socket straight and true. Install the proper
ori ces completely onto the valve. Hold the socket straight and true.
• Remove the regulator and connector (brass elbow – LP, black pipe 90
degree elbow - NG) from the manifold. Use fresh pipe dope or tape to
install the regulator and elbow supplied in kit.
• Open “LP” air shutters three-quarters.
• Open “NG” air shutters one half.
• Replace all burners and grates. Make sure the burner is seated
correctly on the frame with the brass peg inside the positioning hole
Loading ...
Loading ...