Loading ...
Loading ...
Loading ...
SETTING THE CONTROLS (contd.)
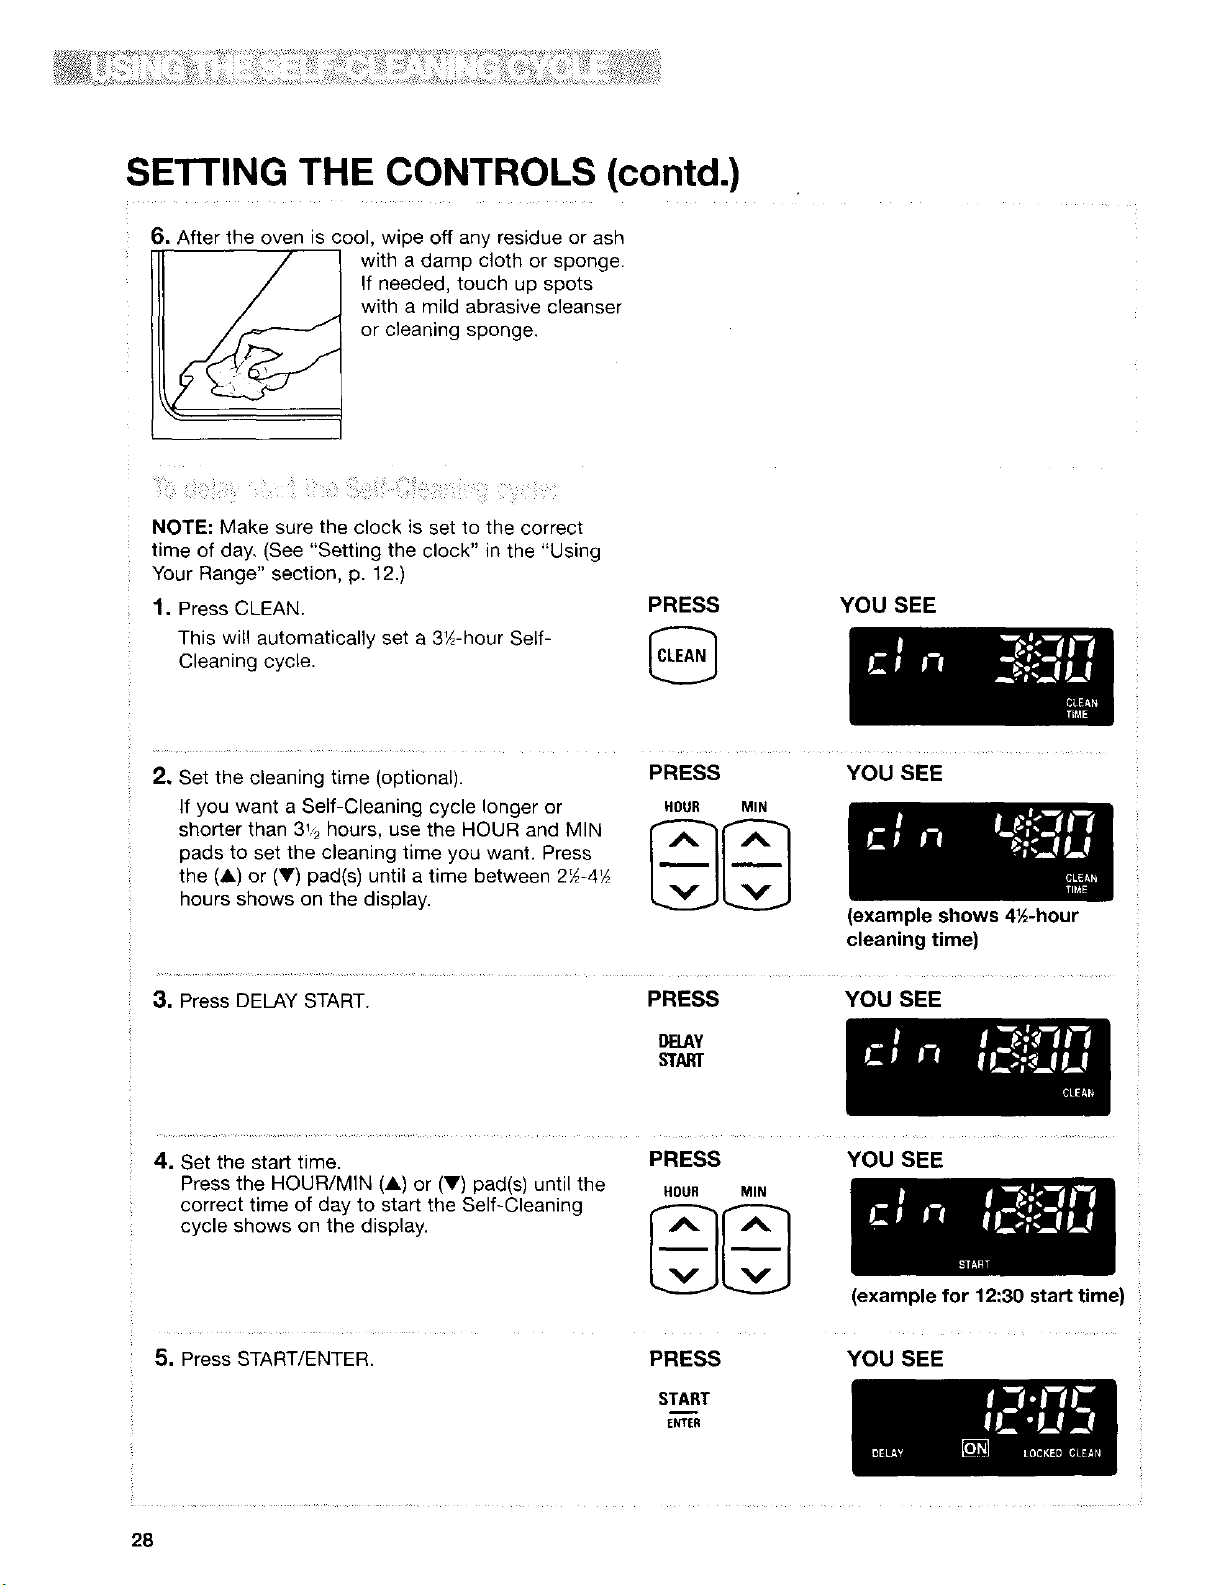
6. After the oven is cool, wipe off any residue or ash
with a damp cloth or sponge.
If needed, touch up spots
with a mild abrasive cleanser
or cleaning sponge.
NOTE: Make sure the clock is set to the correct
time of day, (See "Setting the clock" in the "Using
Your Range" section, p. 12.)
1. Press CLEAN.
This will automatically set a 3'/_-hour Self-
Cleaning cycle.
PRESS
YOU SEE
2. Set the cleaning time (optional). PRESS
If you want a Self-Cleaning cycle longer or HOUR MIN
shorter than 3_,,2hours, use the HOUR and MIN I'_-A-'_II'_-'_I
pads to set the cleaning time you want. Press
the (&) or (V) pad(s) until a time between 2_-4_
hours shows on the display.
YOU SEE
(example shows 4½-hour
cleaning time)
3. Press DELAY START. PRESS YOU SEE
BELAY
START
4. Set the start time.
Press the HOUR/MIN (A) or (V) pad(s) until the
correct time of day to start the Self-Cleaning
cycle shows on the display.
PRESS
HOUR MIN
YOU SEE
(example for 12:30 start time)
5. Press START/ENTER. PRESS YOU SEE
START
E_ER
28
Loading ...
Loading ...
Loading ...