Loading ...
Loading ...
Loading ...
CUSTOMER RESPONSIBILITIES
,_IkWARNING: Disconnect power source before performing maintenance.
Fill in dates as you complete Before
regular service Use
Check for damaged/worn parts _,
Check for loose fasteners/parts _,
Check chain tension _'
Check chain sharpness _'
Check guide bar _'
Check bar and chain oil level _'
Lubricate bar sprocket hole
Inspect and clean unit & labels
Clean guide bar groove
GENERAL RECOMMENDATIONS
The warranty on this unit does not cov-
er items that have been sub ected to
operator abuse or neg gence. To re-
ceive full value from the warranty, the
operator must maintain unit as
instructed in this manual. Various ad*
justments will need to be made period-
ically to properly maintain your unit.
Improper maintenance may cause
damage to the unit and possible injury
to the operator or bystanders.
CHECK FOR DAMAGED OR
WORN PARTS
Contact Sears Service Center for re-
placement of worn or damaged pars.
NOTE: It is normal for a small amount
of oil to appear under the saw after
motor stops. Do not confuse this with a
leaking oil tank.
• Trigger Switch - Ensure the trigger
switch functions properly by squeez-
ing and holding the trigger switch.
Make sure motor starts and stops.
• Oil Tank - Discontinue use of chain
After Every Service
Use 15 min. Dates
CHECK CHAIN TENSION
_WARNING: Wear protective
gloves when handling chain. The
chain is sharp and can cut you even
when it is not moving.
Chain tension is very important. Chain
stretches during use. This is especially
true during the first few times you use
your saw. Always check chain tension
each time you use your saw.
1. Unplug unit from the power source.
2. Use a screwdriver to move chain
around guide bar to ensure kinks
do not exist. The chain should ro-
tate freely.
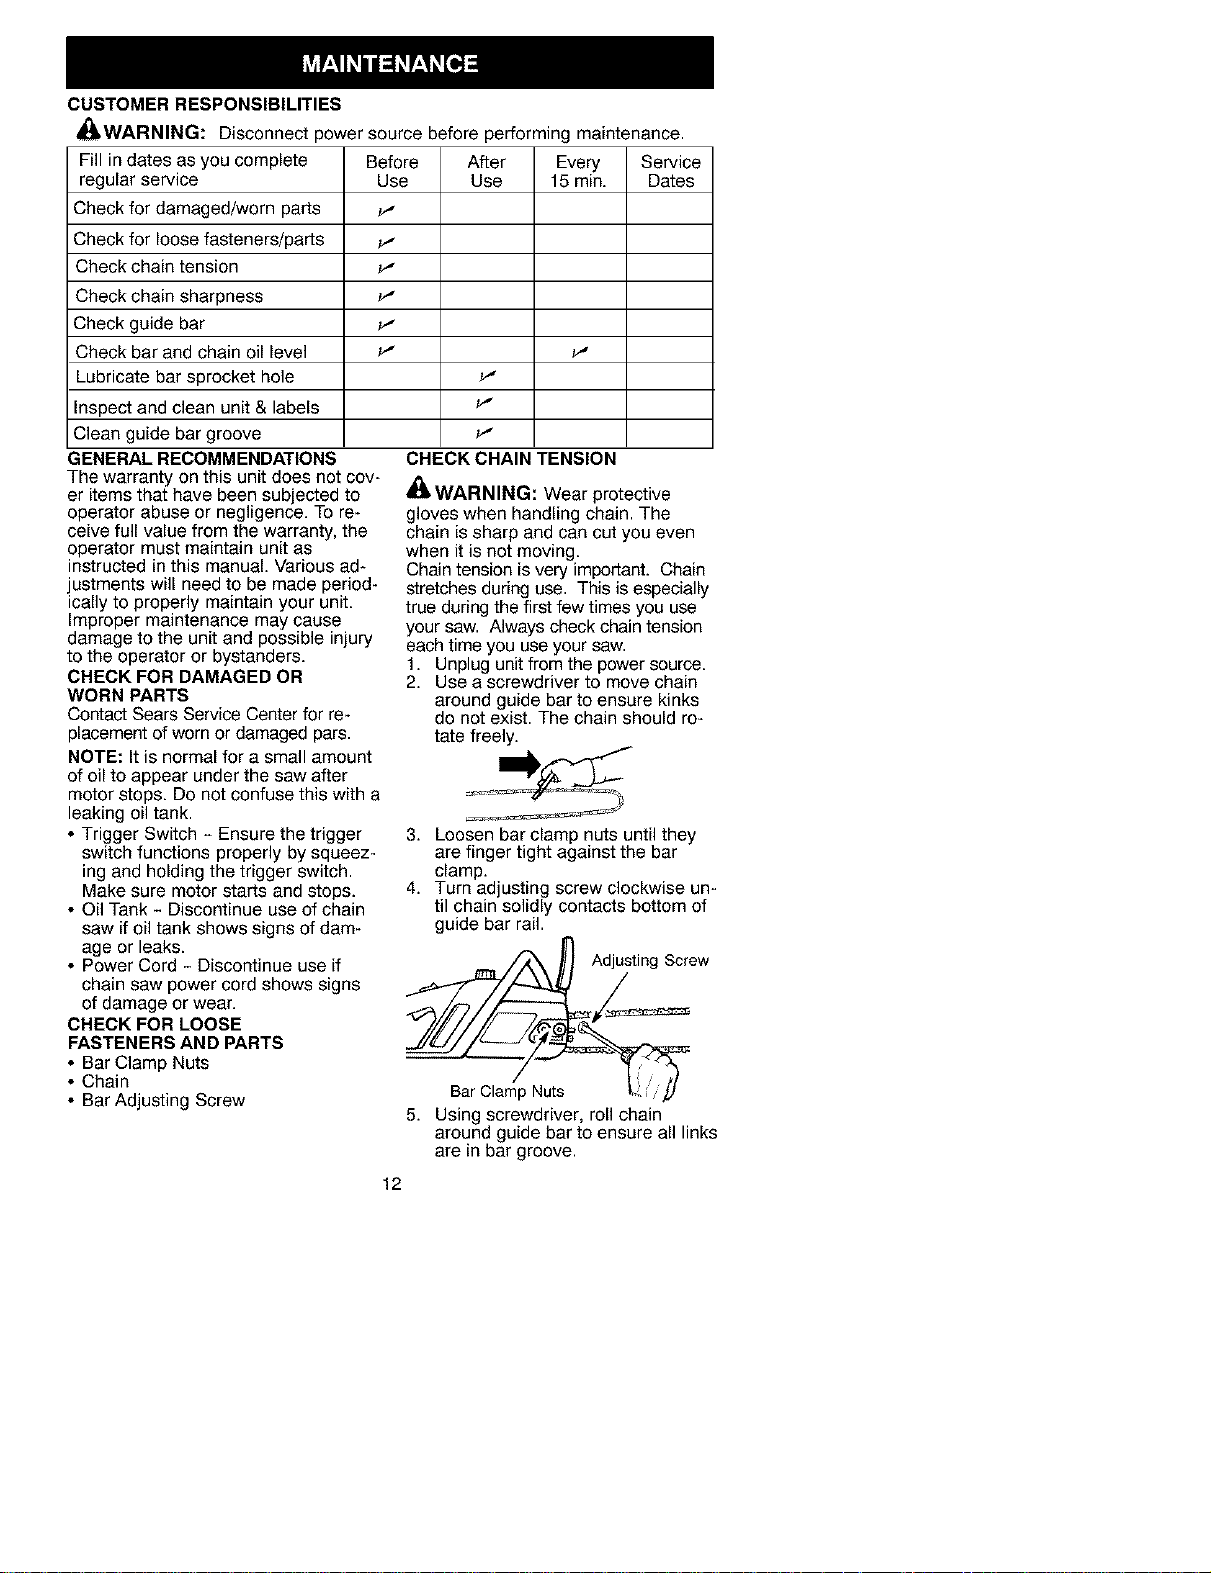
3. Loosen bar clamp nuts until they
are finger tight against the bar
clamp.
4. Turn adjusting screw clockwise un-
til chain solidly contacts bottom of
saw if oil tank shows signs of dam-
age or leaks.
• Power Cord - Discontinue use if
chain saw power cord shows signs
of damage or wear.
CHECK FOR LOOSE
FASTENERS AND PARTS
• Bar Clamp Nuts
• Chain
• Bar Adjusting Screw
guide bar rail.
Adjusting Screw
5. Using screwdriver, roll chain
around guide bar to ensure all links
are in bar groove.
12
Loading ...
Loading ...
Loading ...