Loading ...
Loading ...
Loading ...

Page 7
STEP BY STEP GUIDE
1. Locate the Electrical Transformer inside Grill
Remove the transformer from the plastic bag located in the interior
of grill. Make sure the Transformer is complete, and double check
the grill light plug cord is properly secured to transformer, and all
wires are firmly fixed into plastic clip plug.
2. Mount Transformer to Interior Island Wall
Using metal screws and attach the transformer to the back inner
wall of your islands cabinet wall, somewhere near the already
installed GFCI electrical outlet. When you plug the transformer in,
double check then GFCI breaker switch, that the outlet has power.
4. Connect Light Transformer Plug to Grill
Locate the Light Connection on BACK-LEFT SIDE of grill. The
connection clips together, to form a secure connection. Double
check that all wires are tightly pushed into plug sockets, so all wires
make proper connections.
5. Slide Grill in Place
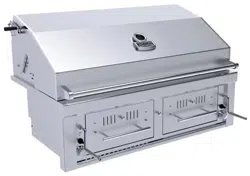
Your Sunstone™ grill is specially designed with an internal built in
hanger lip located at the Right, Left and Back sides. The grill lip
allows it to hang by the three supported edges on the right, left and
back. The front control panel requires no supporting edge; it is
designed to hang down the front of your cut-out.
6. Securing in Place
The control panel is designed to sit flush against the island face. If counter top extends beyond the
islands face, creating a countertop overhang, it must be cut flush with the island face where the width of
the control panel or a gap will be created exposing the forward portions of the left and right side
firewalls.
5. Connect Gas Line to Grill
See the BACK-RIGHT SIDE – This is where the Gas Line will connect to
the Grill. Grill is shipped as Liquid Propane ONLY and includes a LP-
Regulator for portable tank. Recommendation to have a 18” Rubber
or Flex hose to allow grill to be pulled out if necessary.
7. Allow for Ventilation
Your Sunstone™ grill is engineered with special vents on the back of unit, which allow proper airflow out
of the back of grill. Be sure you allow a minimum of 6-1/2" behind grill for proper air ventilation and to
allow hood to open properly. Push grill all the way into cut-out, so there are no gaps present to inside of
island frame and grill control panel is flush against island wall.
Loading ...
Loading ...
Loading ...
