Loading ...
Loading ...
Loading ...
22
Glass Fronted Door Panels
The oven door front panels can be taken o so that the glass
panels can be cleaned. Move the cooker forward to gain
access to the sides (see the ‘Moving the Cooker’ section under
‘Installation’).
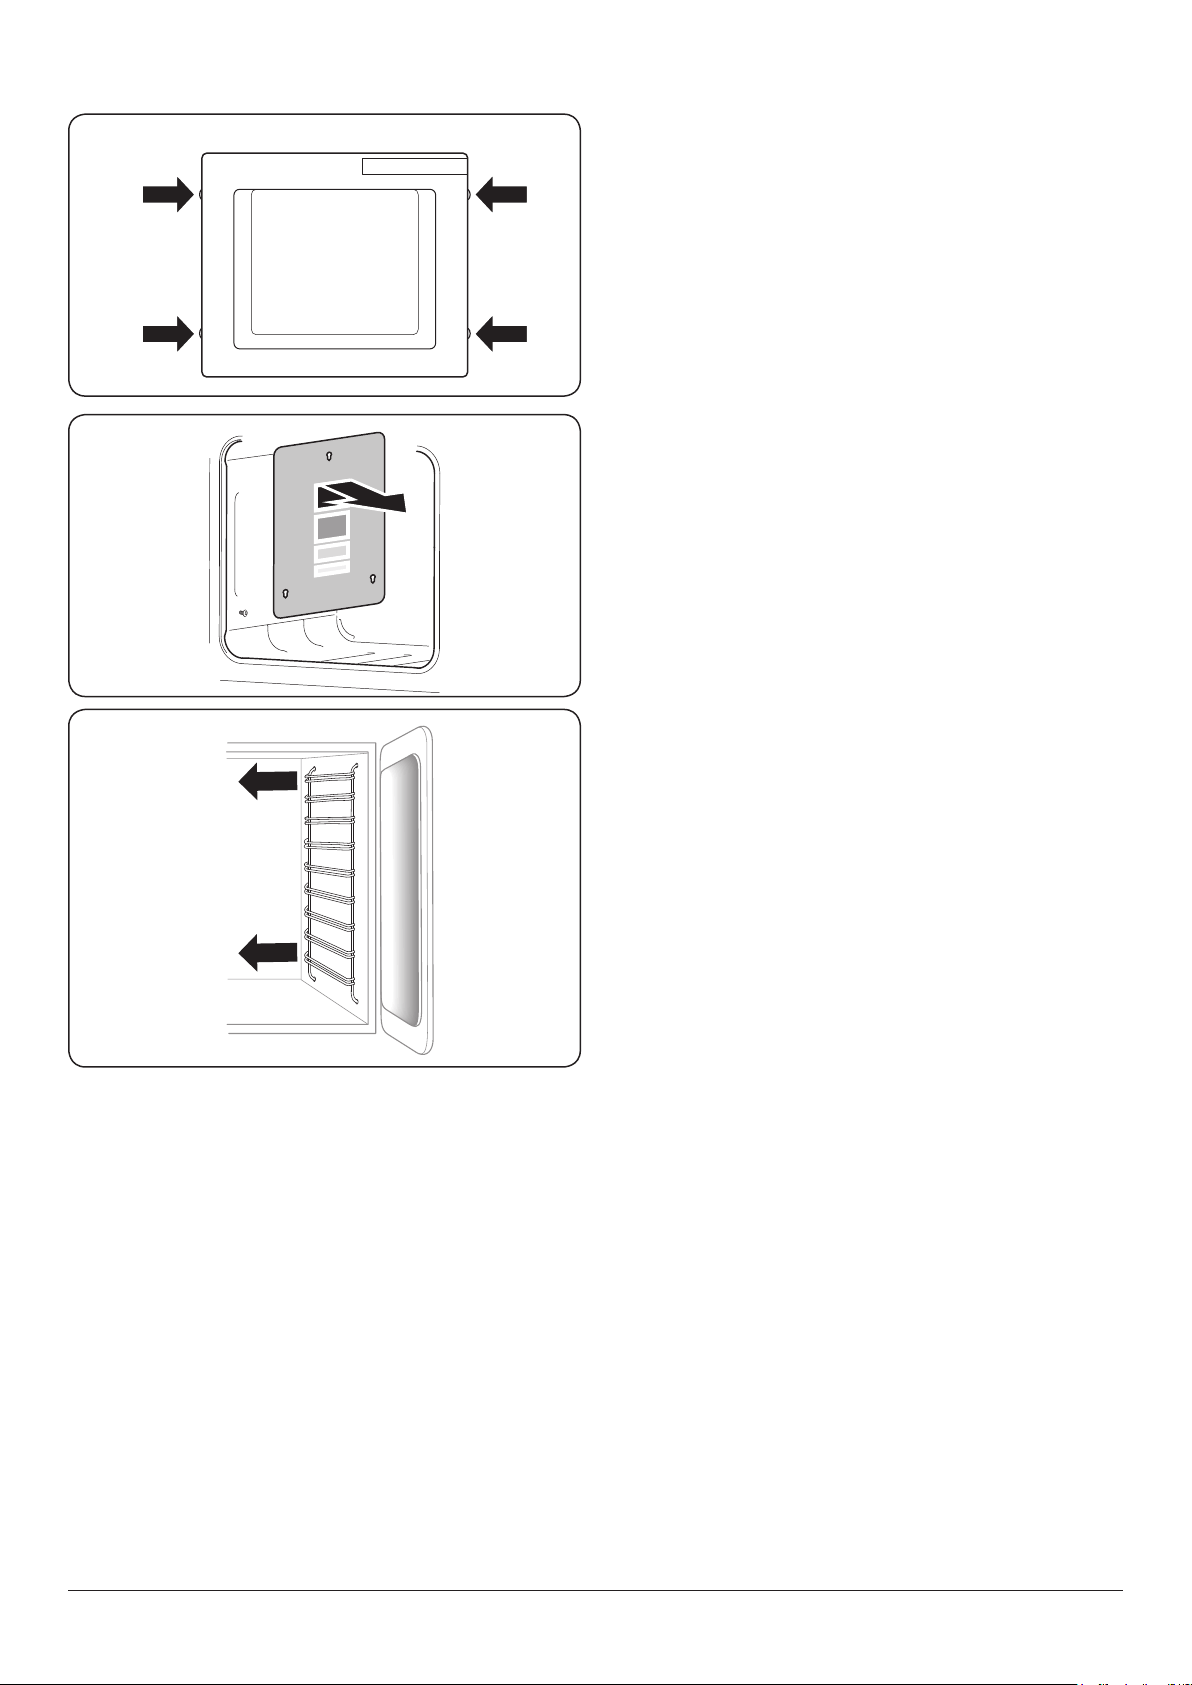
Open the oven door slightly and remove the front panel
xing screws from the door sides, two each side (Fig. 6.7).
Carefully lift o the outer door panel. The inside face of the
glass panels can now be cleaned – take care not to disturb or
wet the door insulation.
Note: If the door is triple glazed then the inner two panels are
xed together and should not be separated. After cleaning,
carefully ret the outer door panel and replace the side xing
screws.
DO NOT use harsh abrasive cleaners or sharp metal
scrapers to clean the oven door glass since they can
scratch the surface, which may result in shattering of
the glass.
Ovens
‘Cook & Clean’ Panels
The main oven has side ‘Cook & Clean’ panels which have
been coated with a special enamel that partly cleans itself.
This does not stop all marks on the lining, but helps to reduce
the amount of manual cleaning needed.
These panels work better above 200 °C. If you do most of your
cooking below this temperature, occasionally remove the
panels and wipe with a lint free cloth and hot soapy water.
The panels should then be dried and replaced and the oven
heated at 200 °C for about one hour. This will make sure that
the panels are working eectively.
Removing the Panels to Clean the Enamel
Interior
Some of the lining panels can be removed for cleaning.
If you wish to clean the enamel interior of the oven, you will
need to remove the shelves before removing the ‘Cook &
Clean’ panels. Lift each panel upward and slide forward o
the support brackets (Fig. 6.8).
Once the panels have been removed, the oven enamel
interior can be cleaned.
DO NOT use steel wool, oven cleaning pads, or any other
materials that will scratch the surface.
Ret in the reverse order.
The Tall Oven
To clean the oven sides, slide out the shelves, unhook the
supports from the oven sides and lift out (Fig. 6.9).
ArtNo.320-0002a Proplus oven door side screws
Fig. 6.7
Fig. 6.8
Fig. 6.9
Loading ...
Loading ...
Loading ...