Loading ...
Loading ...
Loading ...

6 7
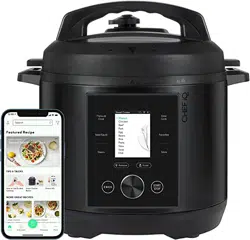
1. COOKING POT
2. CONTROL PANEL
3. DIAL
4. FLOATING VALVE
Your Smart Cooker™ must be used with a 6-quart pot
insert. The nonstick one that comes with it includes handy
measurements inscribed inside. Use nonstick-safe utensils
when cooking and non-abrasive cleaners when cleaning
to protect nonstick coating from damage.
Look here for cooking functions, on-unit screen instruc-
tions, scale, and more.
Use the dial to navigate the on-unit screen of the Smart
Cooker™. Turn the dial right or left to move the cursor on
the screen and press the dial to make selections.
The red floating valve indicates whether the Smart Co-
oker™ is pressurized or not. As the Smart Cooker™ beco-
mes pressurized, the valve will rise, sealing steam inside
the pot. When the valve is raised, the Smart Cooker™ lid
will lock and will only unlock after pressure is released.
When the machine is o or another cooking method is
being used, the valve remains flush with the lid.
DISCOVER.
CREATE.
PLATE.
5. PRESSURE REGULATOR KNOB
6. POWER CORD
7. LID
Pressure (hot steam) is regulated and released via vents in
the pressure regulator knob. When cooking with pressure,
turn the knob to the “Sealed” position and keep face and
hands away from the knob. For non-pressure functions like
steam and slow cook, turn the pressure regulator knob to
the “Venting” position before cooking.
NOTE: THE KNOB IS REMOVABLE; BE CAREFUL WHEN HANDLING THE
LID AS IT CAN COME OFF.
WARNING: STEAM IS RELEASED FROM THE PRESSURE REGULATOR
KNOB. DO NOT PUT HANDS, FACE, OR OTHER BODY PARTS OVER OR
NEAR THE PRESSURE REGULATOR KNOB. STEAM IS HOT AND MAY
CAUSE BURNS.
The power cord is detachable. Plug the power cord into
the Smart Cooker™ before plugging it into an outlet.
When not in use, unplug the power cord from the outlet
to protect against external power surges or other power
fluctuations.
It’s essential that the lid be in place for certain cooking
functions, most especially pressure cooking. To secure
the lid, position the regulator knob over the condensa-
tion cup area at the back of the Smart Cooker™. Turn
the handle clockwise until lid is secure. When properly
aligned, the two wings on the lid will align with the two
handles on the Smart Cooker™ unit and the arrow on the
lid will align with the lock icon on the unit. When pres-
sure cooking, the lid will lock once pressure is reached
and will only unlock after pressure is released.
SMART COOKER™
FEATURES
SMART COOKER™ FEATURES
SMART COOKER™ FEATURES
Loading ...
Loading ...
Loading ...