Loading ...
Loading ...
Loading ...
18 19
HOW TO PRESSURE COOK
IN THE SMART COOKER™
IMPORTANT: IF YOU’RE USING A ® GUIDED COOKING RECIPE FROM THE APP, THOSE DIRECTIONS
INCLUDE COOKING PARAMETERS SENT DIRECTLY FROM THE APP TO YOUR SMART COOKER™ AND
DO NOT REQUIRE ADDITIONAL MANUAL INPUT ON THE UNIT. TO EXECUTE THE GUIDED COOKING
RECIPES, SIMPLY FOLLOW THE STEPS DISPLAYED IN THE RECIPE ON YOUR SMART DEVICE.
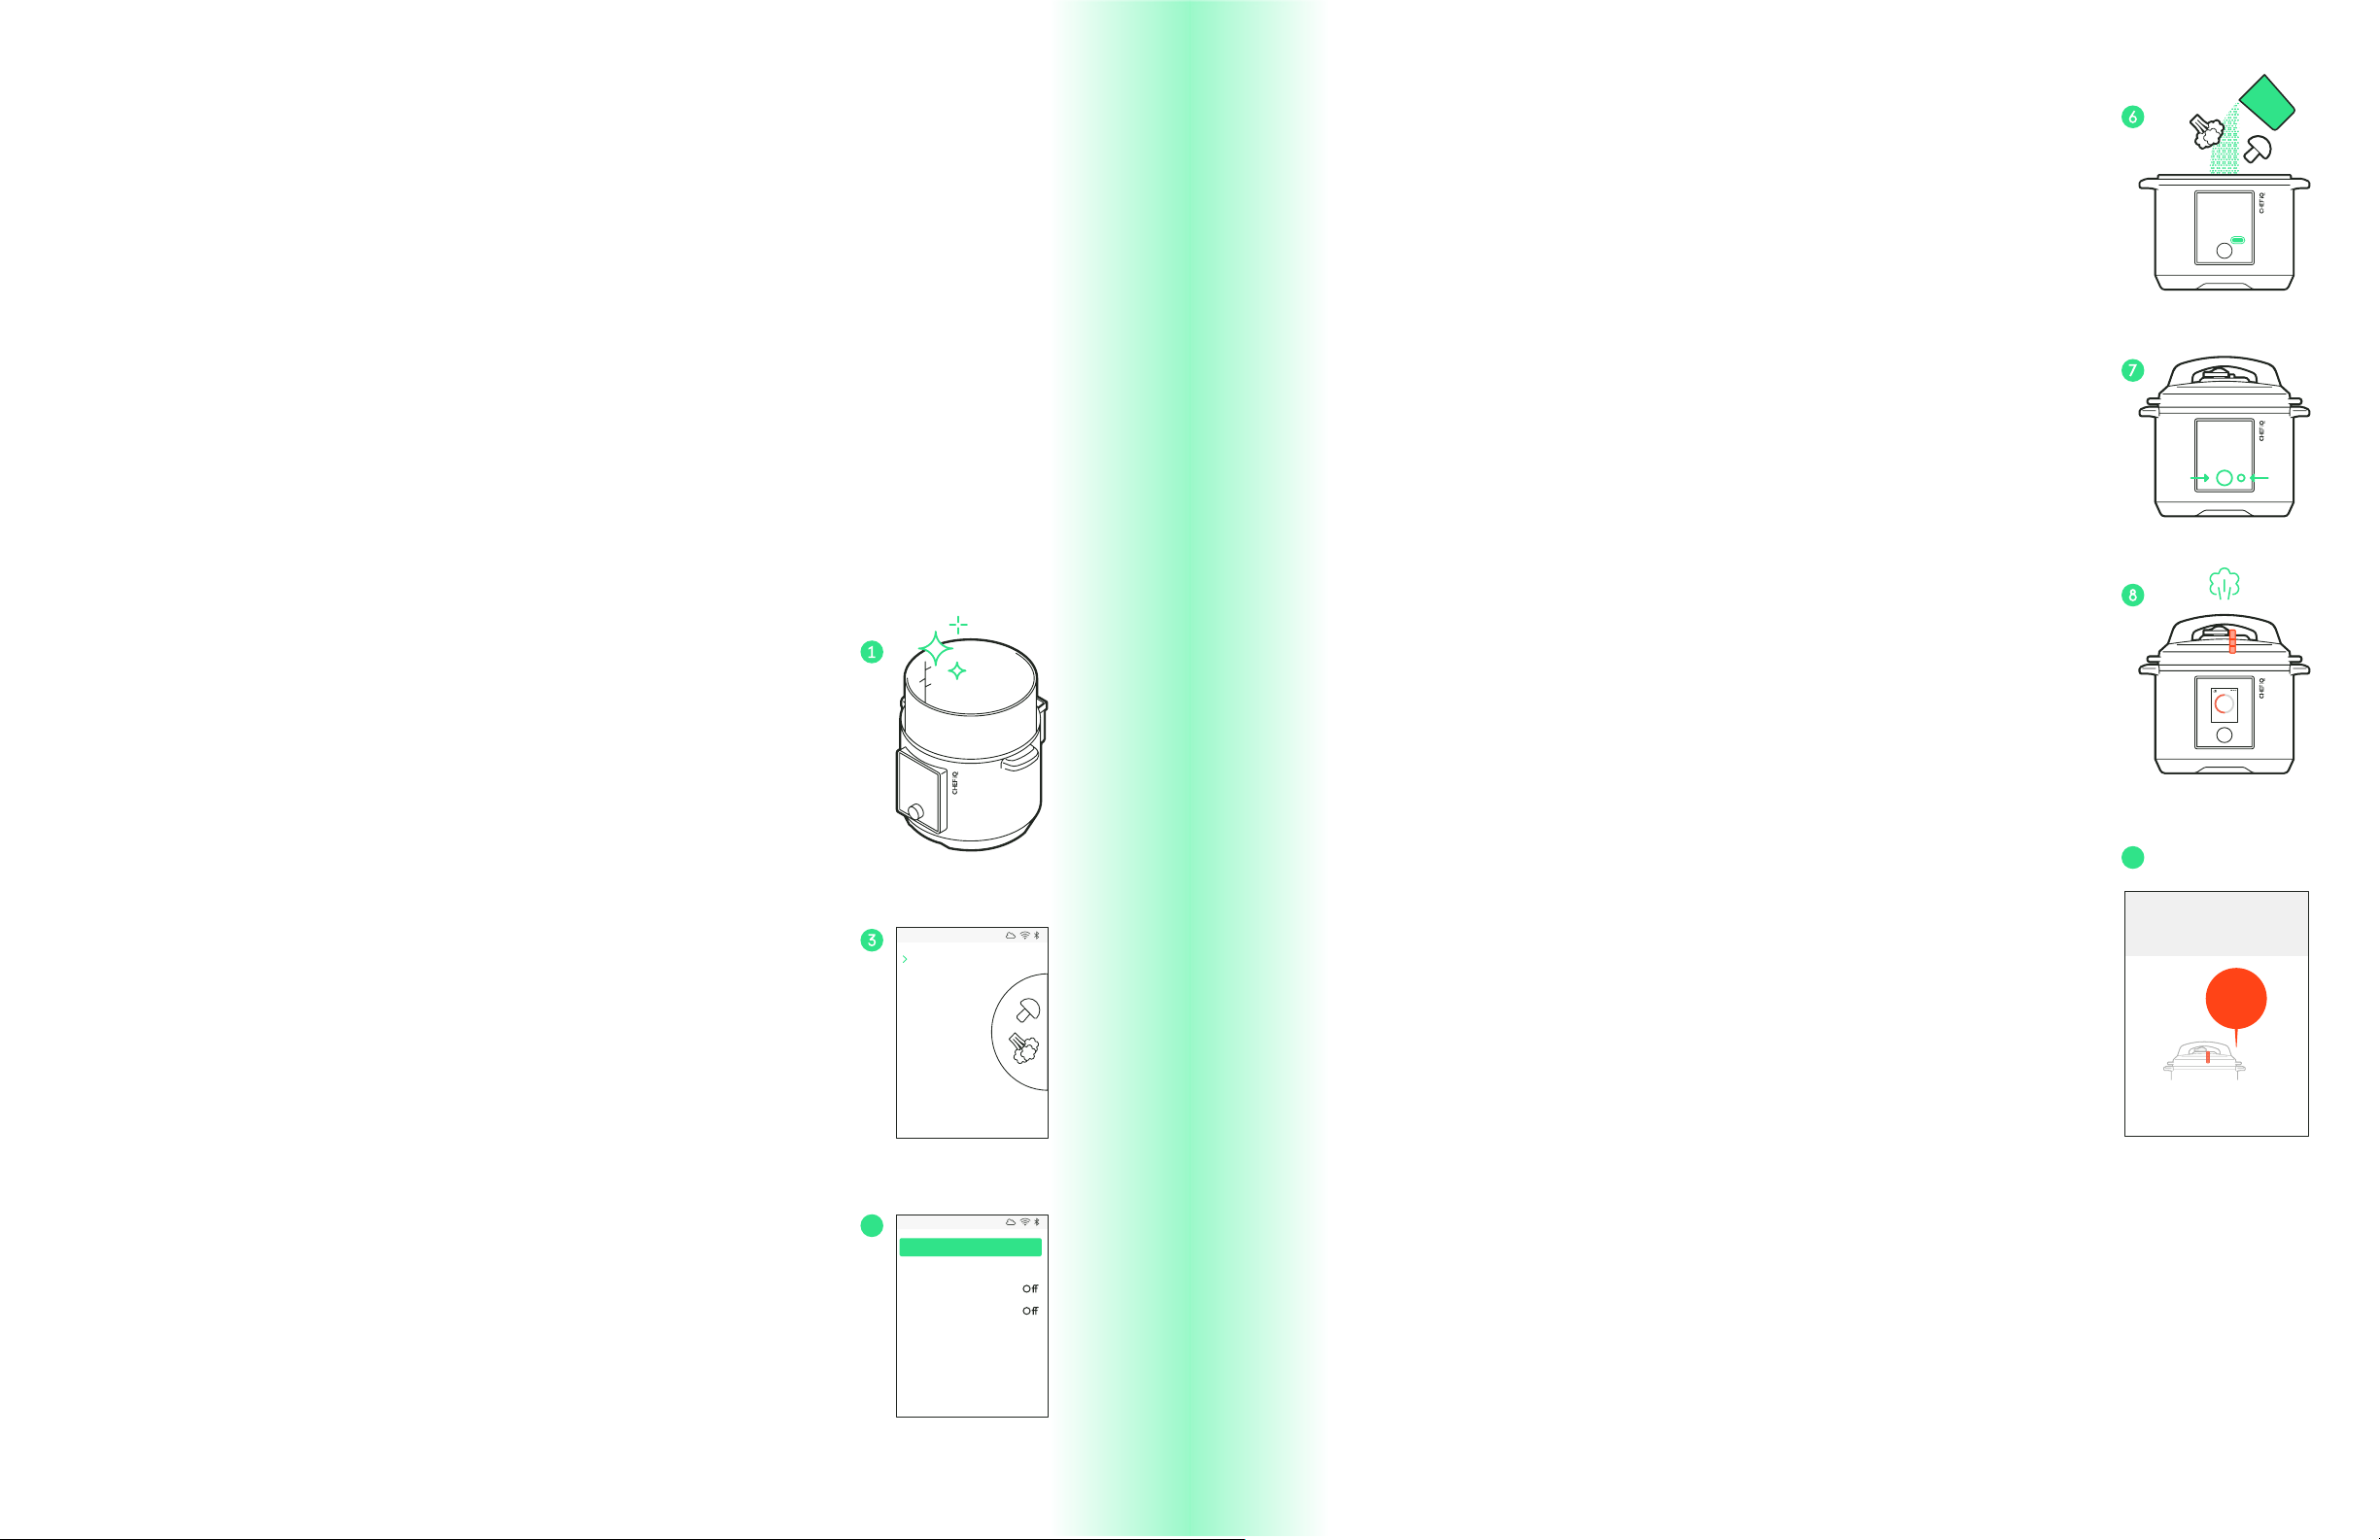
1. Ensure the cooking pot is clean and dry. Insert it into the
Smart Cooker™.
2. Press Pressure Cook on the control panel; the Pressure Cook
menu will display on the screen.
3. Use the dial to select Manual to cook with custom parameters or
select a food category to receive suggested cooking parameters.
(If selecting a food category, you’ll be prompted to select details
about the food you’re cooking in order to determine the best
time, pressure level, and release method for the food.)
4. Use the dial to adjust the Cook Time, Pressure Level, Keep
Warm, Delay Start, and Pressure Release settings as desired. If
using suggested cooking parameters, however, it's best to use
the recommended settings.
NOTE: THE KEEP WARM SETTING WILL KEEP FOODS AT 165°F FOR UP TO 72
HOURS AFTER COOKING.
NOTE: DELAY START WILL NOT INITIATE COOKING UNTIL THE SET DELAY TIME
HAS ENDED. PLEASE FOLLOW PROPER FOOD SAFETY GUIDELINES WHEN
USING THIS FEATURE.
5. Select Continue to confirm the cooking parameters.
Smart Cooker 123
Manual
Chicken
Beef
Pork
Egg
Beans
Rice
Pasta
Stew
Soup
Chili
Smart Cooker 123
HighLow
On
Quick Pulse Natural
Cook Time
Pressure Level
Keep Warm
Delay Start
Pressure Release
20 min
Continue
6. Place the food into the cooking pot no higher than the line
marked MAX PC.
7. Follow the directions on the checklist displayed on the unit’s
screen, which include pressing the Start/Stop button on the
control panel to start cooking. (If Delay Start was selected, the
Smart Cooker™ will begin the countdown to the start time. If
not, cooking will begin, and pressure will start to build.)
NOTE: THE LID MUST REMAIN ON IN ORDER FOR PRESSURE TO BUILD; A
MELODY WILL SOUND IF YOU OPEN THE LID WHILE THE SMART COOKER™ IS
BUILDING PRESSURE.
8. Once the set pressure level is reached, the red floating valve
will be fully risen, the lid locked, and the Cook Time will begin
to count down.
NOTE: YOU CAN CANCEL OUT OF COOKING AT ANY TIME BY PRESSING THE
START/STOP BUTTON.
9. When the Cook Time ends, pressure will release automatically
in one of three ways (Quick, Pulse, or Natural), depending on
what was set. To manually release pressure, press and hold
Release on the control panel.
10. If the Keep Warm function was selected, it will begin after
pressure cooking ends. Press Start/Stop to exit out of Keep
Warm and return to the main menu.
11. If Keep Warm was not set, press the Dial to return to the
main menu.
Poultry
�
Cooking
Remaining
10 hr
4 min
PRESSURE COOK
PRESSURE COOK
4
20 min 34 sec
Keeping Warm
FOOD IS
READY!
The floating
valve will
drop
when it is safe
to open lid.
10
4
Loading ...
Loading ...
Loading ...