Loading ...
Loading ...
Loading ...
page 6
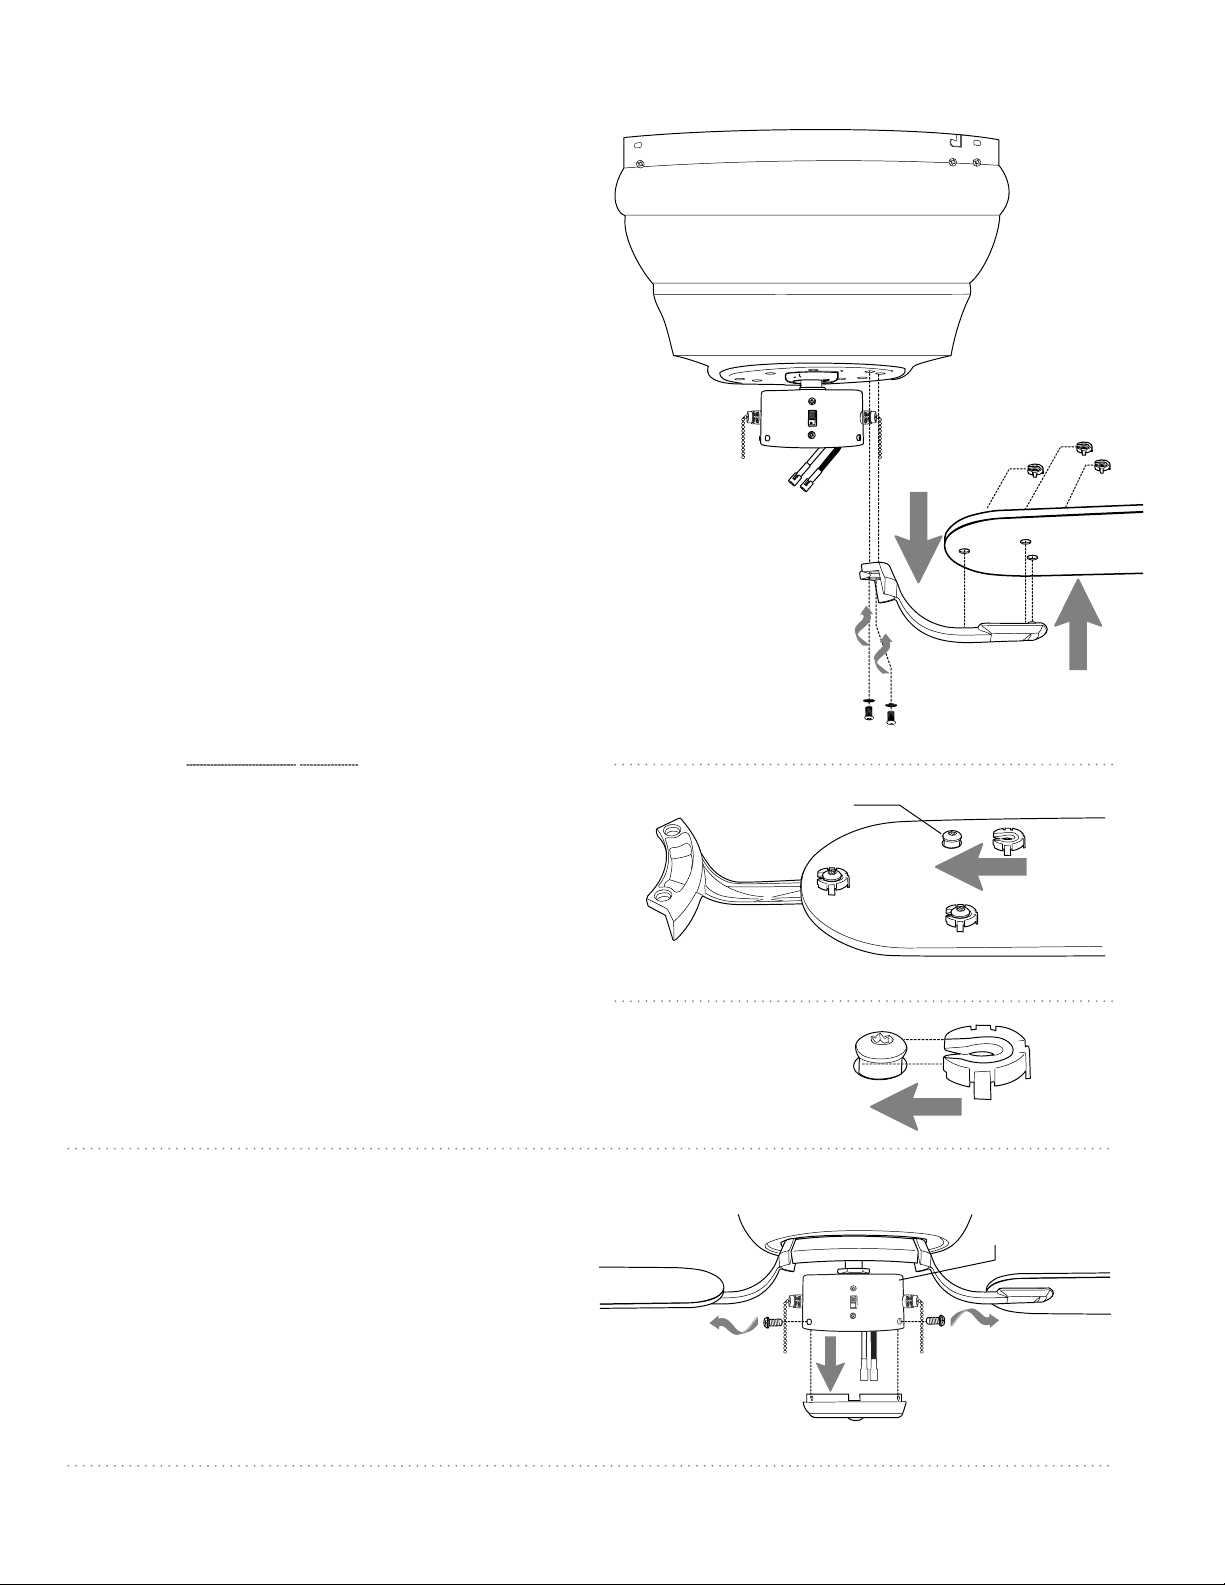
8. Blade Assembly.
motor
housing
blade
lock washers
blade screw post
blade arm screws
blade arm
Locate fifteen 3C-Clips™ in one of the hardware
packs. Hold a blade arm up to a blade and align
the preassembled blade screw posts on the
blade arm with the holes on the blade. [NOTE:
Make sure to attach blade arm so the flat side of
the blade faces UP.]
Press on blade firmly until blade screw posts
come through holes in blade and then slide a
3C-Clip onto each blade screw post. PLEASE
NOTE WARNINGS BELOW when attaching
3C-Clips.
Repeat above procedure for each blade.
WARNING: To reduce the risk of personal injury
or damage to fan and other items, 3C-Clip must
be installed with the opening facing toward the
blade arm.
WARNING: To reduce the risk of personal injury,
make sure the friction detents on 3C-Clip face
down and recessed groove faces up. Slide
3C-Clips completely under blade screw posts so
edges of blade screw posts are captured by the
recessed groove on the 3C-Clips.
Remove blade arm screws/lock washers from
underside of motor. If plastic motor locks are
installed with blade arm screws, discard plastic
motor locks (save blade arm screws/lock washers
to secure blade arms). Align blade arm holes with
motor screw holes and attach blade arm with
blade arm screws/lock washers. Before securing
screws permanently, repeat this procedure with
remaining blade arms. Secure all screws.
NOTE: Tighten blade arm screws twice a year.
9. Light Kit Assembly (Optional).
If you wish to use fan WITHOUT the light kit,
please proceed to Section 10 on page 8 to
complete installation WITHOUT the light kit.
If you wish to use fan WITH the light kit, remove
3 screws from switch housing on underside of
motor housing. Remove switch housing cap from
switch housing.
["Light Kit Assembly" continued on next page.]
switch housing
motor housing
switch housing cap
blade screw post
blade arm
blade
3C-Clips
3C-Clip
3C-Clip
Loading ...
Loading ...
Loading ...