Loading ...
Loading ...
Loading ...
Section 3 - MAINTENANCE
3.1 INTRODUCTION
To retain the quality of the snow thrower, use only
genuine SNAPPER replacement parts. Contact a
local SNAPPER dealer for parts and service
assistance. For the correct part or information for a
particular snow thrower, always mention model and
serial number.
3.2 SERVICE - AFTER FIRST 5 HOURS
3.2.1 CHECK AUGER DRIVE BELT
1. Visually check engine drive belt for cracking,
fraying, severed or belt strands exposed. Replace
belt before operating snow thrower. See Figure 3.1
AUGER BELT
3.3 GENERAL LUBRICATION
Lubricate machine as instructed before and after
operation each season.
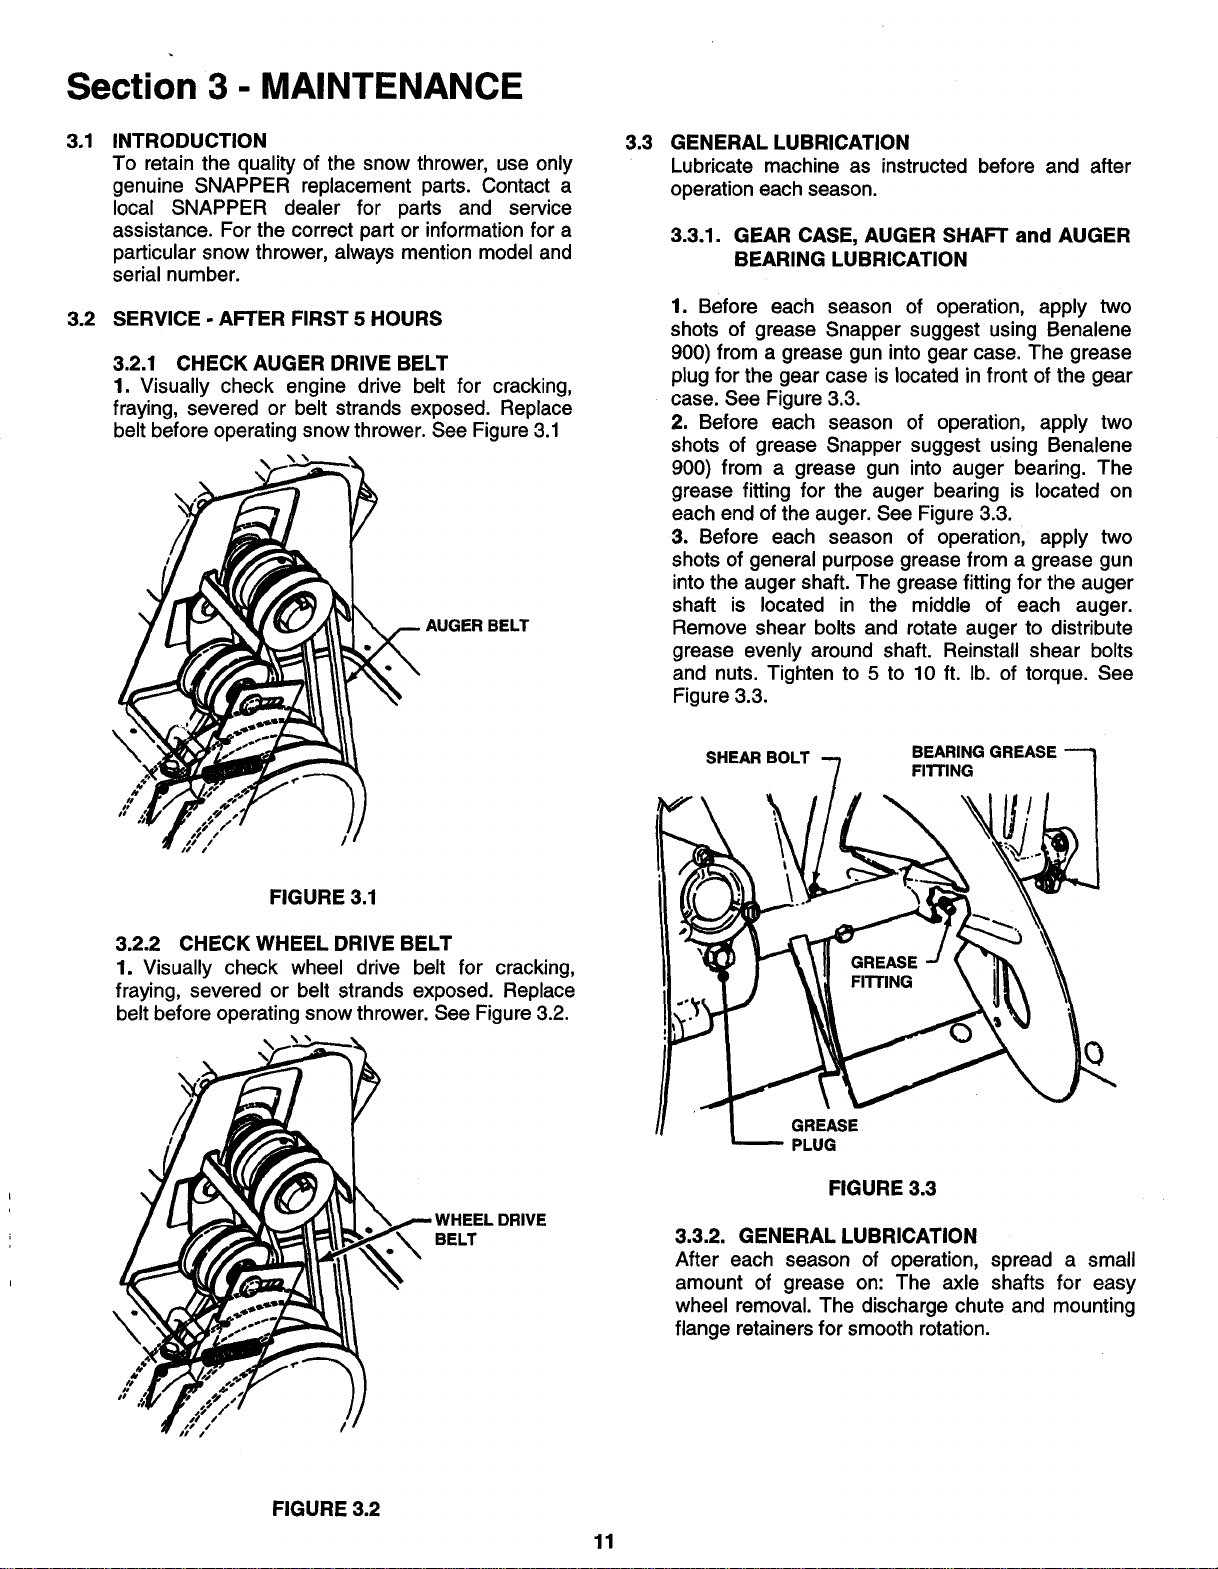
3.3.1. GEAR CASE, AUGER SHAFT and AUGER
BEARING LUBRICATION
1. Before each season of operation, apply two
shots of grease Snapper suggest using Benalene
900) from a grease gun into gear case. The grease
plug for the gear case is located in front of the gear
case. See Figure 3.3.
2. Before each season of operation, apply two
shots of grease Snapper suggest using Benalene
900) from a grease gun into auger bearing. The
grease fitting for the auger bearing is located on
each end of the auger. See Figure 3.3.
3. Before each season of operation, apply two
shots of general purpose grease from a grease gun
intothe auger shaft. The grease fitting for the auger
shaft is located in the middle of each auger.
Remove shear bolts and rotate auger to distribute
grease evenly around shaft. Reinstall shear bolts
and nuts. Tighten to 5 to 10 ft. lb. of torque. See
Figure 3.3.
SHEAR BOLT BEARING GREASE
FITTING
FIGURE 3.1
3.2.2 CHECK WHEEL DRIVE BELT
1. Visually check wheel drive belt for cracking,
fraying, severed or belt strands exposed. Replace
belt before operating snow thrower. See Figure 3.2.
%
BELT
DRIVE
GREASE
PLUG
FIGURE 3.3
3.3.2. GENERAL LUBRICATION
After each season of operation, spread a small
amount of grease on: The axle shafts for easy
wheel removal. The discharge chute and mounting
flange retainers for smooth rotation.
FIGURE 3.2
11
Loading ...
Loading ...
Loading ...