
Loading ...
Loading ...
Loading ...
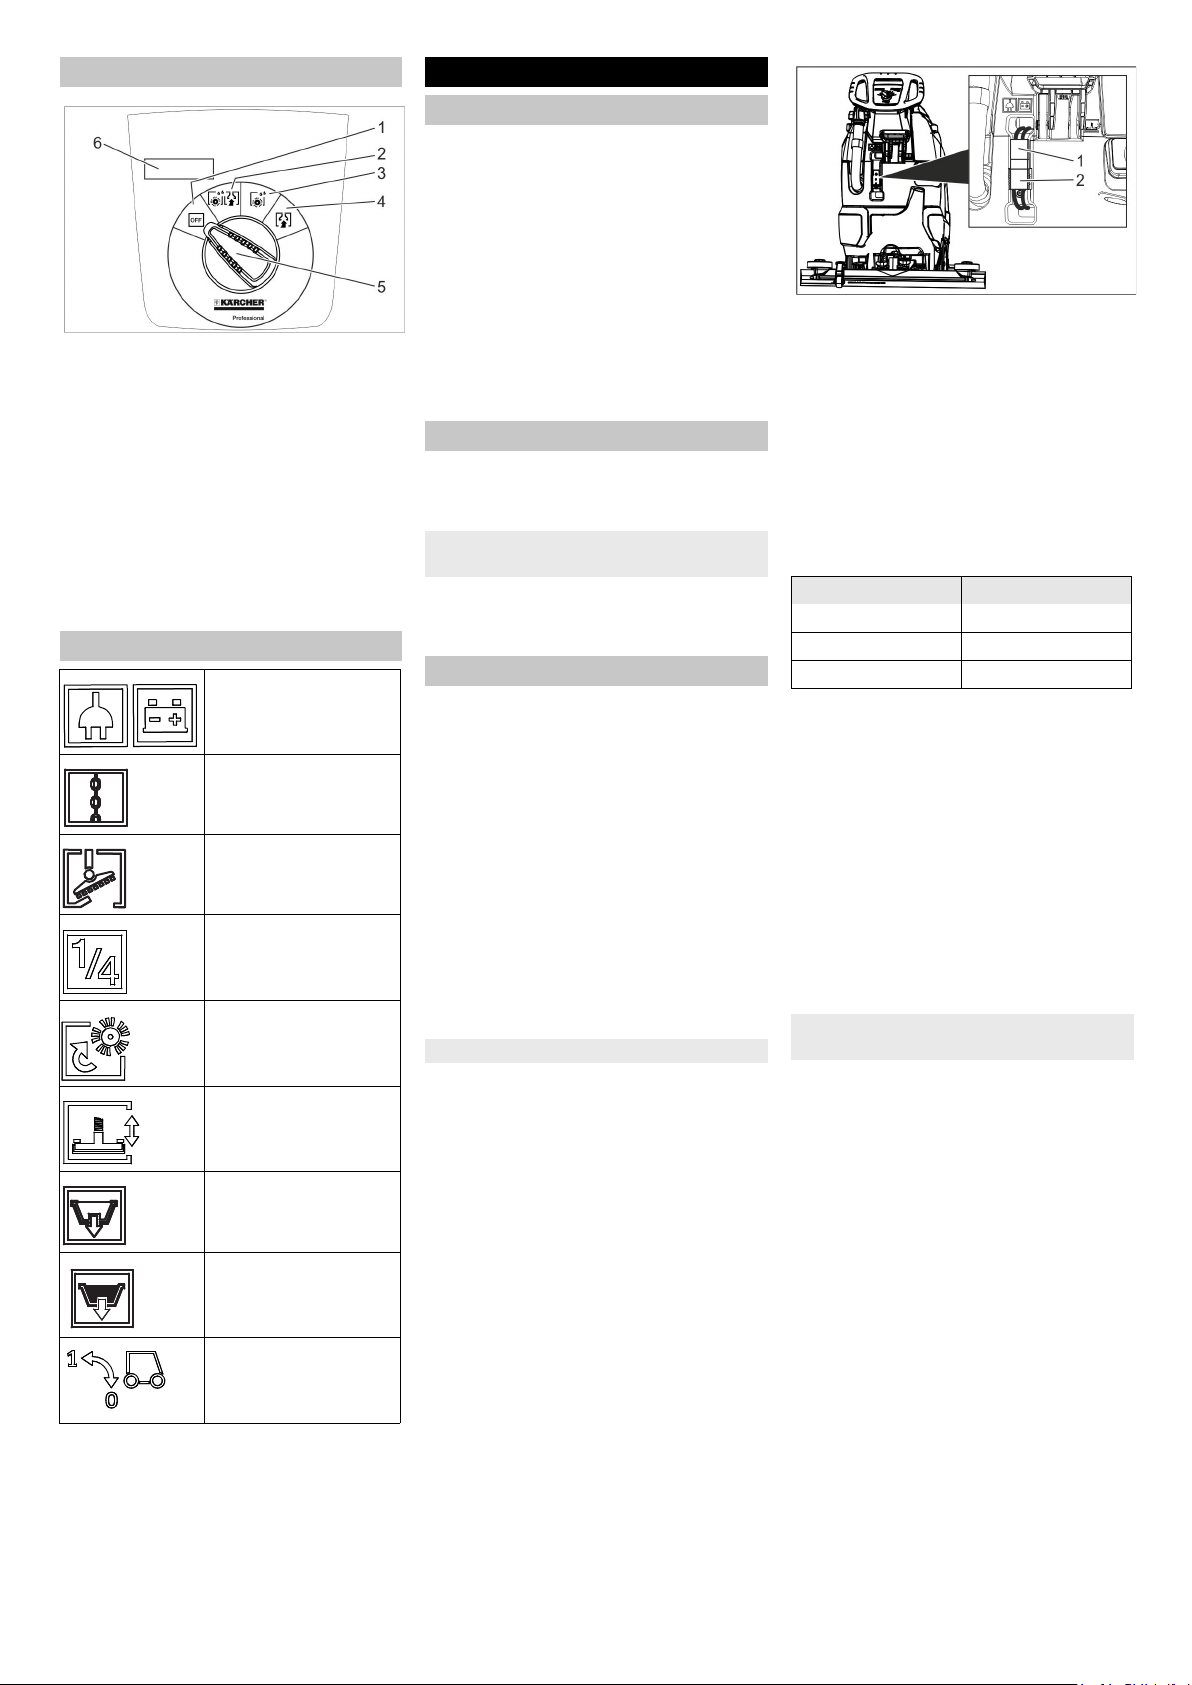
- 5
1 OFF
Device is switched off
2 Normal mode
Wet clean the floor and vacuum up
dirt water.
3 Intense mode
Wet clean the floor and allow the
detergent to react.
4 Vacuum mode
Suck in the dirt fleet.
5 Program selection switch
6 Display
** option
Unscrew the screws from the mid-
dle board of the pallet.
Push down the device holding the
push handle and pull out the middle
board.
Remove the chocks in front of and
next to the wheels.
Push down the device holding the
push handle and push it forwards
up to the edge of the pallet.
Lift the device off the pallet and set
it on the floor.
Install the batteries (see "Care and
Maintenance/Install and connect bat-
teries").
We recommend using our batteries as
described in chapter "Care and Main-
tenance/Recommended batteries".
Note:
The device is equipped with a safety
mechanism to prevent total discharge,
i.e. when the permissible minimum ca-
pacity is reached, the brush motor and
the turbine are switched off.
Drive the machine directly to the
charging station; avoid any steep
gradients in the process.
DANGER
Danger of injury due to electric shock.
Observe the mains voltage and fuse
protection on the type plate of the de-
vice.
Average charging time is approx. 10 -
15 hours.
The appliance must not be used during
the charging process.
DANGER
Danger of explosion
Prior to charging low-maintenance
batteries
Remove waste water tank (see Chap-
ter "Maintenance and care/Mainte-
nance tasks/Removing the waste wa-
ter tank"). This prevents the accumula-
tion of hazardous gases underneath
the tank during the charging process.
ATTENTION
Risk of damage. Do not clean the de-
vice with water while the tank is re-
moved.
1 Battery plug, appliance side
2 Battery plug, battery side
Detach the battery plug on the unit
side.
ATTENTION
Risk of damage!
– Do not connect the charger with the
battery plug on the unit side.
– Only use a charger that is suitable
for the installed battery type:
Note: Please read the operating in-
structions of the charger manufacturer,
especially the chapters on safety in-
structions!
Connect the battery plug on the bat-
tery side with the charger.
Plug the mains plug of the charger
into a power outlet.
Execute the charging process ac-
cording to the information in the op-
erating instructions of the charger.
Connect the battery plug on the de-
vice side with the battery plug on
the battery side.
몇 WARNING
Danger of causticization!
– Adding water to the battery in its
discharged state can cause the
acid to leak.
– Use safety glasses while handling
battery acid and follow the safety in-
structions to avoid personal injury
or damage to clothes.
– Should the acid spray on to the skin
or clothes, rinse immediately with
lots of water.
ATTENTION
Risk of damage!
– Use only distilled or desalinated
water (EN 50272-T3) for filling the
battery.
– Do not add any substances (so-
called performance improving
agents), else warranty claims will
not be entertained.
– Replace batteries with the same
battery type only.
Operator console
Symbols on the machine
Battery socket
Lashing point
Mop holder **
Filling level fresh wa-
ter tank 25%
Bow brush change
Vacuum bar lowering
lever
Drain outlet fresh wa-
ter tank
Dirt water discharge
hose
Transport chassis
1: Transport
0: Operation
Before Startup
Unloading
Install batteries
Using batteries made by other
manufacturers
Charging battery
Charging process
Battery type Charger
6.654-141.0 6.654-333.0
6.654-093.0 6.654-329.0
6.654-290.0 6.654-332.0
Low maintenance batteries (wet
batteries)
7EN
Loading ...
Loading ...
Loading ...